This is a no-fuss tutorial to help you change BIOS Mode from Legacy to UEFI in Windows 10. We promise it won’t take more than a few minutes. 😄
Basic Input/Output System (BIOS) is the first thing you wake up whenever you power on your computer. It allows for a proper handshake between the operating system and the attached hardware. And from there on, you start using your computer.
BIOS (aka Legacy or Legacy BIOS) was good at what it did from 1975 until 2020; the year chipmakers slowly started to migrate to an efficient alternative: UEFI (Unified Extensible Firmware Interface).
The upgrade ensures:
- Faster boot times and system performance
- Support to hard disks (and partitions) larger than 2.1 TB
- More security and Advanced Graphical User Interface
- Boot Support for both GPT (GUID Partition Table) and MBR (Master Boot Record) (via compatibility mode)
In addition, UEFI’s ability to use the GPT partition table means no practical limitation on the number of partitions.
Why change from Legacy to UEFI in Windows 10?
UEFI has many advantages over Legacy BIOS like:
Performance Boost
Short Booting Times
User-Friendly Interface
Supports bigger Hard disks and Partitions than 2.1 TB
Consecutively, this is more secure and makes your system perform better.
How to Change BIOS mode from Legacy to UEFI in Windows 10
This tutorial is divided into two parts:
- Converting your hard disk from MBR to GPT
- Turning on UEFI from the BIOS setup (that’s up to you)
The second part is specific to the manufacturer. So, check out upfront and get comfortable before going ahead with the first. Chances are, the option for UEFI won’t be in the BIOS if you’re using a really old PC.
But for recent ones, you’ll have this option to switch to the UEFI BIOS.
Before starting with this guide, make sure:
- You have a full backup of your system
- You don’t have more than three partitions
- Device encryption services like BitLocker is turned off
And yeah, don’t bother reading any further if you’re on Windows 11. In that case, your PC should already be running on UEFI. However, this is an important item on the checklist for Windows 10 users who wish to upgrade to Windows 11.
Let’s start with the main course.
Check the current status.
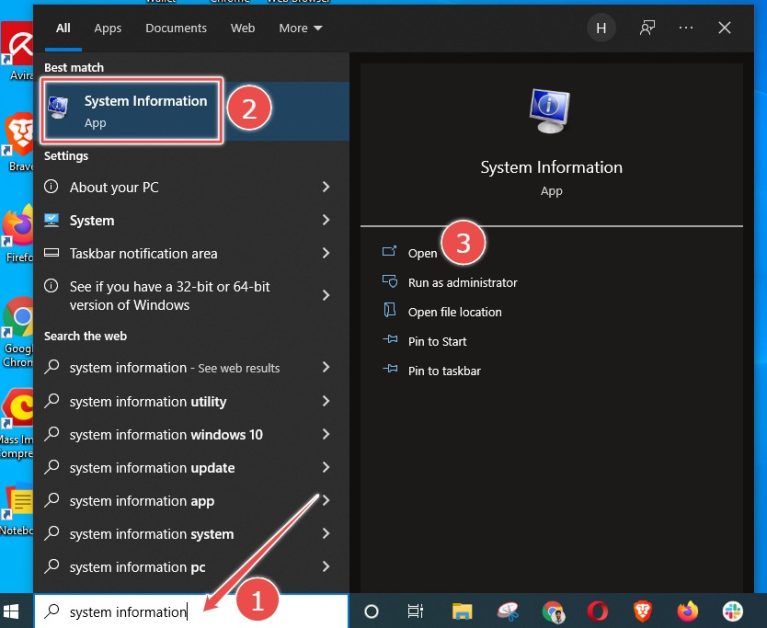
Type System Information in the Search bar and click open the appropriate result.
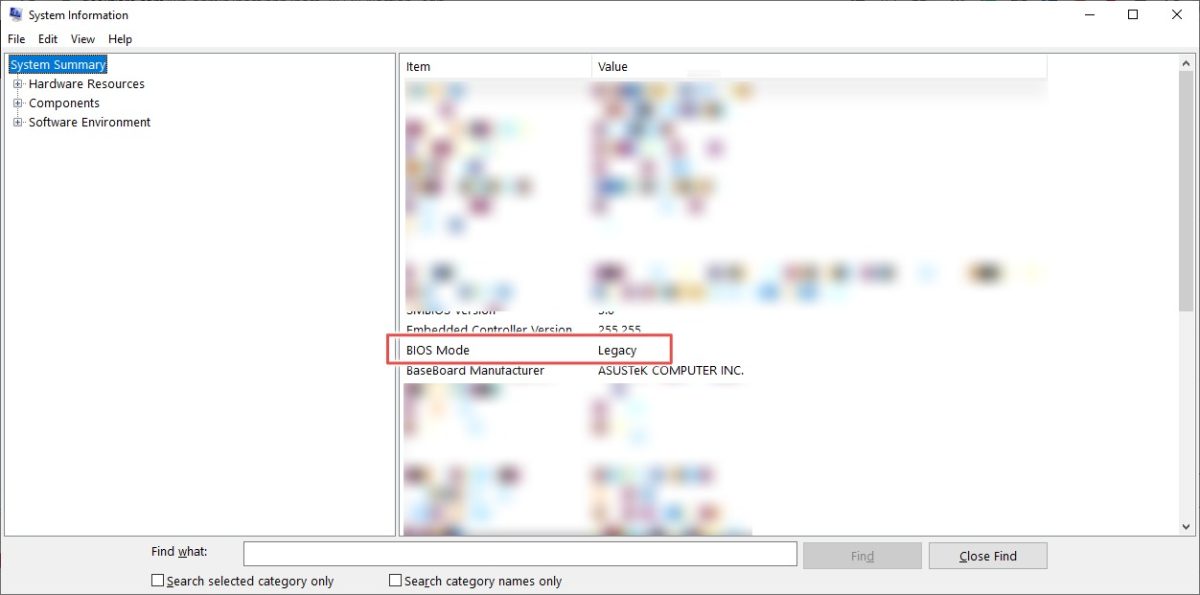
There you can check the BIOS Mode is showing Legacy:
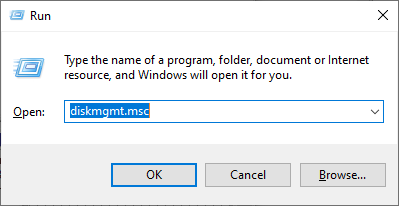
You can also confirm this with the disk type. Press Windows R, type diskmgmt.msc, and click OK.
This will open the Disk Management console. Follow the steps in the given video and verify that you have Master Boot Record (MBR) in the Partition Style mentioned under the Volumes tab.
So now that we know we have an MBR disk, we will try to convert it to GPR. This is done with a simple tool, MBR2GPT, which Microsoft has shipped with Windows 10 version 1703 or later.
You can check your Windows version by typing winver in the Run (Windows R).
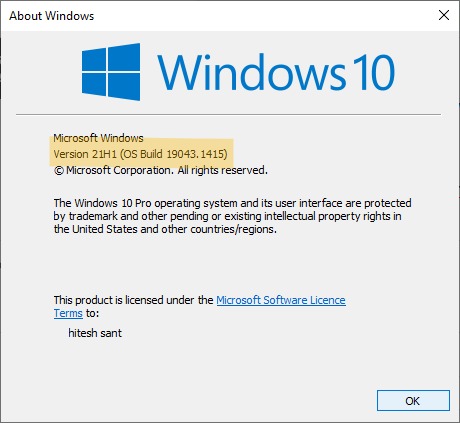
As we are eligible to use that tool, let’s head towards the command prompt.
MBR to GPT Conversion
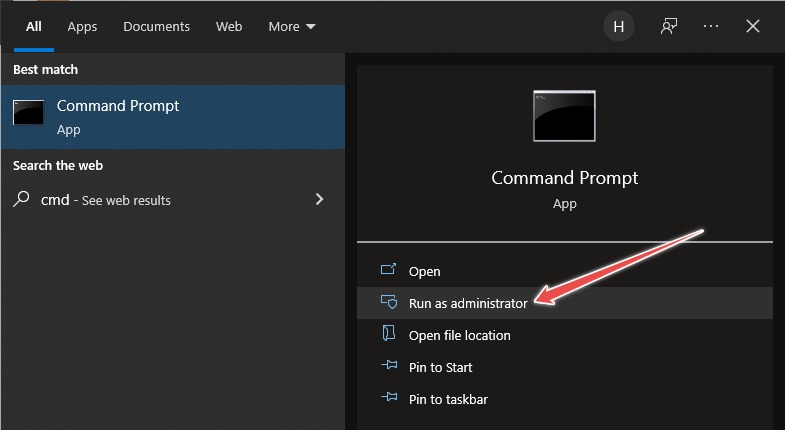
Open the command prompt with the administrator privileges. For this, type cmd, then click the Run as administrator in the right panel.
Afterward, enter mbr2gpt /validate /allowFullOS in the command prompt:

Check that the validation is successful. Go through this solution from the Microsoft community if you’re getting Disk layout validation failed.
After successful validation, type mbr2gpt /convert /allowFullOS and hit enter:

The Failed to update ReAgent.xml is an error specific to my system. You may not get it, and this won’t affect the conversion process even if it’s there.
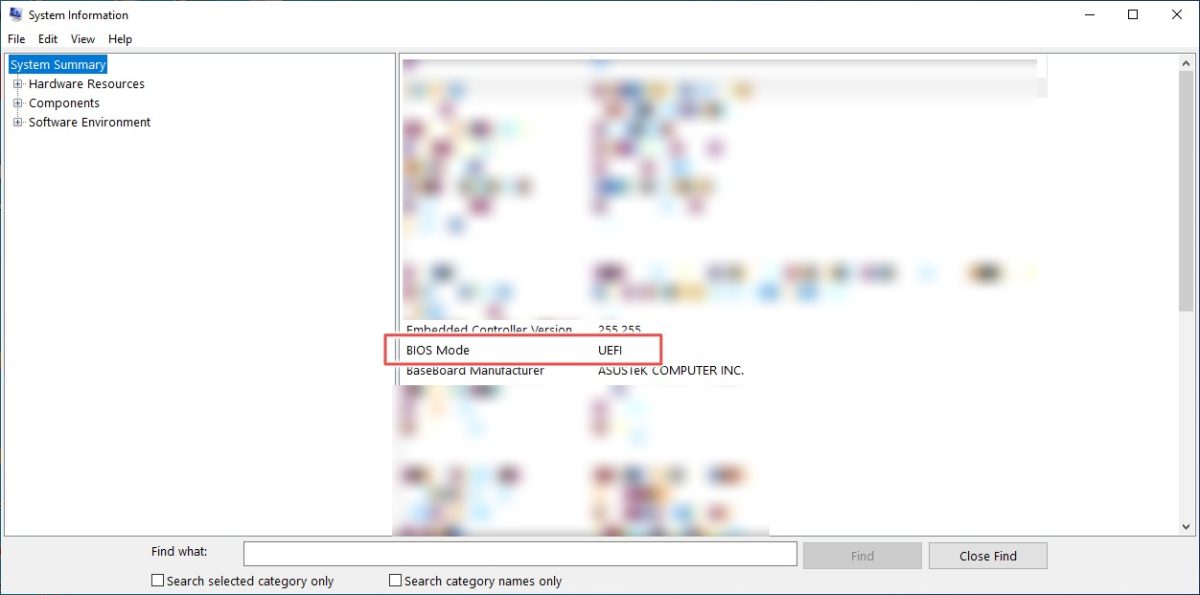
Conclusively, the process is complete, and we’ve changed BIOS Mode from Legacy to UEFI.
And this screenshot confirms that:
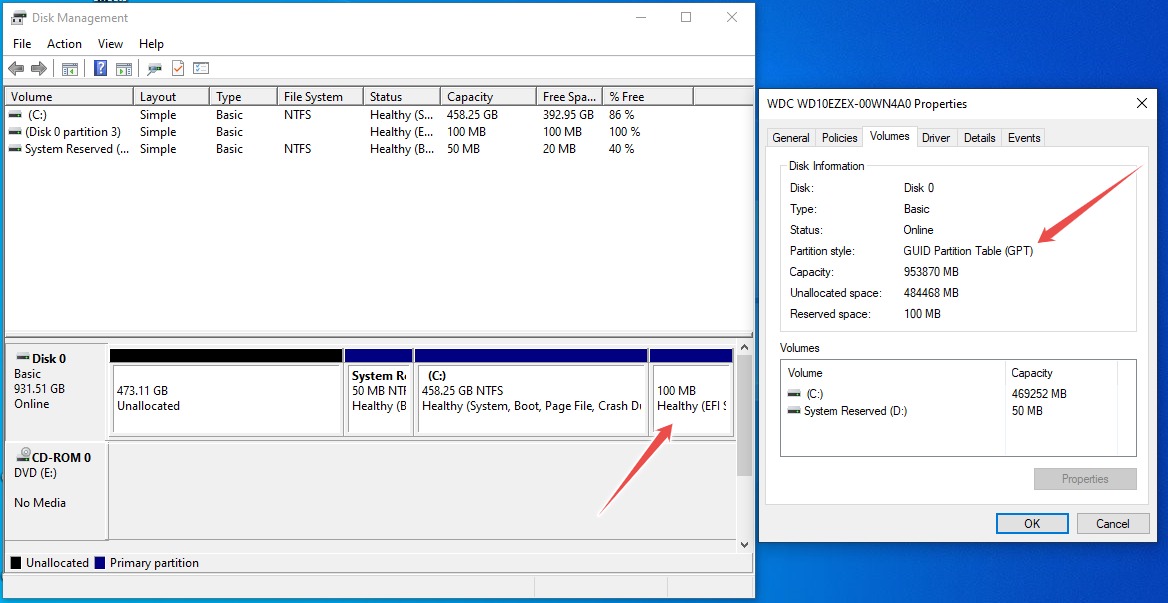
Additionally, the disk management tools show the partition style is GUID Partition Table (GPT). This process created a 100 MB EFI partition from the main disk. You can validate this by noticing the change in the size of the main partition which was reduced from 458.35 GB to 458.25 GB.
But your computer won’t boot after this because the last step consists of changing the BIOS settings from Legacy to UEFI. As already stated, this depends on your PC manufacturer or on your motherboard brand if you’ve got an assembled PC.
Conclusion
While it was easy to convert BIOS mode from Legacy to UEFI in Windows 10, an average user may not need it. So make sure you really need to do this before going through all this trouble.
If it ain’t broke, don’t fix it!
Instead, what’s worth fixing are the hearts of countless people made ineligible from getting Windows 11. 😉
So check out Geekflare’s guide to install Windows 11 on unsupported PCs.


