
Hugo is a free and open-source website framework written in developed in Go. Hugo provides a reliable and modern static site generator that allows you to create a simple and fast website easily. It comes with pre-made templates and other features including, SEO, commenting, analytics, and other functions. Hugo sites can run without any expensive run times like PHP, Python, Ruby and don’t need any database.
In this post, we will show you how to install and use the Hugo site generator on Debian 11.
Prerequisites
- A server running Debian 11.
- A root password is configured on the server.
Install Hugo on Debian 11
By default, the Hugo package is included in the Debian 11 default repository. You can install it using the following command:
apt-get install hugo -y
Once the Hugo is installed, you can verify the Hugo version using the command below:
hugo version
You should get the following output:
Hugo Static Site Generator v0.80.0/extended linux/amd64 BuildDate: 2021-07-18T09:31:51Z (debian 0.80.0-6 b5)
Create a Website with Hugo
In this section, we will create a new website named hugo.example.com.
Run the following command to create a website:
hugo new site hugo.example.com
Once the website is created, you should get the following output:
Congratulations! Your new Hugo site is created in /root/hugo.example.com.

Just a few more steps and you're ready to go:

1. Download a theme into the same-named folder.
   Choose a theme from https://themes.gohugo.io/ or
   create your own with the "hugo new theme " command.
2. Perhaps you want to add some content. You can add single files
   with "hugo new /.".
3. Start the built-in live server via "hugo server".

Visit https://gohugo.io/ for quickstart guide and full documentation.
You can list all files created by Hugo using the following command:
ls -l hugo.example.com
You will get the following output:
drwxr-xr-x 2 root root 4096 Nov 13 09:27 archetypes
-rw-r--r-- 1 root root   82 Nov 13 09:27 config.toml
drwxr-xr-x 2 root root 4096 Nov 13 09:27 content
drwxr-xr-x 2 root root 4096 Nov 13 09:27 data
drwxr-xr-x 2 root root 4096 Nov 13 09:27 layouts
drwxr-xr-x 2 root root 4096 Nov 13 09:27 static
drwxr-xr-x 2 root root 4096 Nov 13 09:27 themes
Create an About page and Sample Post
First, change the directory to your website using the following command:
cd hugo.example.com
Next, create an about page using the following command:
hugo new about.md
You will get the following output:
/root/hugo.example.com/content/about.md created
Next, edit the about.md page with the following command:
nano content/about.md
Change the file as shown below:
---
title: "About Us"
date: 2021-11-13T09:28:18Z
draft: false
---

This is About Us page for this website.
Next, create a sample post using the following command:
hugo new post/page.md
You will get the following output:
/root/hugo.example.com/content/post/page.md created
Next, edit the sample post page with the following command:
nano content/post/page.md
Change the file as shown below:
---
title: "Page"
date: 2021-11-13T09:29:29Z
draft: true
---

# Hugo Page

This is my first hugo website page!
Save and close the file when you are finished.
Install Themes on Your Website
Next, you will need to download and set up a theme to access your Hugo website.
First, change the directory to themes with the following command:
cd themes
Next, download the Hugo theme with the following command:
wget https://github.com/digitalcraftsman/hugo-strata-theme/archive/master.zip
Next, unzip the downloaded theme with the following command:
unzip master.zip
Next, rename the extracted theme with the following command:Advertisement
mv hugo-strata-theme-master hugo-strata-theme
Next, copy the content of the config.toml to your site’s config.
cat hugo-strata-theme/exampleSite/config.toml > ../config.toml
Next, edit the config.toml file with the following command:
nano ../config.toml
Add / Modify the following lines:
baseurl = "/"

[[menu.main]]
  name = "About"
  url  = "about"
  weight = 5
Save and close the file then create an index.html file for your website:
cd ../
nano layouts/index.html
Add the following lines:
{{ define "main" }}
        {{ if not .Site.Params.about.hide }}
                {{ partial "about" . }}
        {{ end }}

        {{ if not .Site.Params.portfolio.hide }}
                {{ partial "portfolio" . }}
        {{ end }}

        {{ if not .Site.Params.recentposts.hide }}
                {{ partial "recent-posts" . }}
        {{ end }}

        {{ if not .Site.Params.contact.hide }}
                {{ partial "contact" . }}
        {{ end }}
{{ end }}
Save and close the file.
Build and Launch Your Website
Now, you will need to build your website to use it. You can build it by running the following command:
hugo
You will get the following output:
    {{ with .OutputFormats.Get "RSS" }}{{ .RelPermalink }}{{ end }}

                   | EN
------------------- -----
  Pages            |  8
  Paginator pages  |  0
  Non-page files   |  0
  Static files     | 26
  Processed images |  0
  Aliases          |  2
  Sitemaps         |  1
  Cleaned          |  0

Total in 48 ms
Next, start the Hugo server and bind it with your server IP using the following command:
hugo server --bind=0.0.0.0 --baseUrl=http://104.245.34.233 -D -F
You will get the following output:
    {{ with .OutputFormats.Get "RSS" }}{{ .RelPermalink }}{{ end }}

                   | EN
------------------- -----
  Pages            | 11
  Paginator pages  |  0
  Non-page files   |  0
  Static files     | 26
  Processed images |  0
  Aliases          |  3
  Sitemaps         |  1
  Cleaned          |  0

Built in 42 ms
Watching for changes in /root/hugo.example.com/{archetypes,content,data,layouts,static,themes}
Watching for config changes in /root/hugo.example.com/config.toml
Environment: "development"
Serving pages from memory
Running in Fast Render Mode. For full rebuilds on change: hugo server --disableFastRender
Web Server is available at http://104.245.34.233:1313/ (bind address 0.0.0.0)
Press Ctrl C to stop
At this point, the Hugo server is started and listens on port 1313.
Access the Hugo Website
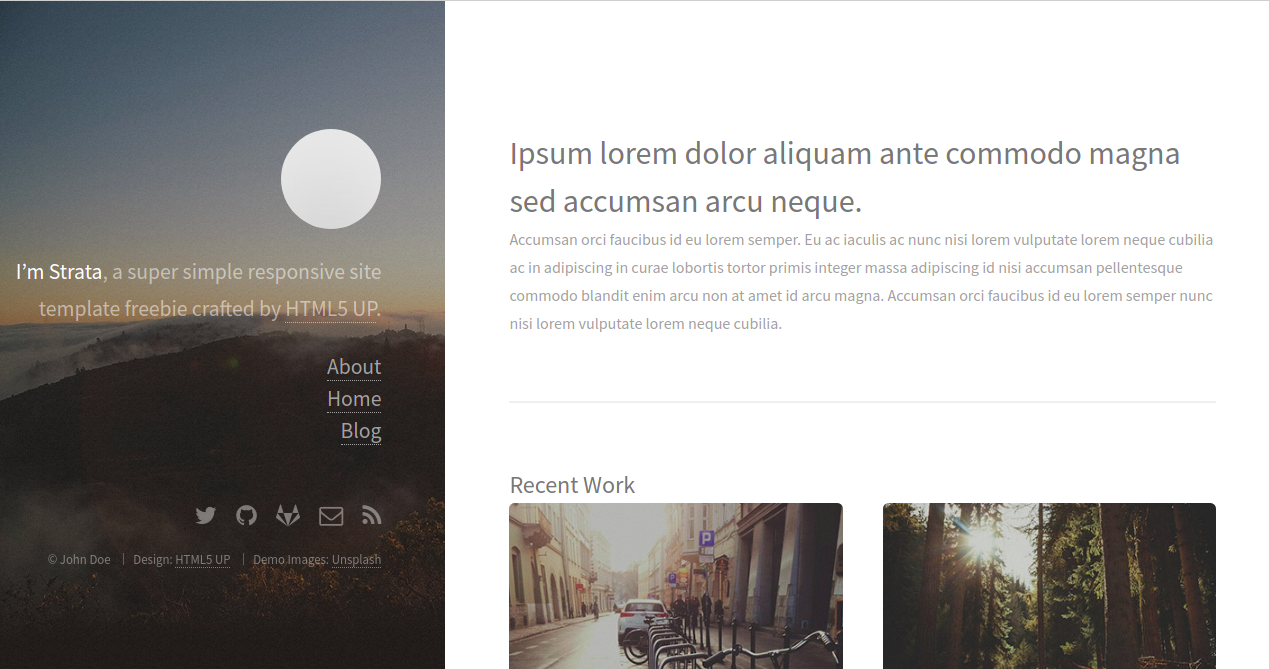
Now, open your web browser and access your website using the URL http://your-server-ip:1313. You should see the Hugo default page:
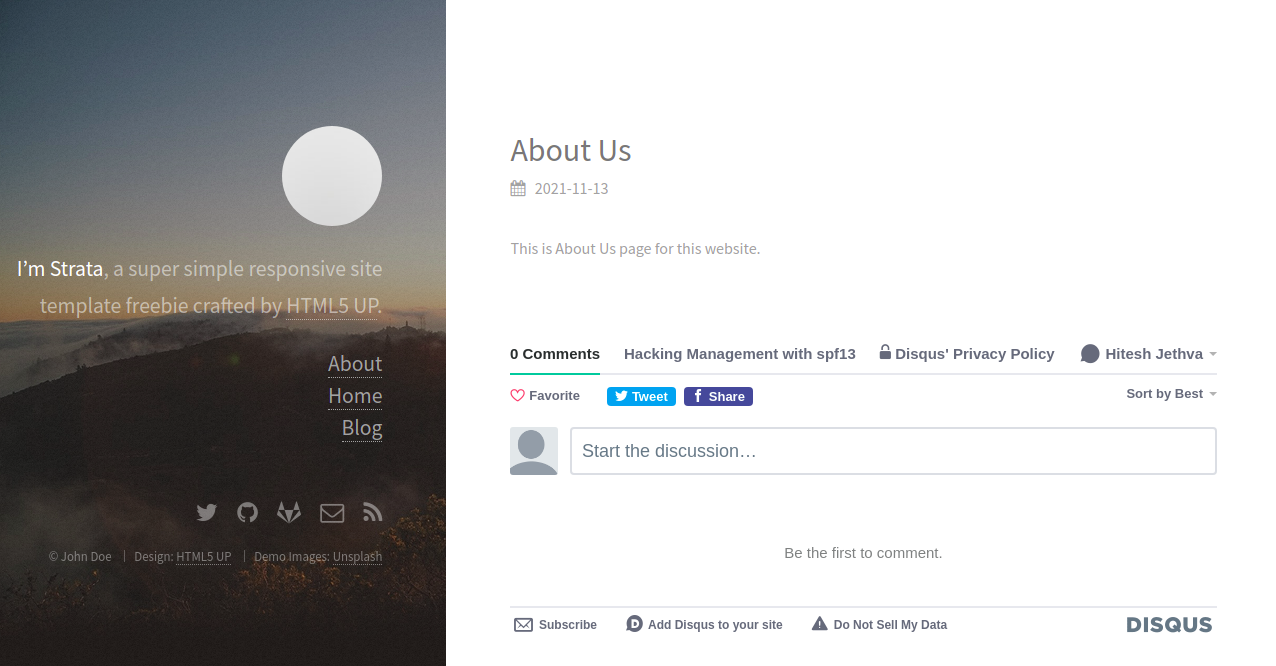
Click on the About in the left pane. You should see your About page on the following screen:
Conclusion
Congratulations! you have successfully installed Hugo and created a website on Debian 11. You can now build a secure and fast website easily using the Hugo.


