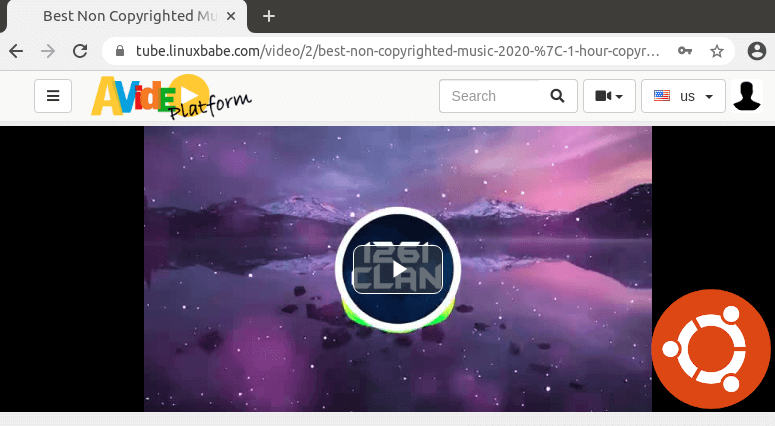
This tutorial is going to show you how to run your own video-sharing website with AVideo (formerly YouPHPTube) on Ubuntu 18.04. AVideo is an open-source, self-hosted alternative to video-sharing websites like YouTube, Vimeo, etc. With AVideo, users can upload videos to your server and share it with the Internet.
AVideo Features
- Unlimited and simultaneous live streams and you can have unlimited users connected to each live stream.
- Import and encode videos from other sites directly from the Internet
- Bulk encoding from local video directory
- Make private videos
- Totally integrated function with Youtube, syncing your videos with Youtube
- Transcode multiple formats of multimedia files to MP4, WebM and MP3 file
- Support Amazon S3 (Simple Storage Service)
- Responsive site layout. AVideo looks incredible on any device. (You can choose YouTube or Netfilx style layout.)
- User channels and user playlists
- Subscribe to channels you like
- You can monitor the performance of your videos with up-to-date metrics and reports in AVideo Statistics.
- Extend site functionalities with plugins.
- SEO Optimized
- iOS and Android apps available
AVideo Server Requirements
First, you should know that a single-core CPU is not viable for a video sharing website, because the encoding process will use a lot of CPU resource.
Then choose the server specs in accordance with the number of users your site have.
- If you just want to use it to share your own videos, you need a server with at least 2 CPU cores and 4GB RAM. You can buy a powerful VPS (virtual private server) from Contabo with very little cost.
- If you expect you site to have dozens of users, then you can consider the Contabo extra large VPS, which has 10 CPU cores, 60GB RAM, 1Gbit/s port speed, 1.6TB disk space, unlimited traffic but costs just 26.99 Euros/month.
- When your site grows beyond that, you should buy a dedicated server.
Software Requirements for Installing AVideo on Ubuntu 18.04
AVideo requires PHP and MySQL/MariaDB. To follow this tutorial, you should have already set up a LAMP stack or LEMP stack. If you prefer to use Apache web server, then install LAMP stack.
If you prefer to use Nginx web server, then install LEMP stack.
Note: AVideo support with Nginx is only experimental. Your site may have issues if you use Nginx.
You also need a domain name. I registered my domain name at NameCheap because the price is low and they give whois privacy protection free for life.
AVideo is comprised of two parts.
- The main part is the front end stream server, which allows users to watch existing videos.
- The other part is the encoder, which allows users to upload their videos.
The public encoder uses the domain name https://encoder1.avideo.com. If you don’t want users to leave your site when uploading videos, you need to set up your private encoder. I will show you how in this article. Without further ado, let’s get started.
Step 1: Download AVideo on Ubuntu 18.04 Server
Log into your Ubuntu 18.04 server via SSH. Then go to the web root directory.
cd /var/www/
Clone the AVideo streamer repository from Github.
sudo apt install git
sudo git clone https://github.com/WWBN/AVideo.git
Then go into the directory.
cd AVideo/
Clone the AVideo encoder repository from Github.
sudo git clone https://github.com/WWBN/AVideo-Encoder.git
It will be saved as AVideo-Encoder. We rename it to upload, so users can have a better idea of what this URL is for when uploading videos.
sudo mv AVideo-Encoder upload
Next, we need to make www-data (the web server user) as the owner of the web root.
sudo chown www-data:www-data /var/www/AVideo/ -R
Step 2: Install Dependencies
AVideo uses FFmpeg to encode videos. We can easily install FFmpeg from the default Ubuntu repository.
sudo apt install ffmpeg
To read and write meta information in multimedia files, we need to install the libimage-exiftool-perl package.
sudo apt install libimage-exiftool-perl
You also need to install some common PHP extensions.
sudo apt install php7.2-cli php7.2-common php7.2-json php7.2-opcache php7.2-readline php7.2-curl php7.2-gd
To fetch videos from other sites, we need to install YouTube-DL. Though it’s included in the Ubuntu repository, but it’s outdated. We will install YouTube-DL from the Python Package Index, which always contains the latest version of YouTube-DL.
sudo apt install python3-pip
sudo -H pip3 install youtube-dl
It’s very important that you use the latest version, or you might not be able to download videos from other sites. We can create a Cron job to automatically check and install the latest version.
sudo crontab -e
Add the following line at the end of the Crontab file to try upgrading YouTube-DL daily.
@daily sudo -H pip3 install --upgrade youtube-dl > /dev/null
Step 3: Create Database and User in MariaDB
Log into MariaDB database server with the following command. Since MariaDB is now using unix_socket plugin to authentication user login, there’s no need to enter MariaDB root password. We just need to prefix the mysql command with sudo.
sudo mysql
Then create a database for AVideo. This tutorial names the database AVideo. You can use whatever name you like.
create database AVideo;
Create the database user. Again, you can use your preferred name for this user. Replace your-password with your preferred password.
create user AVideo@localhost identified by 'your-password';
Grant this user all privileges on the AVideo database.
grant all privileges on AVideo.* to AVideo@localhost;
We also need to create a separate database for the encoder.
create database AVideoEncoder;
Create a user for this database.
create user AVideoEncoder@localhost identified by 'your-password';
Grant privileges.
grant all privileges on AVideoEncoder.* to AVideoEncoder@localhost;
Flush the privileges table and exit.
flush privileges;

exit;
Step 4: Setting Up Web Server
We can use Apache or Nginx web server.
Apache
If you prefer Apache, create a virtual host file for AVideo with a command-line text editor like Nano.
sudo nano /etc/apache2/sites-available/avideo.conf
Put the following text into the file. Replace the red-colored text with your actual data. I use a subdomain in this tutorial. You can use your main domain name if you prefer. Don’t forget to set DNS A record for the domain name in your DNS record manager. Also, note that the document root directory is case-sensitive and you should not add a forward slash at the end.
    ServerName tube.yourdomain.com
    DocumentRoot /var/www/AVideo

    <Directory /var/www/AVideo>
       DirectoryIndex index.php
       Options  FollowSymLinks
       AllowOverride All
       Require all granted


    ErrorLog ${APACHE_LOG_DIR}/avideo.error.log
    CustomLog ${APACHE_LOG_DIR}/avideo.access.log combined
Save and close the file. Then enable this virtual host.
sudo a2ensite avideo.conf
We need to enable the rewrite module.
sudo a2enmod rewrite
Restart Apache for the changes to take effect.
sudo systemctl restart apache2
Now visit tube.yourdomain.com and you will be redirected to the setup wizard page (tube.yourdomain.com/install/index.php). If you see the default Apache page instead of the setup wizard, then you need to disable the default virtual host.
sudo a2dissite 000-default.conf
And restart Apache.
Before entering any information in the setup wizard, we need to enable HTTPS.
Nginx
If you prefer Nginx, create a youphptube.conf file in /etc/nginx/conf.d/ directory.
sudo nano /etc/nginx/conf.d/avideo.conf
Put the following text into the file. Replace the red-colored text with your actual data. I use a subdomain in this tutorial. You can use your main domain name if you prefer. Don’t forget to set DNS A record for the domain name in your DNS record manager. Also note that the document root directory is case-sensitive.
server {
    listen      80;
    server_name tube.yourdomain.com;

    root /var/www/AVideo;
    index index.php index.html index.htm;
    charset utf-8;
    client_max_body_size 2G;

    location / {
        try_files $uri $uri/ /index.php?$query_string;
    }

    access_log  /var/log/nginx/avideo.access.log;
    error_log   /var/log/nginx/avideo.error.log;

    location ~ .php$ {
        fastcgi_split_path_info ^(. .php)(/. )$;
        fastcgi_pass unix:/run/php/php7.2-fpm.sock;
        fastcgi_index index.php;
        include fastcgi_params;
        fastcgi_param SCRIPT_FILENAME $document_root$fastcgi_script_name;
    }

    location = /upload/index.php {
       rewrite ^(.*)$ /upload/view/index.php last;
    }

    location = /upload/isAdmin {
      rewrite ^(.*)$ /upload/view/isAdmin.php last;
   }

   location = /upload/removeStreamer {
     rewrite ^(.*)$ /upload/view/removeStreamer.php last;
   }

  location = /upload/priority {
     rewrite ^(.*)$ /upload/view/priority.php last;
  }

  location = /upload/status {
     rewrite ^(.*)$ /upload/view/status.php last;
  }

  location = /upload/serverStatus {
    rewrite ^(.*)$ /upload/view/status.php?serverStatus=1 last;
  }

  location = /upload/upload {
    rewrite ^(.*)$ /upload/view/upload.php last;
  }

  location = /upload/listFiles.json {
   rewrite ^(.*)$ /upload/view/listFiles.json.php last;
  }

  location = /upload/deleteQueue {
    rewrite ^(.*)$ /upload/view/deleteQueue.php last;
  }

  location = /upload/saveConfig {
    rewrite ^(.*)$ /upload/view/saveConfig.php last;
  }

  location = /upload/youtubeDl.json {
    rewrite ^(.*)$ /upload/view/youtubeDl.json.php last;
  }

  location = /upload/send.json {
    rewrite ^(.*)$ /upload/view/send.json.php last;
  }

  location = /upload/streamers.json {
    rewrite ^(.*)$ /upload/view/streamers.json.php last;
  }

  location = /upload/queue.json {
    rewrite ^(.*)$ /upload/view/queue.json.php last;
  }

  location = /upload/queue {
    rewrite ^(.*)$ /upload/view/queue.php last;
  }

  location = /upload/login {
    rewrite ^(.*)$ /upload/objects/login.json.php last;
  }

  location = /upload/logoff {
    rewrite ^(.*)$ /upload/objects/logoff.json.php last;
  }

  location /upload/ {
    rewrite "^/getImage/([A-Za-z0-9=/] )/([A-Za-z0-9]{3})$" /upload/objects/getImage.php?base64Url=$1&format=$2 last;
    rewrite "^/getImageMP4/([A-Za-z0-9=/] )/([A-Za-z0-9]{3})/([0-9.] )$" /upload/objects/getImageMP4.php?base64Url=$1&format=$2&time=$3 last;
  }

  location /upload/getSpiritsFromVideo {
    rewrite ^/getSpiritsFromVideo/([A-Za-z0-9=/] )/([0-9] )/([0-9] )$ /upload/objects/getSpiritsFromVideo.php?base64Url=$1&tileWidth=$2&totalClips=$3 last;
  }

  location /upload/getLinkInfo {
    rewrite ^/getLinkInfo/([A-Za-z0-9=/] )$ /upload/objects/getLinkInfo.json.php?base64Url=$1 last;
  }

}
Save and close the file. Then test Nginx configuration.
sudo nginx -t
If the test is successful, reload Nginx for the changes to take effect.
sudo systemctl reload nginx
Now visit tube.yourdomain.com and you will be redirected to the setup wizard page (tube.yourdomain.com/install/index.php). Before entering any information in the setup wizard, we need to enable HTTPS.
Step 5: Enabling HTTPS
To encrypt the HTTP traffic, we can enable HTTPS by installing a free TLS certificate issued from Let’s Encrypt. Run the following command to install Let’s Encrypt client (certbot) on Ubuntu 18.04 server.
sudo apt install certbot
If you use Apache, you also need to install the Certbot Apache plugin.
sudo apt install python3-certbot-apache
And run this command to obtain and install TLS certificate.
sudo certbot --apache --agree-tos --redirect --hsts --staple-ocsp --email [email protected] -d tube.yourdomain.com
If you use Nginx, install the Certbot Nginx plugin.
sudo apt install python3-certbot-nginx
Next, run the following command to obtain and install TLS certificate.
sudo certbot --nginx --agree-tos --redirect --hsts --staple-ocsp --email [email protected] -d tube.yourdomain.com
Where
--nginx: Use the nginx plugin.--apache: Use the Apache plugin.--agree-tos: Agree to terms of service.--redirect: Force HTTPS by 301 redirect.--hsts: Add the Strict-Transport-Security header to every HTTP response. Forcing browser to always use TLS for the domain. Defends against SSL/TLS Stripping.--staple-ocsp: Enables OCSP Stapling. A valid OCSP response is stapled to the certificate that the server offers during TLS.
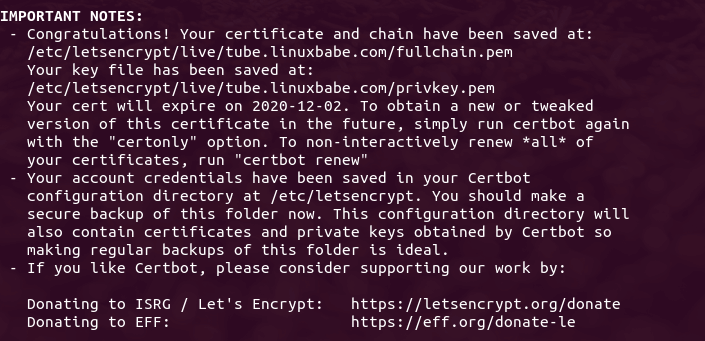
The certificate should now be obtained and automatically installed.
Step 6: Finish Installation with the Setup Wizard
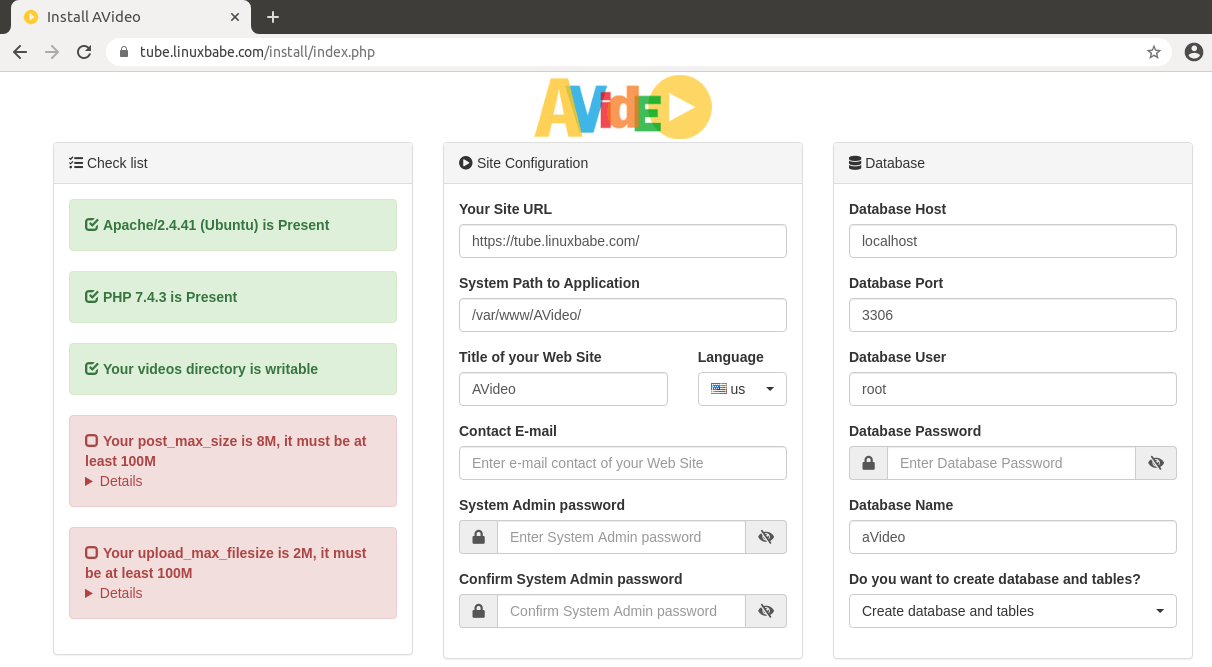
Now go to tube.yourdomain.com and the setup wizard will appear. On the left side, you can see if your server meet the requirements.
If you use Nginx, you can ignore the following message.
Your server is nginx/1.14.2, you must install Apache.
As you can see, the PHP post_max_size should be at least 100M and upload_max_filesize should be at least 100M. We need to edit the php.ini file to change the two values. If you use Apache web server, then
sudo nano /etc/php/7.2/apache2/php.ini
If you use Nginx with PHP-FPM, then you need to edit the FPM version of php.ini file.
sudo nano /etc/php/7.2/fpm/php.ini
Find the following two lines.
post_max_size = 8M
upload_max_filesize = 2M
Change the values according to the video file size you are going to upload. For example, if you allow uploading 1G video file, then
post_max_size = 1024M
upload_max_filesize = 1024M
Save and close the file. Restart Apache for the changes to take effect.
sudo systemctl restart apache2
If you use Nginx with PHP-FPM, then restart PHP-FPM.
sudo systemctl restart php7.2-fpm
Now refresh the AVideo install wizard page. Your server should pass all requirements. Now on the right side, you can enter a title your video site, and set a system admin password. Enter the AVideo database name, user and password your created earlier. (Note: You should use the main database, not the encoder database. Also be aware of case-sensitive.)
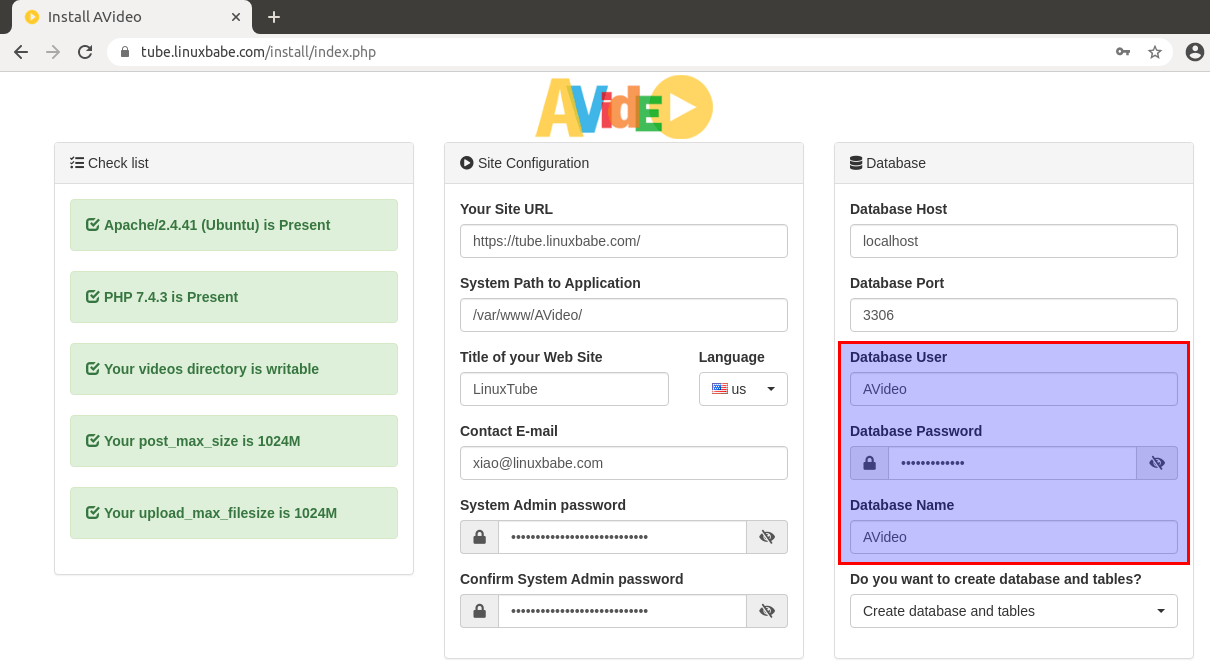
Click the Install now button and AVideo should be installed successfully.

Now we need to remove the /var/www/AVideo/install/ directory.
sudo rm /var/www/AVideo/install/ -r
Click the Go to the main page button and you will see the AVideo main page.
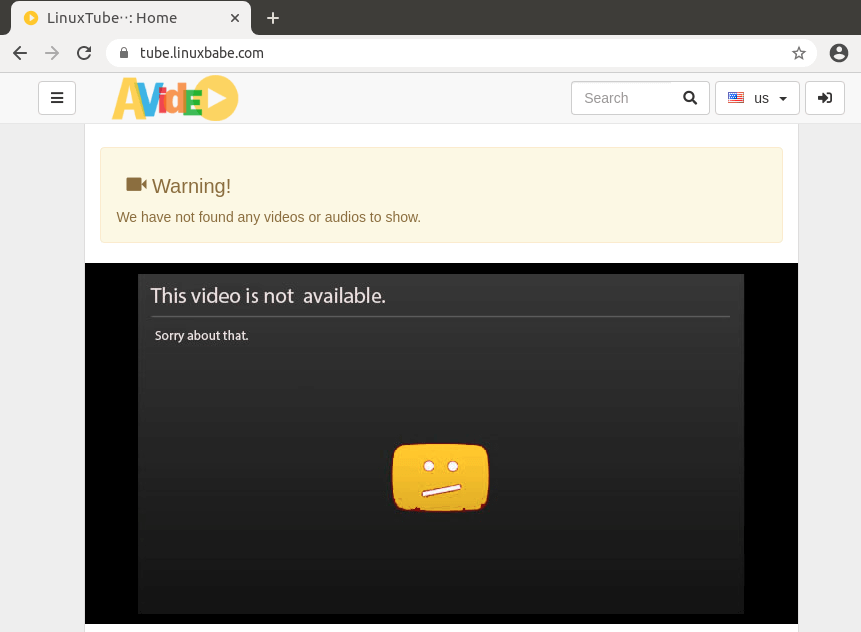
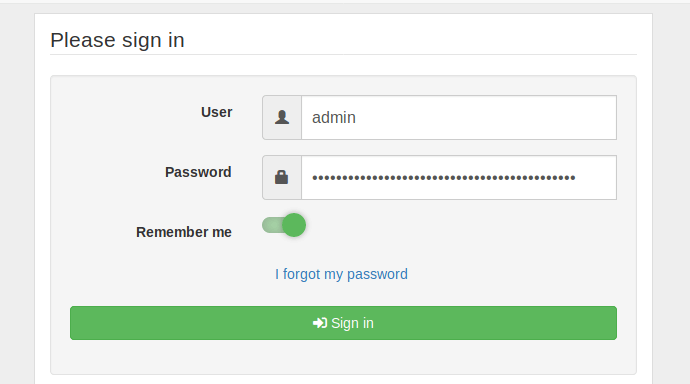
You can click the drop-down menu on the left and login as the admin user and with the password you set just a few moments ago.
Step 7: Set Up the Encoder
Go to https://tube.yourdomain.com/upload/. You will be redirected to the Encoder setup wizard. If you are not automatically redirected, then you can manually enter the setup wizard URL.
https://tube.yourdomain.com/upload/install/index.php/
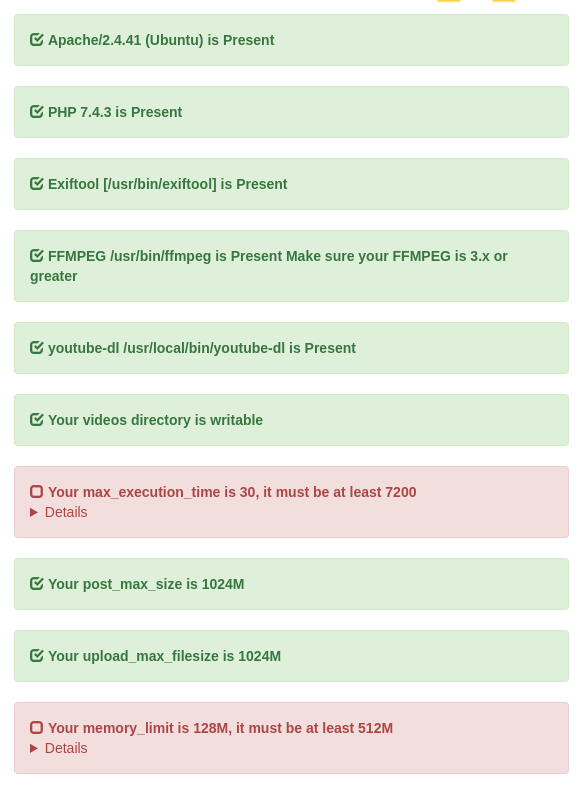
The left hand side will show you if your server meet the requirements of AVideo Encoder.
If you use Nginx, you can ignore the following message.
Your server is nginx/1.14.2, you must install Apache.
As you can see the PHP max_execution_time should be at least 7200 and PHP memory_limit should be at least 512M. We need to edit the php.ini file to change the two values. If you use Apache web server, then
sudo nano /etc/php/7.2/apache2/php.ini
If you use Nginx with PHP-FPM, then you need to edit the FPM version of php.ini file.
sudo nano /etc/php/7.2/fpm/php.ini
Find the following two lines.
max_execution_time = 30
memory_limit = 128M
Change the values.
max_execution_time = 7200
memory_limit = 512M
Note that if later video encoding stops half way through, you need to increase the max_execution_time, or upgrade your CPU.
Save and close the file. Restart Apache for the changes to take effect.
sudo systemctl restart apache2
If you use Nginx with PHP-FPM, then restart PHP-FPM.
sudo systemctl restart php7.2-fpm
Now refresh the AVideo Encoder install wizard page. Your server should pass all requirements. Now on the right side, you need to enter the AVideoEncoder database name, user and password your created earlier. Be aware of case-sensitive and enter the streamer site’s admin password.
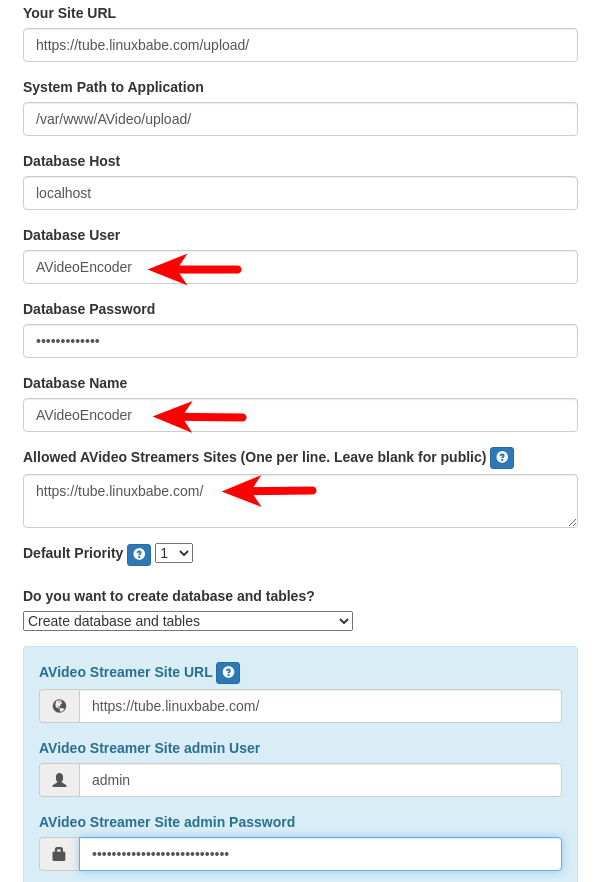
Click the Install Now button and AVideo Encoder will be installed.

Remove the install directory.
sudo rm /var/www/AVideo/upload/install/ -r
And go to the main page.
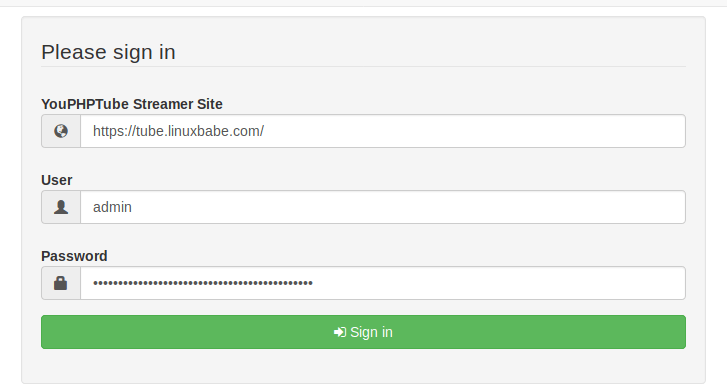
Step 8 : Change the Encoder URL
By default, AVideo uses the public encoder for uploading videos. To use your own encoder, sign in as admin in AVideo (not AVideo Encoder) and go to the admin panel from the left sidebar.

Go to settings -> site settings -> advanced configuration. Change the Encoder URL to https://tube.yourdomain.com/upload/. Save the settings, clear the cache directory and generate a new sitemap.
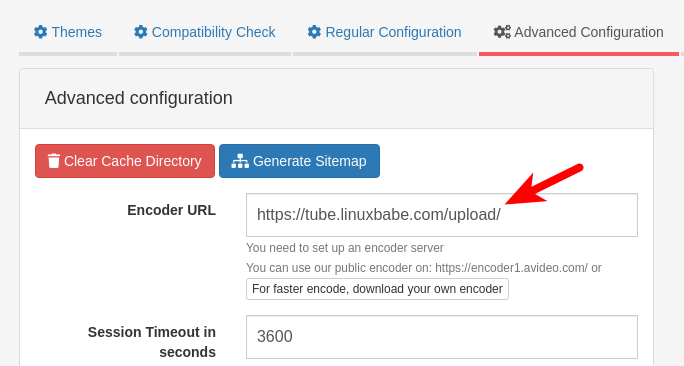
Now log out and log back in. If you click the encode video and audio button on the upper-right corner, you will be taken to your own encoder to upload videos. It should be noted that the encoding speed depends on your server’s CPU power. It doesn’t require much RAM because the encoder will copy the video to a temporary file in the upload directory (/var/www/AVideo/upload/videos).
Step 9: Configure SMTP
To send out emails (such as account registration, password reset, etc), you need to configure an SMTP server. If you would like to use your own mail server to send emails to clients, please check out the following article to set up your own mail server.
If you would like to use an SMTP relay service, I recommend Mailjet. You can follow the tutorial below to set up SMTP relay on your AVideo server.
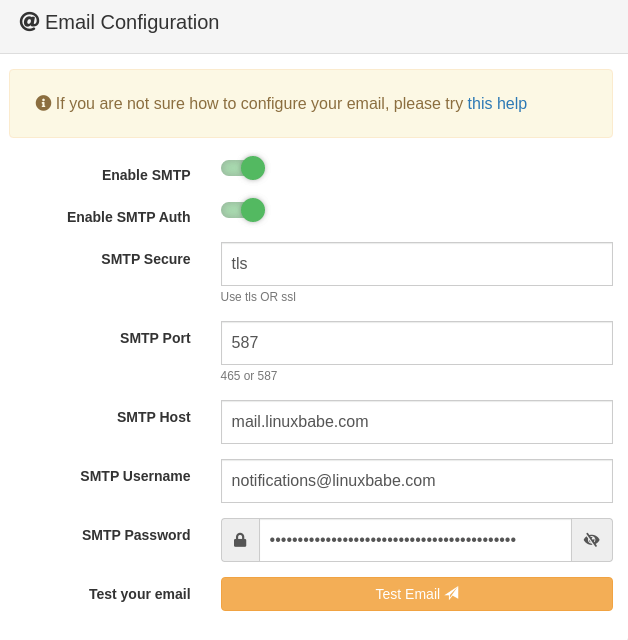
You can test email sending by going to the admin panel -> Setttings -> Site Settings -> Advanced Configuration, you can find SMTP configuration. Use the following settings.
- Enable SMTP.
- Enable SMTP Auth.
- Use
tlsin SMTP Secure. - Use
587as the SMTP port. - Enter your mail server’s hostname.
- Enter an SMTP username and password.
Click the Save button to save the settings, then click Test Email to see if it’s working.
Enable TCP BBR
For a video streaming server, it’s recommended to enable the TCP BBR congestion control algorithm in the Linux kernel by following the instructions in the article below.
Mobile Apps
You can download the free android app or iOS app by doing a search for AVideo on Google Play Store or YPT Mobile in Apple Store. White-label mobile app require a paid license.
Troubleshooting
If your AVideo main page failed to load some CSS and JavaScript resources,
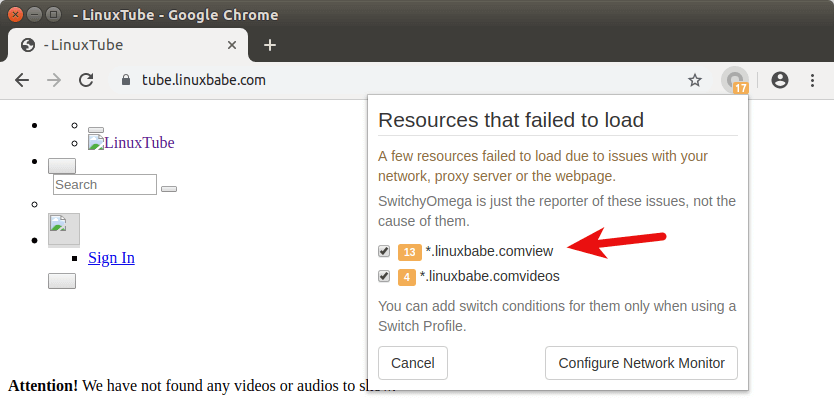
It’s likely that you have added extra forward slash in the Apache or Nginx virtual host file for the web root directory. Instead of using
DocumentRoot /var/www/AVideo/
You should use
DocumentRoot /var/www/AVideo
If the main website isn’t working properly, you can check the log file at /var/www/AVideo/videos/youphptube.log. If your encoder isn’t working properly, you can check the log file at /var/www/AVideo/upload/videos/youphptube.log.
Other Tidbits
When encoding videos, you can choose resolutions (low, SD, HD). If you use AVideo as a personal video streaming site, I recommend choosing HD resolution only to reduce encoding time and save disk space. If you have already encoded videos to all 3 resolutions, you can go to the AVideo video directory (/var/www/AVideo/videos) and delete low resolution and SD resolution videos.
cd /var/www/AVideo/videos/
sudo rm *Low.mp4
sudo rm *SD.mp4
How To Download All Videos From Your Video Site
You can use the youtube-dl command line utility to download all videos. First, you need to go to AVideo dashboard, then go to the video list page and scroll down to the bottom, click the download your videos list (permalink .txt file) button. You will see a list of URL for all the videos.
Next, open up a terminal and create a txt file with a text editor, copy the URLs from the web page and paste them into the file. Then you can run the following command to download the videos. Replace video-list.txt with the your own file name.
youtube-dl -a video-list.txt
Wrapping Up
I hope this tutorial helped you install AVideo on Ubuntu 18.04 server. As always, if you found this post useful, then subscribe to our free newsletter to get more tips and tricks. Take care 🙂
Rate this tutorial
[Total: 2 Average: 5]

