ConfigServer Firewall (CSF) is a Firewall for Linux servers and BSD systems to control the inbound and outbound traffic. Before we go into specific details about CSF, let’s understand what a firewall is and how it works.
A firewall acts as a shield that protects the system from an outside attack. A few of them are stateful firewalls, circuit-level gateways, UDP/ICMP-filtering firewalls, or application-layer filters.
The firewall comes with a set of rules to filter the incoming and outgoing traffic. And depending on what kind of Firewall you are using, it decides whether an IP is allowed to access the network or not. The list of rules is defined for a particular system, and the firewall filters traffic as per the rules.
ConfigServer Firewall (CSF) is one of the most widely used open-source firewalls in Linux servers. CSF comes with a list of features that can be used to configure the rules. Hence it is very powerful and easy to use at the same time.
Prerequisites
In order to install and configure CSF on Debian 11, you must have:
- A server running Debian 11 and your system should be connected to the internet.
- Root access to the server.
Updating your System
Before installing ConfigServer Firewall, you should update your system. Run the command below to update your system.
sudo apt update
Once the update is complete, run the following commands to install the required dependencies.
sudo apt install libio-socket-inet6-perl libsocket6-perl -y
sudo apt install sendmail dnsutils unzip libio-socket-ssl-perl -y
sudo apt install libcrypt-ssleay-perl git perl iptables libnet-libidn-perl -y
In case you have a previous version of CSF installed in your system, run the following command to uninstall it first. As Debian 11 uses a new version of Perl, the CSF installation can cause conflicts with the existing CSF installation.
cd /etc/csf && sh uninstall.sh
If you’re using another firewall configuration script like UFW, you should turn them off before continuing.
sudo ufw disable
Installing CSF Firewall on Debian 11
Now that you have installed all the necessary prerequisites, let’s download and install the CSF firewall.
The Debian 11 repository does not contain CSF packages. Hence, you need to download the latest version of ConfigServer firewall from their official site.
To do that, issue the following command.
wget http://download.configserver.com/csf.tgz
Now ru the command below to extract the downloaded file.
sudo tar -xvzf csf.tgz
Once you have extracted the file, install CSF using the following command.
cd csf && sh install.sh
Once the installation is complete, the firewall should be now installed. To start CSF firewall, run the following command.
sudo systemctl start csf
Run the command below to make sure everything is fine.
perl /usr/local/csf/bin/csftest.pl
You will get an output as shown below. This output confirms that CSF is up and running.
To enable CSF firewall to start on boot, run the following command.
sudo systemctl enable csf
You can check the status of CSF using the command below.
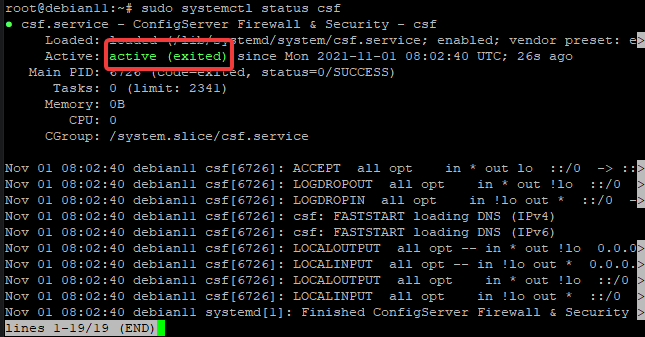
sudo systemctl status csf
This output confirms that CSF is up and running. Now let’s configure this firewall.
Sample output:
Configuring CSF Firewall on Debian 11
Once you have installed the CSF firewall, the default rules are active which comes with a configuration file /etc/csf/csf.conf
You should review this configuration file to make sure that it is configured as per your needs. In this file, you can see all the default rules which are active from your system’s perspective. Let’s take a closer look at some of them.
sudo nano /etc/csf/csf.conf
The fewer the number of open ports, the more secure the system is. But you should always have some common ports open. You can see all the ports which are open by default, in csf.conf file as shown below.
As you can see in the configuration file, if you want to allow/block any port, you should add/remove the port number in the list respectively.
For example, if you want to block port 80, then it should be removed from the list, as shown below.
If you are using IPv6, you should also update it in the configuration file as most of the attacks nowadays are done over IPv6 protocol. You should configure TCP6_IN, TCP6_OUT similarly to what we have configured for IPv4 ports above.
Sample output:
Now let’s configure the CONNLIMIT settings. CONNLIMIT is a security feature in CSF that allows you to limit the number of concurrent a remote connection can have on a specific port. This helps in mitigating the risk of DoS/DDoS attacks.
For example, if you want to limit any IP with no more than 3 concurrent connections, then you should update it as shown below. This setting would allow only 3 concurrent connections on port 22 and 3 concurrent connections on port 443.
Next, let’s configure the PORTFLOOD settings. This option allows us to configure the maximum number of connection requests allowed on a port within a certain time frame.
For example, if you want to block any IP if more than 3 connections are established on port 443 using TCP protocol within 60 seconds, you should update it as shown below. The block will automatically be removed once the 60-second time frame is over since the last connection.
The most basic feature of any firewall is to block and allow IP addresses. You can add the IP address you want to block by manually adding them in csf.deny file or you can add an entire range of IPs in the csf.deny file.
For example, you can block all the 192.168.1.0/24 IP range.
Or
You can block a single IP of 192.168.2.0 by adding it in the csf.deny file as shown below.
Open the csf.deny file with the following command.
sudo nano /etc/csf/csf.deny
Add the following lines to the bottom of the file. One line at a time.
192.168.2.0
192.168.1.0/24
Sample output:
Once you are done, save and close the file by hitting CTRL X, Y, and Enter.
One’s opposite to the csf.deny file, the csf.allow file is used to exclude an IP or range of IPs from all the filters. Note that even if you already added an IP to the csf.deny file, the blocked IP address is still allowed to access your server by adding it in the csf.allow file.
sudo nano /etc/csf/csf.allow
CSF offers a wide variety of options to set up your own firewall, which is beyond the scope of this tutorial. You can consult the ConfigServer documentation about the settings and how they work.
Once you finish updating all the required settings, save and close the csf.conf file by hitting CTRL X, Y, and Enter.
CSF also offers a feature of ignoring an IP address from any filter. Unlike allowing an IP address in the csf.allow file, you can not ignore an IP address if it was listed in the csf.deny file.
sudo nano /etc/csf/csf.ignore
Now that you have configured all the settings in the csf.conf file, it is time to update the ruleset to apply the changes.
To do that, run the following command.
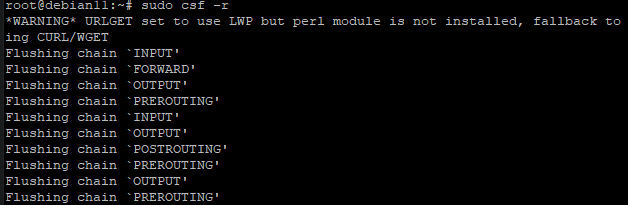
sudo csf -r
Once the execution of the above command is complete, you will be able to see a message as shown in the following screenshot. If no error messages are displayed, congratulations! Your server’s firewall configuration is now updated and ready for use.
Conclusion
In this tutorial, you have learned how to install ConfigServer Security & Firewall (CSF) on a Debian 11 server. You have also learned how to create firewall rules, adding IPs to both allowed and blocked lists using CSF configuration files.
If you encounter any issue, you can always refer the ConfigServer Firewall documentation for more information.


