
Fathom is a privacy-focused web analytics software with GDPR compliance and no cookie banners required. It’s an alternative to Google Analytics, but without invading users’ privacy, and doesn’t compromise visitor data.
In this article, we’ll show you how to install Fathom Privacy Focused Web Analytics software on Ubuntu 22.04 server. You will install Fathom with PostgreSQL and Nginx as a reverse proxy.
Prerequsites
To install Fathom, ensure you have the following:
- An Ubuntu 22.04 server.
- A non-root user with root privileges.
- A domain name pointed to a server IP address.
Installing PostgreSQL Server
Fathom is an open-source web analytics that uses PostgreSQL as a backend database. To install Fathom, you must install PostgreSQL and then create a new PostgreSQL database and user.
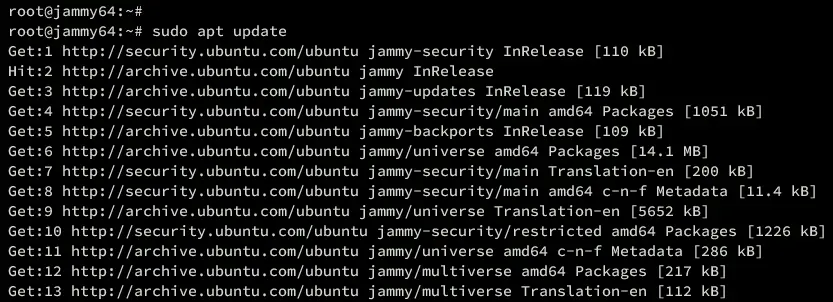
First, run the following command to update your Ubuntu package index.
sudo apt update
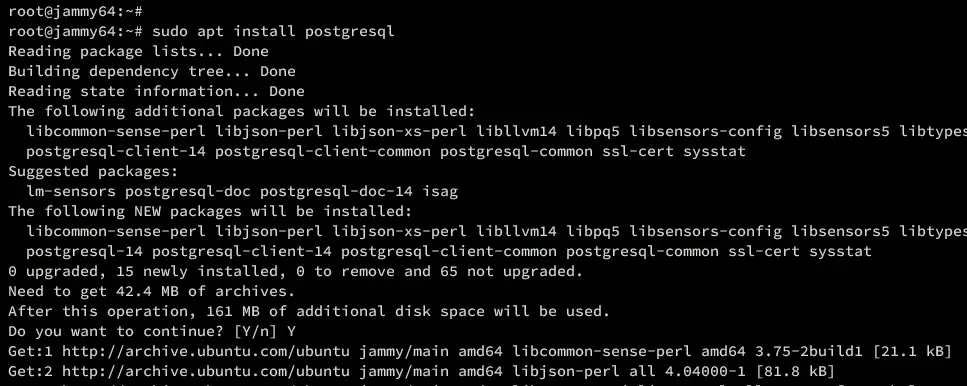
Then, run the command below to install the PostgreSQL database server to your Ubuntu system.
sudo apt install postgresql
Input Y to confirm the process.
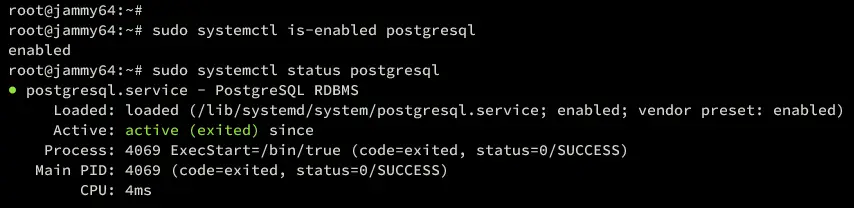
After installation, the Postgresql service will automatically run and be enabled. Run the following systemctl command to verify PostgreSQL is started.
sudo systemctl is-enabled postgresql
sudo systemctl status postgresql
In this output below, you can see the postgresql service is enabled and will start automatically at started. And you can see the postgresql service status is running.
Creating PostgreSQL Database and User
With the PostgreSQL installed, let’s create a new database and user for Fathom installation.
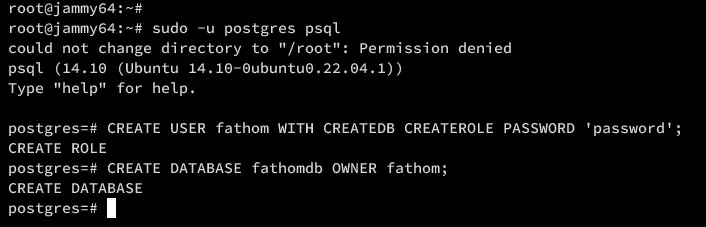
Log in to the PostgreSQL as default user postgres using the command below.
sudo -u postgres psql
Once logged in, execute the following queries to create a new PostgreSQL database and user. In this example, you will create a database fathomdb and user fathom for your Fathom installation.
CREATE USER fathom WITH CREATEDB CREATEROLE PASSWORD 'password';
CREATE DATABASE fathomdb OWNER fathom;
Now verify the list available database and user using the query below. This will ensure that your database and user are created.
du
l
In the following output, you can see the database fathomdb and user fathom are created. Type q or press Ctrl d to exit from the PostgreSQL.
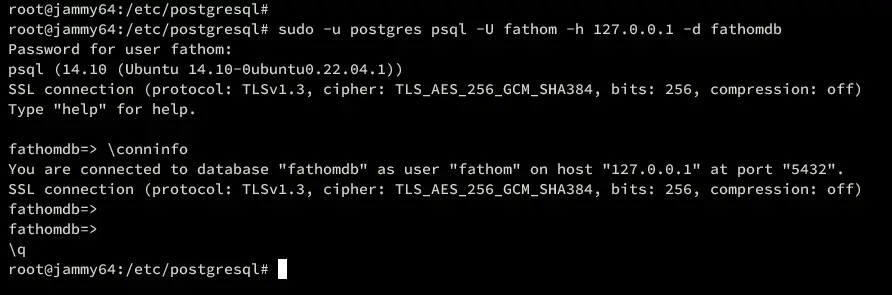
Next, execute the following command to connect to the PostgreSQL database fathomdb via fathom user. Input your password when asked, then press ENTER to confirm.
sudo -u postgres psql -U fathom -h 127.0.0.1 -d fathomdb
Once logged in, verify your connection using the following query.
conninfo
The following screenshot shows that the user fathom is connected to the PostgreSQL database fathomdb. With this, proceed with the Fathom installation.
Installing Fathom on Ubuntu
Now that the PostgreSQL database is ready, you will start the Fathom installation by completing the following stage:
- Setting Up User and Downloading Fathom
- Configuring Fathom
- Running Fathom as a Systemd Service
Without further ado, let’s begin.
Setting up User and Downloading Fathom
In the first place, you will need to create a new system user that will be used to run Fathom. Then, you will download the Fathom binary package to your Ubuntu machine.
To get started, run the command below to create a new system user fathom.
sudo useradd -r -d /opt/fathom fathom
Create a new home directory /opt/fathom and change the ownership to user and group fathom.
sudo mkdir -p /opt/fathom
sudo chown -R fathom:fathom /opt/fathom
Next, download the fathom binary package using the wget command below.
wget https://github.com/usefathom/fathom/releases/download/v1.3.1/fathom_1.3.1_linux_amd64.tar.gz
Once downloaded, extract the fathom binary file to the /usr/local/bin directory and make the fathom binary file executable.
tar -C /usr/local/bin -xzf fathom_1.3.1_linux_amd64.tar.gz
chmod  x /usr/local/bin/fathom
Lastly, verify the fathom location and version by executing the following command.
which fathom
fathom --version
Fathom 1.3.1 is installed at /usr/local/bin/fathom.
Configuring Fathom
At this point, you’ve downloaded Fathom and created the required user and installation directory. Now, let’s dive in to configure the Fathom installation.
Run the command below to generate a random password secret. Copy the generated secret to your note.
head /dev/urandom | tr -dc A-Za-z0-9 | head -c 20 ; echo ''
Now go to the /opt/fathom directory.
cd /opt/fathom
Create a new data directory and .env file using the command below.
sudo -u fathom mkdir -p /opt/fathom/data
sudo -u fathom touch /opt/fathom/data/.env
Use the following nano editor command to open the .env file.
sudo -u fathom nano /opt/fathom/data/.env
Insert the following configuration and be sure to change the details PostgreSQL database and FATHOM_SECRET with your information.
FATHOM_GZIP=true
FATHOM_DEBUG=true
FATHOM_DATABASE_DRIVER="postgres"
FATHOM_DATABASE_NAME="fathomdb"
FATHOM_DATABASE_USER="fathom"
FATHOM_DATABASE_PASSWORD="password"
FATHOM_DATABASE_HOST="127.0.0.1"
FATHOM_DATABASE_SSLMODE="disable"
FATHOM_SECRET="qDQ4fawzKOfBAtJ3O4ID"
Save and exit the file when finished.
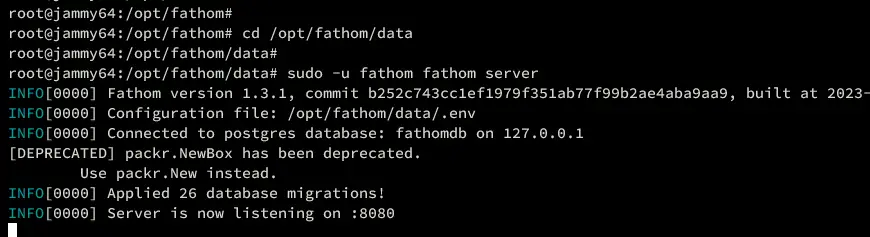
Now move to /opt/fathom/data directory and run Fathom via the command below.
cd /opt/fathom/data
sudo -u fathom fathom server
This will initialize and migrate the Fathom database. If successful, you should get the confirmation of Fathom running on default port 8080. You can now press Ctrl c to terminate the Fathom process.
Running Fathom as Systemd Service
Now that you’ve configured Fathom, successfully run it via the command line. Let’s take it further to run Fathom as a systemd service for ease of management. This allows you to manage Fathom via systemctl.
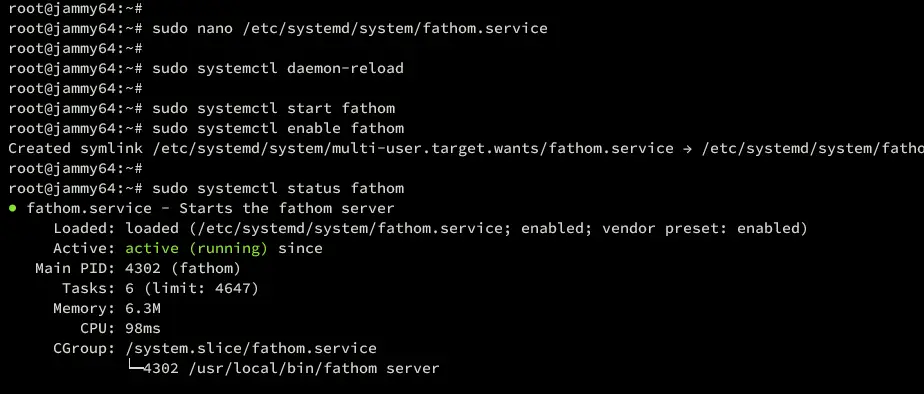
Run the following nano editor command to create a new systemd service file /etc/systemd/system/fathom.service.
sudo nano /etc/systemd/system/fathom.service
Insert the following configuration into the file. As seen below, the fathom service will be running under user `fathom` with the default working directory /opt/fathom/data.
[Unit]
Description=Starts the fathom server
Requires=network.target
After=network.target[Service]
Type=simple
User=fathom
Restart=always
RestartSec=3
WorkingDirectory=/opt/fathom/data
ExecStart=/usr/local/bin/fathom server[Install]
WantedBy=multi-user.target
Save and exit the editor when you’re done.
Now run the command below to reload the systemd manager.
sudo systemctl daemon-reload
Once reloaded, start and enable the fathom service using the following command. With this, Fathom should be running in the background and will be run automatically at boot.
sudo systemctl start fathom
sudo systemctl enable fathom
Execute the command below to verify the fathom service.
sudo systemctl status fathom
If your configuration is successful, you should see fathom service with the status running.
Lastly, run the command below to check Fathom via open ports. Fathom is running on default port 8080 on your Ubuntu machine.
ss -tulpn | grep fathom
Creating Fathom User
Now that Fathom is up and running, you need to create the first user for your Fathom installation.
Move to the /opt/fathom/data directory.
cd /opt/fathom/data
Execute the fathom command below to create a Fathom user. In this example, you will create a new user bob with password password.
sudo -u fathom fathom user add --email="[email protected]" --password="password"
Installing and Configuring Nginx as Reverse Proxy
In this guide, you will run Fathom with Nginx as a reverse proxy. Let’s install Nginx and create a new server block configuration for Fathom.
Execute the following apt command to install Nginx on your Ubuntu server.
sudo apt install nginx -y
Once the installation is finished, create a new server block configuration /etc/nginx/sites-available/fathom using nano editor.
sudo nano /etc/nginx/sites-available/fathom
Insert the following configuration and be sure to change the domain name within the server_name line.
server {
 listen 80;
 server_name fathom.hwdomain.io;location / {
 proxy_set_header X-Real-IP $remote_addr;
 proxy_set_header X-Forwarded-For $remote_addr;
 proxy_set_header Host $host;
 proxy_pass http://127.0.0.1:8080;
 }
}
Save and exit the file when you’re done.
Now, run the command below to activate the server block configuration /etc/nginx/sites-available/fathom and verify overall your Nginx syntax.
sudo ln -s /etc/nginx/sites-available/fathom /etc/nginx/sites-enabled/
sudo nginx -t
If no error, you should get an output ‘syntax is ok – test is successful’.
Now run the systemctl command below to restart the Nginx service and apply the changes.
sudo systemctl restart nginx
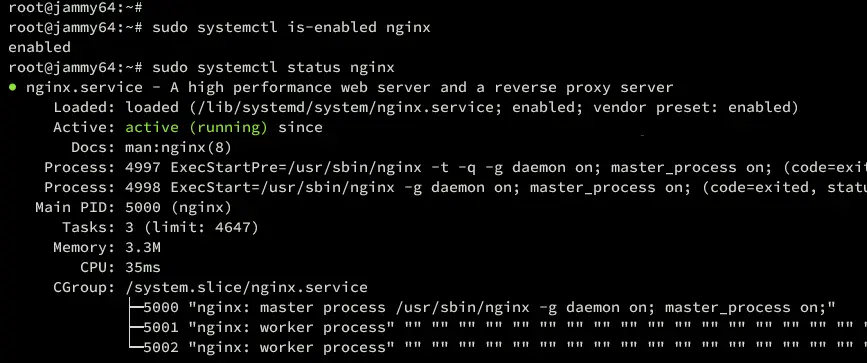
Lastly, verify the Nginx service status using the command below. Ensure Nginx is active (running) and enabled on your Ubuntu server.
sudo systemctl is-enabled nginx
sudo systemctl status nginx
Securing Fathom with UFW
After configuring Nginx, let’s configure UFW and open both HTTP and HTTPS ports to allow access to Fathom installation.
Execute the following command to add the OpenSSH application profile to UFW. Then, start and enable UFW.
sudo ufw allow OpenSSH
sudo ufw enable
Input y to proceed and UFW will start and run automatically at boot.
Now, run the command below to add the application profile ‘Nginx Full‘. This will open both HTTP and HTTPS protocols on your Ubuntu system.
sudo ufw allow 'Nginx Full'
Verify the list of ports on UFW using the command below. ensure both OpenSSH and ‘Nginx Full‘ profiles are enabled on UFW.
sudo ufw status
Enable HTTPS via Certbot
At this stage, your Fathom installation is accessed from outside the network, but still on HTTP mode. To secure your installation, you must enable HTTPS on the Nginx server block configuration.
In this example, you will enable HTTPS via Certbot and Letsencrypt. So, be sure that you’ve your domain name pointed to the Ubuntu server IP address.
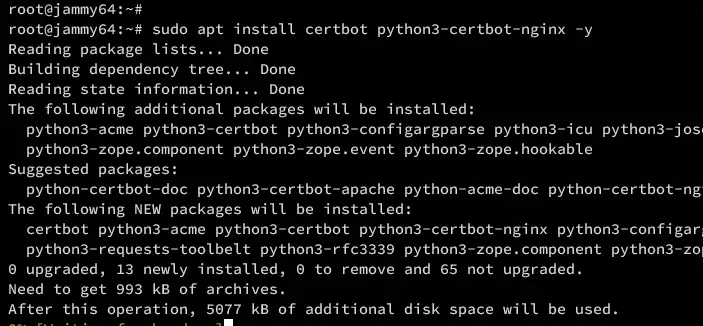
Run the following apt command to install Certbot and python3-certbot-nginx packages to your Ubuntu. Type y to proceed and continue.
sudo apt install certbot python3-certbot-nginx -y
Once the installation is finished, generate new SSL/TLS certificates by executing the certbot command below. Be sure to change the details of the domain name and email address with your information.
sudo certbot --nginx --agree-tos --redirect --hsts --staple-ocsp --email [email protected] -d fathom.hwdomain.io
Once the process is finished, your SSL certificates will be generated at /etc/letsencrypt/live/domain.com directory. Also, your Nginx server block configuration will automatically configured with HTTPS, which is done by the Nginx Certbot plugin.
Accessing Fathom Installation
Lunch your web browser and visit the domain name of your Fathom installation (i.e: https://fathom.hwdomain.io/). If your installation is successful, you will get the Fathom login page.
Log in with your username and password that you’ve created, then press Sign In to confirm.
At first, you will be asked to create your first tracker. Input your site name and click Create site.
Now you will see the generated JavaScript tracking code for your site. Copy the code to your code editor and put it to your target site.
You can now click the update site button to continue, and click outside the pop-up window to get to the Fathom analytic dashboard like the following:
Conclusion
Congratulation! You have now installed Fathom web analytics on the Ubuntu server. You’ve installed Fathom with the PostgreSQL database server and configured Nginx as a reverse proxy. In addition to that, you’ve also secured Fathom with HTTPS via Letsencrypt, and configured UFW to open both HTTP and HTTPS ports.


