
Gitea is a free, open-source, self-hosted, and well-known Git server written in the Go programming language. It is a version control platform similar to Github. It is robust, scalable and offers many features including issues and time tracking, repository branching, file locking, and tagging, merging, and many others. If you are looking for a self-hosted Git service, then probably Gitea is the best option you can use.
In this tutorial, I will show you how to install Gitea on Debian 11.
Prerequisites
- A server running Debian 11.
- A root password is configured on the server.
Install and Configure MariaDB Database
Gitea uses a MariaDB/MySQL as a database backend. So the database server must be installed in your server. If not installed you can install it by running the following command:
apt-get install mariadb-server -y
Once the MariaDB is installed, you will need to set a MariaDB password and secure the installation. You can do it by running the mysql_secure_installation script:
mysql_secure_installation
Answer all the questions as shown below:
Enter current password for root (enter for none):
OK, successfully used password, moving on...
Set root password? [Y/n] Y
Remove anonymous users? [Y/n] Y
Disallow root login remotely? [Y/n] Y
Remove test database and access to it? [Y/n] Y
Reload privilege tables now? [Y/n] Y
Next, connect to the MariaDB interface using the following command:
mysql -u root -p
Once you are connected, create a database and user for Gitea with the following command:
MariaDB [(none)]> CREATE DATABASE gitea;
MariaDB [(none)]> GRANT ALL PRIVILEGES ON gitea.* TO 'gitea'@'localhost' IDENTIFIED BY 'password';
Next, flush the privileges and exit from the MariaDB with the following command:
MariaDB [(none)]> FLUSH PRIVILEGES;
MariaDB [(none)]> QUIT;
Install Gitea
First, you will need to create a dedicated user to run Gitea. You can create it with the following command:
adduser --system --shell /bin/bash --gecos 'Git Version Control' --group --disabled-password --home /opt/git git
You should see the following output:
Adding system user `git' (UID 109) ...
Adding new group `git' (GID 115) ...
Adding new user `git' (UID 109) with group `git' ...
Creating home directory `/opt/git' ...
Next, download the latest version of Gitea with the following command:
curl -s https://api.github.com/repos/go-gitea/gitea/releases/latest |grep browser_download_url | cut -d '"' -f 4 | grep 'linux-amd64$' | wget -i -
Next, move the Gitea binary to the system path with the following command:
mv gitea-*-linux-amd64 /usr/local/bin/gitea
Next, set executable permission to the Gitea binary:
chmod x /usr/local/bin/gitea
Next, verify the Gitea version using the following command:
gitea --version
You should see the following output:
Gitea version 1.15.3 built with GNU Make 4.1, go1.16.8 : bindata, sqlite, sqlite_unlock_notify
Next, you will need to create a directory structure for Gitea. You can create it with the following command:
mkdir -p /etc/gitea /var/lib/gitea/{custom,data,indexers,public,log}
Next, set proper permission and ownership with the following command:
chown git:git /var/lib/gitea/{data,indexers,log}
chmod 750 /var/lib/gitea/{data,indexers,log}
chown root:git /etc/gitea
chmod 770 /etc/gitea
Once you are finished, you can proceed to the next step.
Create a Systemd Service File for Gitea
Next, you will need to create a systemd service file for Gitea. You can create it with the following command:
nano /etc/systemd/system/gitea.service
Add the following lines:
[Unit]
Description=Gitea (Git with a cup of tea)
After=syslog.target
After=network.target
After=mysql.service

[Service]
LimitMEMLOCK=infinity
LimitNOFILE=65535
RestartSec=2s
Type=simple
User=git
Group=git
WorkingDirectory=/var/lib/gitea/
ExecStart=/usr/local/bin/gitea web -c /etc/gitea/app.ini
Restart=always
Environment=USER=git HOME=/opt/git GITEA_WORK_DIR=/var/lib/gitea

[Install]
WantedBy=multi-user.target
Save and close the file then reload the systemd daemon with the following command:
systemctl daemon-reload
Next, start and enable the Gitea service with the following command:
systemctl start gitea
systemctl enable gitea
To check the Gitea service, run the following command:
systemctl status gitea
You should see the following output:
? gitea.service - Gitea (Git with a cup of tea)
     Loaded: loaded (/etc/systemd/system/gitea.service; disabled; vendor preset: enabled)
     Active: active (running) since Sat 2021-10-02 12:59:27 UTC; 9s ago
   Main PID: 19179 (gitea)
      Tasks: 8 (limit: 4679)
     Memory: 128.3M
        CPU: 1.415s
     CGroup: /system.slice/gitea.service
             ??19179 /usr/local/bin/gitea web -c /etc/gitea/app.ini

Oct 02 12:59:28 debian11 gitea[19179]: 2021/10/02 12:59:28 cmd/web.go:102:runWeb() [I] Starting Gitea on PID: 19179
Oct 02 12:59:28 debian11 gitea[19179]: 2021/10/02 12:59:28 ...s/setting/setting.go:569:NewContext() [W] Custom config '/etc/gitea/app.ini' not>
Oct 02 12:59:28 debian11 gitea[19179]: 2021/10/02 12:59:28 ...s/install/setting.go:21:PreloadSettings() [I] AppPath: /usr/local/bin/gitea
Oct 02 12:59:28 debian11 gitea[19179]: 2021/10/02 12:59:28 ...s/install/setting.go:22:PreloadSettings() [I] AppWorkPath: /var/lib/gitea
Oct 02 12:59:28 debian11 gitea[19179]: 2021/10/02 12:59:28 ...s/install/setting.go:23:PreloadSettings() [I] Custom path: /var/lib/gitea/custom
Oct 02 12:59:28 debian11 gitea[19179]: 2021/10/02 12:59:28 ...s/install/setting.go:24:PreloadSettings() [I] Log path: /var/lib/gitea/log
Oct 02 12:59:28 debian11 gitea[19179]: 2021/10/02 12:59:28 ...s/install/setting.go:25:PreloadSettings() [I] Preparing to run install page
Oct 02 12:59:28 debian11 gitea[19179]: 2021/10/02 12:59:28 ...s/install/setting.go:28:PreloadSettings() [I] SQLite3 Supported
Oct 02 12:59:29 debian11 gitea[19179]: 2021/10/02 12:59:29 cmd/web.go:196:listen() [I] Listen: http://0.0.0.0:3000
Oct 02 12:59:29 debian11 gitea[19179]: 2021/10/02 12:59:29 ...s/graceful/server.go:62:NewServer() [I] Starting new Web server: tcp:0.0.0.0:300>
At this point, Gitea is started and listens on port 3000. You can check it with the following command:
ss -antpl | grep 3000
You should see the following output:
LISTEN 0 4096 *:3000 *:* users:(("gitea",pid=19179,fd=6))
Once you are finished, you can proceed to the next step.
Configure Nginx for Gitea
Next, you will need to install and configure Nginx as a reverse proxy for Gitea. First, install the Nginx with the following command:
apt-get install nginx -y
Next, create an Nginx virtual host configuration file with the following command:
nano /etc/nginx/conf.d/gitea.conf
Add the following lines:
server {
    listen 80;
    server_name gitea.example.com;
    access_log /var/log/nginx/gitea_access.log;
    error_log /var/log/nginx/gitea_error.log;


    location / {
        proxy_pass http://localhost:3000;
    }
}
Save and close the file then verify the Nginx for any syntax error:
nginx -t
You should see the following output:
nginx: the configuration file /etc/nginx/nginx.conf syntax is ok
nginx: configuration file /etc/nginx/nginx.conf test is successful
Next, restart the Nginx service with the following command:
systemctl restart nginx
To check the Nginx status, run the following command:
systemctl status nginx
You should see the following output:
? nginx.service - A high performance web server and a reverse proxy server
     Loaded: loaded (/lib/systemd/system/nginx.service; enabled; vendor preset: enabled)
     Active: active (running) since Sat 2021-10-02 13:00:33 UTC; 4s ago
       Docs: man:nginx(8)
    Process: 19209 ExecStartPre=/usr/sbin/nginx -t -q -g daemon on; master_process on; (code=exited, status=0/SUCCESS)
    Process: 19211 ExecStart=/usr/sbin/nginx -g daemon on; master_process on; (code=exited, status=0/SUCCESS)
   Main PID: 19212 (nginx)
      Tasks: 3 (limit: 4679)
     Memory: 3.2M
        CPU: 50ms
     CGroup: /system.slice/nginx.service
             ??19212 nginx: master process /usr/sbin/nginx -g daemon on; master_process on;
             ??19213 nginx: worker process
             ??19214 nginx: worker process

Oct 02 13:00:33 debian11 systemd[1]: Starting A high performance web server and a reverse proxy server...
Oct 02 13:00:33 debian11 systemd[1]: Started A high performance web server and a reverse proxy server.
Next, you will need to edit the Gitea app.ini file and define your domain information:
nano /etc/gitea/app.ini
Change the following lines:
DOMAIN           = gitea.example.com
ROOT_URL         = http://gitea.example.com/
Save and close the file then restart the Gitea service to apply the changes:
systemctl restart gitea
Once you are finished, you can proceed to the next step.
Access Gitea Web Interface
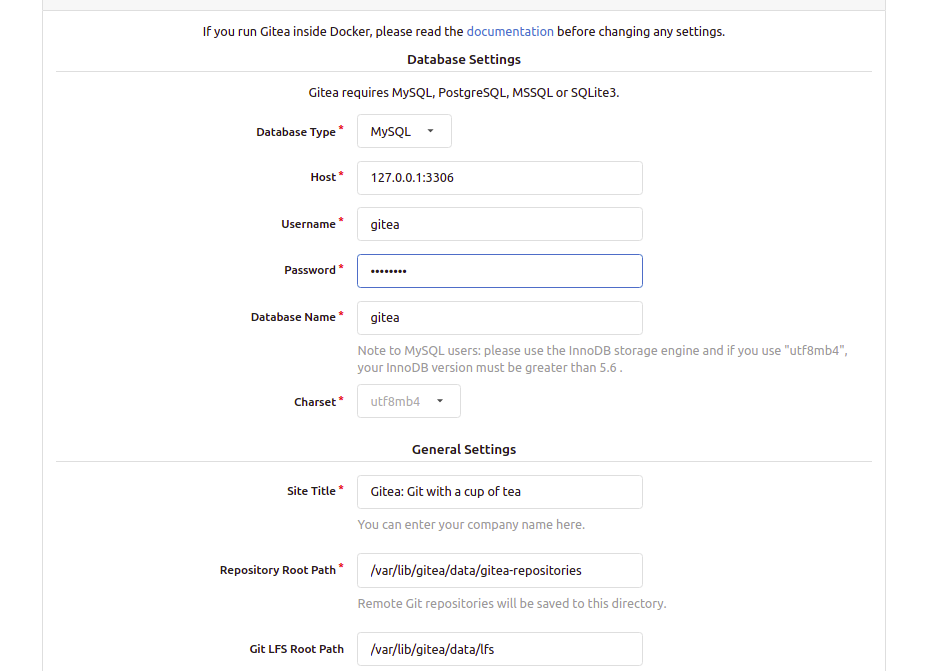
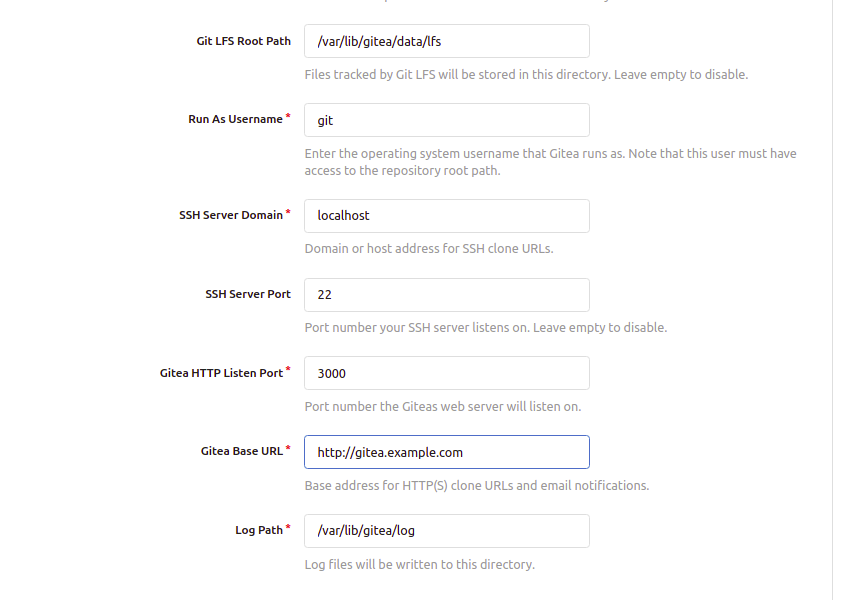
Now, open your web browser and access the Gitea web interface using the URL http://gitea.example.com. You will be redirected to the following page:
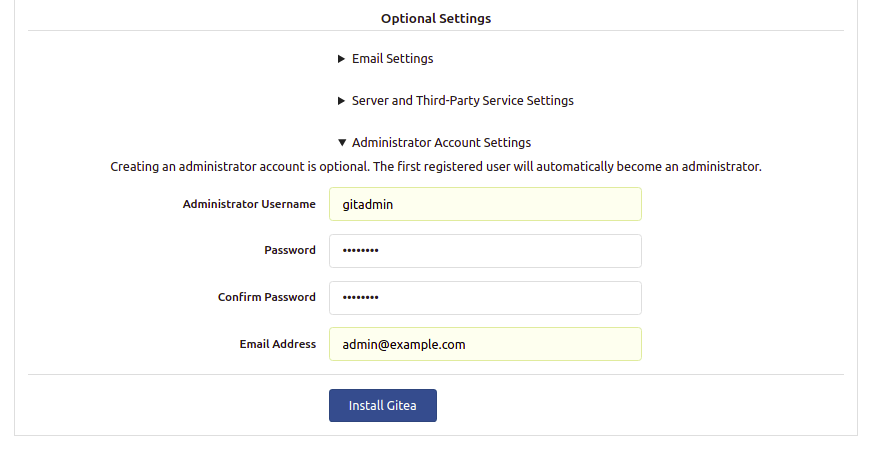
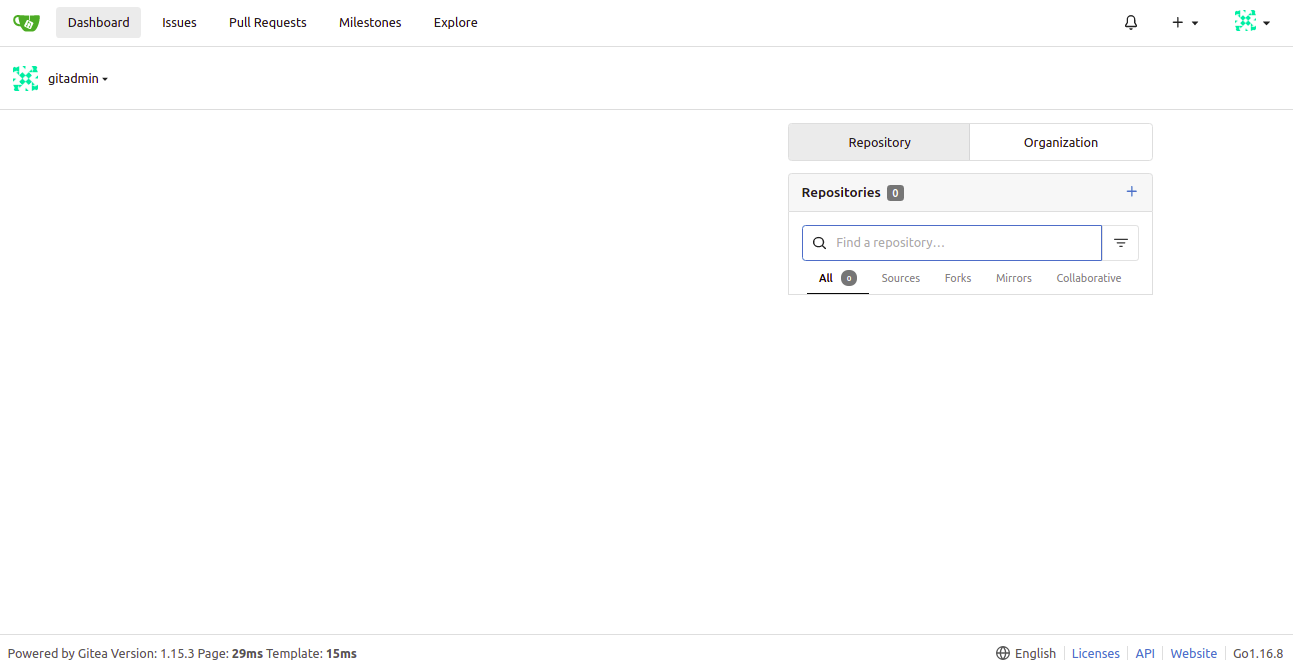
Provide your Gitea database information, URL, admin username, password, port and click on the Install Gitea button. You should see the Gitea dashboard on the following page:
Conclusion
Congratulations! you have successfully installed Gitea with Nginx as a reverse proxy on Debian 11. You can implement Gitea in your development environment to track and manage your project.


