
Gitea is a free, open-source, and self-hosted solution for Git servers. Gitea has written in the Go programming language, a lightweight application, available as the binary package that can be installed on most of the platforms including Windows, Linux, and macOS. It is one of the robust, scalable, fast, easy to use and alternatives to GitLab.
Gitea offers many features including a repository file editor, bug and time tracking, repository branching, file locking, built-in wiki, merging, Multiple database support, Easy upgrade process, Built-in Container Registry, and much more.
In this tutorial, I will show you how to install Gitea from binary with PostgreSQL on Debian 11.
Prerequisites
- A server running Debian 11.
- A root password is configured on the server.
Step 1 – Update OS
Before starting Gitea installation, run the below command to update your system with the latest version.
sudo apt-get update -ysudo apt-get upgrade -y
Step 2 – Install and Configure PostgreSQL
Gitea supports all major databases like MySQL, MariaDB, SQLite, MySQL, and PostgreSQL, But in this guide, PostgreSQL is used as a Gitea database.
First, create PostgreSQL Repository using the following command:
sudo sh -c 'echo "deb http://apt.postgresql.org/pub/repos/apt $(lsb_release -cs)-pgdg main" > /etc/apt/sources.list.d/pgdg.list'
Next, you will need to import the repository signing key:
wget --quiet -O - https://www.postgresql.org/media/keys/ACCC4CF8.asc | sudo apt-key add -
Now, install PostgreSQL by using the following commands:
sudo apt-get updatesudo apt-get -y install postgresql
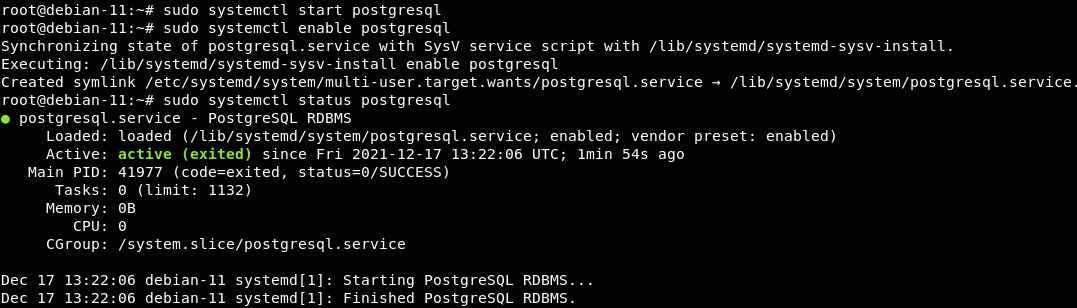
Next, start the PostgreSQL service, enable it at system startup, and check PostgreSQL service status using the following command:
sudo systemctl start postgresqlsudo systemctl enable postgresql
sudo systemctl status postgresql
Next, You need to switch to ‘SCRAM-SHA-256’ scheme from md5 encryption scheme for better security. If you want to connect to PostgreSQL remotely, then you need to allow your IP address in the PostgreSQL configuration file. Open Configuration file to make changes using the following command:
sudo vim /etc/postgresql/14/main/postgresql.conf
If you have another PostgreSQL version installed, then change the above command path according to it.
Next, change the following variables as per your requirement:
listen_addresses = 'localhost, 134.122.38.45'
password_encryption = scram-sha-256
Save and exit the file and restart the PostgreSQL service to apply changes.
sudo systemctl restart postgresql
Next, Log in to the PostgreSQL shell using the following command:
sudo -u postgres psql
Then create a user role and database for Gitea by executing the following command:
postgres=# CREATE ROLE gitea WITH LOGIN PASSWORD '[email protected]';postgres=# CREATE DATABASE giteadb;
postgres=# GRANT ALL PRIVILEGES ON DATABASE giteadb TO gitea;
postgres=# exit
Here, you need to set username, database name, and your password for Gitea.
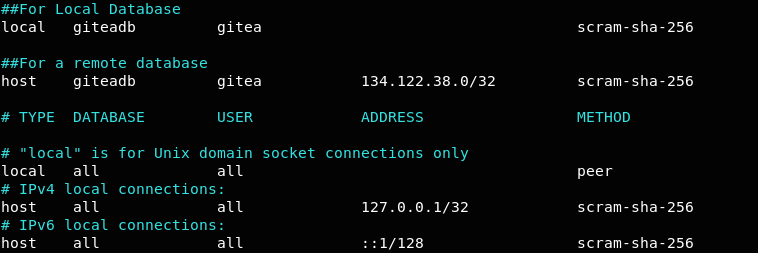
At this point, your PostgreSQL setup and ready for Gitea, verify authentication settings in /etc/postgresql/14/main/pg_hba.conf file.
PostgreSQL accepts all local connections by defaults.
host all all 127.0.0.1/32 scram-sha-256
If you want to use giteadb remotely, then add the following line with your IP address in /etc/postgresql/14/main/pg_hba.conf
host giteadb gitea 134.122.38.0/32 scram-sha-256
Step 3 – Install and configure Git
Next, install git using the following command:
sudo apt install git
Verify the git installation by checking the Git version:
git --version
Output:-
git version 2.30.2
Next, you need to set your name and email address for Git.
git config --global user.name "Your Name"git config --global user.email "[email protected]”
You can check your Git configuration by using the following command.
git config --list
Output:-
user.name=Your Name
[email protected]
Step 4 – Create a git user for Gitea
Now, you will need to create a Gitea user. You can do this with the following command:
sudo adduser
   --system
   --shell /bin/bash
   --gecos 'Git Version Control'
   --group
   --disabled-password
   --home /home/git
   git
This will create a new user git.
Step 5 – Install and Configure Gitea
Go to the Gitea Download Page and download the latest version of the Gitea binary available. At the time of writing this tutorial, Gitea’s latest version is 1.15.7. You can change the VERSION variable in the below command to install any other version.
cd /tmp
GITEAVERSION=1.15.7
wget -O gitea https://dl.gitea.io/gitea/${GITEAVERSION}/gitea-${GITEAVERSION}-linux-amd64
Next, move the Gitea binary to the system path with the following command:
sudo mv /tmp/gitea /usr/local/bin
Next, set executable permission to the Gitea binary file by running the following command into the terminal:
chmod x /usr/local/bin/gitea
Next, you will need to create a directory structure for Gitea, to do so run the following commands:
sudo mkdir -p /etc/giteasudo mkdir -p /var/lib/gitea/{custom,data,indexers,public,log}
Next, give required permissions for Gitea to work properly with the following commands:
sudo chown -R git:git /var/lib/gitea/sudo chown root:git /etc/gitea
sudo chmod -R 750 /var/lib/gitea/
sudo chmod 770 /etc/gitea
Next, create a systemd service file for Gitea with the following command:
vim /etc/systemd/system/gitea.service
Paste the following code in it.
[Unit]
Description=Gitea
After=syslog.target
After=network.target
After=postgresql.service[Service]
RestartSec=2s
Type=simple
User=git
Group=git
WorkingDirectory=/var/lib/gitea/
ExecStart=/usr/local/bin/gitea web -c /etc/gitea/app.ini
Restart=always
Environment=USER=git HOME=/home/git GITEA_WORK_DIR=/var/lib/gitea[Install]
WantedBy=multi-user.target
Save and exit the file. Then reload systemd daemon and start Gitea service using the below command:
sudo systemctl daemon-reload
sudo systemctl start gitea
Next, you need to enable Gitea service at system reboot:
sudo systemctl enable gitea
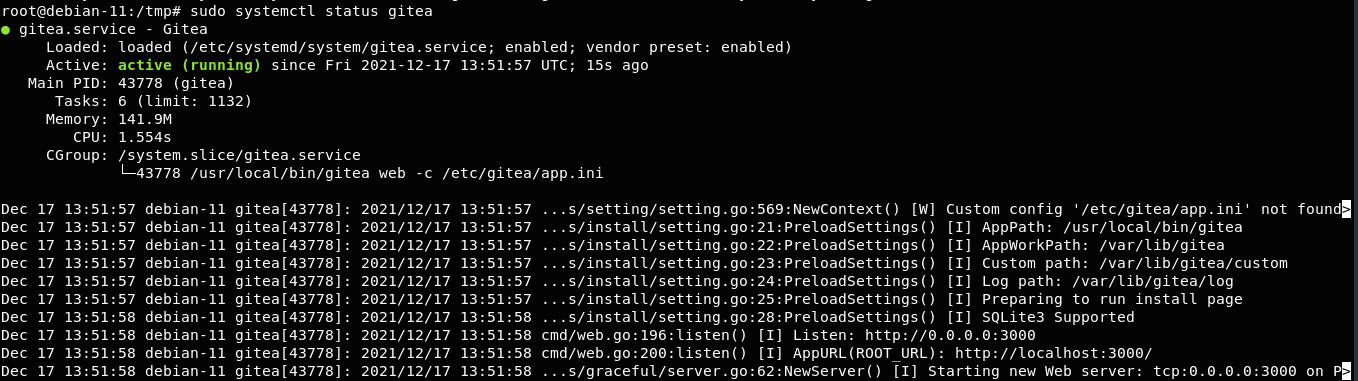
Next, verify the status of Gitea with the following command:Advertisement
sudo systemctl status gitea
You should see the following output:
As you can see, Gitea is started and running on port 3000 by default. You can verify Gitea port with the following command:
netstat -tulpan | grep 3000
You should see output like the below:
tcp6 0 0 :::3000 :::* LISTEN 43778/gitea
Step 6 – Access Gitea Web Interface
Gitea is now up and listening on port 3000 by default. Open your browser and type https://YOURIPADDRESS:3000.
Next, fill in the required parameters as follows:
Database Settings
Database Type: PostgreSQL
Host: 127.0.0.1:5432
Username: gitea
Password: Enter the password you chose during Postgres role creation.
Database Name: giteadb
SSL: Disable
General Settings
Site Title: Title of your choice.
Repository Root Path: /var/lib/gitea/data/repositories
Git LFS Root Path: /var/lib/gitea/data/lfs
Run As Username: git
SSH Server Domain: your_domain/IP
SSH Server Port: 22
Gitea HTTP Listen Post: 3000
Gitea Base URL: http://YOURIPADDRESS:3000
Log Path: /var/lib/gitea/log
At this stage, you can configure your email and Server and Third-party settings, or you can do it later. However, you should configure the Administrator
username to log in to Gitea. Hence, go to Optional Setting and enter Administrator Account Setting details and create ‘Administrator User’ for Gitea.
Next, click on the ‘Install Gitea’ button. Once the installation has been completed successfully, you will be redirected to the Gitea dashboard shown in the following page:
Now, you can explore Gitea and from the Site Administration option from your admin account, you can set up other 3rd party services like integrating window’s active directory with Gitea.
Step 7 – Setting up Email Notifications
You can enable Email Notifications in Gitea using Sendmail or via a 3rd party Email service such as Amazon SES, Sendgrid.
To enable Email Notifications, Open the Gitea configuration file using the following command:
vim /etc/gitea/app.in
Next, edit the following section in the file and add the following code as per your email settings.
[mailer]
ENABLED        = true
FROM           = [email protected]
MAILER_TYPE    = smtp
HOST           = mail.example.com:587
IS_TLS_ENABLED = true
USER           = [email protected]
PASSWD         = password
Save and exit the file and restart Gitea service to apply changes:
sudo systemctl restart gitea
Step 10 – Updating Gitea
Upgrading Gitea is an effortless process, and you just need to download and replace the Gitea binary.
First, stop the Gitea service:
sudo systemctl stop gitea
Next, Download and install the Gitea binary using the following command:
cd /tmp
GITEAVERSION=LATESTVERSION
wget -O gitea https://dl.gitea.io/gitea/${GITEAVERSION}/gitea-${GITEAVERSION}-linux-amd64
sudo mv gitea /usr/local/bin
sudo chmod  x /usr/local/bin/gitea
Next, start the Gitea service with the following command:
sudo systemctl start gitea
Now, your Gitea is up-to-date without any downtime.
Conclusion
Congratulations! You have successfully installed the Gitea git service on Debian 11. You can now easily update Gitea and manage your git repository through a web browser. Furthermore, you are welcome to ask me if you have any questions.


