Developed in Java, Kotlin, and Groovy, Gradle is an open-source build automation tool that is used mostly in Java projects. It automates the building process of applications which includes compiling, linking, and packaging of code without manual input. Gradle also supports Groovy, which is an object-oriented dynamic language created for Java applications. Let’s install Gradle on CentOS Linux 8.
Prerequisites
To get off with the installation of Gradle, have in place the following:
- A running instance of CentOS 8 with a configured sudo user
- A stable internet connection
Step 1: Install OpenJDK on CentOS 8 instance
Since Gradle is written in Java, we need to install OpenJDK first to ensure that it runs smoothly without a problem. We are going to install OpenJDK 11 which offers Long Term Support. Therefore, execute:
$ sudo dnf install java-11-openjdk

Once installed, verify the installation of OpenJDK as follows:
$ java -version
The output clearly shows that we have installed OpenJDK version 11.0.9.1. Cool stuff!

Step 2: Download Gradle zip file
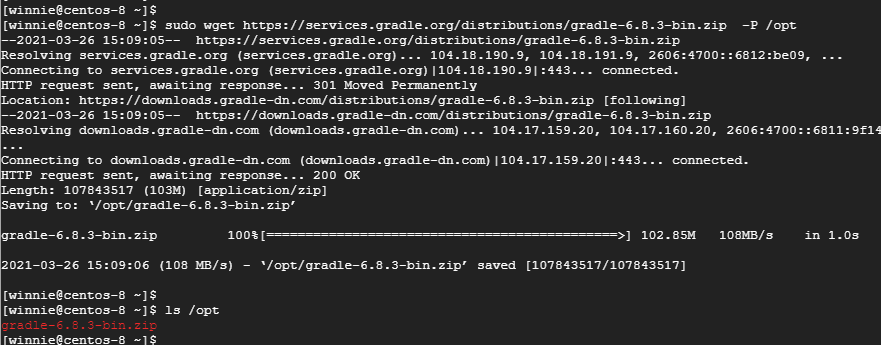
With OpenJDK successfully installed, the next step is to download Gradle. As I am penning this blog article, Gradle 6.8.3 is the latest version. Feel free to glance at the Gradle releases page for newer versions.
For now, let’s download the current Gradle zip file as shown.
$ wget https://services.gradle.org/distributions/gradle-6.8.3-bin.zip

Next, move the zip file to the /opt directory as shown.
$ sudo mv gradle-6.8.3-bin.zip /opt
Head over to the /opt directory and proceed to unzip the contents of the Gradle zip file as follows.
$ cd /opt
$ sudo unzip gradle-6.8.3-bin.zip
Unzipping yields a Gradle folder labeled gradle-6.8.3.To confirm that all the Gradle files are in place, run the command:
$ ls gradle-6.8.3

Step 3: Configure the environment variables
We need to set the PATH variable to the Gradle bin directory. So we will create a gradle.sh script file as shown in the directory /etc/profile.d
$ sudo vim /etc/profile.d/gradle.sh
Define the path variable as shown
export GRADLE_HOME=/opt/gradle-6.8.3
export PATH=${GRADLE_HOME}/bin:${PATH}
Save and exit the Gradle script file. Proceed and assign execute permissions to the Gradle script as shown.
$ sudo chmod x /etc/profile.d/gradle.sh
To apply the changes and notify the shell, use the source command.
$ source /etc/profile.d/gradle.sh

Step 4: Confirm successful installation of Gradle
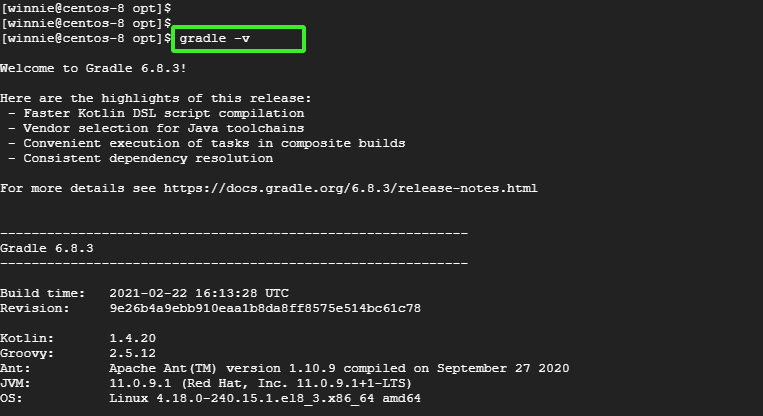
Finally, the only thing we are left to do is to verify if the installation of Gradle was successful. To achieve this, execute the command:
$ gradle -v
The output provides a decent amount of information including the version of Gradle, highlights about the latest release, build time, and versions of Kotlin and Groovy.
Below is a snippet of the output.

Conclusion
We have managed to successfully install the latest version of Gradle on CentOS Linux 8.


