
iRedMail is an Open Source Mail Server solution designed to ease deployment, configuration and general day-to-day mail operations. iRedMail runs on Linux, FreeBSD and OpenBSD systems. This blog post will discuss the steps of installing iRedMail Mail Server on CentOS 8 Linux server.
A more easy installation method is available for those not comfortable with the command line interface. iRedMail Easy is a web-based deployment and support platform. With this platform, it’s easy to deploy and keep the iRedMail server up to date, easy to get the fast and professional technical support from iRedMail team.
Other installations:
Debian: Install and Setup iRedMail Mail Server on Debian Linux
CentOS 7: Install iRedMail Mail Server on CentOS 7
Features of iRedMail Mail Server
- Fully Open Source: All iRedMail components are built from open source applications. It has bee certified to run on Red Hat Enterprise Linux, CentOS, Debian, Ubuntu, FreeBSD, OpenBSD.
- Top Security: All mail services are accessed through secured connections – Use of TLS to access POP3, IMAP and SMTP services. Web portals are access via HTTPS. Emails are encrypted in transit using TLS if possible.
- Access to Webmail: An intuitive web portal is available for accessing and managing mails, folders, sieve filters – (Roundcube webmail or/and SOGo groupware).
- Unlimited Accounts: You have the powers to create as many mail accounts (domains, users, mailing lists, admins) as you want.
- Web Admin Panel: As admin user, you get a web admin panel where you manage mail accounts.
- Antispam & Antivirus: SpamAssassin, ClamAV, SPF, DKIM, greylisting, whitelisting, blacklisting. Quarantining detected spam into SQL database for further review.
- Support for OpenLDAP, MySQL, MariaDB, and PostgreSQL backend store for mail accounts. Choose what you like.
Install iRedMail Mail Server on CentOS 8 Linux
For the installation to be successful, check the minimum server requirements below.
- 2 GB of memory required. If you plan to use it in production environment with multiple domains and user accounts, the add more memory – 4 GB
- Make sure 3 UID/GID are not used by other user/group: 2000, 2001, 2002.
- Mail Server domain name
- A sudo user account – User account added to wheel group or root user access
With the basic hardware requirements satisfied, you can begin installation and configuration of iRedMail Mail Server on CentOS 8 Linux server.
Step 1: Add EPEL repository & Update System
Let’s add EPEL repository to our CentOS 8 server incase some dependency packages are located here.
sudo yum -y install epel-release
sudo yum config-manager --set-enabled PowerTools
Update system and perform reboot.
sudo dnf -y update
sudo systemctl reboot
Step 2: Set SELinux in Permissive mode
iRedMail development team doesn’t provide SELinux policies for the service to work when SELinux is enforcing. You need to disable SELinux or configure it to run in Permissive mode.
sudo setenforce 0
sudo sed -i 's/^SELINUX=.*/SELINUX=permissive/g' /etc/selinux/config
Confirm current SELinux status after making the change.
$ sestatus
SELinux status:                 enabled
SELinuxfs mount:                /sys/fs/selinux
SELinux root directory:         /etc/selinux
Loaded policy name:             targeted
Current mode:                   permissive
Mode from config file:          permissive
Policy MLS status:              enabled
Policy deny_unknown status:     allowed
Max kernel policy version:      31
Step 3: Set Server hostname
Set server hostname to a subdomain name configured in your DNS server. Replace mail.computingforgeeks.com with the correct hostname you’ll be using.
export HOSTNAME="mail.computingforgeeks.com"
sudo hostnamectl set-hostname $HOSTNAME --static
sudo hostnamectl set-hostname $HOSTNAME --transient
After updating your hostname, logout and login again to update your working environment.
$ logoutNow add the IP address and DNS name mapping to the /etc/hosts file.
# Example
$ sudo vim /etc/hosts
95.216.98.16 mail.computingforgeeks.com
To confirm DNS resolution, first install bind-utils package.
sudo yum -y install bind-utilsThen use host command for local resolution.
$ host mail.computingforgeeks.com
mail.computingforgeeks.com has address 95.216.98.16
For record in DNS server, use the dig command.
$ dig A mail.computingforgeeks.comStep 4: Download iRedMail on CentOS 8
Visit the iRedMail Download page to get the latest stable release of iRedMail for your platform.
As of this article update, the latest release is v1.2.
sudo yum -y install wget
wget https://github.com/iredmail/iRedMail/archive/1.2.tar.gz
Extract the downloaded archive file.
sudo yum -y install tar bzip2
tar xvf 1.2.tar.gz
Step 5: Install iRedMail on CentOS 8 Linux
We will use an automated script to setup iRedMail on CentOS 8 Linux.
cd iRedMail-*/Start iRedMail installer.
chmod  x iRedMail.sh
sudo ./iRedMail.sh
The installer script will install dependencies required then ask you several simple questions required to setup iRedMail mail server on CentOS 8.
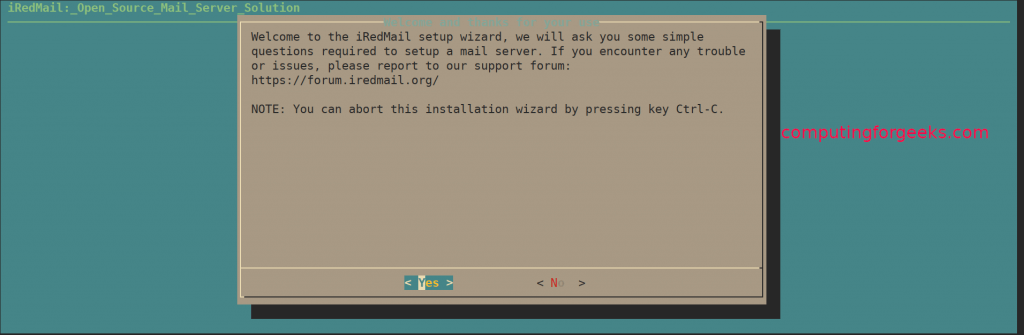
1 – Accept installation wizard
The first screen asks you whether to accept or decline installation of iRedMail on CentOS 7.
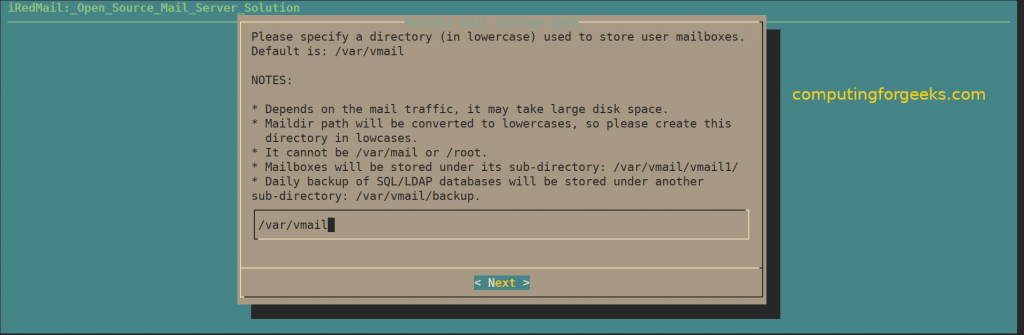
2 – Specify directory used to store mailboxes
Make sure you read the NOTES provided before changing default mailboxes store directory.
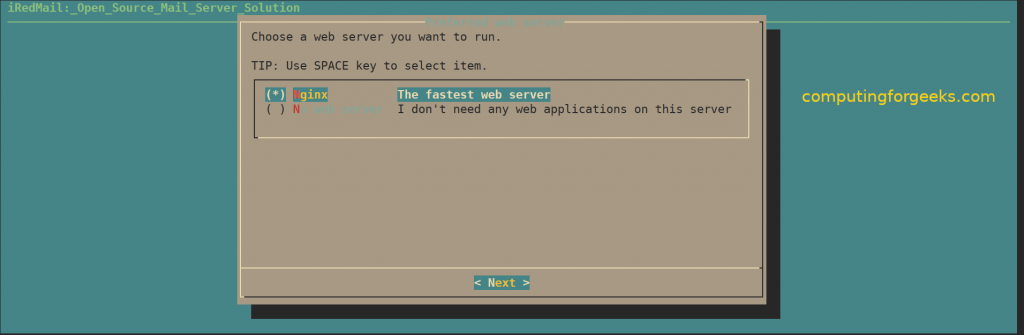
3 – Choose web server to use
Go with the default selection of nginx.
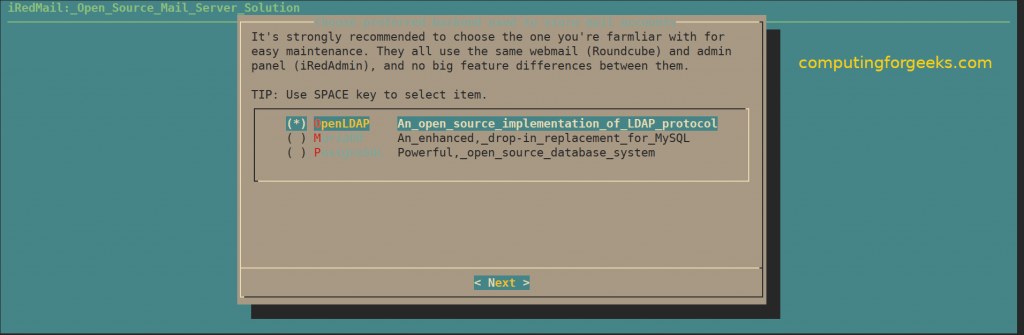
4 – Choose backend used to store mail account
Choose the one you’re familiar with for easier management and maintenance after installation. I’ll go with OpenLDAP.
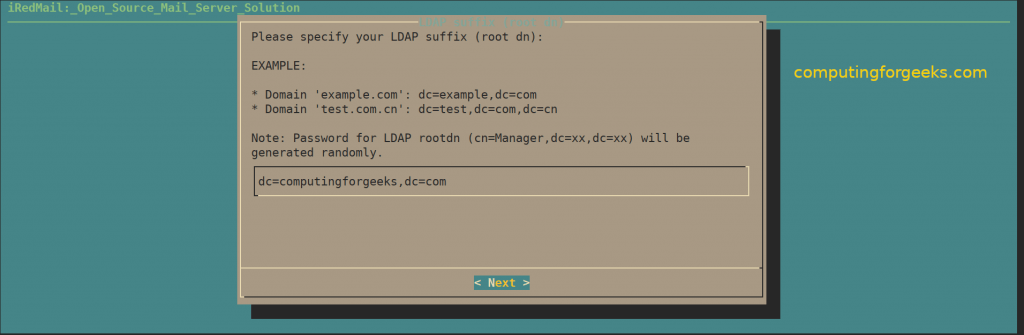
5 – Specify LDAP Suffix
If you chose OpenLDAP as default backend for storing mail accounts, provide LDAP suffix. These are just components of your domain name.
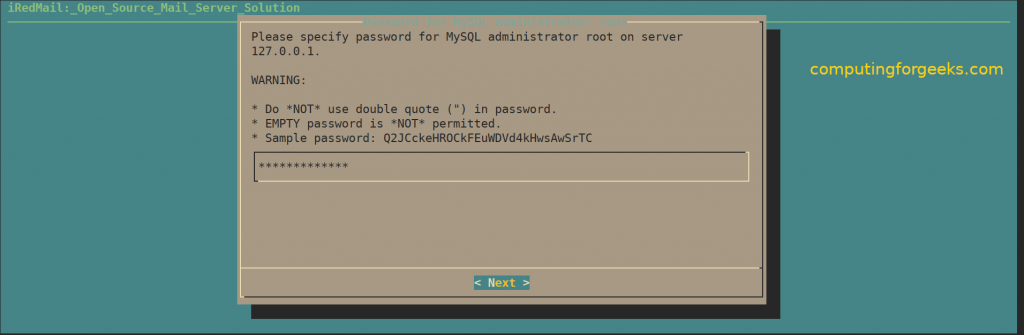
6 – Set MySQL root password
Provide the password for MySQL root user.
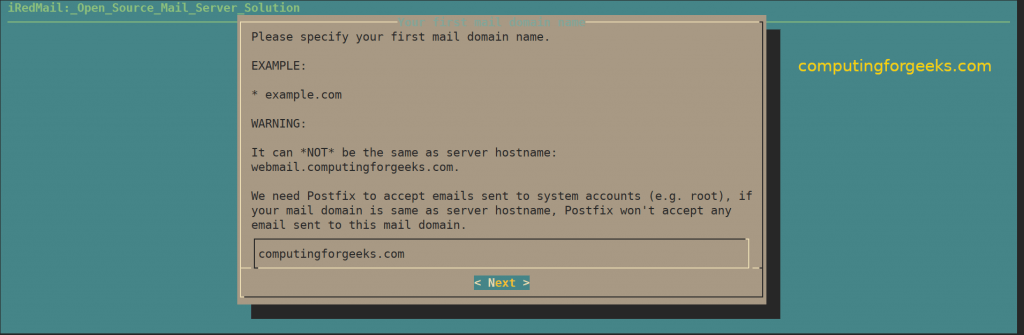
7 – Add your first mail domain name
Provide your Mail domain name – This cannot be the same as server name.
8 – Provide Password for Mail domain Administrator
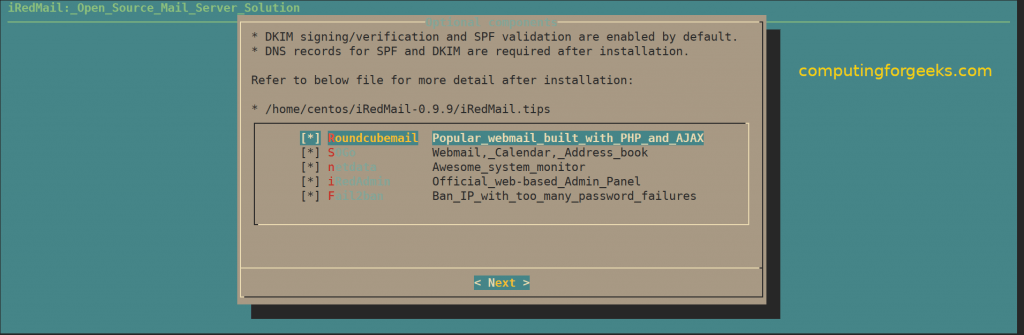
Input the mail domain administrator password and tick the features to enable.
Allow DKIM and SPF validation.
Validate settings and agree to installation of iRedMail on CentOS 8 server.
*************************************************************************
***************************** WARNING ***********************************
*************************************************************************
*                                                                       *
* Below file contains sensitive infomation (username/password), please  *
* do remember to *MOVE* it to a safe place after installation.          *
*                                                                       *
*   * /root/iRedMail-1.2/config
*                                                                       *
*************************************************************************
********************** Review your settings *****************************
*************************************************************************

* Storage base directory:               /var/vmail
* Mailboxes:
* Daily backup of SQL/LDAP databases:
* Store mail accounts in:               OpenLDAP
* Web server:                           Nginx
* First mail domain name:               computingforgeeks.com
* Mail domain admin:                    [email protected]
* Additional components:                Roundcubemail netdata iRedAdmin Fail2ban

 Continue? [y|N]y
Type y or Y and press Enter to start installation. The script will install and configure all the packaged required automatically.
Accept Firewall configurations.
*************************************************************************
* iRedMail-1.2 installation and configuration complete.
*************************************************************************

[ INFO ] Disable SELinux in /etc/selinux/config.
 Would you like to use firewall rules provided by iRedMail?
 File: /etc/firewalld/zones/iredmail.xml, with SSHD ports: 22. [Y|n]y
[ INFO ] Copy firewall sample rules.
 Restart firewall now (with ssh ports: 22)? [y|N]y
[ INFO ] Restarting firewall ...
 Would you like to use MySQL configuration file shipped within iRedMail now?
 File: /etc/my.cnf. [Y|n]y
[ INFO ] Copy MySQL sample file: /etc/my.cnf.
[ INFO ] Enable SSL support for MySQL server.
Save login credentials shown.
********************************************************************
* URLs of installed web applications:
*
* - Roundcube webmail: https://iredmail.computingforgeeks.com/mail/
* - netdata (monitor): https://iredmail.computingforgeeks.com/netdata/
*
* - Web admin panel (iRedAdmin): https://iredmail.computingforgeeks.com/iredadmin/
*
* You can login to above links with below credential:
*
* - Username: [email protected]
* - Password: password
*
*
********************************************************************
* Congratulations, mail server setup completed successfully. Please
* read below file for more information:
*
*   - /root/iRedMail-1.2/iRedMail.tips
*
* And it's sent to your mail account [email protected]
*
********************* WARNING **************************************
*
* Please reboot your system to enable all mail services.
*
********************************************************************
Reboot your Server to enable mail services.
sudo rebootStep 6: iRedMail Access Credentials
Your iRedMail Server details & Access credentials are store in the file “/root/iRedMail-1.x/config” if script was run as root user or “~/iRedMail-1.x/config” if the script was executed as normal user.
The URLs of installed web applications are shown after a successful installation of iRedMail on CentOS 8.
- Roundcube webmail: https://your_server/mail/
- SOGo Groupware: https://your_server/SOGo
- Web admin panel (iRedAdmin): httpS://your_server/iredadmin/
- Awstats: httpS://your_server/awstats/awstats.pl?config=web (or
?config=smtpfor SMTP traffic log)
Login to the portals using the credentials saved.
Step 7: Secure iRedMail With Let’s Encrypt SSL Certificates
iRedMail generates self-signed certificates during installation, you have an option of getting a Commercial certificate or using Let’s Encrypt free SSL Certificates. Refer to our guide below.
Secure iRedMail Server with Let’s Encrypt SSL Certificate
Our next guide will cover addition of domains and users to iRedMail Mail server:


