
MongoDB is an open-source document-oriented NoSQL database. NoSQL means “Not Only SQL”. Many people have learned the relational databases because of their usage in RDBMS for many years. That’s why it’s difficult to switch over to a non-relational one.
MongoDB is not like traditional SQL-based relational databases like MySQL, Oracle etc. It stores data in JSON-like format (BSON) by default (BSON is Binary JSON). By using BSON instead of pure JSON, the size of the document can be reduced significantly. As they store data in key-value pairs, these DBs are highly performant for reading or querying purposes.
This doesn’t mean that MongoDB does not support ACID transactions. ACID stands for Atomicity, Consistency, Isolation, and Durability. It supports atomic operations, which provide database-level atomicity. For example, if we write multiple documents in a collection, then all of these updates will be an atomic operation. There are various advantages of using MongoDB over relational DBs, like easier replication setup etc.
MongoDB is one of the most popular NoSQL databases currently available on the market. This is because of the richness in features, flexibility, and ease to use. Its design is inspired by many popular databases like Cassandra, Redis, etc.
So, how do I install MongoDB? It’s the age-old question. The answer is here. It’s pretty straightforward to install MongoDB on a Linux machine. There are many ways to do it. One of the easiest ways is using a package manager. In this case, we will use Dnf for installing MongoDB on an AlmaLinux 8 machine.
Prerequisites
This tutorial assumes that you have AlmaLinux 8 already installed and working fine on your machine, and you have root access to this machine.
Step 1. Updating your System
First, you have to update your system with the latest package lists by using te dnf command as shown below.
sudo dnf -y update
If you already have done this recently, then you can skip this step.
Step 2. Installing MongoDB Repository
The default repositories of AlmaLinux doesn’t provide the MongoDB package, so we have to add a custom repository in order to get the latest supported version of the MongoDB. For this purpose, we will add the MongoDB repository from the developer, as shown below.
sudo nano /etc/yum.repos.d/mongodb.repo
After opening up this file copy and paste the following lines into it and save it back to the file using CTRL X, Y and ENTER keys.
[mongodb-org-4.4]
name=MongoDB Repository
baseurl=https://repo.mongodb.org/yum/redhat/$releasever/mongodb-org/4.4/x86_64/
gpgcheck=1
enabled=1
gpgkey=https://www.mongodb.org/static/pgp/server-4.4.asc
Now, rebuild the system repository cache by using the dnf command as shown below.
sudo dnf update
To check if the repository is properly configured or not, you can use the following command.
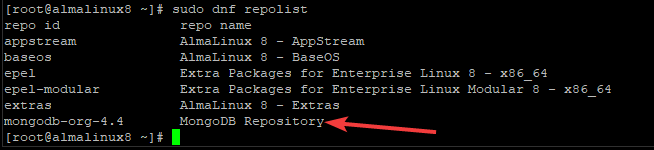
sudo dnf repolist
You should see something like this.
To check if the Mongodb repository is enabled or not, you can use the following command.
sudo dnf repolist enabled
You should see something like this.
Step 3. Installing MongoDB
After adding the required repository to our AlmaLinux system, we can move ahead and install the MongoDB by using the following command.
sudo dnf -y install mongodb-org
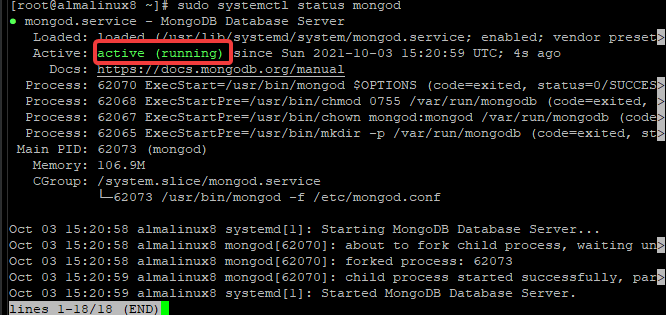
Once the installation of MongoDB is completed, it will automatically start running on your system. You can verify this by typing the following command into your terminal.
sudo systemctl status mongod
You should see something like this.
If it is not started automatically, you can start it by using the following command.
sudo systemctl start mongod
To enable automatic start-up of the MongoDB service at system boot, run the following command.
sudo systemctl enable mongod
Step 4. Testing the MongoDB Installation
Now, the most exciting part is testing our MongoDB installation. For this purpose, we will create a new administrative user for our MongoDB instance.
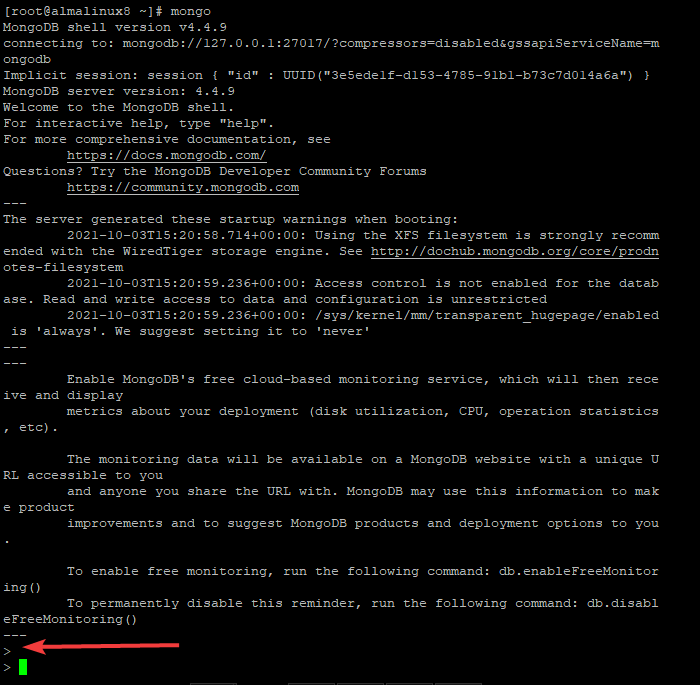
First, log into the MongoDB shell with the following command.
mongo
You will now log in with the mongo > prompt.
To create a new user with privileges to manage the database, we will need to connect to the admin database first. To do so, run the following command at the prompt.
use admin
Sample output:
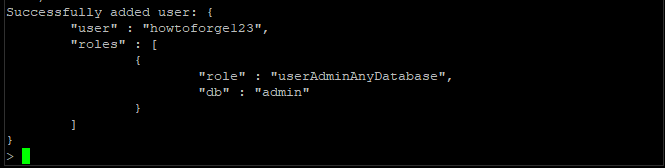
And then, run the following command to create a new user with named howtoforge and password howtoforge123, and have the userAdminAnyDatabase role. You can create whatever username and password you want. Do not forget to set a secure password for the users.
db.createUser(
  {
    user: "howtoforge ",
    pwd: "howtoforge123",
    roles: [ { role: "userAdminAnyDatabase", db: "admin" } ]
  }
)
Press Enter to complete the user creation process. You should see something like this.
To check your new user, run the following command.
show users
This command should return a list of users that currently exist in the system, including the newly created user, as shown below.
Conclusion
In this guide, we have installed MongoDB on an AlmaLinux 8 system. You can now start creating databases and adding data to them as per your requirements. If you have any questions or suggestions, feel free to leave a comment below.


