
NodeBB is an open-source forum software written in JavaScript and Node.js. It uses MongoDB as the default database. NodeBB offers multiple features, such as real-time notifications via web socket, social media integration, and also full REST APIs.
This guide will show you how to install NodeBB on a Debian 12 server with MongoDB as the database and Nginx as a reverse proxy.
Prerequisites
Before you begin, make sure you have the following:
- A Debian 12 server.
- A non-root user with sudo privileges.
- A domain name pointed to a server IP address.
Installing Dependencies
To start the process, you will be installing dependencies for NodeBB. This includes the Node.js, NPM (Node.js Package Manager), and Nginx web server from the Debian repository. As for MongoDB, you will install it through the official MongoDB repository.
First, run the following command to install gnupg and curl packages to your Debian system.
sudo apt install gnupg curl -y
Add the MongoDB GPG key and repository with the following command:
curl -fsSL https://pgp.mongodb.com/server-7.0.asc |
sudo gpg -o /usr/share/keyrings/mongodb-server-7.0.gpg
--dearmor
echo "deb [ signed-by=/usr/share/keyrings/mongodb-server-7.0.gpg ] http://repo.mongodb.org/apt/debian bookworm/mongodb-org/7.0 main" | sudo tee /etc/apt/sources.list.d/mongodb-org-7.0.list
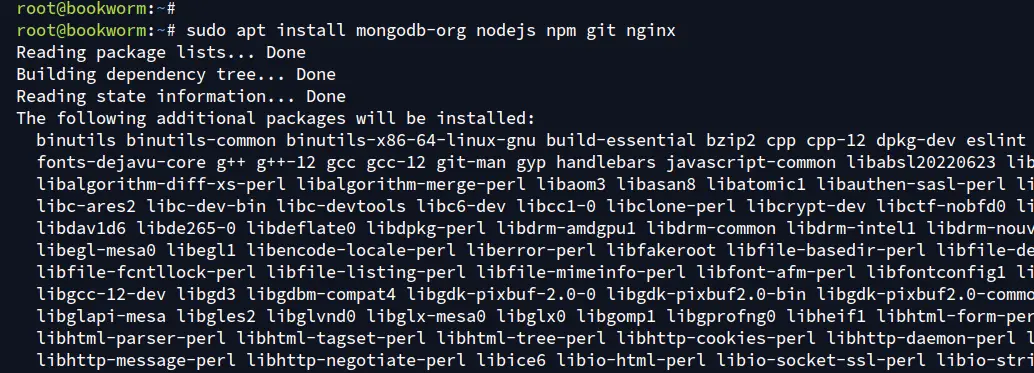
Now update your Debian package index and install MongoDB, Node.js, NPM, Nginx, and Git. Input Y to confirm the installation.
sudo apt update
sudo apt install mongodb-org nodejs npm git nginx
After the installation is complete, reload the systemd manager with the following:
sudo systemctl daemon-reload
Now run the command below to start, enable, and verify the MongoDB service status.
sudo systemctl enable --now mongod
sudo systemctl status mongod
The following output confirms that MongoDB is running.
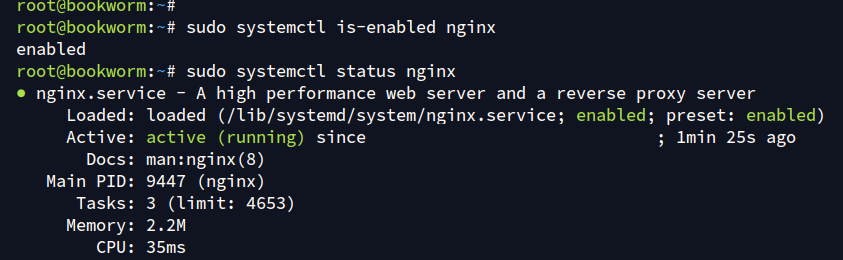
Next, check the Nginx service status with the command below. You should see Nginx is enabled and running on your system.
sudo systemctl is-enabled nginx
sudo systemctl status nginx
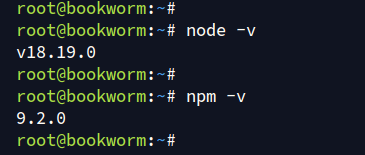
Lastly, check the Node.js and NPM version with the following:
sudo node-v
sudo npm -v
You can see below that Node.js 18 and NPM 9 are installed.
Setting up MongoDB server
In this section, you will enable MongoDB authentication, create a new administrator user for MongoDB, and then create a new database and user for NodeBB installation.
Log in to the MongoDB server with the command below.
mongosh
Run the following query to switch to the ‘admin’ database and create a new administrator user ‘admin‘ for MongoDB. Make sure to change the password ‘MongoDBAdminPass‘ with the new password.
use admin
db.createUser( { user: "admin", pwd: "MongoDBAdminPass", roles: [ { role: "root", db: "admin" } ] } )
Next, create a new database and user ‘nodebb‘ with the password ‘NodeBBPassword‘. This database and user will be used for the NodeBB installation.
use nodebb
db.createUser( { user: "nodebb", pwd: "NodeBBPassword", roles: [ { role: "readWrite", db: "nodebb" }, { role: "clusterMonitor", db: "admin" } ] } )
Now type ‘quit()‘ to exit from the MongoDB.
Next, open the MongoDB configuration ‘/etc/mongod.conf‘ with the nano editor.
sudo nano /etc/mongod.conf
Enable the MongoDB authentication by adding the following configuration.
security:
 authorization: enabled
Save and close the file when done.
Now run the command below to restart the MongoDB service and apply your new changes. After the command is executed, the MongoDB authentication will be enabled.
sudo systemctl restart mongod
To ensure that your MongoDB configuration is successful, log in to the MongoDB with the user ‘nodebb‘ to the database ‘nodebb‘. Enter your password when asked.
mongosh "mongodb://127.0.0.1:27017" --username nodebb --authenticationDatabase nodebb
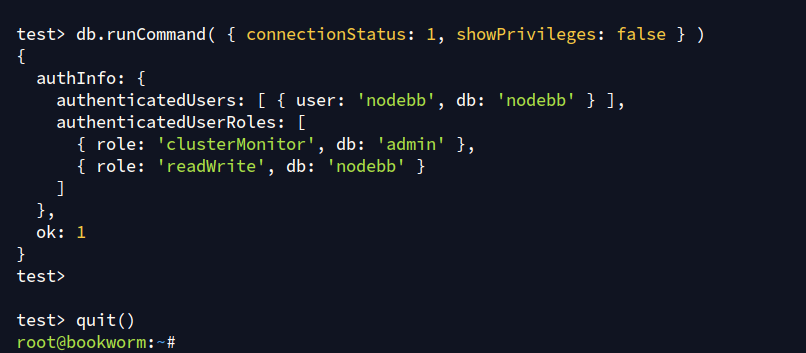
After logging in, run the query below to check your connection and exit from the MongoDB.
db.runCommand( { connectionStatus: 1, showPrivileges: false } )
quit()
In the following output, you can see the authenticated as ‘nodebb‘ to the database ‘nodebb‘.
Installing NodeBB
With the MongoDB configuration finished, you will be downloading and installing NodeBB. You will create a dedicated user for NodeBB, download and install NodeBB dependencies, and then set up a service file for your NodeBB installation.
Add a new system user ‘nodebb‘ with default home directory ‘/opt/nodebb‘ using the following command.
sudo adduser --system --no-create-home --home=/opt/nodebb --group nodebb
Now download NodeBB source v3 to the ‘/opt/nodebb‘ directory using git and change the ownership of the ‘/opt/nodebb‘ directory to the user ‘nodebb‘.
git clone -b v3.x https://github.com/NodeBB/NodeBB.git /opt/nodebb
sudo chown -R nodebb:nodebb /opt/nodebb
Go to the ‘/opt/nodebb’ directory and configure your NodeBB installation with the command below.
cd /opt/nodebb
sudo su -s /bin/bash -c "./nodebb setup" nodebb
- Input your domain name for NodeBB.
- Leave the NodeBB secret as default and press ENTER.
- Type no to disable anonymous plugin usage.
- Select the database as MongoDB.
- Input the MongoDB database with url string: mongodb://nodebb:[email protected]:27017/nodebb.
- Input your administrator user and email address for NodeBB.
- Input your password and repeat.
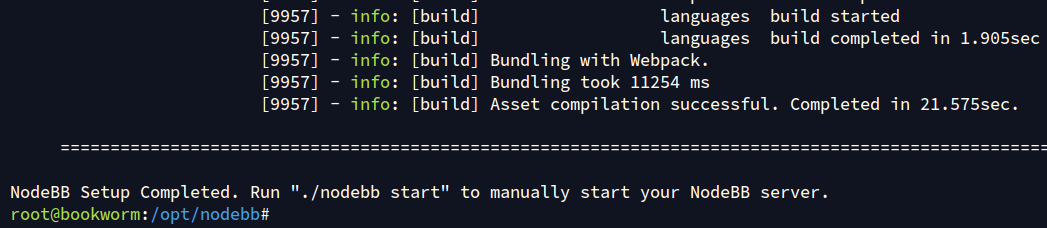
After the process is complete, you will see an output ‘NodeBB Setup Completed‘. You can also see the command to run NodeBB.
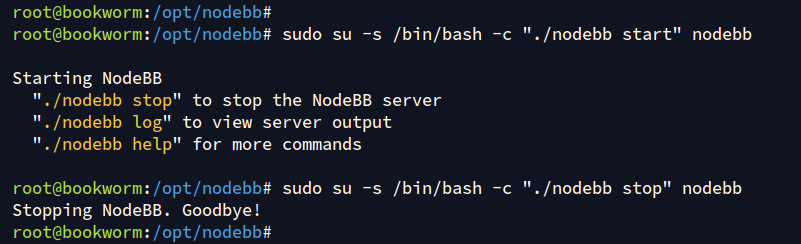
Next, execute the command below to start or stop NodeBB. You can use this when you need to start to stop NodeBB manually.
sudo su -s /bin/bash -c "./nodebb start" nodebb
sudo su -s /bin/bash -c "./nodebb stop" nodebb
To make NodeBB management easier, you will create a new systemd service file for NodeBB. With this, your NodeBB installation will be running in the background and you can manage it with the systemctl command.
Create a new systemd service file ‘/etc/systemd/system/nodebb.service‘ with the nano editor command.
sudo nano /etc/systemd/system/nodebb.service
Insert the following configuration into the file:
[Unit]
Description=NodeBB
Documentation=https://docs.nodebb.org
After=system.slice multi-user.target mongod.service[Service]
Type=simple
User=nodebbStandardError=syslog
SyslogIdentifier=nodebbEnvironment=NODE_ENV=production
[Install]
WorkingDirectory=/opt/nodebb
ExecStart=/usr/bin/env node loader.js --no-silent --no-daemon
Restart=always
WantedBy=multi-user.target
Save and close the file.
Now run the command below to reload the systemd manager and apply the new NodeBB service file.
sudo systemctl daemon-reload
After that, start and enable the ‘nodebb‘ service with the following systemctl command.
sudo systemctl start nodebb
sudo systemctl enable nodebb
Verify the ‘nodebb‘ service with the following to ensure that the service is running.
sudo systemctl status nodebb
You can see below the NodeBB is running in the background as a systemd service.
Setting up Nginx as a reverse proxy
At this point, the NodeBB is running in the background on port ‘4567’. Now you will be creating a new Nginx server block that will be used as a reverse proxy for your NodeBB forum. make sure that you have your domain name pointed to your server IP address.
Create a new Nginx server block configuration ‘/etc/nginx/sites-available/nodebb‘ with nano editor.
sudo nano /etc/nginx/sites-available/nodebb
Add the following configuration to set up Nginx as a reverse proxy for NodeBB. Make sure to change the server_name parameter with your domain name.
server {
 listen 80; server_name forum.hwdomain.io; location / {
 proxy_set_header X-Real-IP $remote_addr;
 proxy_set_header X-Forwarded-For $proxy_add_x_forwarded_for;
 proxy_set_header X-Forwarded-Proto $scheme;
 proxy_set_header Host $http_host;
 proxy_set_header X-NginX-Proxy true; proxy_pass http://127.0.0.1:4567;
 proxy_redirect off; # Socket.IO Support
 proxy_http_version 1.1;
 proxy_set_header Upgrade $http_upgrade;
 proxy_set_header Connection "upgrade";
 }
}
When finished, save the file and exit.
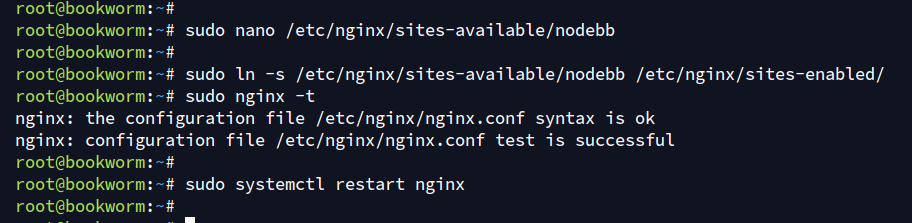
Now activate the server block file ‘nodebb’ and test your Nginx syntax with the following:
sudo ln -s /etc/nginx/sites-available/nodebb /etc/nginx/sites-enabled/
sudo nginx -t
If you have proper Nginx syntax, you will see an output ‘syntax is ok – test is successful’.
Lastly, run the command below to restart the Nginx service and apply your changes.
sudo systemctl restart nginx
Securing NodeBB with HTTPS
In this guide, you will secure NodeBB with HTTPS through Certbot and Letsencrypt. If you’re using a local domain, you can skip this or you can also generate self-signed certificates.
Install Certbot and Certbot Nginx plugin with the following apt command. Type Y to proceed with the installation.
sudo apt install certbot python3-certbot-nginx
Now run the certbot command below to generate the SSL certificates for your NodeBB domain name. Make sure to change both the email address and the domain name with your information.
sudo certbot --nginx --agree-tos --no-eff-email --redirect --hsts --staple-ocsp --email [email protected] -d forum.hwdomain.i
After completing the process, your NodeBB installation should be secured automatically with HTTPS. Your SSL/TLS certificates will be available in the ‘/etc/letsencrypt/live/domain.com‘ directory.
Accessing NodeBB
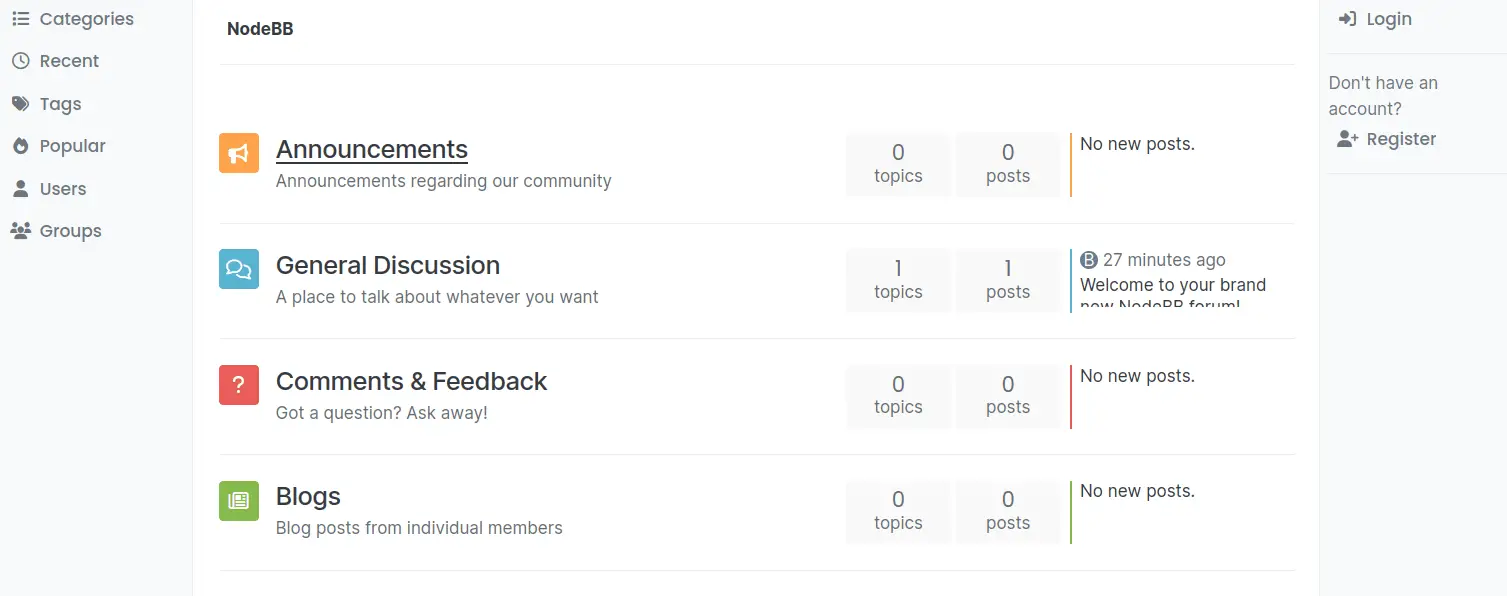
Visit https://forum.hwdomain.io/ using your web browser and you will see the default index page of NodeBB like the following:
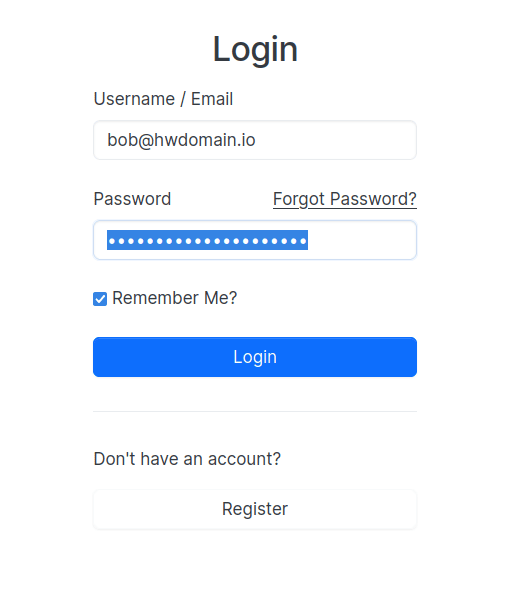
From the home page, click the Login menu and you will be shown the NodeBB login page. Enter your admin user and password, and then click Login.
If successful, you will see the following user dashboard.
Click on the Admin menu to access the NodeBB administration dashboard like the following:
Conclusion
Congratulations! You have now installed NodeBB on the Debian 12 server. You have NodeBB running with the MongoDB database and Nginx reverse proxy. You also secured NodeBB with HTTPS through Certbot and Letsencrypt.


