
Statping is an open-source uptime monitor that keeps track of websites and applications hosted across multiple servers. It can generate a beautiful status page by fetching real-time data from various sources. It can work with multiple database systems including SQLite, MySQL, and Postgres. For our tutorial, we will be using the fork of Statping, called Statping-ng since the original application is no longer being developed.
In this tutorial, you will learn how to install Statping on a Ubuntu 22.04 server using Docker and Nginx server as a proxy.
Prerequisites
-
A server running Ubuntu 22.04.
-
A non-root user with sudo privileges.
-
The uncomplicated Firewall(UFW) is enabled and running.
-
A Fully Qualified domain name (FQDN) pointing to the server like,
status.example.com. -
Everything is updated.
$ sudo apt update && sudo apt upgrade
Step 1 – Configure Firewall
Before installing any packages, the first step is configuring the firewall to allow HTTP and HTTPS connections.
Check the status of the firewall.
$ sudo ufw status
You should see something like the following.
Status: active

To                         Action      From
--                         ------      ----
OpenSSH                    ALLOW       Anywhere
OpenSSH (v6)               ALLOW       Anywhere (v6)
Allow HTTP and HTTPs ports.
$ sudo ufw allow http
$ sudo ufw allow https
Check the status again to confirm.
$ sudo ufw status
Status: active

To                         Action      From
--                         ------      ----
OpenSSH                    ALLOW       Anywhere
80/tcp                     ALLOW       Anywhere
443                        ALLOW       Anywhere
OpenSSH (v6)               ALLOW       Anywhere (v6)
80/tcp (v6)                ALLOW       Anywhere (v6)
443 (v6)                   ALLOW       Anywhere (v6)
Step 2 – Install Docker
Add Docker’s official GPG key.
$ curl -fsSL https://download.docker.com/linux/ubuntu/gpg | sudo gpg --dearmor -o /usr/share/keyrings/docker.gpg
Run the following command to add the Docker repository.
$ echo
  "deb [arch=$(dpkg --print-architecture) signed-by=/usr/share/keyrings/docker.gpg] https://download.docker.com/linux/ubuntu
  $(lsb_release -cs) stable" | sudo tee /etc/apt/sources.list.d/docker.list > /dev/null
Update the system to include Docker’s repository.
$ sudo apt update
Install Docker and the Docker compose plugin.
$ sudo apt-get install docker-ce docker-ce-cli containerd.io docker-compose-plugin
This tutorial will be using the Docker Compose v2 plugin instead of the older legacy binary. Therefore, the command for running it has changed from docker-compose to docker compose and this is reflected here.
Docker runs with elevated privileges so you will need to use sudo frequently to run commands. The better option is to add your Linux user account to the docker user group.
$ sudo usermod -aG docker ${USER}
The ${USER} variable picks up the currently logged-in system account. If you are not logged in with the user you want to give privileges to, replace ${USER} with the username.
To apply for the new group membership, log out of the server and back in, or use the following command. You will be prompted for the user’s password.
$ su - ${USER}
Step 3 – Install Nginx
Ubuntu 22.04 ships with an older version of Nginx. To install the latest version, you need to download the official Nginx repository.
Import Nginx’s signing key.
$ curl https://nginx.org/keys/nginx_signing.key | gpg --dearmor
| sudo tee /usr/share/keyrings/nginx-archive-keyring.gpg >/dev/null
Add the repository for Nginx’s stable version.
$ echo "deb [signed-by=/usr/share/keyrings/nginx-archive-keyring.gpg arch=amd64]
http://nginx.org/packages/ubuntu `lsb_release -cs` nginx"
| sudo tee /etc/apt/sources.list.d/nginx.list
Update the system repositories.
$ sudo apt update
Install Nginx.
$ sudo apt install nginx
Verify the installation.
$ nginx -v
nginx version: nginx/1.22.0
Step 4 – Install SSL
We need to install Certbot to generate the SSL certificate. You can either install Certbot using Ubuntu’s repository or grab the latest version using the Snapd tool. We will be using the Snapd version.
Ubuntu 22.04 comes with Snapd installed by default. Run the following commands to ensure that your version of Snapd is up to date.
$ sudo snap install core
Install Certbot.
$ sudo snap install --classic certbot
Use the following command to ensure that the Certbot command can be run by creating a symbolic link to the /usr/bin directory.
$ sudo ln -s /snap/bin/certbot /usr/bin/certbot
Run the following command to generate an SSL Certificate.
$ sudo certbot certonly --standalone --agree-tos --no-eff-email --staple-ocsp --preferred-challenges http -m [email protected] -d status.example.com
The above command will download a certificate to the /etc/letsencrypt/live/status.example.com directory on your server.
Generate a Diffie-Hellman group certificate.
$ sudo openssl dhparam -dsaparam -out /etc/ssl/certs/dhparam.pem 4096
Open the file /etc/letsencrypt/renewal/status.example.com.conf for editing.
$ sudo nano /etc/letsencrypt/renewal/status.example.com.conf
Paste the following code at the bottom.
pre_hook = systemctl stop nginx
post_hook = systemctl start nginx
Save the file by pressing Ctrl X and entering Y when prompted.
We have generated the SSL certificate using the standalone option of Certbot. It runs its web server to create the certificate which means Nginx should be shut off during the renewal. The pre_hook and post_hook commands run before and after the renewal to automatically shut and restart the Nginx server thereby requiring no manual intervention.
To check whether the SSL renewal is working fine, do a dry run of the process.
$ sudo certbot renew --dry-run
If you see no errors, you are all set. Your certificate will renew automatically.
Step 5 – Configure Docker Compose File
Create a directory for the Docker compose file.
$ mkdir ~/statping
Switch to the directory.
$ cd ~/statping
Create and open the docker compose file for editing.
$ nano docker-compose.yml
Paste the following code in it.
services:
  statping:
    container_name: statping
    image: adamboutcher/statping-ng
    restart: always
    ports:
      - 8080:8080
    volumes:
      - ./statping_data:/app
    links:
      - postgres
    depends_on:
      - postgres
    environment:
      DB_CONN: postgres
      DB_HOST: postgres
      DB_PORT: 5432
      DB_DATABASE: statping
      DB_USER: root
      DB_PASS: password123
      NAME: 'Howtoforge Statping page'
      DESCRIPTION: 'Statping Demo page'
      USE_ASSETS: 'true'
      SAMPLE_DATA: 'false'
      ALLOW_REPORTS: 'false'
      ADMIN_USER: navjot
      ADMIN_PASSWORD: yourpassword

  postgres:
    container_name: postgres
    image: postgres:14-alpine
    ports:
      - 5432:5432
    volumes:
      - ./pg_data:/var/lib/postgresql/data/pg_data
    environment:
      POSTGRES_PASSWORD: password123
      POSTGRES_DB: statping
      POSTGRES_USER: root
      POSTGRES_PORT: 5432
      PGDATA: /var/lib/postgresql/data/pg_data
Save the file by pressing Ctrl X and entering Y when prompted.
We are setting up Statping and Postgres docker images. Most of the docker file is easy to follow. We are using local disk backups to store the app data and the Postgres database. We have also configured several environment variables to configure the application and the database. Let us take a look at them. To get a full list of the environment variables you can define, check the official list from the Statping GitHub repository.
- The USE_ASSETS variable allows the app to use the assets from the
assetsfolder. - The SAMPLE_DATA variable is set to false to disable the default monitors that Statping configures during installation.
- The ALLOW_REPORTS variable is set to false to disable the anonymous error reports Statping sends.
- The ADMIN_USER and ADMIN_PASSWORD variables are used to set the login information for the default user.
- The DB_ variables are used to set the database credentials which should match the variables defined for the Postgres container.
Step 6 – Configure NGinx
Open the file /etc/nginx/nginx.conf for editing.
$ sudo nano /etc/nginx/nginx.conf
Add the following line before the line include /etc/nginx/conf.d/*.conf;.
server_names_hash_bucket_size 64;
Save the file by pressing Ctrl X and entering Y when prompted.
Create and open the file /etc/nginx/conf.d/statusping.conf for editing.
$ sudo nano /etc/nginx/conf.d/statusping.conf
Paste the following code in it. Replace status.example.com with your domain name.
upstream backend {
   server 127.0.0.1:8080;
   keepalive 32;
}

server {
  listen 80 default_server;
  server_name status.example.com;
  return 301 https://$server_name$request_uri;
}

server {
   listen 443 ssl http2;
   server_name status.example.com;

   http2_push_preload on; # Enable HTTP/2 Server Push

   ssl_certificate /etc/letsencrypt/live/status.example.com/fullchain.pem;
   ssl_certificate_key /etc/letsencrypt/live/status.example.com/privkey.pem;
   ssl_trusted_certificate /etc/letsencrypt/live/status.example.com/chain.pem;
   ssl_session_timeout 1d;

   # Enable TLS versions (TLSv1.3 is required upcoming HTTP/3 QUIC).
   ssl_protocols TLSv1.2 TLSv1.3;

   # Enable TLSv1.3's 0-RTT. Use $ssl_early_data when reverse proxying to
   # prevent replay attacks.
   #
   # @see: https://nginx.org/en/docs/http/ngx_http_ssl_module.html#ssl_early_data
   ssl_early_data on;

   ssl_ciphers 'ECDHE-ECDSA-AES256-GCM-SHA384:ECDHE-RSA-AES256-GCM-SHA384:ECDHE-ECDSA-CHACHA20-POLY1305:ECDHE-RSA-CHACHA20-POLY1305:ECDHE-ECDSA-AES256-SHA384:ECDHE-RSA-AES256-SHA384';
   ssl_prefer_server_ciphers on;
   ssl_session_cache shared:SSL:50m;
   # OCSP Stapling --- fetch OCSP records from URL in ssl_certificate and cache them
   ssl_stapling on;
   ssl_stapling_verify on;
   ssl_dhparam /etc/ssl/certs/dhparam.pem;

   add_header X-Early-Data $tls1_3_early_data;

   access_log /var/log/nginx/statusping.access.log main;
   error_log  /var/log/nginx/statusping.error.log;

   location / {
       client_max_body_size 50M;
       proxy_set_header Connection "";
       proxy_set_header Host $http_host;
       proxy_set_header X-Real-IP $remote_addr;
       proxy_set_header X-Forwarded-For $proxy_add_x_forwarded_for;
       proxy_set_header X-Forwarded-Proto $scheme;
       proxy_set_header X-Frame-Options SAMEORIGIN;
       proxy_set_header X-Client-Verify  SUCCESS;
       proxy_set_header X-Client-DN      $ssl_client_s_dn;
       proxy_set_header X-SSL-Subject    $ssl_client_s_dn;
       proxy_set_header X-SSL-Issuer     $ssl_client_i_dn;
       proxy_buffers 256 16k;
       proxy_buffer_size 16k;
       proxy_read_timeout 1800s;
       proxy_connect_timeout 1800s;
       proxy_http_version 1.1;
       proxy_pass http://backend;
   }
}

# This block is useful for debugging TLS v1.3. Please feel free to remove this
# and use the `$ssl_early_data` variable exposed by NGINX directly should you
# wish to do so.
map $ssl_early_data $tls1_3_early_data {
  "~." $ssl_early_data;
  default "";
}
Save the file by pressing Ctrl X and entering Y when prompted.
Verify your Nginx configuration.
$ sudo nginx -t
Restart the Nginx server.
$ sudo systemctl restart nginx
Step 7 – Run Statping
Switch to the Statping directory.
$ cd ~/statping
Create and launch the Docker container.
$ docker compose up -d
Check the status of the container.
$ docker compose ps
You will see the following output.
NAME                COMMAND                  SERVICE             STATUS              PORTS
postgres            "docker-entrypoint.s…"   postgres            running             0.0.0.0:5432->5432/tcp
statping            "https://www.howtoforge.com/bin/sh -c 'statpin…"   statping            running (healthy)   0.0.0.0:8080->8080/tcp
You can also use the command docker ps to get a more detailed status. To check the container logs, use the command docker logs .
Step 8 – Configure Statping
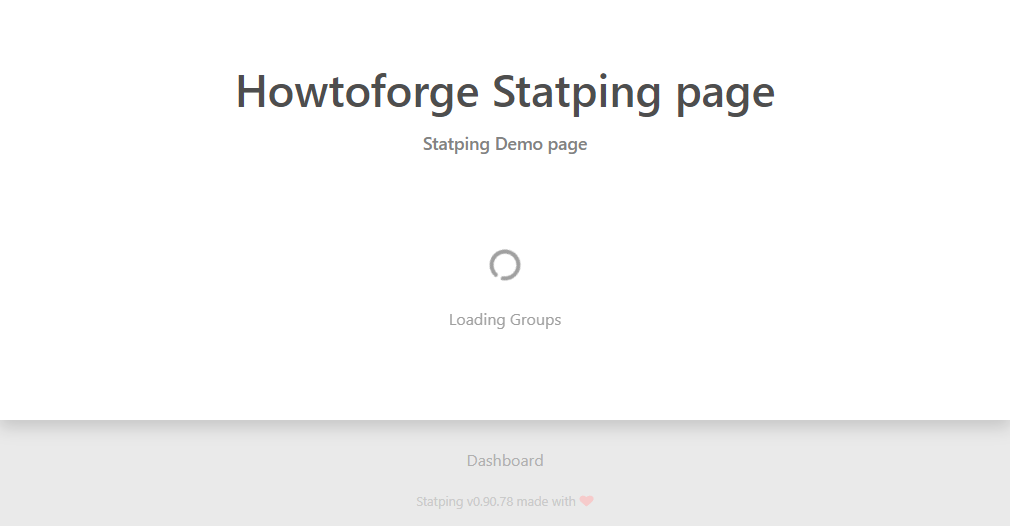
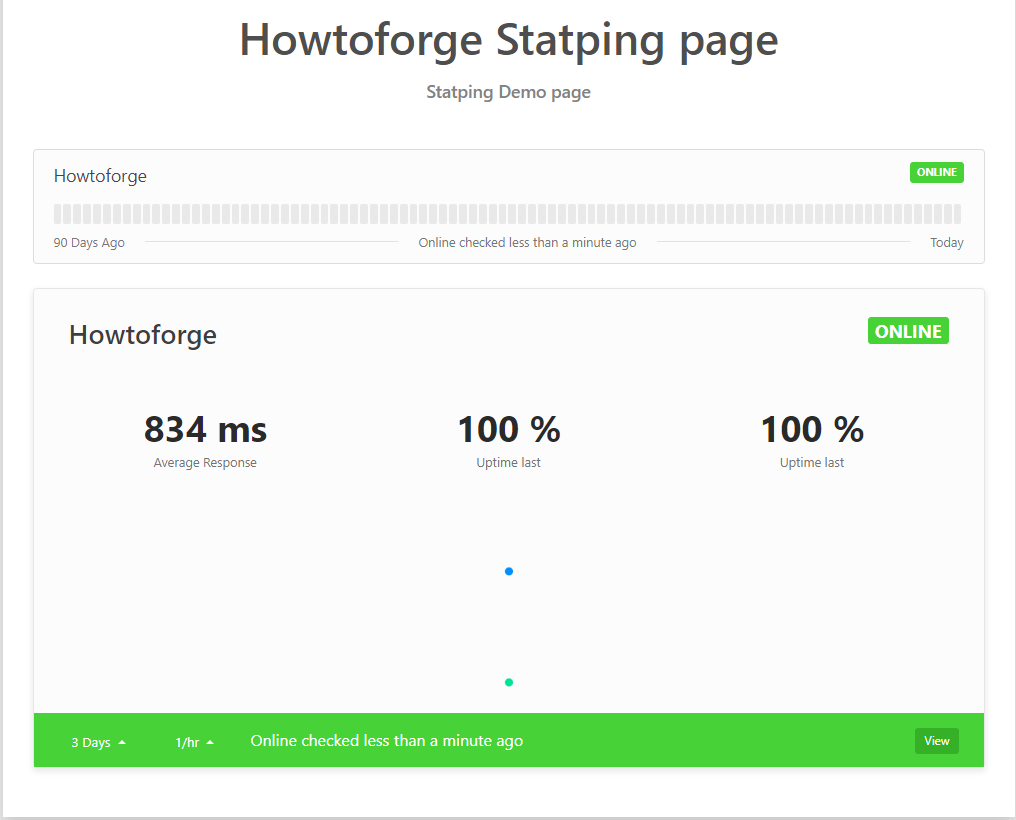
Now that your container is running, launch the URL https://status.example.com in your browser and you will see a blank status page. If you omit the variable SAMPLE_DATA in the docker compose file, you will see a full page with different services pre-defined.
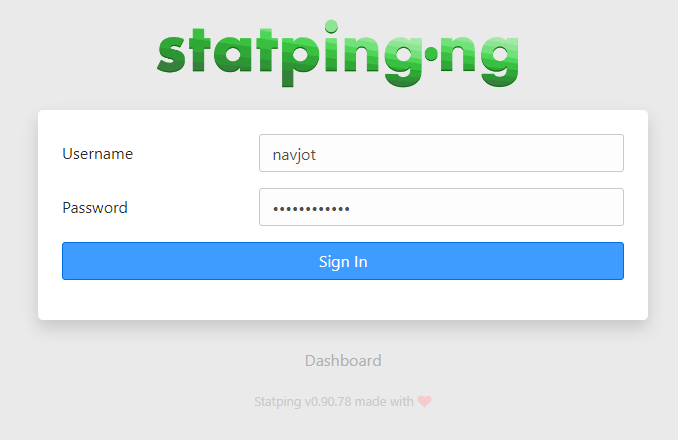
Click the Dashboard link at the bottom to access the login screen.
Fill in admin as both the default username and the password. Make sure you type the username as well even though it looks like it is pre-filled. Click the Sign in button to access the Statping dashboard.
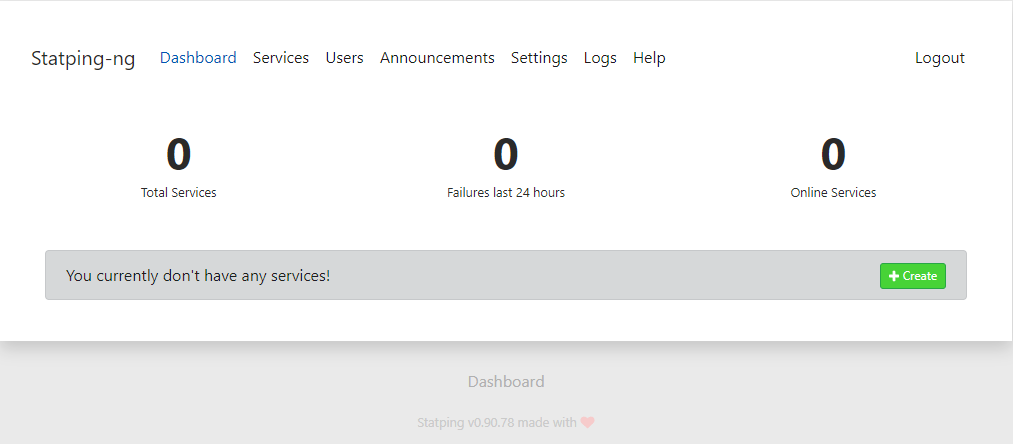
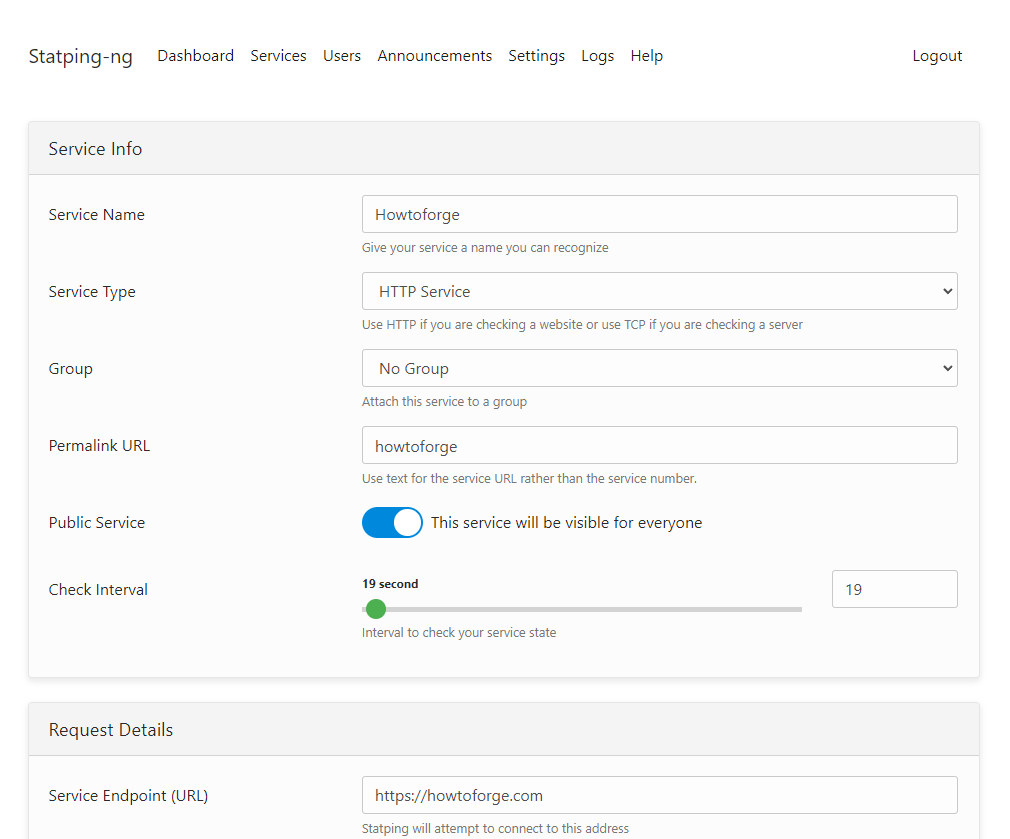
To add a new service, click the Create button and fill in the required values.
Click the Create service button at the bottom to finish. To configure email and other notifications, visit the settings page. You can also give your stats page a new name.
Step 9 – Update Statping
Upgrading Statping is a simple step. Switch to Statping’s Docker compose directory.
$ cd ~/statping
Next, stop and remove the existing container. Your data will be retained though.
$ docker compose down --remove-orphans
Pull the latest version of the Statping docker image.
$ docker compose pull
Start the containers again.
$ docker compose up -d
Your Statping installation is updated and started again.
Conclusion
This concludes the tutorial where you learned how to install Statping on a Ubuntu 22.04 server. If you have any questions, post them in the comments below.


