
Strapi is an open-source, headless Content Management System (CMS) built with JavaScript. Like other headless CMS’, Strapi doesn’t come with a frontend out of the box. It uses an API for its frontend, allowing you to build the website using popular frameworks like React and Next.js. Based on a plugin system, Strapi is a flexible CMS whose admin panel and API are extensible – and whose every part is customizable to match any use case. Strapi also has a built-in user system to manage in detail what the administrators and end users have access to.
In this tutorial, you will learn how to install the community version of Strapi CMS on a Ubuntu 22.04 server, along with Nginx as a reverse proxy server.
Prerequisites
-
A server running Ubuntu 22.04.
-
A non-root user with sudo privileges.
-
A fully qualified domain name (FQDN) like
strapi.example.com. -
Make sure everything is updated.
$ sudo apt update
$ sudo apt upgrade
-
Few packages that your system needs.
$ sudo apt install wget curl nano software-properties-common dirmngr apt-transport-https gnupg2 ca-certificates lsb-release ubuntu-keyring unzip -y
Some of these packages may already be installed on your system.
Step 1 – Configure Firewall
The first step is to configure the firewall. Ubuntu comes with ufw (Uncomplicated Firewall) by default.
Check if the firewall is running.
$ sudo ufw status
You should get the following output.
Status: inactive
Allow SSH port so the firewall doesn’t break the current connection on enabling it.
$ sudo ufw allow OpenSSH
Allow HTTP and HTTPS ports as well.
$ sudo ufw allow http
$ sudo ufw allow https
Enable the Firewall
$ sudo ufw enable
Command may disrupt existing ssh connections. Proceed with operation (y|n)? y
Firewall is active and enabled on system startup
Check the status of the firewall again.
$ sudo ufw status
You should see a similar output.
Status: active

To                         Action      From
--                         ------      ----
OpenSSH                    ALLOW       Anywhere
80/tcp                     ALLOW       Anywhere
443                        ALLOW       Anywhere
OpenSSH (v6)               ALLOW       Anywhere (v6)
80/tcp (v6)                ALLOW       Anywhere (v6)
443 (v6)                   ALLOW       Anywhere (v6)
Step 2 – Install and Configure PostgreSQL
Strapi works with PostgreSQL 11 and above. Ubuntu 22.04 ships with PostgreSQL 14 by default. We will use PostgreSQL 15 for our tutorial.
Run the following command to add the PostgreSQL GPG key.
$ curl https://www.postgresql.org/media/keys/ACCC4CF8.asc | gpg --dearmor | sudo tee /usr/share/keyrings/postgresql-key.gpg >/dev/null
Add the APT repository to your sources list.
$ sudo sh -c 'echo "deb [signed-by=/usr/share/keyrings/postgresql-key.gpg arch=amd64] http://apt.postgresql.org/pub/repos/apt $(lsb_release -cs)-pgdg main" > /etc/apt/sources.list.d/pgdg.list'
Update the system repository.
$ sudo apt update
Now, you can install PostgreSQL using the command below.
$ sudo apt install postgresql postgresql-contrib
The postgresql-contrib package contains some extra utilities.
Check the status of the PostgreSQL service.
$ sudo systemctl status postgresql
? postgresql.service - PostgreSQL RDBMS
     Loaded: loaded (/lib/systemd/system/postgresql.service; enabled; vendor preset: enabled)
     Active: active (exited) since Wed 2022-12-28 18:03:03 UTC; 17s ago
   Main PID: 4119 (code=exited, status=0/SUCCESS)
        CPU: 2ms

Dec 28 18:03:03 strapi systemd[1]: Starting PostgreSQL RDBMS...
Dec 28 18:03:03 strapi systemd[1]: Finished PostgreSQL RDBMS.
You can see that the service is enabled and running by default.
Launch the PostgreSQL shell.
$ sudo -i -u postgres psql
Create the Strapi database.
postgres=# CREATE DATABASE strapidb;
Create the Strapi user and choose a strong password.
postgres-# CREATE USER strapiuser WITH PASSWORD 'Your_Password';
Change the database owner to Strapi user.
postgres-# ALTER DATABASE strapidb OWNER TO strapiuser;
Exit the shell.
postgres-# q
Verify that your credentials work.
$ psql --username strapiuser --password --host localhost strapidb
Password:
psql (15.1 (Ubuntu 15.1-1.pgdg22.04 1))
SSL connection (protocol: TLSv1.3, cipher: TLS_AES_256_GCM_SHA384, bits: 256, compression: off)
Type "help" for help.

strapidb=>
Exit the shell by typing q.
Step 3 – Install Node.js
Ubuntu 22.04 ships with Node v12 which is outdated. We will install the latest LTS version of Node which is v18 at the time of writing this tutorial.
Grab the Node v18 installer from Nodesource.
$ curl -sL https://deb.nodesource.com/setup_18.x -o nodesource_setup.sh
Run the installer script.
$ sudo bash nodesource_setup.sh
Install Node.js.
$ sudo apt install nodejs
Verify the Node.js version.
$ node -v
v18.12.1
Delete the installer file.
$ rm nodesource_setup.sh
Step 4 – Install Strapi
Run the following command to install Strapi.
$ npx [email protected] howtoforge-project
Need to install the following packages:
  [email protected]
Ok to proceed? (y) y
Enter y to proceed with the installation. Next, you will be asked to choose the Installation type. Choose Custom to proceed and answer the questions as follows.
? Choose your installation type Custom (manual settings)
? Choose your preferred language JavaScript
? Choose your default database client postgres
? Database name: strapidb
? Host: 127.0.0.1
? Port: 5432
? Username: strapiuser
? Password: Your_Password
? Enable SSL connection: No
Depending on your requirements, you can either choose Typescript or JavaScript as the language for Strapi.
Once the installation is complete, you are ready to build your Strapi project.
Switch to the project directory.
$ cd howtoforge-project
Run the following command to build the project, including the Strapi Admin UI.
$ NODE_ENV=production npm run build
Start the Strapi server using the following command.
$ node ~/howtoforge-project/node_modules/.bin/strapi start
Your application should be visible on the URL http://:1337. But first, open the port in the firewall.
$ sudo ufw allow 1337
Once you open the URL, you should get the following screen.
Press Ctrl C in the terminal to stop the server. You should delete the firewall rule because we won’t need it.
$ sudo ufw delete allow 1337
Step 5 – Install and Configure PM2
Instead of starting the server manually, we can use PM2 (Process Manager 2) to manage the process and create a systemd service for the same.
Switch to the home directory.
$ cd ~
Install PM2.
$ sudo npm install [email protected] -g
Create and open the PM2 configuration file for editing.
$ sudo nano ecosystem.config.js
Paste the following content in the file. Make sure to enter the correct directory name along with Postgres credentials.
module.exports = {
  apps: [
    {
      name: 'strapi',
      cwd: '/home/navjot/my-project',
      script: 'npm',
      args: 'start',
      env: {
        NODE_ENV: 'production',
        DATABASE_HOST: 'localhost',
        DATABASE_PORT: '5432',
        DATABASE_NAME: 'strapidb',
        DATABASE_USERNAME: 'strapiuser',
        DATABASE_PASSWORD: 'Your_Password',
      },
    },
  ],
};
Save the file by pressing Ctrl X and entering Y when prompted once finished.
Run your Strapi instance in the background using PM2.
$ pm2 start ecosystem.config.js
You will get the following output.
                        -------------

__/\\\\\\____/\\____________/\\____/\\\\_____
 _/\/////////\_/\\\________/\\\__/\///////\___
  _/\_______/\_/\//\____/\//\_///______//\__
   _/\\\\\\/__/\\///\/\/_/\___________/\/___
    _/\/////////____/\__///\/___/\________/\//_____
     _/\_____________/\____///_____/\_____/\//________
      _/\_____________/\_____________/\___/\/___________
       _/\_____________/\_____________/\__/\\\\\\\_
        _///______________///______________///__///////////////__


                          Runtime Edition

        PM2 is a Production Process Manager for Node.js applications
                     with a built-in Load Balancer.

                Start and Daemonize any application:
                $ pm2 start app.js

                Load Balance 4 instances of api.js:
                $ pm2 start api.js -i 4

                Monitor in production:
                $ pm2 monitor

                Make pm2 auto-boot at server restart:
                $ pm2 startup

                To go further checkout:
                http://pm2.io/


                        -------------

[PM2] Spawning PM2 daemon with pm2_home=/home/navjot/.pm2
[PM2] PM2 Successfully daemonized
[PM2][WARN] Applications strapi not running, starting...
[PM2] App [strapi] launched (1 instances)
????????????????????????????????????????????????????????????????????????????????????????????????????????????????????????????????????????
? id  ? name      ? namespace   ? version ? mode    ? pid      ? uptime ? ?    ? status    ? cpu      ? mem      ? user
    ? watching ?
????????????????????????????????????????????????????????????????????????????????????????????????????????????????????????????????????????
? 0   ? strapi    ? default     ? N/A     ? fork    ? 4824     ? 0s     ? 0    ? online    ? 0%       ? 31.9mb   ? navjot   ? disabled ?
????????????????????????????????????????????????????????????????????????????????????????????????????????????????????????????????????????
Applications running under PM2 restart automatically if they crash or get killed.
Create a startup systemd script using the following command.
$ pm2 startup
You will get the following output.
[PM2] Init System found: systemd
[PM2] To setup the Startup Script, copy/paste the following command:
sudo env PATH=$PATH:/usr/bin /usr/lib/node_modules/pm2/bin/pm2 startup systemd -u navjot --hp /home/navjot
Copy the command from the above output and run it.
$ sudo env PATH=$PATH:/usr/bin /usr/lib/node_modules/pm2/bin/pm2 startup systemd -u navjot --hp /home/navjot
Save the PM2 process list.
$ pm2 save
Your Strapi service is now running in the background in production mode.
Step 6 – Install Nginx
Ubuntu 22.04 ships with an older version of Nginx. To install the latest version, you need to download the official Nginx repository.
Import Nginx’s signing key.
$ curl https://nginx.org/keys/nginx_signing.key | gpg --dearmor
	| sudo tee /usr/share/keyrings/nginx-archive-keyring.gpg >/dev/null
Add the repository for Nginx’s stable version.
$ echo "deb [signed-by=/usr/share/keyrings/nginx-archive-keyring.gpg arch=amd64]
http://nginx.org/packages/ubuntu `lsb_release -cs` nginx"
    | sudo tee /etc/apt/sources.list.d/nginx.list
Update the system repositories.
$ sudo apt update
Install Nginx.
$ sudo apt install nginx
Verify the installation.
$ nginx -v
nginx version: nginx/1.22.1
Start the Nginx server.
$ sudo systemctl start nginx
Step 7 – Install SSL
We need to install Certbot to generate the SSL certificate. You can either install Certbot using Ubuntu’s repository or grab the latest version using the Snapd tool. We will be using the Snapd version.
Ubuntu 22.04 comes with Snapd installed by default. Run the following commands to ensure that your version of Snapd is up to date. Ensure that your version of Snapd is up to date.
$ sudo snap install core
$ sudo snap refresh core
Install Certbot.
$ sudo snap install --classic certbot
Use the following command to ensure that the Certbot command runs by creating a symbolic link to the /usr/bin directory.
$ sudo ln -s /snap/bin/certbot /usr/bin/certbot
Run the following command to generate an SSL Certificate.
$ sudo certbot certonly --nginx --agree-tos --no-eff-email --staple-ocsp --preferred-challenges http -m [email protected] -d strapi.example.com
The above command will download a certificate to the /etc/letsencrypt/live/strapi.example.com directory on your server.
Generate a Diffie-Hellman group certificate.
$ sudo openssl dhparam -dsaparam -out /etc/ssl/certs/dhparam.pem 4096
Do a dry run of the process to check whether the SSL renewal is working fine.
$ sudo certbot renew --dry-run
If you see no errors, you are all set. Your certificate will renew automatically.
Step 8 – Configure Nginx
Open the file /etc/nginx/nginx.conf for editing.
$ sudo nano /etc/nginx/nginx.conf
Add the following line before the line include /etc/nginx/conf.d/*.conf;.
server_names_hash_bucket_size 64;
Save the file by pressing Ctrl X and entering Y when prompted.
Create and open the file /etc/nginx/conf.d/strapi.conf for editing.
$ sudo nano /etc/nginx/conf.d/strapi.conf
Paste the following code in it.
server {
  # Redirect any http requests to https
  listen         80;
  listen         [::]:80;
  server_name    strapi.example.com;
  return 301     https://$host$request_uri;
}

server {
  listen                    443 ssl http2;
  listen                    [::]:443 ssl http2;
  server_name               strapi.example.com;

  access_log                /var/log/nginx/strapi.access.log;
  error_log                 /var/log/nginx/strapi.error.log;

  # TLS configuration
  ssl_certificate           /etc/letsencrypt/live/strapi.example.com/fullchain.pem;
  ssl_certificate_key       /etc/letsencrypt/live/strapi.example.com/privkey.pem;
  ssl_trusted_certificate   /etc/letsencrypt/live/strapi.example.com/chain.pem;
  ssl_protocols             TLSv1.2 TLSv1.3;

  ssl_ciphers 'ECDHE-ECDSA-AES256-GCM-SHA384:ECDHE-RSA-AES256-GCM-SHA384:ECDHE-ECDSA-CHACHA20-POLY1305:ECDHE-RSA-CHACHA20-POLY1305:ECDHE-ECDSA-AES256-SHA384:ECDHE-RSA-AES256-SHA384';
  ssl_prefer_server_ciphers on;
  ssl_session_cache         shared:SSL:50m;
  ssl_session_timeout       1d;

  # OCSP Stapling ---
  # fetch OCSP records from URL in ssl_certificate and cache them
  ssl_stapling on;
  ssl_stapling_verify on;
  ssl_dhparam /etc/ssl/certs/dhparam.pem;

  location / {
    proxy_set_header        X-Real-IP $remote_addr;
    proxy_set_header        X-Forwarded-Proto $scheme;
    proxy_set_header	    X-Forwarded-Host $http_host;
    proxy_set_header        X-Forwarded-For $proxy_add_x_forwarded_for;
    proxy_pass              http://127.0.0.1:1337;
  }
}
Save the file by pressing Ctrl X and entering Y when prompted once finished.
Verify the Nginx configuration file syntax.
$ sudo nginx -t
nginx: the configuration file /etc/nginx/nginx.conf syntax is ok
nginx: configuration file /etc/nginx/nginx.conf test is successful
Restart the Nginx service.
$ sudo systemctl restart nginx
You can now access Strapi CMS via the URL https://strapi.example.com. You will see the following page which shows that Strapi is running in production mode.
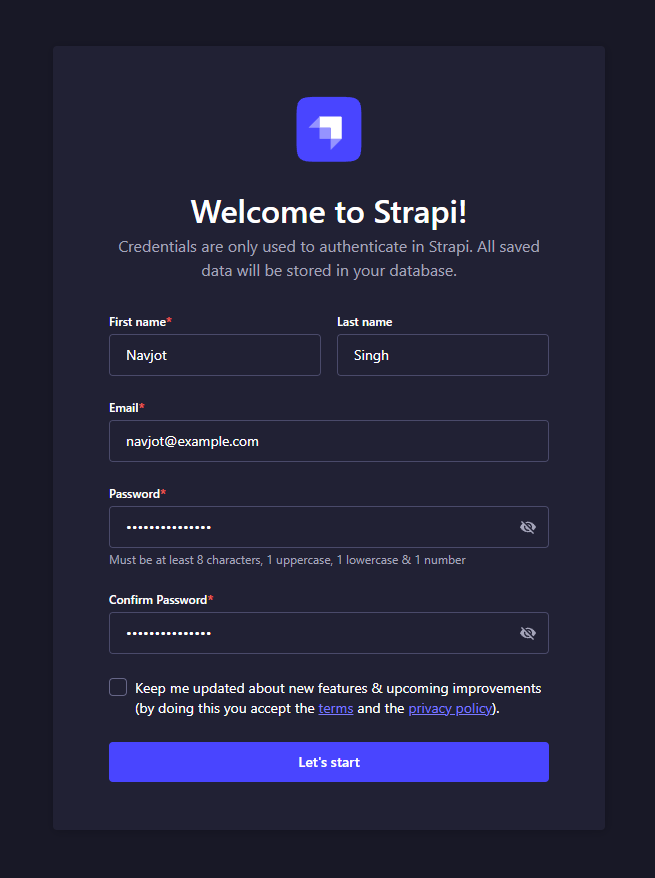
Visit the https://strapi.example.com/admin URL to create an administrator user.
Fill in your admin details and click the Let’s start button to proceed to the administrator dashboard screen.
From here on, you can start creating content on Strapi.
Step 9 – Upgrade Strapi
The first step in upgrading Strapi is to stop the server.
$ cd ~
$ pm2 stop ecosystem.config.js
Switch to the project directory and open the package.json file for editing.
$ cd howtoforge-project
$ nano package.json
Upgrade all of the Strapi package version numbers to the latest stable Strapi version. You can get the latest available version from Strapi’s GitHub releases page.
"devDependencies": {},
  "dependencies": {
    "@strapi/strapi": "4.5.5",
    "@strapi/plugin-users-permissions": "4.5.5",
    "@strapi/plugin-i18n": "4.5.5",
    "pg": "8.6.0"
  },
Here you need to change 4.5.5 to the latest stable version. Save the file by pressing Ctrl X and entering Y when prompted once finished.
Install the upgraded version.
$ npm install
Rebuild the Administration panel.
$ NODE_ENV=production npm run build
Start the server again.
$ cd ~
$ pm2 start ecosystem.config.js
Your Strapi installation is now upgraded and running.
Conclusion
This concludes our tutorial on installing Strapi CMS on a Ubuntu 22.04 server and Nginx as a reverse proxy server. If you have any questions, post them in the comments below.


