In a previous tutorial, we explained how you can install LibreELEC on a Raspberry Pi to set up a home media server and replace your smart TV OS. This tutorial is going to show you how to install the YouTube add-on and set up YouTube API in Kodi.
Step 1: Install the YouTube Add-on in Kodi
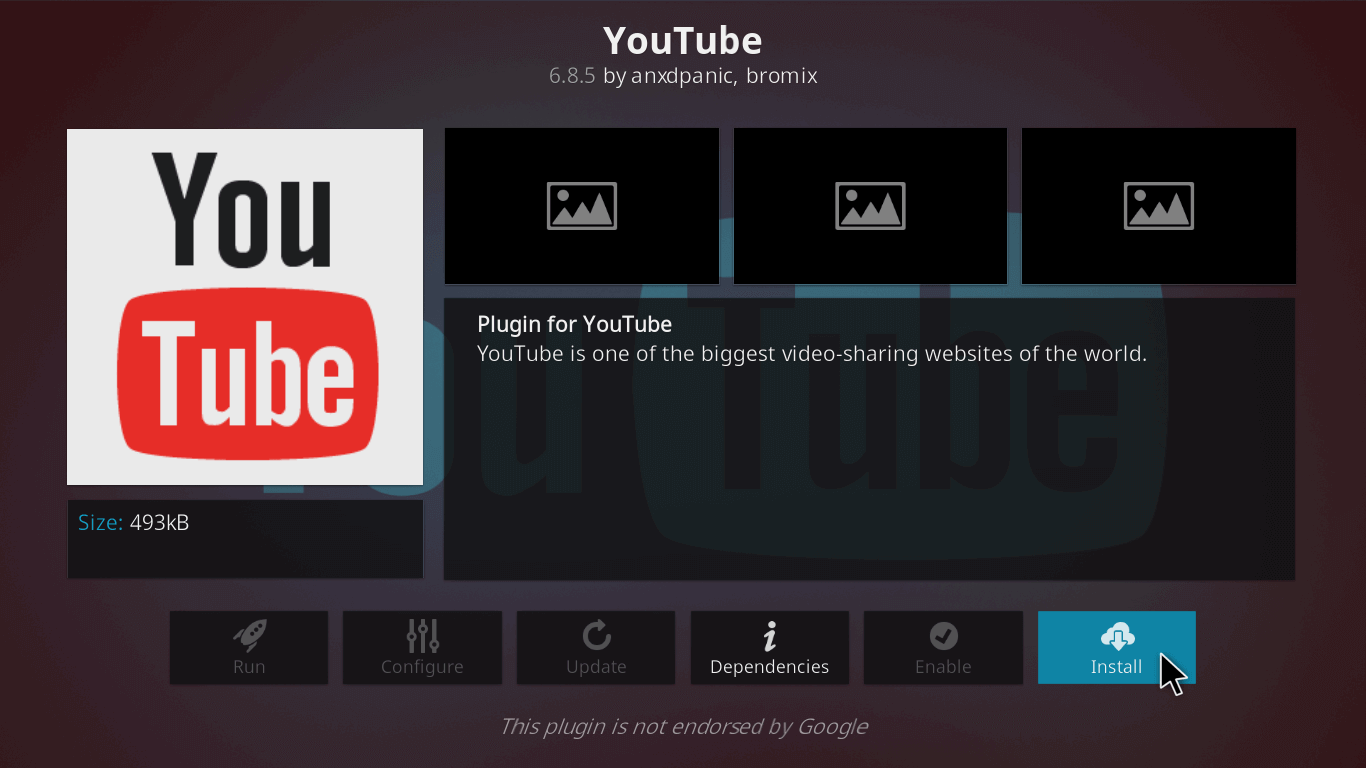
Go to Kodi Settings -> Add-ons -> Install from repository -> All repositories. There are many add-ons in the repository, such as subtitle add-on, the movie database add-on, etc. You will find YouTube in the video add-on category.
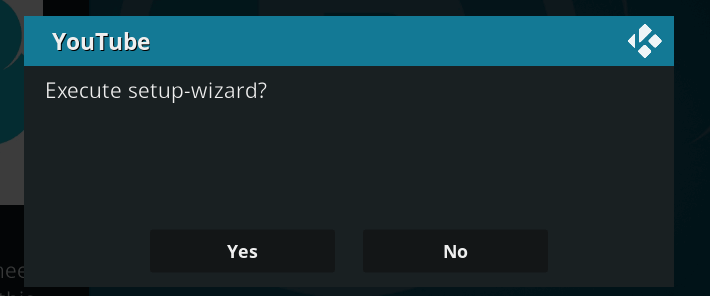
Once the YouTube add-on is installed, the setup wizard will appear. Select Yes to execute the setup wizard.
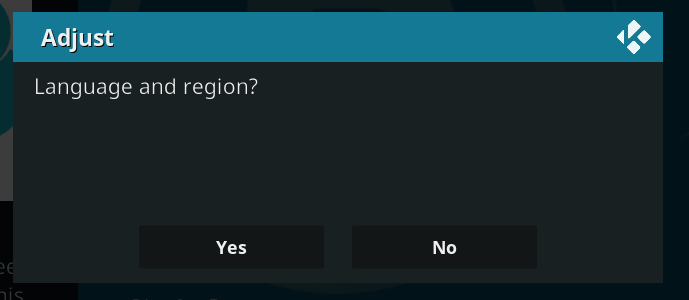
If you need to use another language or region, select Yes to choose.
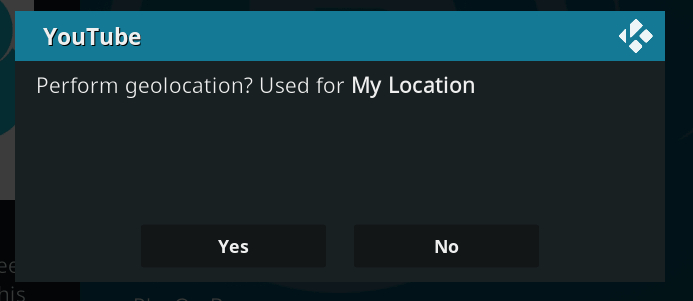
You also have the option to enable geolocation.
Then, go back to the Kodi home screen, select Add-ons from the left sidebar, and choose the YouTube add-on. Before using this add-on, you need to enter your YouTube API key.
Step 2: Create YouTube API Key in Your Google Account
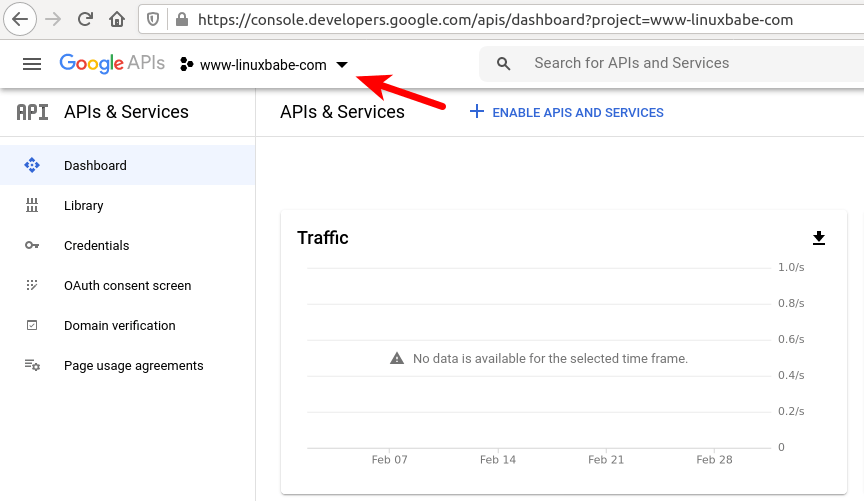
You need to set up your YouTube API key before you can use this add-on to watch videos on YouTube. Go to your Google API dashboard, and click the drop-down menu on the upper-left corner to create a new project.
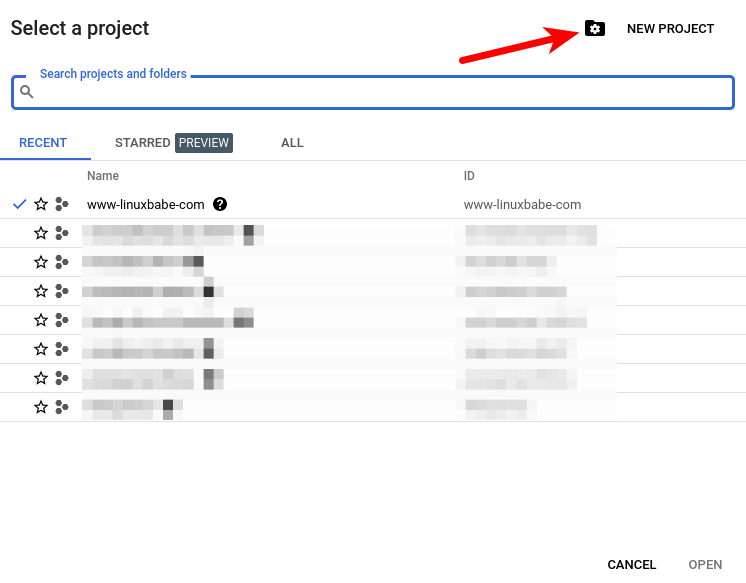
If you have created other projects before, then click the New Project button.
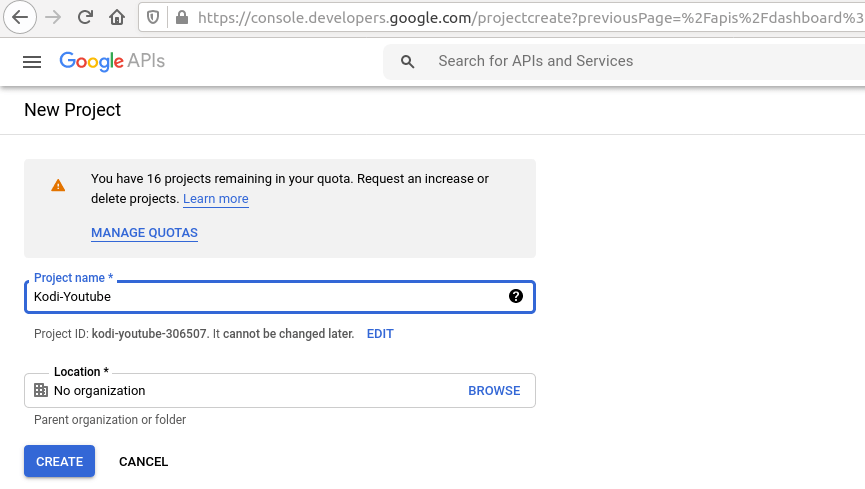
Enter a project name such as Kodi-YouTube, then click the create button.
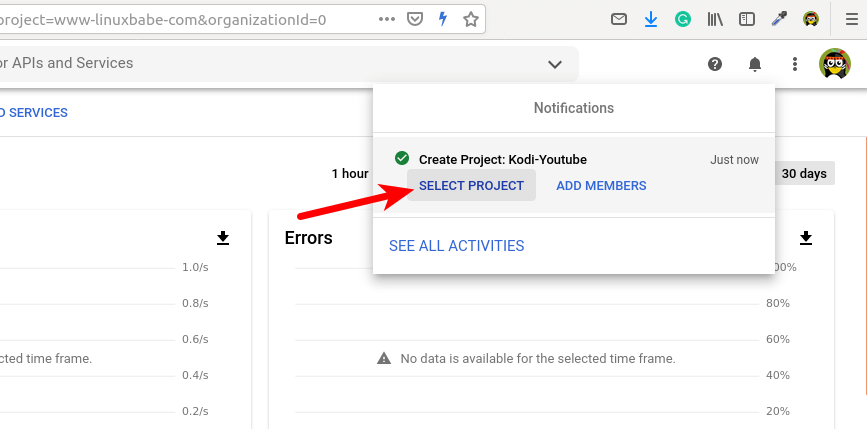
Once the project is created, select the project in the notification bar.
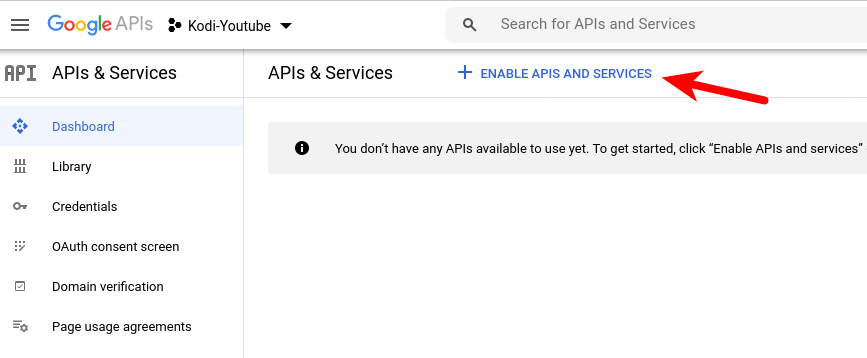
Next, click the Enable APIs and Service button.
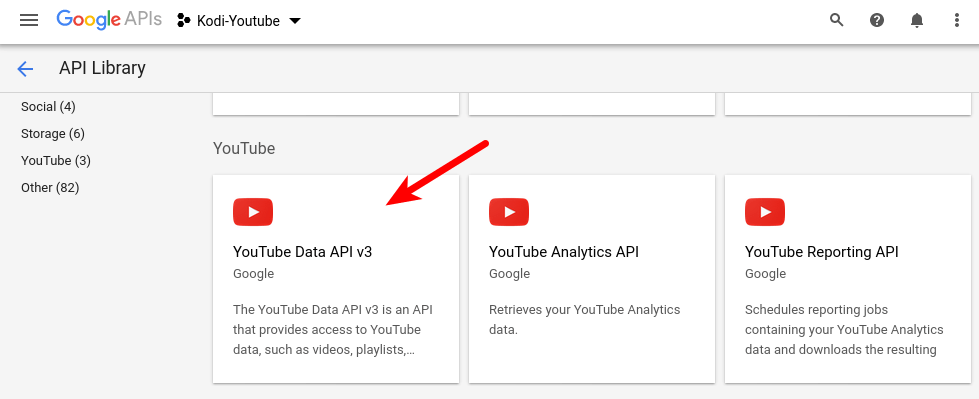
Select YouTube Data API v3.
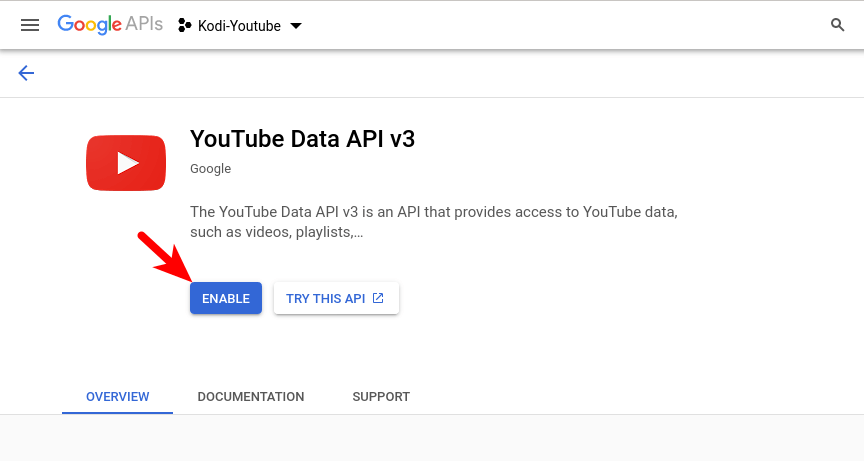
Click the Enable button to enable this API.
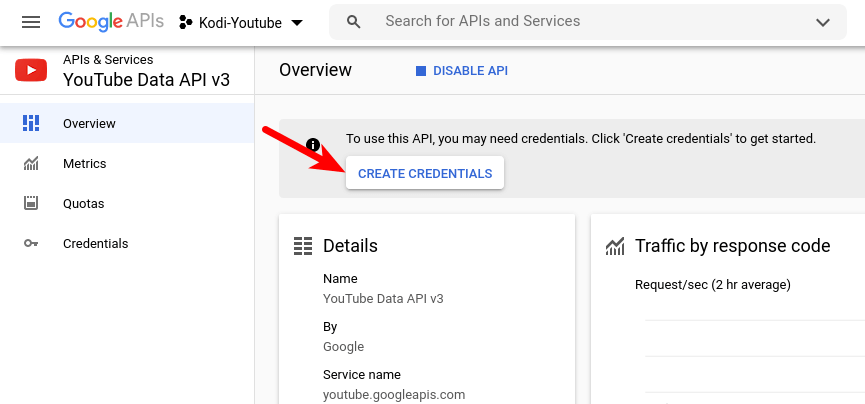
Once it’s enabled, you will be brought back to the API dashboard. Click the Create Credentials button.
Choose the following items.
- YoutTube Data API v3,
- Other UI (e.g. Windows, CLI tools)
- Public data
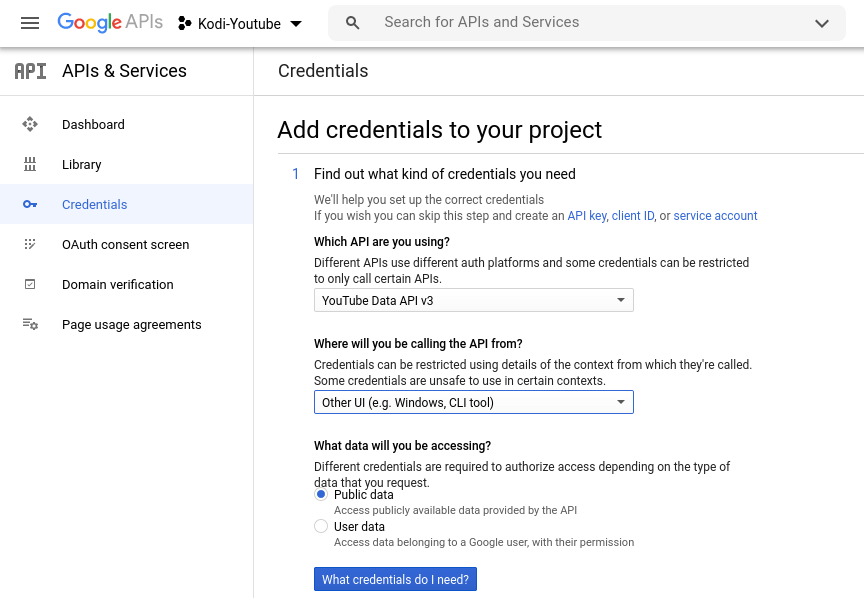
Then click the What credentials do I need? button. You will see your credential, i.e, your API key. Copy the API key to your clipboard, or save it to a file. Then click the Done button.
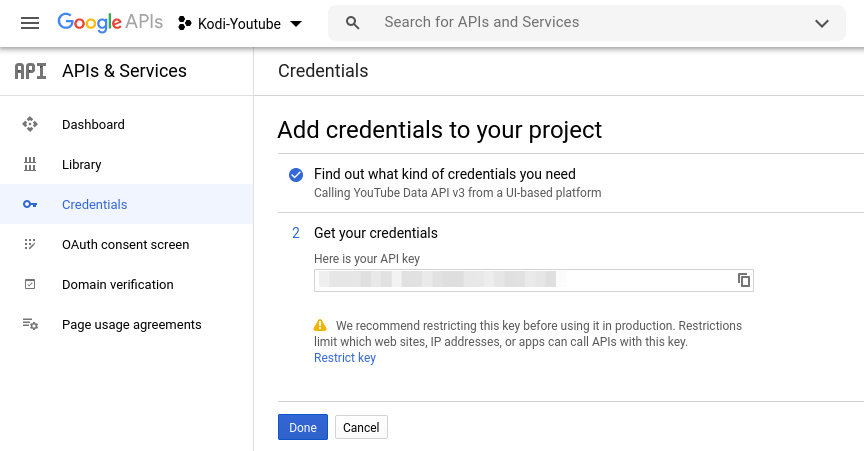
Next, click the Configure Consent Screen button.
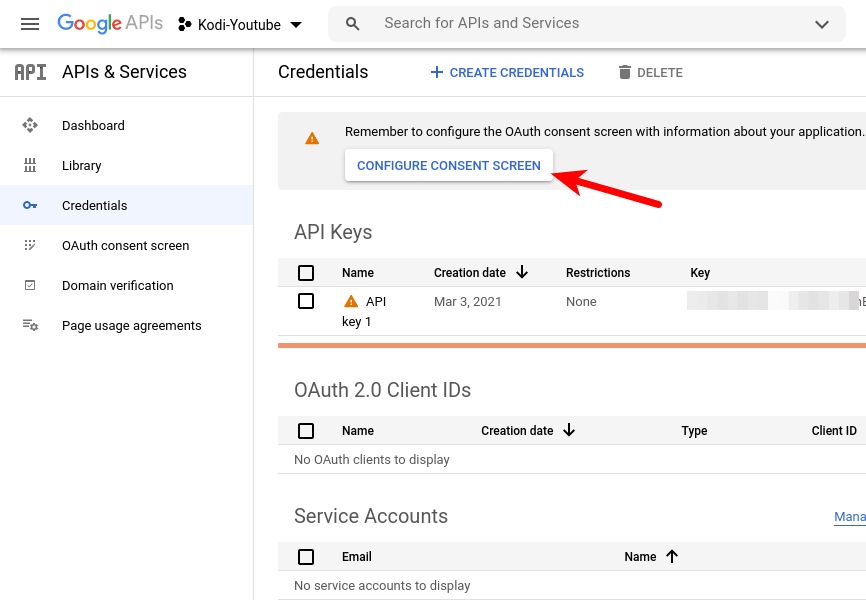
Tick on External and click the Create button.
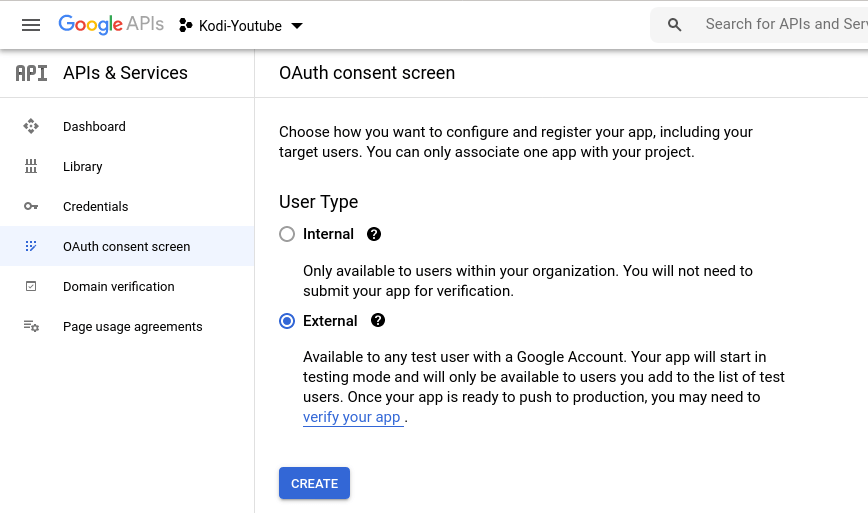
Give the App a name such as Kodi-Youtube, and select a contact email address. You also need to enter the developer’s email address (Simply enter your email address). Click Save and Continue button.
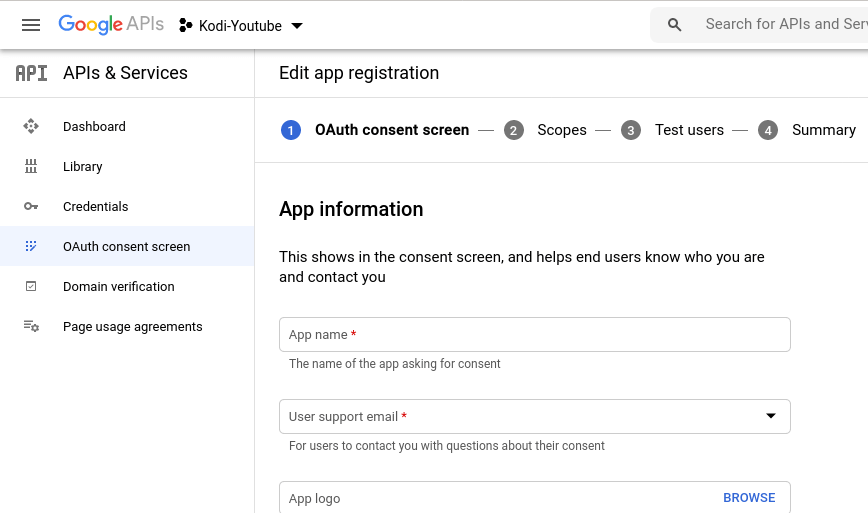
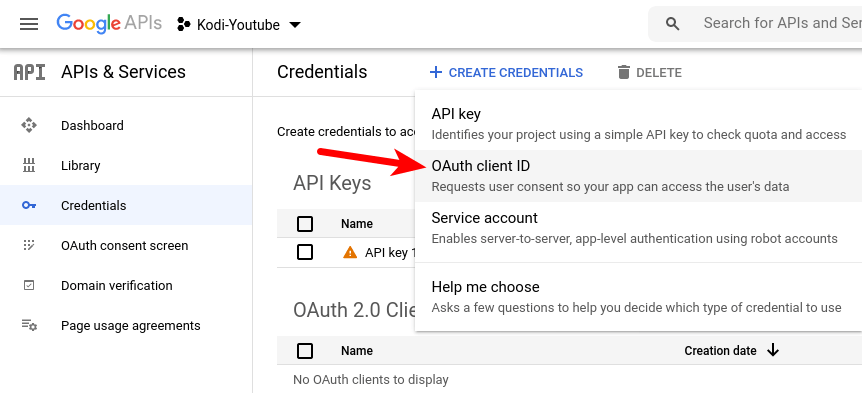
Go back to your API dashboard. Select Credentials on the left sidebar and click the Create Credentials button, select OAuth client ID.
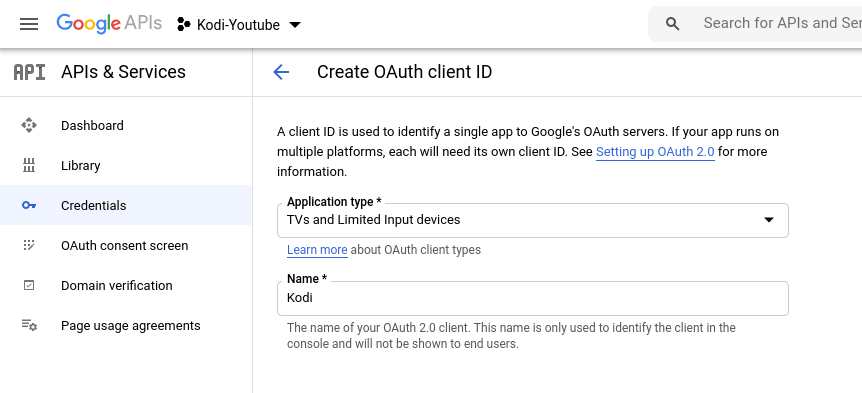
Choose TVs and Limited Input devices as the application type. Give the client ID a name such as Kodi. Click the create button.
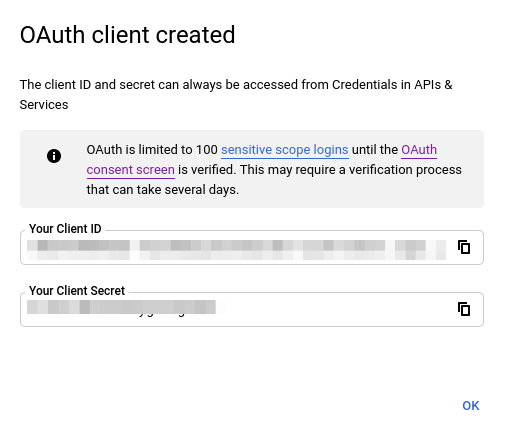
Once the OAuth client is created, the Client ID and Client Secret will be displayed on the screen. Save them to a file. Then click the OK button.
Step 3: Set Up API in the Kodi YouTube Add-on
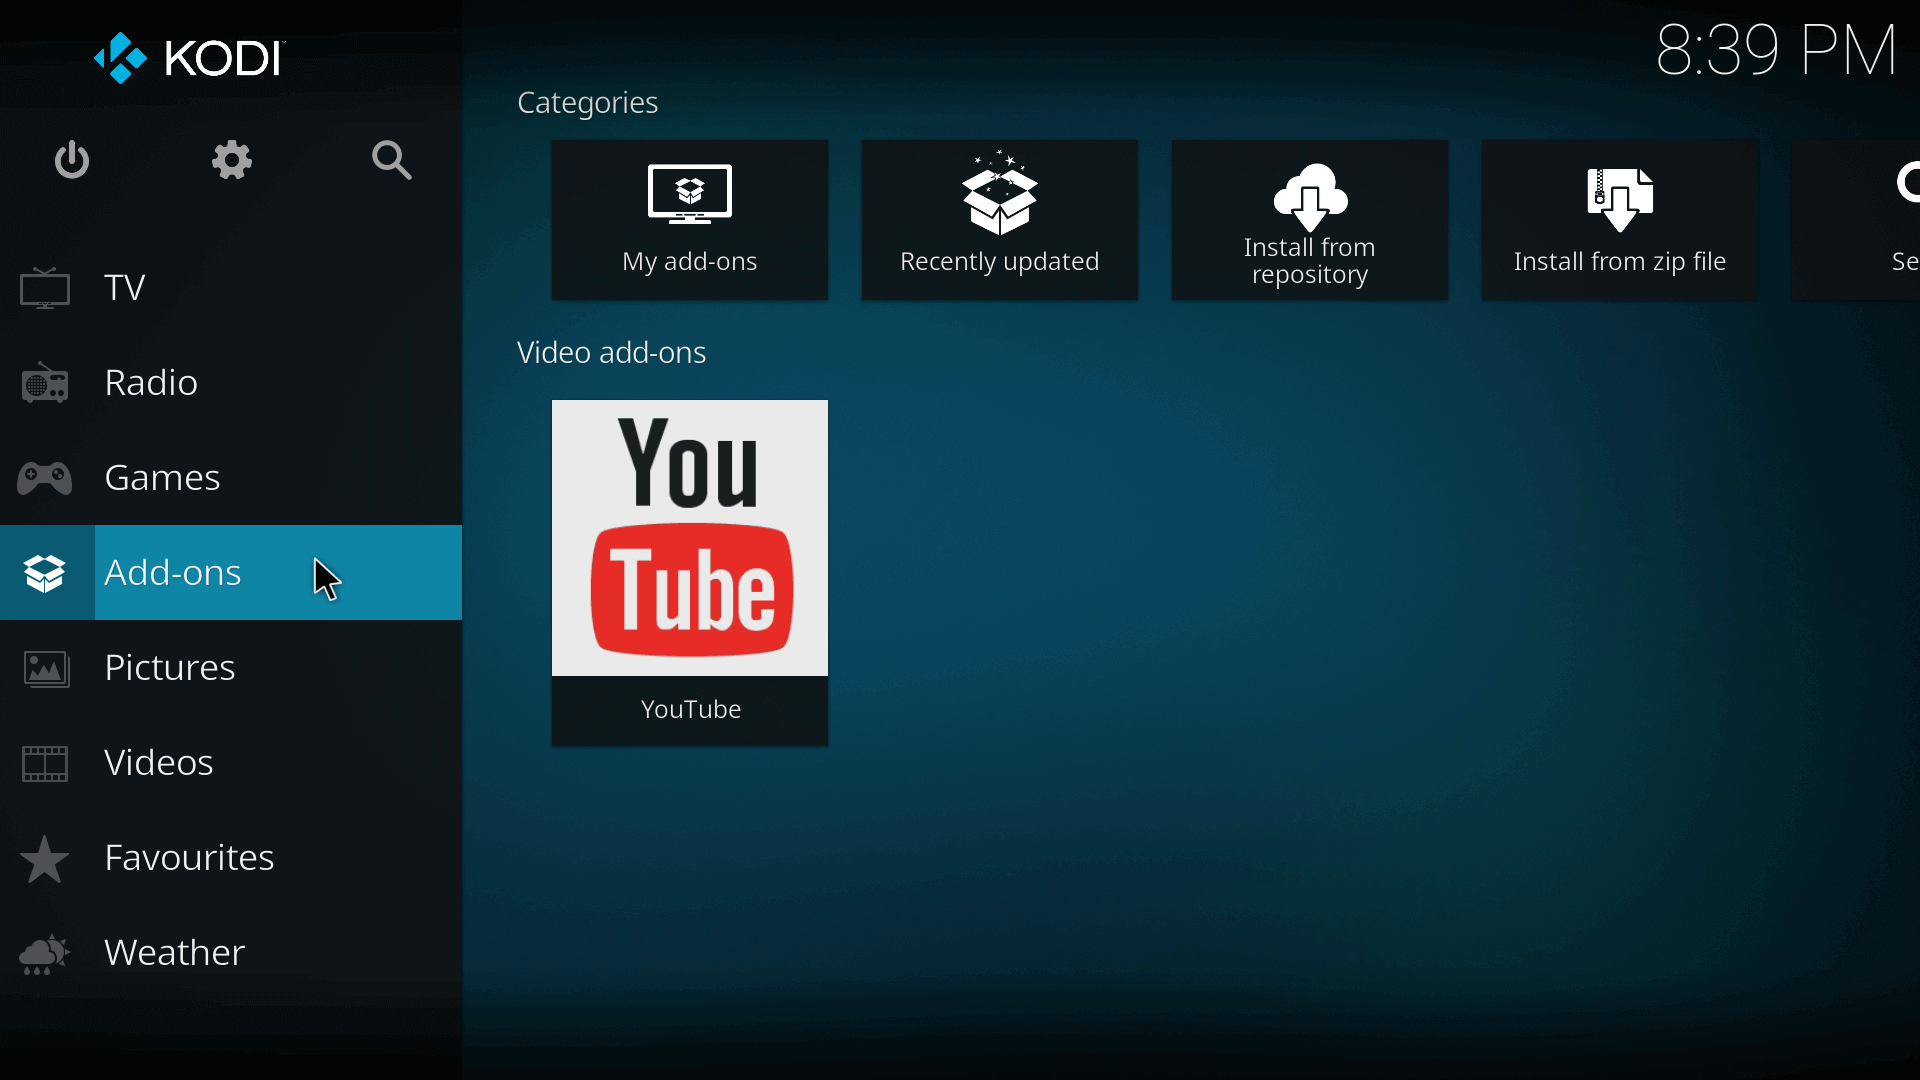
Go to the Kodi home screen, select Add-ons on the left sidebar and choose YouTube.
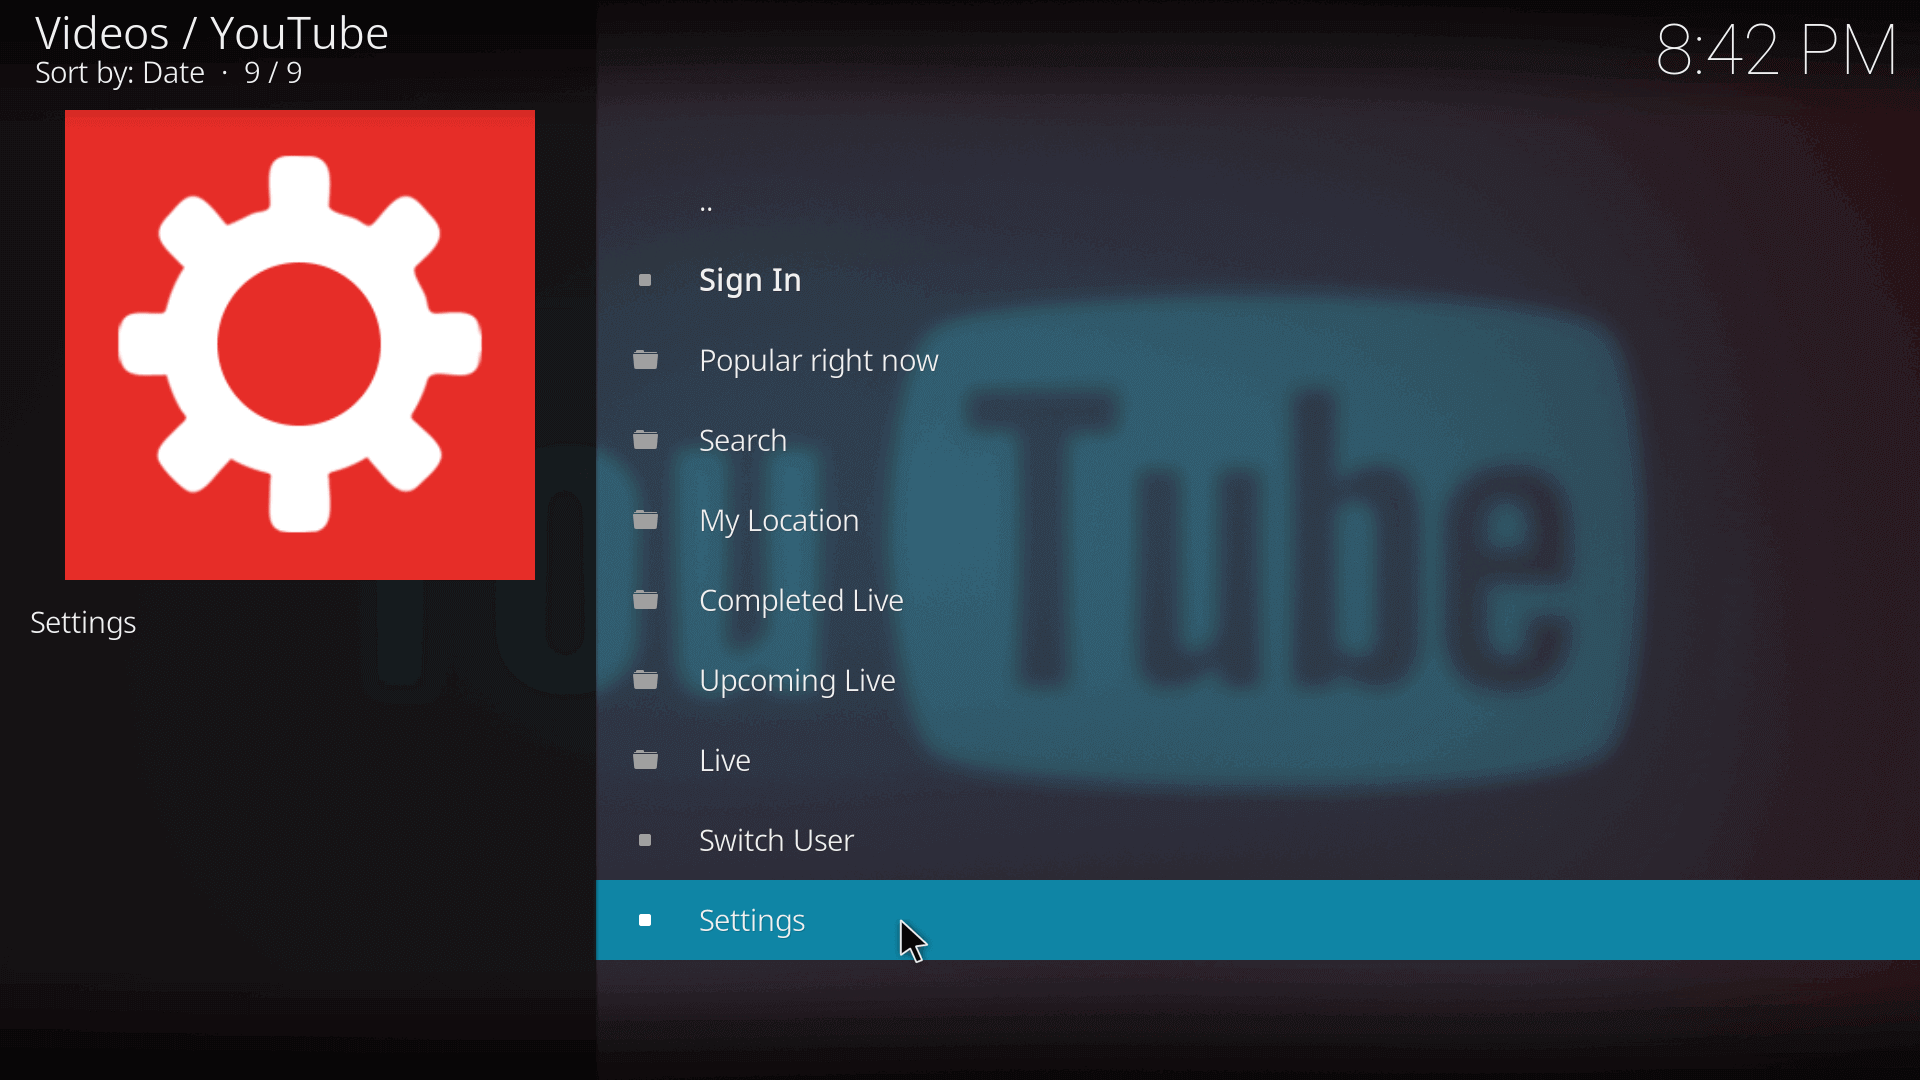
Select Settings.
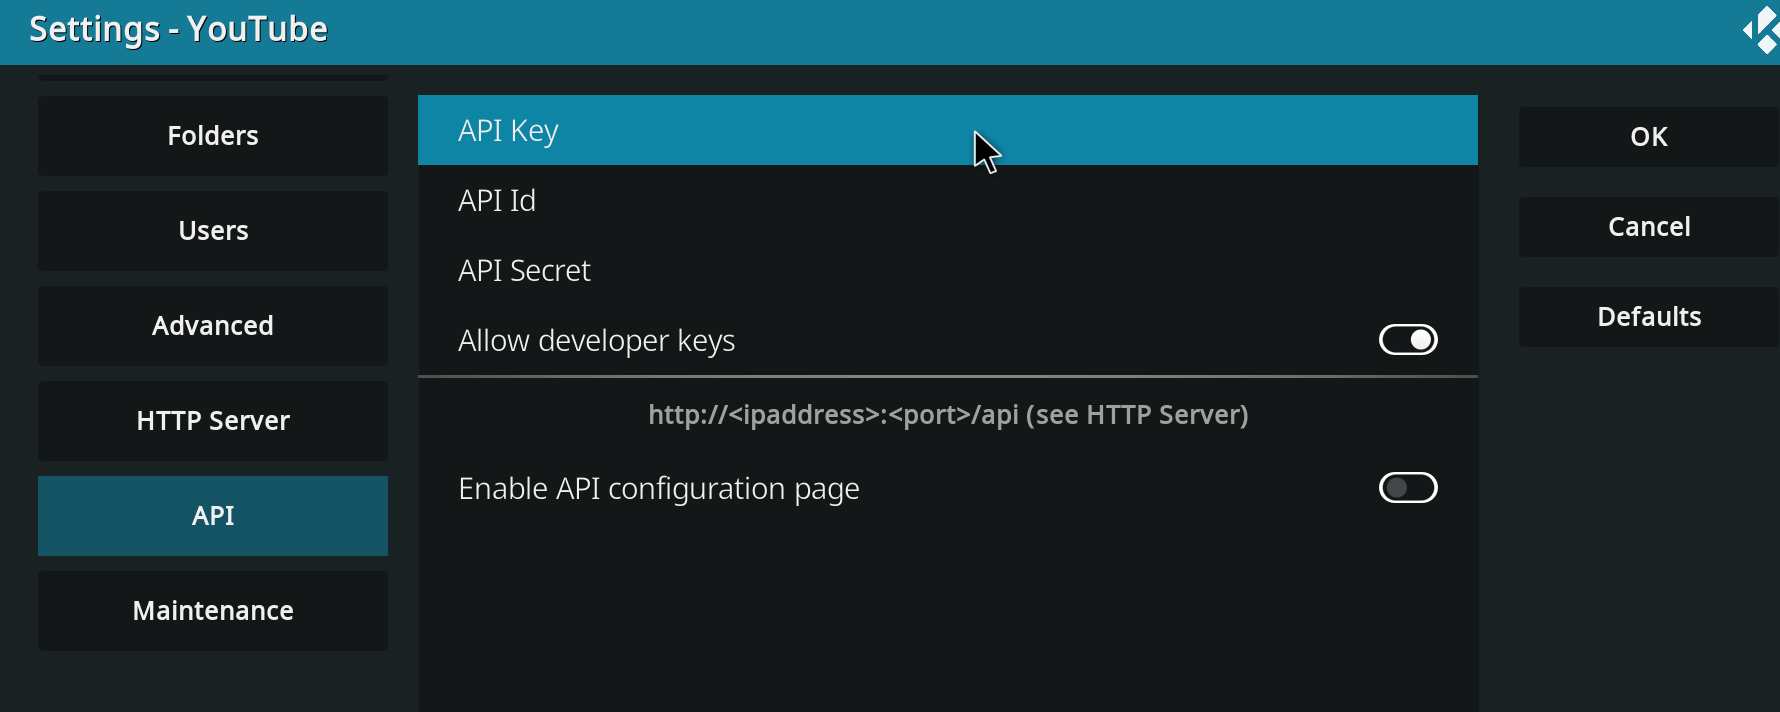
Choose API in the left sidebar and enter your API key, client ID, and client secret. Click the OK button.
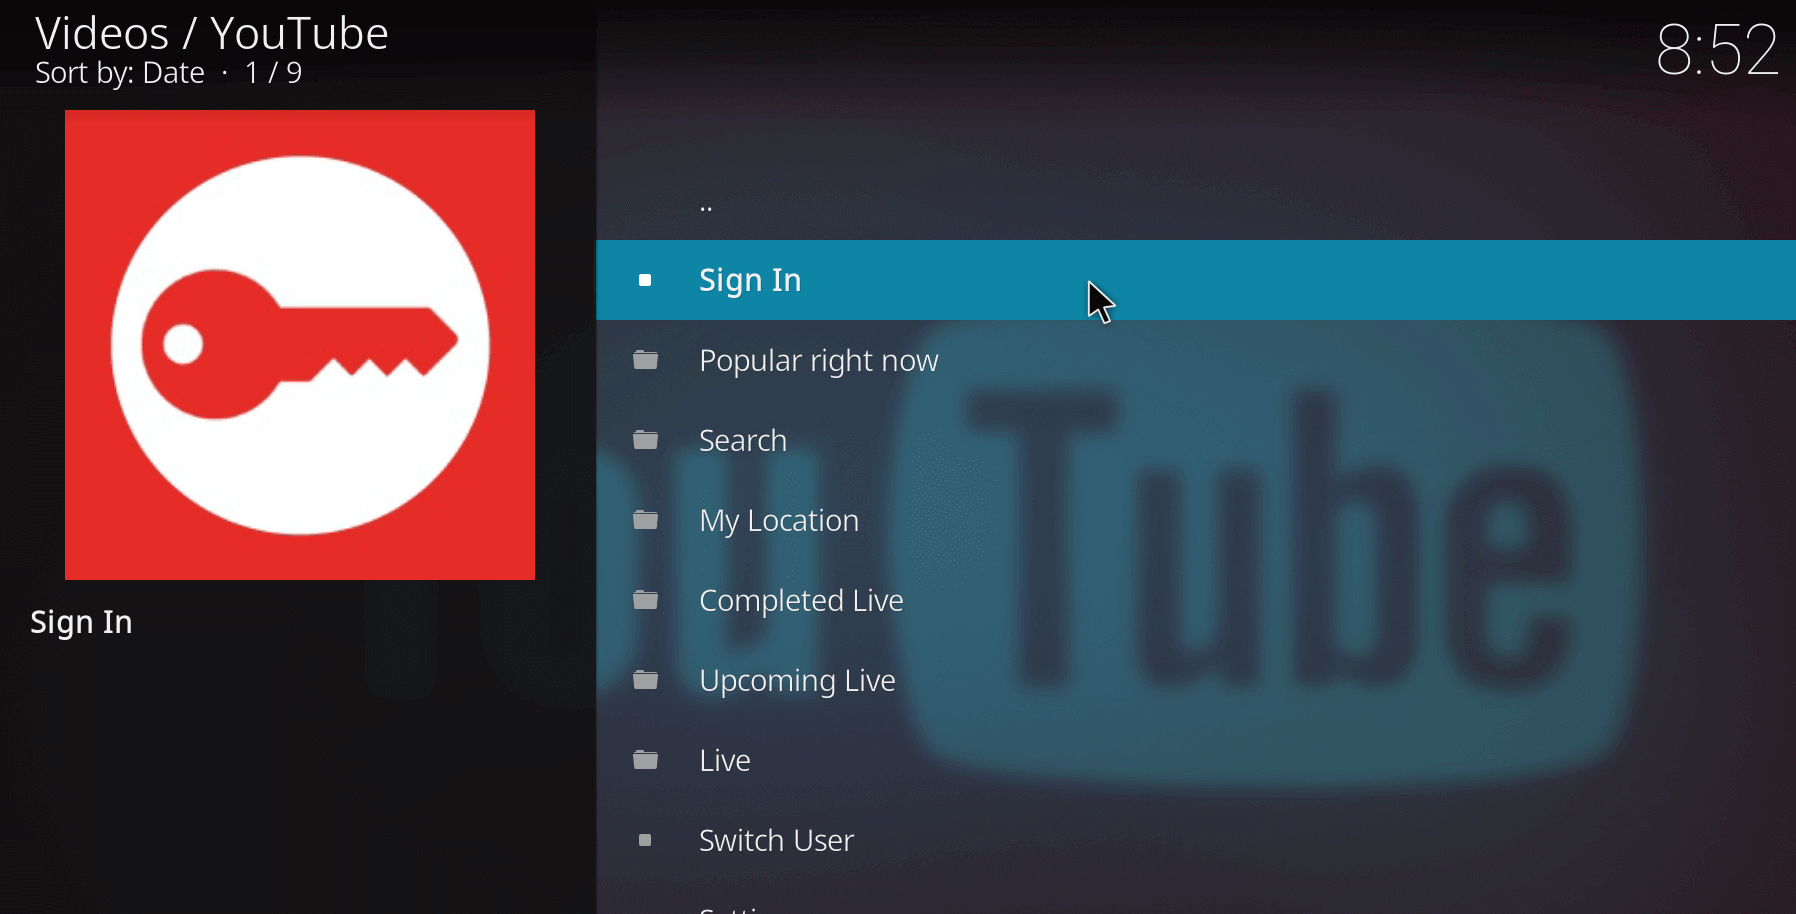
Next, select Sign In.
If your API key, client ID, and client secret are entered correctly, it will tell you to visit a URL and enter a code.
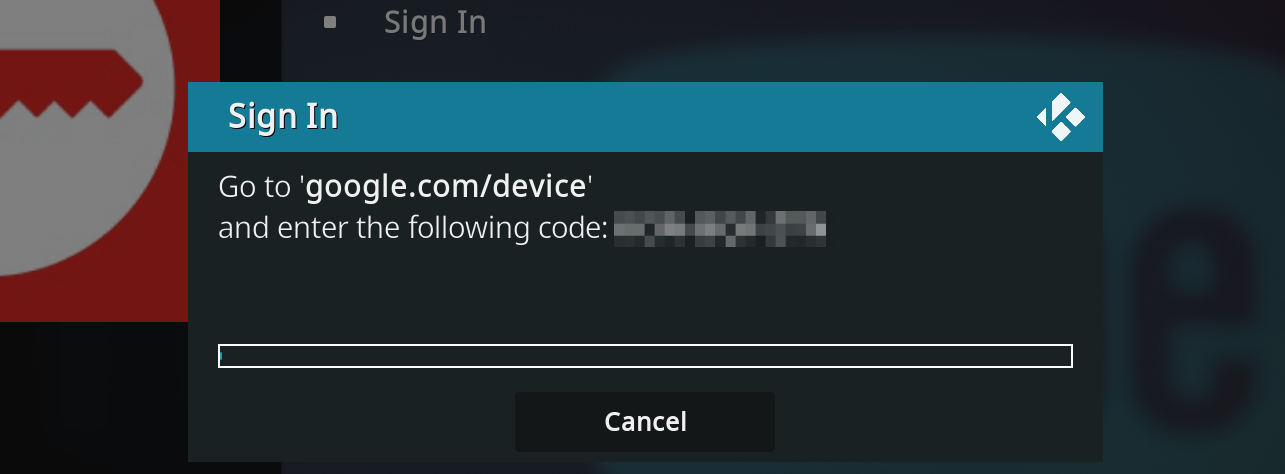
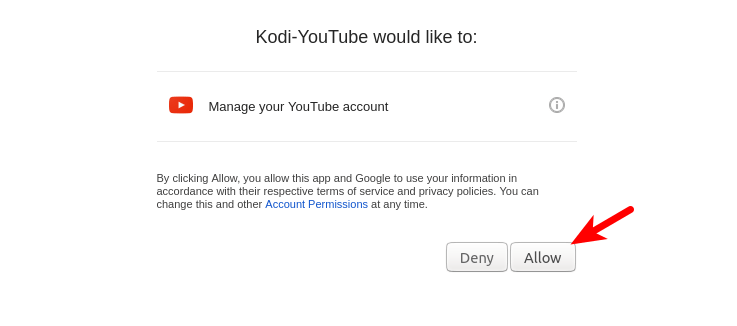
Once you entered the code, click the Allow button so Kodi will be able to access your YouTube account.
Now you should be able to watch YouTube videos on your Kodi media server. (Sometimes, you may need to enter two verification codes in order to sign in to your YouTube account.)
Troubleshooting Tips
Unauthorized Access
If you see the following error when trying to authenticate in your Google account,
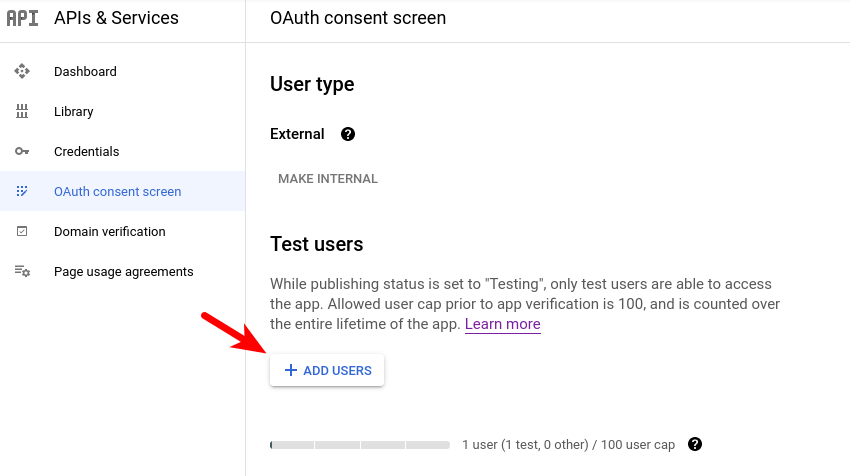
The developer hasn’t given you access to this app. It’s currently being tested and it hasn’t been verified by Google.
then you need to go to the app verification page to add your Google user account (your email address) to the allowed user.
Can’t Play YouTube Videos
If your Kodi can’t play YouTube videos and you see the following error in the Kodi log, it’s probably because you didn’t correctly configure your DNS server, or you need to disable IPv6 in your Raspberry Pi.
ConnectionError: HTTPSConnectionPool(host='www.youtube.com', port=443): Max retries exceeded with url: /feeds/videos.xml?channel_id=UC3BGlwmI-Vk6PWyMt15dKGw (Caused by NewConnectionError(': Failed to establish a new connection: [Errno -3] Temporary failure in name resolution',))
Adding YouTube Playlist to Kodi Favorites
You can create a playlist in your YouTube account and add it to the Kodi Favorites, so you can easily watch the videos. Note that playlists saved from other YouTube users can’t be displayed in Kodi, you must create the playlist yourself.
You can also add a subscribed YouTube channel to the Kodi favorites.
Wrapping Up
I hope this tutorial helped you install the YouTube add-on in Kodi. As always, if you found this post useful, then subscribe to our free newsletter to get more tips and tricks. Take care 🙂
Rate this tutorial
[Total: 0 Average: 0]
