
In this article, I will show you aws-cli commands to manage Cloudwatch from the terminal. This guide will help you get started with using aws-cli for creating, managing Cloudwatch alarms. We will see commands to create, manage, delete an EC2 CPU monitoring alarm. It is assumed that you are already familiar with AWS EC2, Cloudwatch services.
Following are the aws-cli commands for Cloudwatch that we will see in this article.
- list-metrics: This command lists the specified metrics.
- put-metric-alarm: You can create and update an alarm using this command.
- describe-alarms: Get details of the specified alarm.
- set-alarm-state: Change the state of the alarm temporarily for testing purposes using this command.
- describe-alarm-history: Check the history of the specified alarm using this command.
- delete-alarms: use this command to delete a particular alarm.
Visit the official documentation here to know what all commands are available for managing Cloudwatch.
Pre-requisites
- AWS Account (Create if you don’t have one).
- Basic understanding of EC2 instance(Click here to learn to create an EC2 instance).
- Basic understanding of Cloudwatch (Click here to learn to create Alarms for an EC2 instance from the AWS Console).
- AWS IAM user with AdministratorAccess policy attached to it and its access and secret keys (Click here to learn to create an IAM User).
- AWS CLI installed on your local machine.
- SNS Topic(Click here to learn to create an SNS topic using Cloudformation).
What will we do?
- Check aws cli and export the AWS access & secret key on your local machine.
- Manage Cloudwatch using aws-cli
Check aws cli and export the AWS access & secret key on your local machine.
Before you proceed, make sure you have aws-cli installed on your local machine.
aws --verson #aws-cli/2.0.0 Python/3.8.2 Darwin/19.2.0 botocore/2.0.0dev7
Get your AWS IAM user access and secret keys and export them to your terminal.
export AWS_ACCESS_KEY_ID=
export AWS_SECRET_ACCESS_KEY=
Check the identity of the keys you exported.
aws sts get-caller-identity
You will see my keys in the above screenshot, you won’t be able to use them as they are no more active. Also, make a note that you never share your keys with anyone.
Manage Cloudwatch using aws-cli
Creating an alarm is useless if notifications do not reach us when the alarm is triggered. To send alerts we need an SNS Topic with a subscription to it. I already have a few SNS topics with an email subscription to one of them. I shall use it for demo purposes. If you do not have an SNS topic, create it before proceeding.
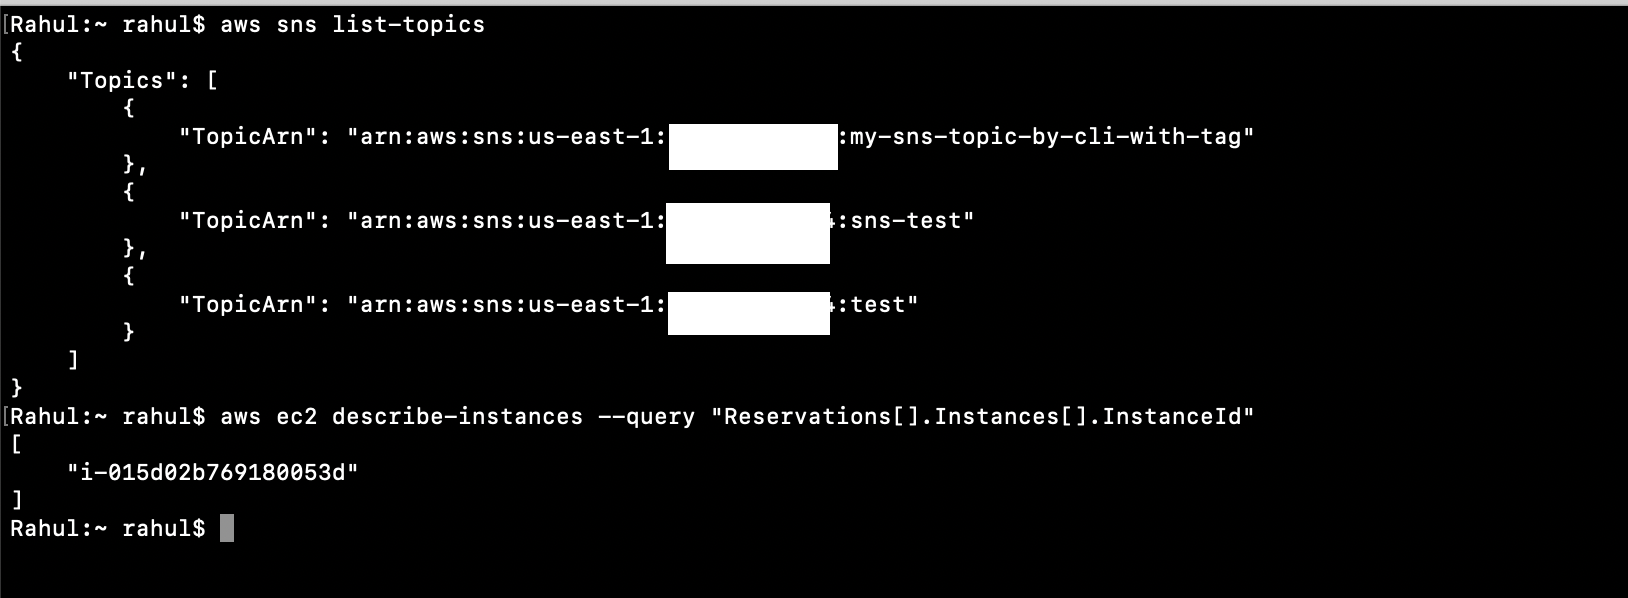
Get a list of existing SNS Topics in your account.
aws sns list-topics
Get IDs of the instances to create an alarm for anyone of them.
aws ec2 describe-instances --query "Reservations[].Instances[].InstanceId"
Keep the instance ID and SNS ARN. Check metrics available for EC2 instances.
aws cloudwatch list-metrics --namespace "AWS/EC2"
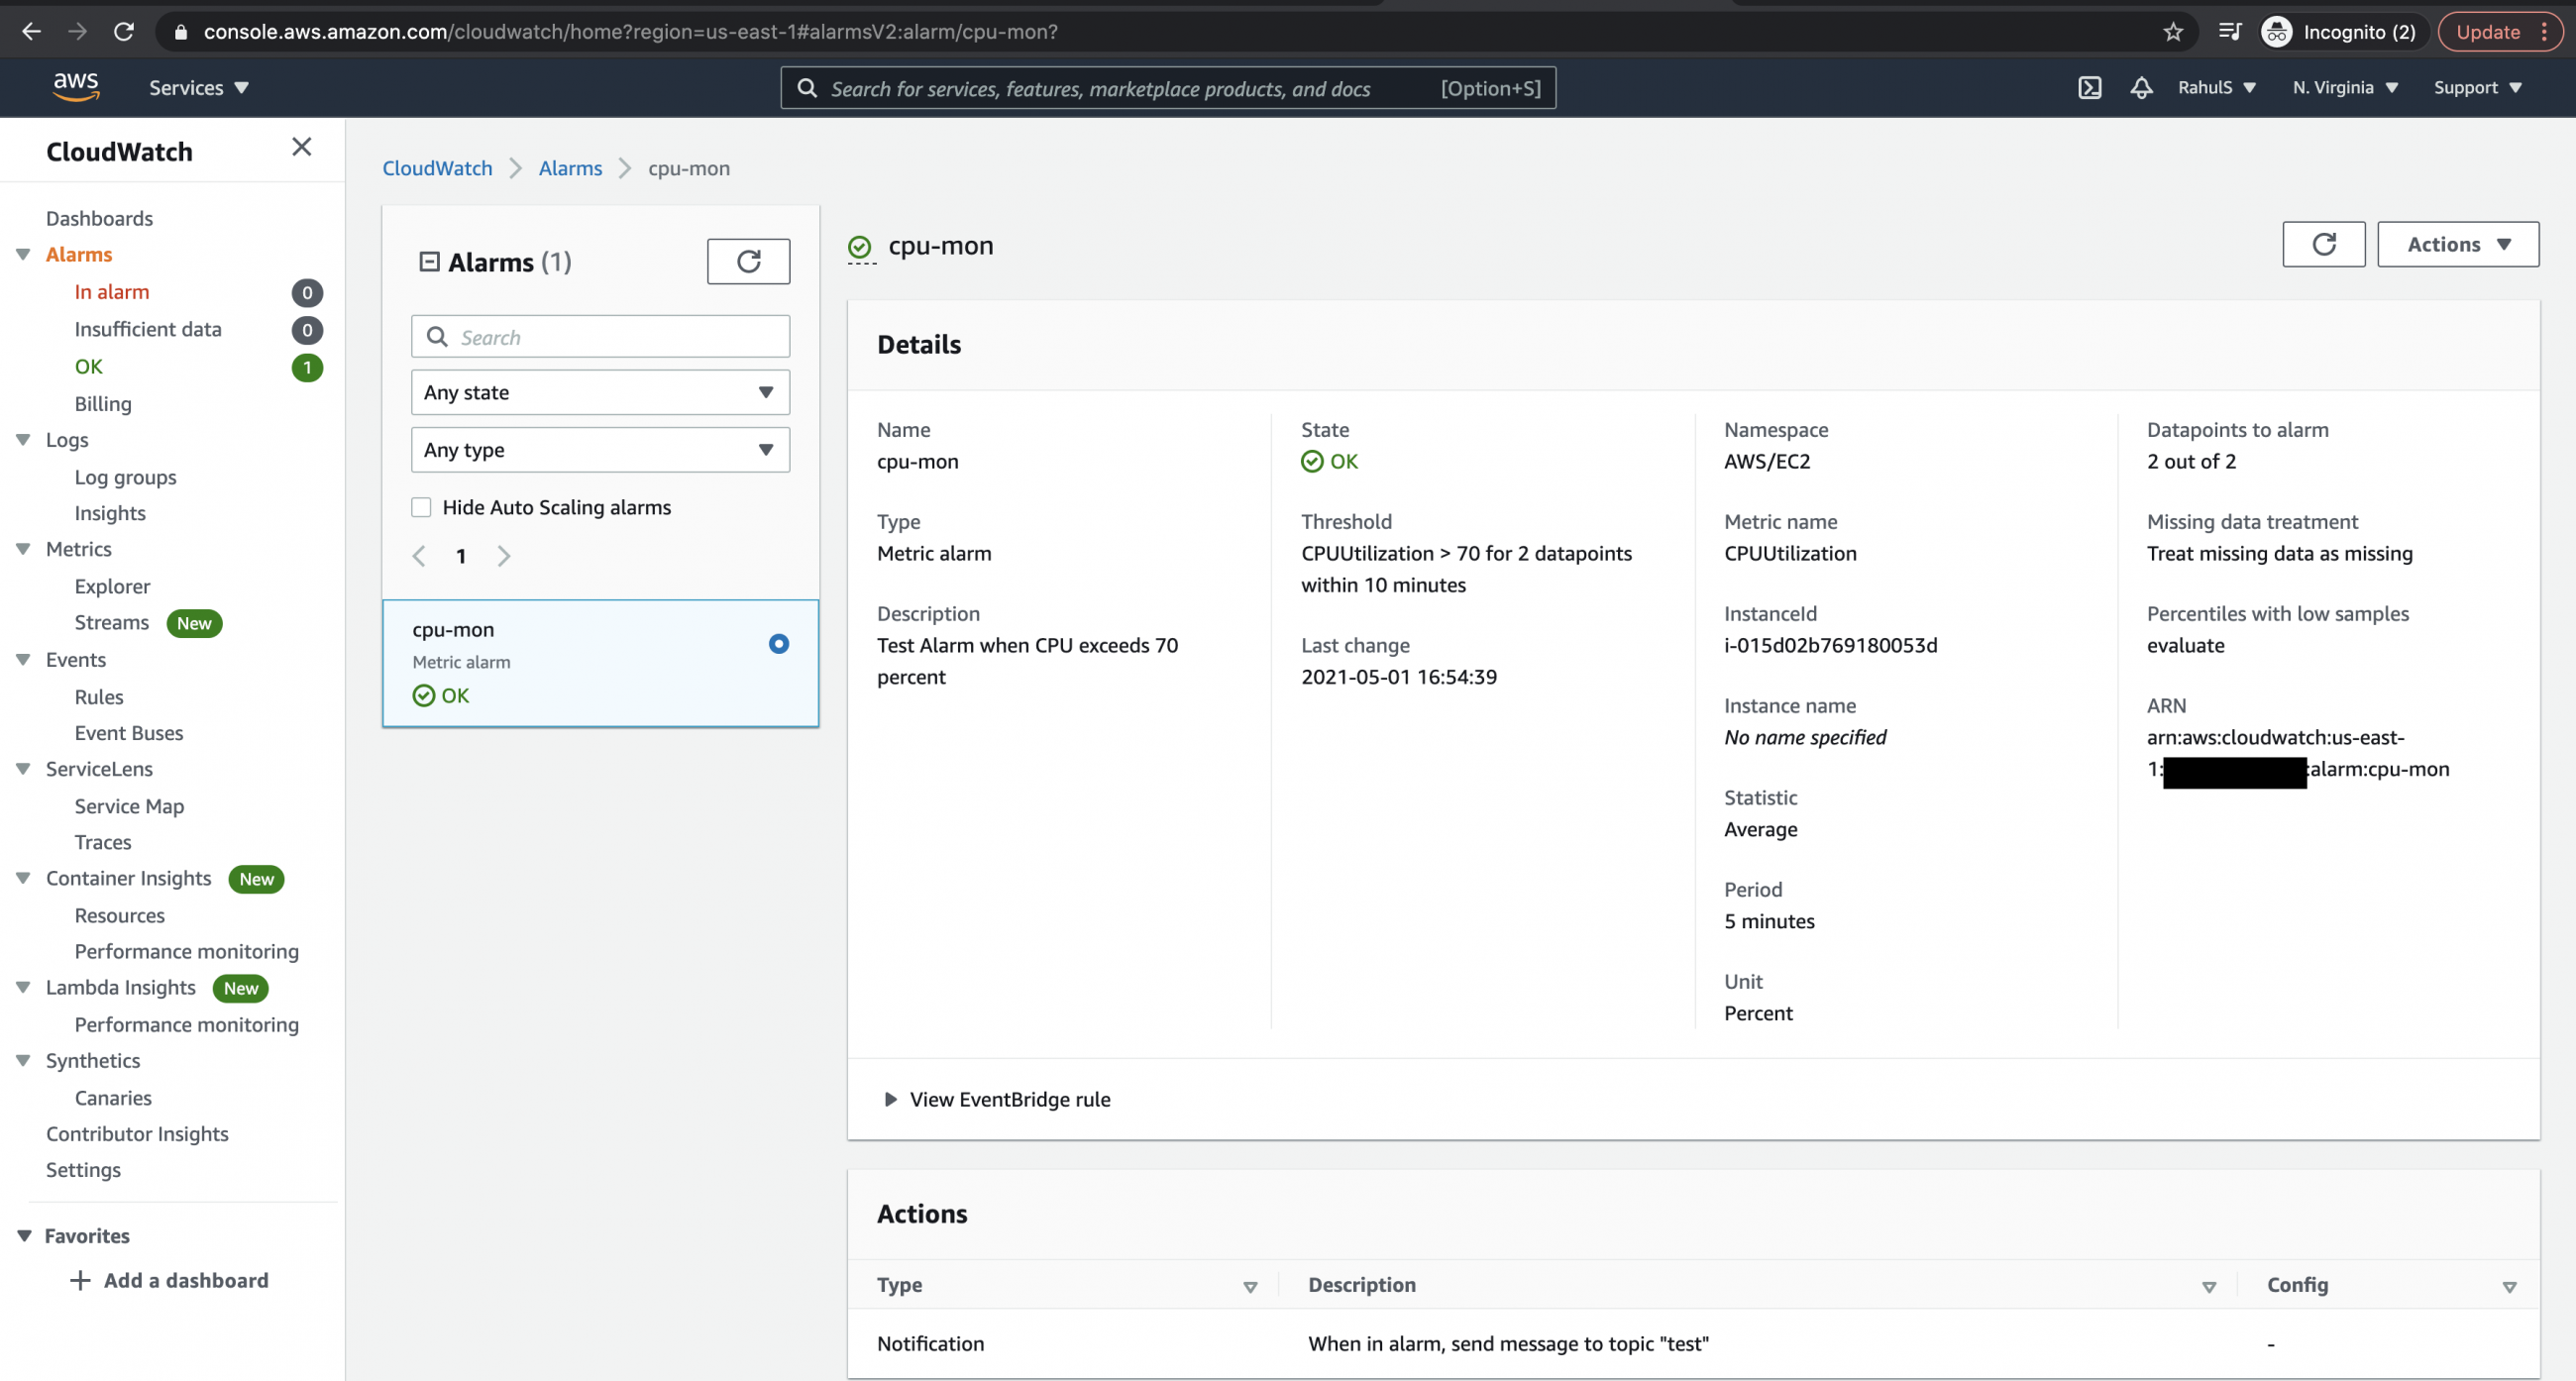
Now, let’s create an alarm named “cpu-mon” that will be triggered when CPU utilization crosses “70 percent” for “300 seconds” for the specified Instance. When the alarm is triggered, a notification will be sent to the specified SNS.
aws cloudwatch put-metric-alarm --alarm-name cpu-mon --alarm-description "Test Alarm when CPU exceeds 70 percent" --metric-name CPUUtilization --namespace AWS/EC2 --statistic Average --period 300 --threshold 70 --comparison-operator GreaterThanThreshold --dimensions "Name=InstanceId,Value=" --evaluation-periods 2 --alarm-actions --unit Percent
Describe the alarm we just created and see its details.
aws cloudwatch describe-alarms --alarm-names cpu-mon
You can change the state of the alarm. To trigger it for test purposes, let’s change the state to “ALARM”. This will change the alarm state to “ALARM” and a notification will be sent to the SNS Topic.
aws cloudwatch set-alarm-state --alarm-name "cpu-mon" --state-value ALARM --state-reason "testing purposes"
Check the history of alarm states.
aws cloudwatch describe-alarm-history --alarm-name "cpu-mon" --history-item-type StateUpdate
When you no longer need that alarm you created, it can be deleted by the following command.
aws cloudwatch delete-alarms --alarm-names cpu-mon
Verify if the alarm has been deleted.
aws cloudwatch describe-alarms
Conclusion
In this article, we saw the commands to create and manage alarms from the terminal using aws-cli. We created an alarm for EC2 Instance to monitor CPU utilization. We saw how to change the alarm state manually to test the alarm we created. We also saw the command to delete the alarm we created. This guide can help you get started with AWS Cloudwatch, you can try different commands and options available to manage Cloudwatch using aws-cli.


