Pritunl is an open-source, simple and easy-to-use VPN server that allows you to setup virtualize your private networks across data centers within a minute. It provides a simple and user-friendly web interface and has an ability to create a wide range of cloud VPN networks. It provides an official client package and supports all OpenVPN clients for most devices and platforms.
In this tutorial, we will explain how to set up a Pritunl VPN Server and Client on Ubuntu 20.04 server.
Prerequisites
- A system running Ubuntu 20.04 server.
- A system running Ubuntu 20.04 Desktop.
- A root password is configured the server.
Getting Started
Before starting, it is recommended to update your system packages to the latest version. You can update all packages by running the following command:
apt-get update -yOnce all the packages are updated, install other required dependencies by running the following command:
apt-get install curl gnupg2 wget unzip -yOnce all the packages are installed, you can proceed to the next step.
Install Pritunl Server
By default, Pritunl is not available in the Ubuntu default repository. So you will need to add GPG key and repository to your system.
First, add the GPG key with the following command:
apt-key adv --keyserver hkp://keyserver.ubuntu.com --recv E162F504A20CDF15827F718D4B7C549A058F8B6B
apt-key adv --keyserver hkp://keyserver.ubuntu.com --recv 7568D9BB55FF9E5287D586017AE645C0CF8E292A
Next, add the Pritunl repository with the following command:
echo "deb http://repo.pritunl.com/stable/apt focal main" | tee /etc/apt/sources.list.d/pritunl.listOnce the repository is added, update the repository cache and install the Pritunl server with the following command:
apt-get update -y
apt-get install pritunl -y
Once the installation is finished, start the Pritunl service and enable it to start at system reboot with the following command:
systemctl start pritunl
systemctl enable pritunl
You can now verify the status of the Pritunl service with the following command:
systemctl status pritunlYou should get the following output:
? pritunl.service - Pritunl Daemon
     Loaded: loaded (/etc/systemd/system/pritunl.service; disabled; vendor preset: enabled)
     Active: active (running) since Sat 2021-01-09 11:51:03 UTC; 4s ago
   Main PID: 11487 (pritunl)
      Tasks: 2 (limit: 2353)
     Memory: 181.2M
     CGroup: /system.slice/pritunl.service
             ??11487 /usr/lib/pritunl/bin/python /usr/lib/pritunl/bin/pritunl start

Jan 09 11:51:03 ubuntu2004 systemd[1]: Started Pritunl Daemon.
Jan 09 11:51:04 ubuntu2004 pritunl[11487]: /usr/lib/pritunl/lib/python2.7/site-packages/OpenSSL/crypto.py:12: CryptographyDeprecationWarning: >
Jan 09 11:51:04 ubuntu2004 pritunl[11487]:   from cryptography import x509
You can also verify the Pritunl listening port with the following command:
ss -antpl | grep pritunlYou should get the following output:
LISTEN   0        4096                          *:443                  *:*       users:(("pritunl-web",pid=11523,fd=4))
LISTEN   0        5                         [::1]:9755              [::]:*       users:(("pritunl",pid=11487,fd=5))
Once you are finished, you can proceed to the next step.
Install MongoDB
Pritunl built on MongoDB so you will need to install the MongoDB server in your system. By default, MongoDB is not available in the Ubuntu 20.04 default repository so you will need to add the MongoDB repository to your system.
First,download and add the MongoDB key with the following command:
curl -fsSL https://www.mongodb.org/static/pgp/server-4.4.asc | apt-key add -Next, add the MongoDB repository with the following command:
echo "deb [ arch=amd64,arm64 ] https://repo.mongodb.org/apt/ubuntu focal/mongodb-org/4.4 multiverse" | tee /etc/apt/sources.list.d/mongodb-org-4.4.listOnce the repository is added, update the repository and install the MongoDB server with the following command:
apt-get update -y
apt-get install mongodb-server -y
Once the installation is finished, start the MongoDB service and enable it to start at system reboot with the following command:
systemctl start mongodb
systemctl enable mongodb
You can verify the status of the MongoDB service with the following command:
systemctl status mongodbYou should get the following output:
? mongodb.service - An object/document-oriented database
     Loaded: loaded (/lib/systemd/system/mongodb.service; enabled; vendor preset: enabled)
     Active: active (running) since Sat 2021-01-09 11:52:12 UTC; 11s ago
       Docs: man:mongod(1)
   Main PID: 11782 (mongod)
      Tasks: 23 (limit: 2353)
     Memory: 41.9M
     CGroup: /system.slice/mongodb.service
             ??11782 /usr/bin/mongod --unixSocketPrefix=/run/mongodb --config /etc/mongodb.conf

Jan 09 11:52:12 ubuntu2004 systemd[1]: Started An object/document-oriented database.
At this point, MongoDB is started and listening on port 27017. You can verify it with the following command:
ss -antpl | grep 27017You should get the following output:
LISTEN 0 4096 127.0.0.1:27017 0.0.0.0:* users:(("mongod",pid=11782,fd=11))
Once you are finished, you can proceed to the next step.
Access Pritunl Web Interface
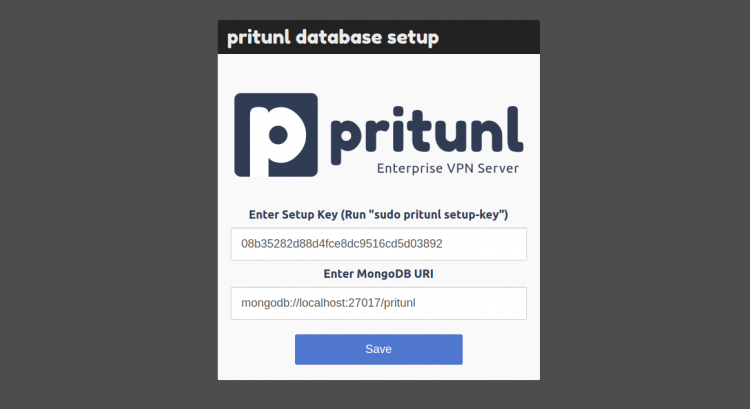
Now, open your web browser and access the Pritunl web installation wizard using the URL https://your-server-ip. You should see the following screen:
Now, open your terminal and run the following command to generate a key:
pritunl setup-keyYou should get the following output:
/usr/lib/pritunl/lib/python2.7/site-packages/OpenSSL/crypto.py:12: CryptographyDeprecationWarning: Python 2 is no longer supported by the Python core team. Support for it is now deprecated in cryptography, and will be removed in the next release.
  from cryptography import x509
08b35282d88d4fce8dc9516cd5d03892
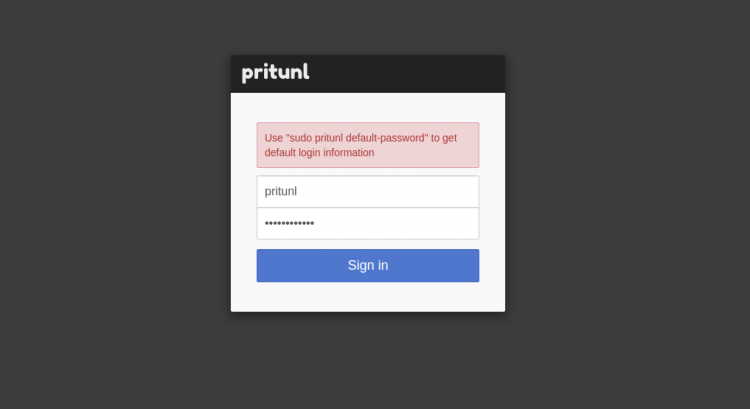
Copy the key from the above output then go to the web interface, paste the key and click on the Save button. You will be redirected to the Pritunl Sign in page:
Now, open your terminal and run the following command to generate a password:
pritunl default-passwordYou should get the following output:
  from cryptography import x509
[undefined][2021-01-09 13:09:17,430][INFO] Getting default administrator password
Administrator default password:
  username: "pritunl"
  password: "27Z4n6yGFZnW"
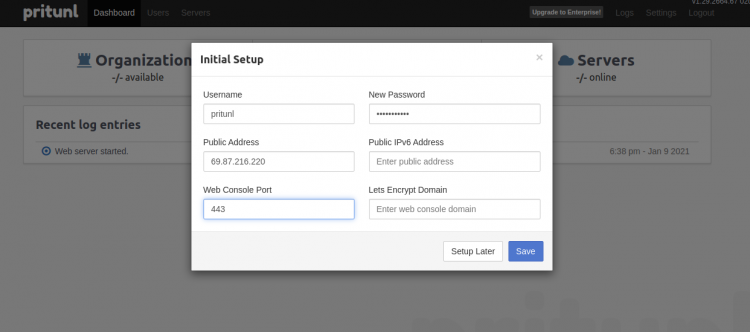
Copy the username and password from the above output then go to the web interface, type your username, password and click on the Sign in button. You will be redirected to the initial setup screen:
Change your password or user if you wish then click on the Save button. You should see the following page.
Now, click on the Add Organization button. You should see the following page:
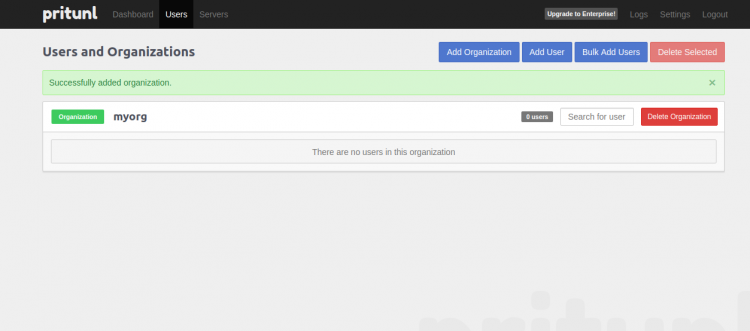
Provide your Organization name and click on the Add button. You should see the following page:
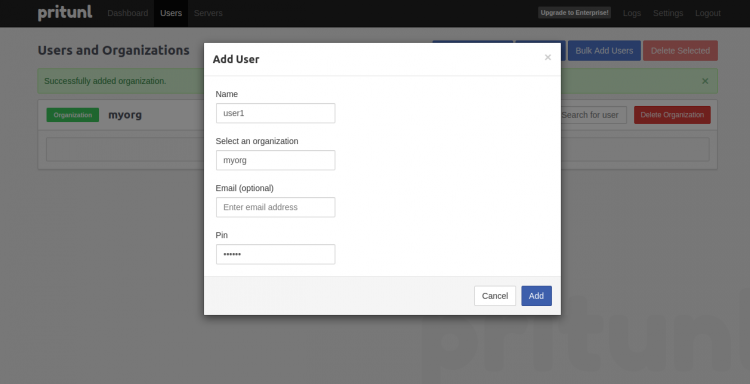
Click on the Add User button. You should see the following page:
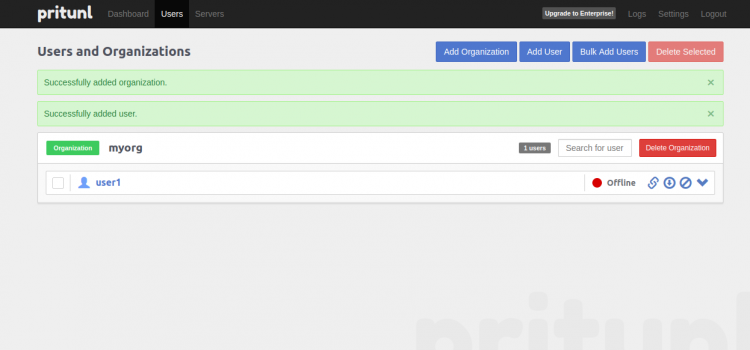
Provide your username, pin and click on the Add button. You should see the following page:
Now, click on the Servers tab. You should see the following page:
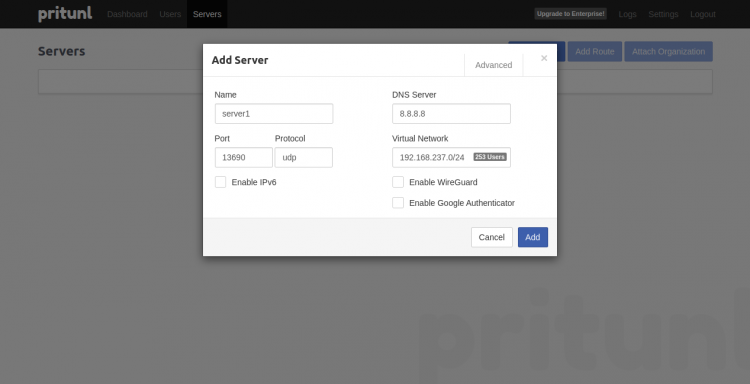
Click on the Add Server button. You should see the following page:
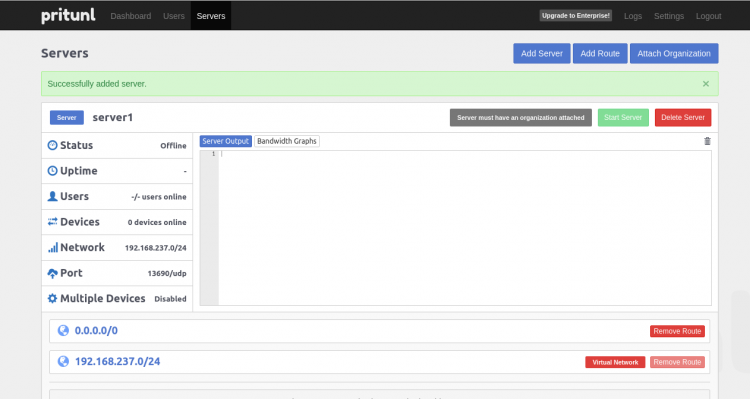
Provide your server name, port, DNS IP, Virtual network and click on the Add button. You should see the following page:
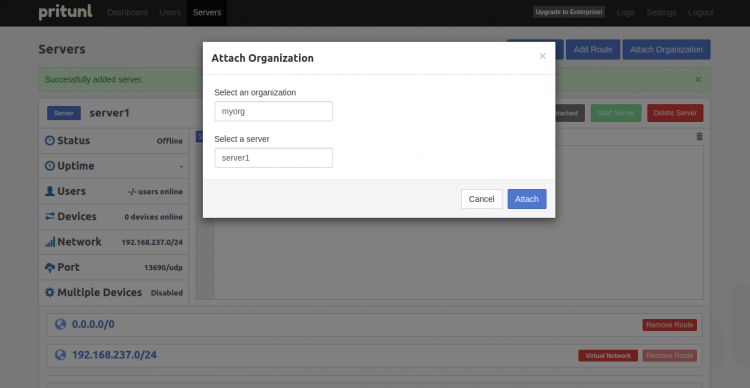
Click on the Attach Organization button to attach your Organization to the server. You should see the following page:
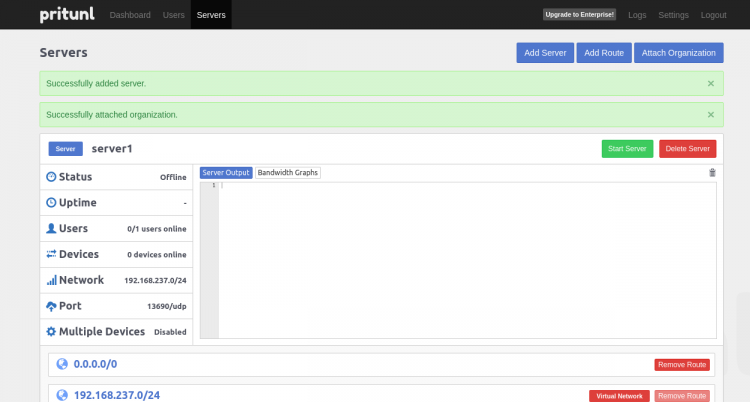
Click on the Attach button. You should see the following page:
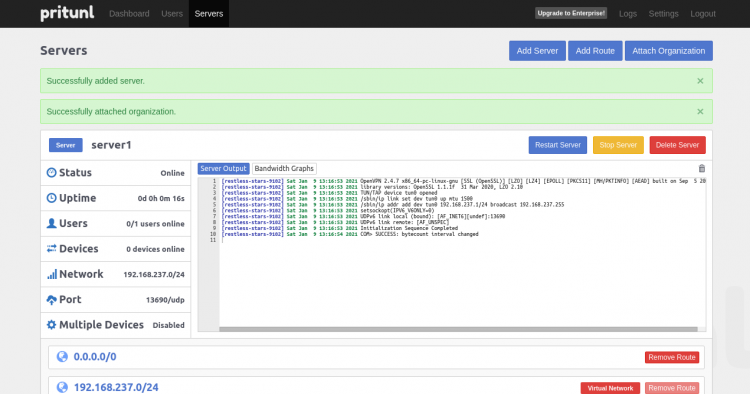
Click on the Start Server button to start the VPN server. You should see the following page:
Install Pritunl Client
At this point, the Pritunl server is installed and configured. Now, you will need to install and configure the Pritunl client of the client machine.
On the client machine, add the Pritunl key with the following command:
apt-key adv --keyserver hkp://keyserver.ubuntu.com --recv E162F504A20CDF15827F718D4B7C549A058F8B6B
apt-key adv --keyserver hkp://keyserver.ubuntu.com --recv 7568D9BB55FF9E5287D586017AE645C0CF8E292A
Once the key is added, add the Pritunl repository with the following command:
echo "deb http://repo.pritunl.com/stable/apt focal main" | tee /etc/apt/sources.list.d/pritunl.listOnce the repository is added, update the repository and install the Pritunl client package with the following command:
apt-get update -y
apt-get install pritunl-client-electron -y
Once the installation is completed, you can proceed to the next step.
Connect Pritunl Client to the Pritunl Server
Next, you will need to open your Pritunl client application and connect to the VPN server.
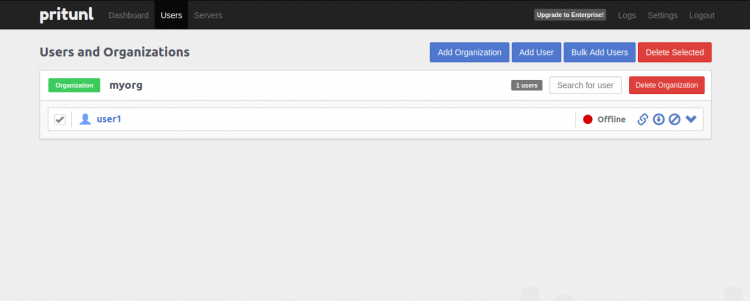
Before starting, go to the Pritunl web interface, click on the Users tab and download the user profile on your client machine:
Click on the download button to download the user profile to the client machine.
Once the download is completed, extract the downloaded tar file with the following command:
tar -xvf user1.tarYou should see the extracted file in the following output:
myorg_user1_server1.ovpn
Now, access the Pritunl client application from the Application menu as shown below:
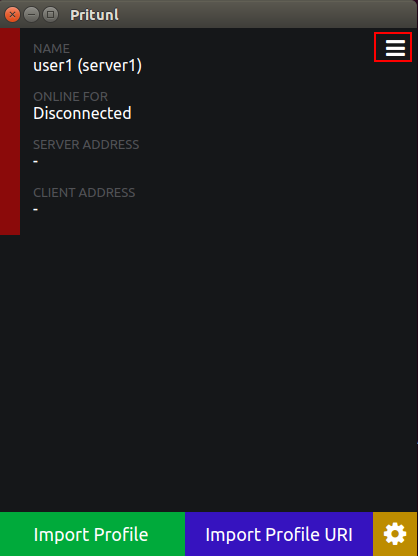
Click on the Import Profile button to import the myorg_user1_server1.ovpn file from your system. You should see the following screen:
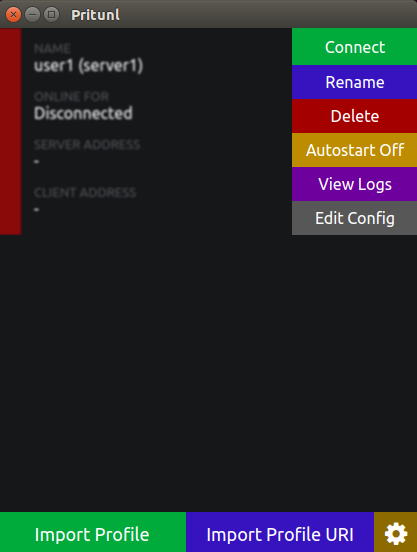
Now, click on the red square button. You should see the following screen:
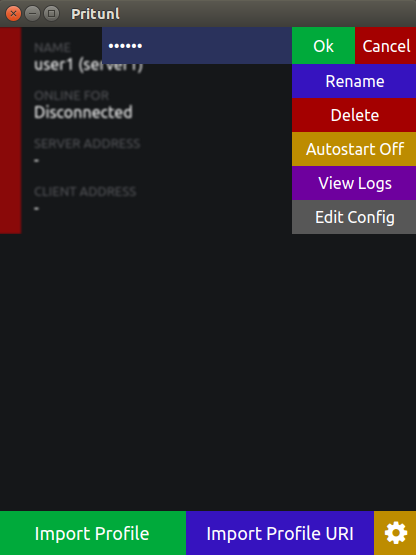
Now, click on the Connect button to connect to the VPN server. You will be asked to provide your user pin as shown below:
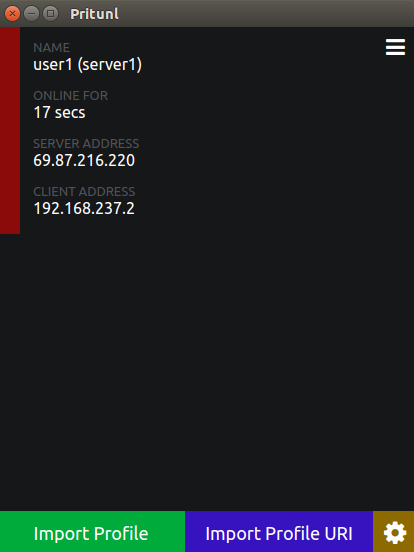
Provide your user pin and click on the Ok button. Once connected, you should see the following screen:
You can also verify the VPN connection with the following command:
ifconfig tun0You should see the following output:
tun0      Link encap:UNSPEC  HWaddr 00-00-00-00-00-00-00-00-00-00-00-00-00-00-00-00
          inet addr:192.168.237.2  P-t-P:192.168.237.2  Mask:255.255.255.0
          UP POINTOPOINT RUNNING NOARP MULTICAST  MTU:1500  Metric:1
          RX packets:3752 errors:0 dropped:0 overruns:0 frame:0
          TX packets:3847 errors:0 dropped:0 overruns:0 carrier:0
          collisions:0 txqueuelen:100
          RX bytes:2399700 (2.3 MB)  TX bytes:807236 (807.2 KB)
Now, all traffic is routed through your VPN server.
To verify it, open your web browser and access the page https://whatismyipaddress.com/. You should get your VPN server IP in the following page:
Conclusion
Congratulations! you have successfully installed the Pritunl server and client on Ubuntu 20.04. You can now surf the internet anonymously by hiding your identity. Feel free to ask me if you have any questions.

