The convenience of having one place to access your servers is something most administrators can consider having in their main course meal every single day. In order to satiate this need, this guide goes into the details of setting up one such platform. By the end of this guide, we should have setup a working Apache Guacamole Server that can be leveraged to provide one place to access all of your servers. Whether they are Windows or Linux, Apache Guacamole is here for you.
Before getting into the crux of this tool, wouldn’t it be good if we knew what it is all bout? Right, let us go ahead and demystify this tool. Apache Guacamole is a clientless remote desktop gateway that supports standard protocols like VNC, RDP, and SSH. Thanks to HTML5, once Guacamole is installed on a server, all you need to access your desktops is a web browser.
Guacamole is separated into two pieces: guacamole-server, which provides the guacd proxy and related libraries, and guacamole-client, which provides the client to be served by your servlet container. In most cases, the only source you will need to build is guacamole-server, and downloading the latest guacamole.war from the project website will be sufficient to provide the client.
For CentOS refer to: Install and Use Guacamole Remote Desktop on CentOS 8
Step 1: Server Preparation
Apache Guacamole has many dependencies and we are going to deal with most of them in this step. Let us get ahead and install each and every of the dependencies that our Guacamole server will require to breath and live. Get them all installed as follows:
sudo apt update
sudo apt install -y gcc vim curl wget g   libcairo2-dev libjpeg-turbo8-dev libpng-dev
libtool-bin libossp-uuid-dev libavcodec-dev libavutil-dev libswscale-dev build-essential
libpango1.0-dev libssh2-1-dev libvncserver-dev libtelnet-dev
libssl-dev libvorbis-dev libwebp-dev
Install FreeRDP2
We are going to install FreeRDP2 version hosted in the remmina PPA as follows:
sudo add-apt-repository ppa:remmina-ppa-team/freerdp-daily
sudo apt update
sudo apt install freerdp2-dev freerdp2-x11 -y
Once the pre-requisites are dealt with, we now have the opportunity of having the main course meal which involves a couple of more steps covered next.
Step 2: Install Apache Tomcat
In this step, we are going to install Apache Tomcat Java servlet container which will run Guacamole Java war file and thus serves Guacamole java client. Since it is in Java, we will have to get Java installed first.
sudo apt install openjdk-11-jdkOnce it is installed, you can check the version installed
$ java --version

openjdk 11.0.9.1 2020-11-04
OpenJDK Runtime Environment (build 11.0.9.1 1-Ubuntu-0ubuntu1.20.04)
OpenJDK 64-Bit Server VM (build 11.0.9.1 1-Ubuntu-0ubuntu1.20.04, mixed mode, sharing)
Create Tomcat system user
It is recommended that a user in the system apart from root is used to run applications. For tomcat, we are going to create a user who will be used to run tomcat application.
sudo useradd -m -U -d /opt/tomcat -s /bin/false tomcatFetch Apache Tomcat
You can get Apache Tomcat binary distribution from the official Tomcat downloads page. When this guide was being written, the latest stable version was 9.0.41.
wget https://downloads.apache.org/tomcat/tomcat-9/v9.0.41/bin/apache-tomcat-9.0.41.tar.gz -P ~The download will complete and you will proceed to extract the tar file to the /opt/tomcat directory like so:
sudo mkdir /opt/tomcat
sudo tar -xzf apache-tomcat-9.0.41.tar.gz -C /opt/tomcat/
sudo mv /opt/tomcat/apache-tomcat-9.0.41 /opt/tomcat/tomcatapp
Since tomcat user is the one who will be running Apache Tomcat, we will have to grant it the requisite rights to the /opt/tomcat directory. Run the command below to make this happen
sudo chown -R tomcat: /opt/tomcatThen make all of the shell scripts in /opt/tomcat/tomcatapp/bin directory executable
sudo chmod x /opt/tomcat/tomcatapp/bin/*.shNext, we are ready to add Tomcat’s Systemd service so that we can have an easy time starting and stopping it like other services in your server. To do that, we will have to create a new file then populate it with the right configuration as follows
$ sudo vim /etc/systemd/system/tomcat.service

[Unit]
Description=Tomcat 9 servlet container
After=network.target

[Service]
Type=forking

User=tomcat
Group=tomcat

Environment="JAVA_HOME=/usr/lib/jvm/java-11-openjdk-amd64"
Environment="JAVA_OPTS=-Djava.security.egd=file:///dev/urandom -Djava.awt.headless=true"

Environment="CATALINA_BASE=/opt/tomcat/tomcatapp"
Environment="CATALINA_HOME=/opt/tomcat/tomcatapp"
Environment="CATALINA_PID=/opt/tomcat/tomcatapp/temp/tomcat.pid"
Environment="CATALINA_OPTS=-Xms512M -Xmx1024M -server -XX: UseParallelGC"

ExecStart=/opt/tomcat/tomcatapp/bin/startup.sh
ExecStop=/opt/tomcat/tomcatapp/bin/shutdown.sh

[Install]
WantedBy=multi-user.target
Our new systemd file is clean. Save it then reload the daemon so that SystemD daemon will read it.
sudo systemctl daemon-reloadThen start the service
sudo systemctl enable --now tomcatAnd tomcat should be running happily
$ systemctl status tomcat

● tomcat.service - Tomcat 9 servlet container
     Loaded: loaded (/etc/systemd/system/tomcat.service; enabled; vendor preset: enabled)
     Active: active (running) since Fri 2020-12-18 13:36:34 UTC; 2s ago
    Process: 53538 ExecStart=/opt/tomcat/tomcatapp/bin/startup.sh (code=exited, status=0/SUCCESS)
   Main PID: 53545 (java)
      Tasks: 27 (limit: 2204)
     Memory: 137.3M
     CGroup: /system.slice/tomcat.service
             └─53545 /usr/lib/jvm/java-11-openjdk-amd64/bin/java -Djava.util.logging.config.file=/opt/tomcat/to
Tomcat listens on port 8080 by default and as you can guess, we need to allow access to the application remotely by allowing the port on the firewall. This is as simple as a one line command as shown below:
sudo ufw allow 8080/tcpStep 3: Build the Guacamole Server From Source
guacamole-server contains all the native, server-side components required by Guacamole to connect to remote desktops. It provides a common C library, libguac, which all other native components depend on, as well as separate libraries for each supported protocol, and a proxy daemon, guacd, the heart of Guacamole.
Download the Latest Stable Version of guacamole-server
wget http://mirror.cc.columbia.edu/pub/software/apache/guacamole/1.2.0/source/guacamole-server-1.2.0.tar.gz -P ~Extract the source tarball after download
tar xzf ~/guacamole-server-1.2.0.tar.gzChange into the guacamole server source code directory;
cd ~/guacamole-server-1.2.0Then execute the configure script to check if any required dependency is missing and to adapt Guacamole server to your system.
./configure --with-init-dir=/etc/init.dThe command above will lead to a long trickle of outputs. When it ends, you should see the following output whish should have a yes on the following: RDP, SSH, Telnet, and VNC.
guacamole-server version 1.2.0
------------------------------------------------

   Library status:

     freerdp2 ............ yes
     pango ............... yes
     libavcodec .......... yes
     libavformat.......... no
     libavutil ........... yes
     libssh2 ............. yes
     libssl .............. yes
     libswscale .......... yes
     libtelnet ........... yes
     libVNCServer ........ yes
     libvorbis ........... yes
     libpulse ............ no
     libwebsockets ....... no
     libwebp ............. yes
     wsock32 ............. no

   Protocol support:

      Kubernetes .... no
      RDP ........... yes
      SSH ........... yes
      Telnet ........ yes
      VNC ........... yes

   Services / tools:

      guacd ...... yes
      guacenc .... no
      guaclog .... yes

   FreeRDP plugins: /usr/lib/x86_64-linux-gnu/freerdp2
   Init scripts: /etc/init.d
   Systemd units: no

Type "make" to compile guacamole-server.
After that, simply run the make command as advised on the last message
makeGive it some time while it does its thing. Once it finishes, install guacamole server as follows
sudo make installTo finish it all, run the ldconfig command to create the necessary links and cache to the most recent shared libraries found in the guacamole server directory.
sudo ldconfigRefresh systemd for it to find the guacd (Guacamole proxy daemon) service installed in /etc/init.d/ directory.
sudo systemctl daemon-reloadOnce reloaded, start and enable the guacd service.
sudo systemctl start guacd
sudo systemctl enable guacd
And to have that mood put on turbo lift, check its status.
$ systemctl status guacd

● guacd.service - LSB: Guacamole proxy daemon
     Loaded: loaded (/etc/init.d/guacd; generated)
     Active: active (running) since Fri 2020-12-18 14:03:06 UTC; 8s ago
       Docs: man:systemd-sysv-generator(8)
    Process: 76312 ExecStart=/etc/init.d/guacd start (code=exited, status=0/SUCCESS)
      Tasks: 1 (limit: 2204)
     Memory: 10.1M
     CGroup: /system.slice/guacd.service
             └─76324 /usr/local/sbin/guacd -p /var/run/guacd.pid
Step 4: Install the Guacamole Web Application
There are two critical files involved in the deployment of Guacamole: guacamole.war, which is the file containing the web application, and guacamole.properties, the main configuration file for Guacamole. The recommend way to set up Guacamole involves placing these files in standard locations, and then creating symbolic links to them so that Tomcat can find them.
guacamole-client contains all Java and Maven components of Guacamole (guacamole, guacamole-common, guacamole-ext, and guacamole-common-js). These components ultimately make up the web application that will serve the HTML5 Guacamole client to users that connect to your server. This web application will connect to guacd, part of guacamole-server, on behalf of connected users in order to serve them any remote desktop they are authorized to access.
Install Guacamole Client on Ubuntu 20.04
The Guacamole client is available as a binary. To install it, just pull it from the Guacamole binaries downloads page as shown below, copy it to /etc/guacamole/ directory and rename it at the same time.
sudo mkdir /etc/guacamole
wget https://downloads.apache.org/guacamole/1.2.0/binary/guacamole-1.2.0.war -P ~
sudo mv ~/guacamole-1.2.0.war /etc/guacamole/guacamole.war
To install the Guacamole client binary, create a symbolic link of the guacamole client to Tomcat webapps directory as shown below;
sudo ln -s /etc/guacamole/guacamole.war /opt/tomcat/tomcatapp/webappsStep 5: Configure Guacamole Server
After the installation of the Guacamole server daemon, you need define how to Guacamole client will connect to the Guacamole server (guacd) under the /etc/guacamole/guacamole.properties configuration file. Within this configuration, you need to simply define Guacamole server hostname, port, user mapping configuration file, authentication provider.
GUACAMOLE_HOME is the name given to Guacamole’s configuration directory, which is located at /etc/guacamole by default. All configuration files, extensions, etc. reside within this directory.
Create GUACAMOLE_HOME environment variable
echo "GUACAMOLE_HOME=/etc/guacamole" | sudo tee -a /etc/default/tomcatCreate /etc/guacamole/guacamole.properties config file and populate is as shown below:
$ sudo vim /etc/guacamole/guacamole.properties
guacd-hostname: localhost
guacd-port:    4822
user-mapping:    /etc/guacamole/user-mapping.xml
auth-provider:    net.sourceforge.guacamole.net.basic.BasicFileAuthenticationProvider
After the configuration is as pretty as above, save it and link the Guacamole configurations directory to Tomcat servlet directory as illustrated below.
sudo ln -s /etc/guacamole /opt/tomcat/tomcatapp/.guacamoleStep 6: Setup Guacamole Authentication Method
Guacamole’s default authentication method reads all users and connections from a single file called user-mapping.xml. In this file, you need to define the users allowed to access Guacamole web UI, the servers to connect to and the method of connection.
Generate the MD5 hash of passwords for a user you are going to use to log into Guacamole web user interface. Replace you password accordingly.
$ echo -n StrongPassword | openssl md5
(stdin)= 0f6e4a1df0cf5ee97c2066953bed21b2
When your password is ready, create the user-mapping file with sample contents illustrated below. You can place any hostname, usernames and hosts as per your environment.
$ sudo vim /etc/guacamole/user-mapping.xml


            ssh
            172.25.169.26
            22


            rdp
            10.10.10.5
            3389
            tech
            true
We are proceeding really well. Once everything is done, restart both Tomcat and guacd to realize the changes made.
sudo systemctl restart tomcat guacdIn case you have a firewall running and you haven’t allowed the ports yet, then this is the chance to do so as quickly as below:
sudo ufw allow 4822/tcpStep 7: Getting Guacamole Web Interface
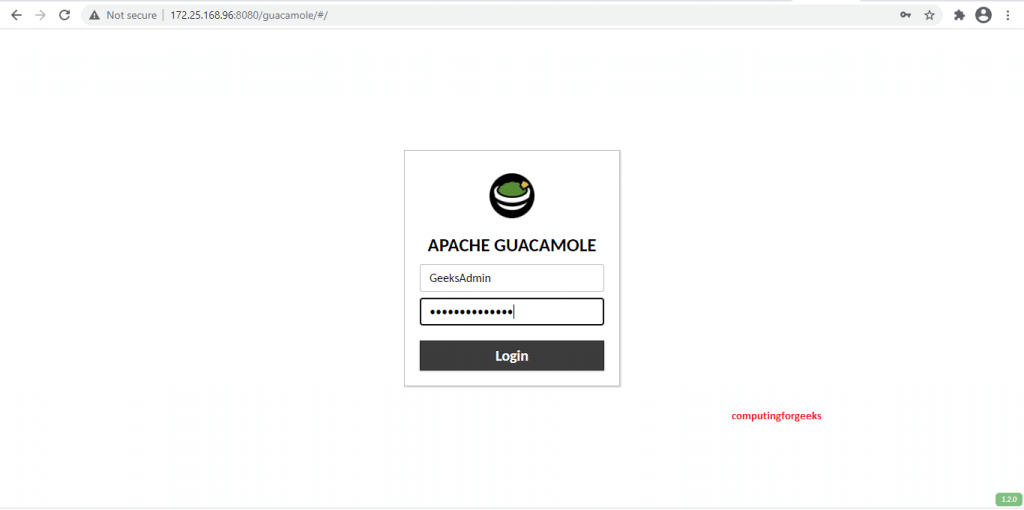
Thus far, we have setup everything well and we should therefore be ready to access the application we have been toiling to bring up. To access Guacamole’s web interface, simply point your browser to http://ip-or-domain-name:8080/guacamole and you should be greeted with a login screen as shown below:

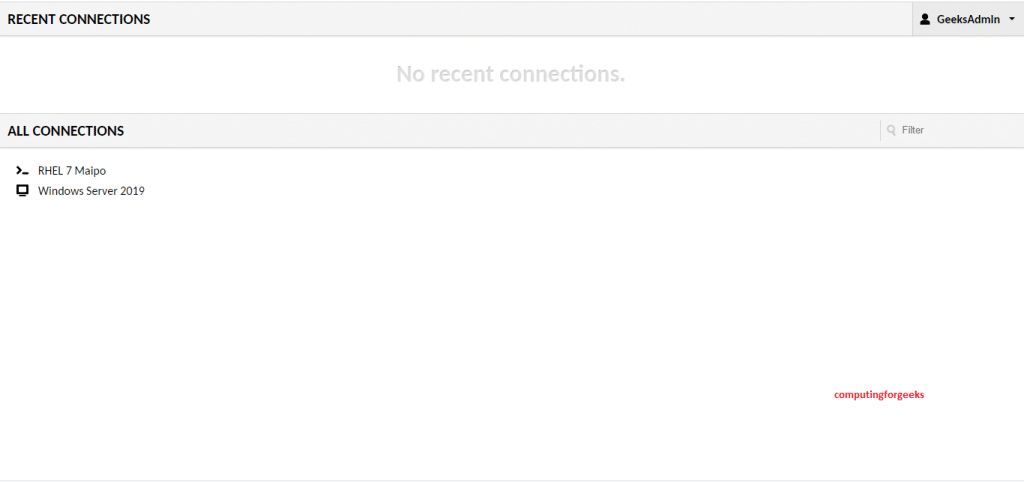
As you can see, the connections we had made in the configuration file, that is the server names, are already loaded when you login.

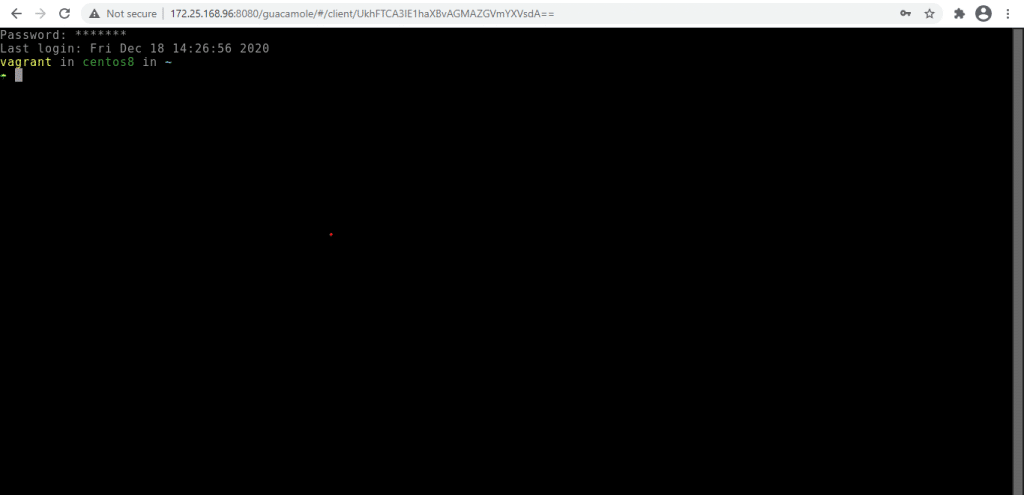
Simply click on the one you would wish to connect to and you will be prompted with a username and password whether via SSH or RDP depending on the Operating System.
And if the credentials are correct, you should be allowed into your server

Culmination
Get your environment organized and easy to use even for new users in your environment by taking advantage of Apache Guacamole to use its cool features as you will see after installation. Check it out and leverage on its flexibility and convenience especially during this season where most of us will be making memories with the ones we care about.
Other guides that might interest you include:
Install and Use Guacamole Remote Desktop on CentOS 8
Easy way to Create SSH tunnels on Linux CLI
Install and Configure OpenSSH Server on Windows Server 2019
How To Set Up Two factor (2FA) Authentication for SSH on CentOS / RHEL 7/8


