")
The chsh (change shell) command in Linux is a utility that allows users to change their default login shell. The login shell is the command-line interface users interact with upon logging into a Unix-like system. Common shells include dash, bash, zsh, ksh, and fish.
Before diving into the chsh command, it’s essential to understand what a login shell is. The login shell is the first process that runs under your user ID when you log in. It’s responsible for initializing your environment and providing an interface to interact with the system.
Common Linux Shells
- Bash (Bourne Again Shell): The default shell for many Linux distributions, known for its ease of use and robust features.
- Zsh (Z Shell): An extended version of bash with many additional features like improved tab completion and customization.
- Ksh (Korn Shell): A shell that offers scripting features found in both sh and csh.
- Fish (Friendly Interactive Shell): Known for its user-friendly features like syntax highlighting and autosuggestions.
- Dash: The Linux Dash shell (dash) is a lightweight, POSIX-compliant shell designed for speed and minimal resource usage, often used as the default scripting shell in Debian-based systems.
The Linux chsh command
As the introduction above explains, the chsh command lets you change your login shell. Following is its syntax:
chsh [options] [LOGIN]
And here’s what the tool’s man page says about it:
       The chsh command changes the user login shell. This determines the name
       of the user's initial login command. A normal user may only change the
       login shell for her own account; the superuser may change the login
       shell for any account.
Following are some Q&A-styled examples that should give you a good idea on how the chsh command works.
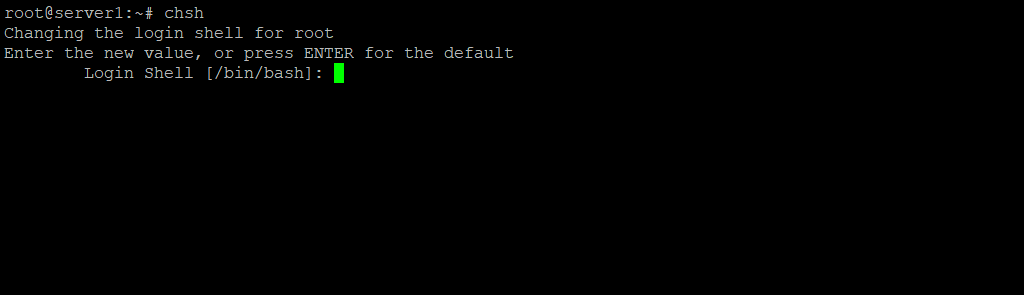
Q1. How to use chsh?
Basic usage is fairly simple – just execute the ‘chsh’ command sans arguments. You’ll be asked for your login password, and after you successfully enter that, you’ll have the option to change your login shell.
chsh
Note that the login shell for the current user is changed by default.
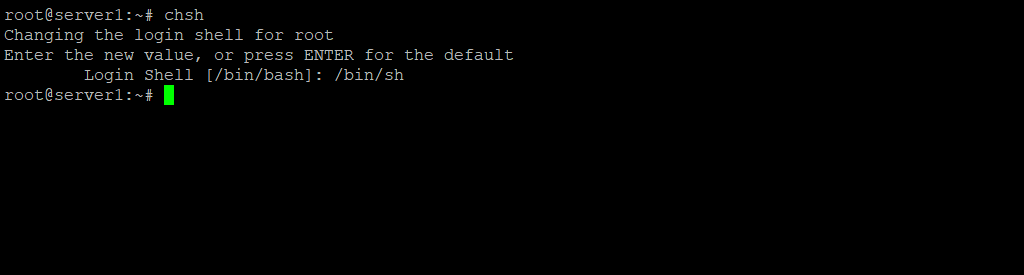
Q2. How to change login shell using chsh?
As you’d expect, just enter the new value (see screenshot in the previous example), and your shell will be changed to the new one.
For example, I entered /bin/sh as the new value.
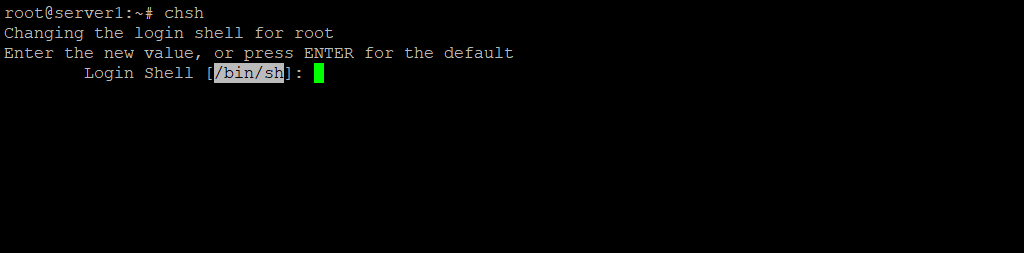
To verify the change, you can run the chsh command again. The value shown in square brackets is the current shell. So in my case, the current shell became /bin/sh:
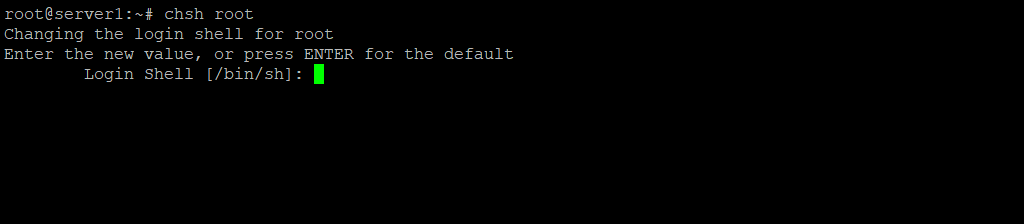
Q3. How to change login shell for some other user?
For this, just specify the username as input to the chsh command.
chsh [username]
For example, to change login shell of root, use chsh in the following way:
chsh root
Q4. How to make chsh run in non-interactive mode?
Use the -s command line option for this, which requires a shell name to be passed as input to it.
For example:
chsh -s /bin/sh
So this way, the login shell for the current user will be changed to /bin/sh in a noninteractive manner.
Q5. How to see a list of available login shells on system?
To quickly take a look at the list of shells available in your system, just cat the /etc/shells file.
For example, here is the output produced on my system:
# /etc/shells: valid login shells
/bin/sh
/bin/bash
/bin/rbash
/bin/dash
Note:
       The only restriction placed on the login shell is that the command name
       must be listed in /etc/shells, unless the invoker is the superuser, and
       then any value may be added. An account with a restricted login shell
       may not change her login shell. For this reason, placing /bin/rsh in
       /etc/shells is discouraged since accidentally changing to a restricted
       shell would prevent the user from ever changing her login shell back to
       its original value.
Conclusion
So you see, the chsh command is an important tool that command line users should be aware of. Here, in this tutorial, we have discussed the majority of the command line options the tool offers. To learn more about chsh, head to its man page.


