
Managing a VPC and other resources like Subnet, Route Table, Internet Gateway from the terminal using aws-cli can be a bit confusing if you are not good at VPC. In this article, we will create a VPC with 2 Subnets, Route Table, and Internet Gateway, these subnets will be public subnets. After the VPC is created, we will try to connect to the EC2 instance created in this VPC. The aim of this article is to introduce you to the commands used to manage VPC from the terminal.
It is advised to first understand the VPC very well, the focus of this article is not on explaining the VPC. To know operations that can be performed on VPC, visit the official documentation here.
Pre-requisites
- AWS Account (Create if you don’t have one).
- Basic understanding of VPC (Click here to learn to create a VPC from the AWS Console).
- AWS IAM user with AmazonVPCFullAccess policy attached to it and its access and secret keys (Click here to learn to create an IAM User).
- AWS CLI installed on your local machine.
- Basic understanding of EC2 Instance (Click here to learn to create an Ubuntu EC2 Instance)
What will we do?
- Check aws cli and export the AWS access & secret key on your local machine.
- Manage VPC using aws cli.
Check aws cli and export aws access & secret key on your local machine.
If you don’t have the aws-cli utility installed on your machine then refer to the official documentation here to install it on your local machine and then check the version of it using the following command.
aws --versionIf you execute the following command, you will get an error as you have not configured access to your AWS account in the terminal.
aws sts get-caller-identityExport AWS IAM user access and secret keys on your terminal using the following commands.
export AWS_ACCESS_KEY_ID=export AWS_SECRET_ACCESS_KEY=This time, you can check your identity by executing the following command
aws sts get-caller-identityManage VPC using aws-cli
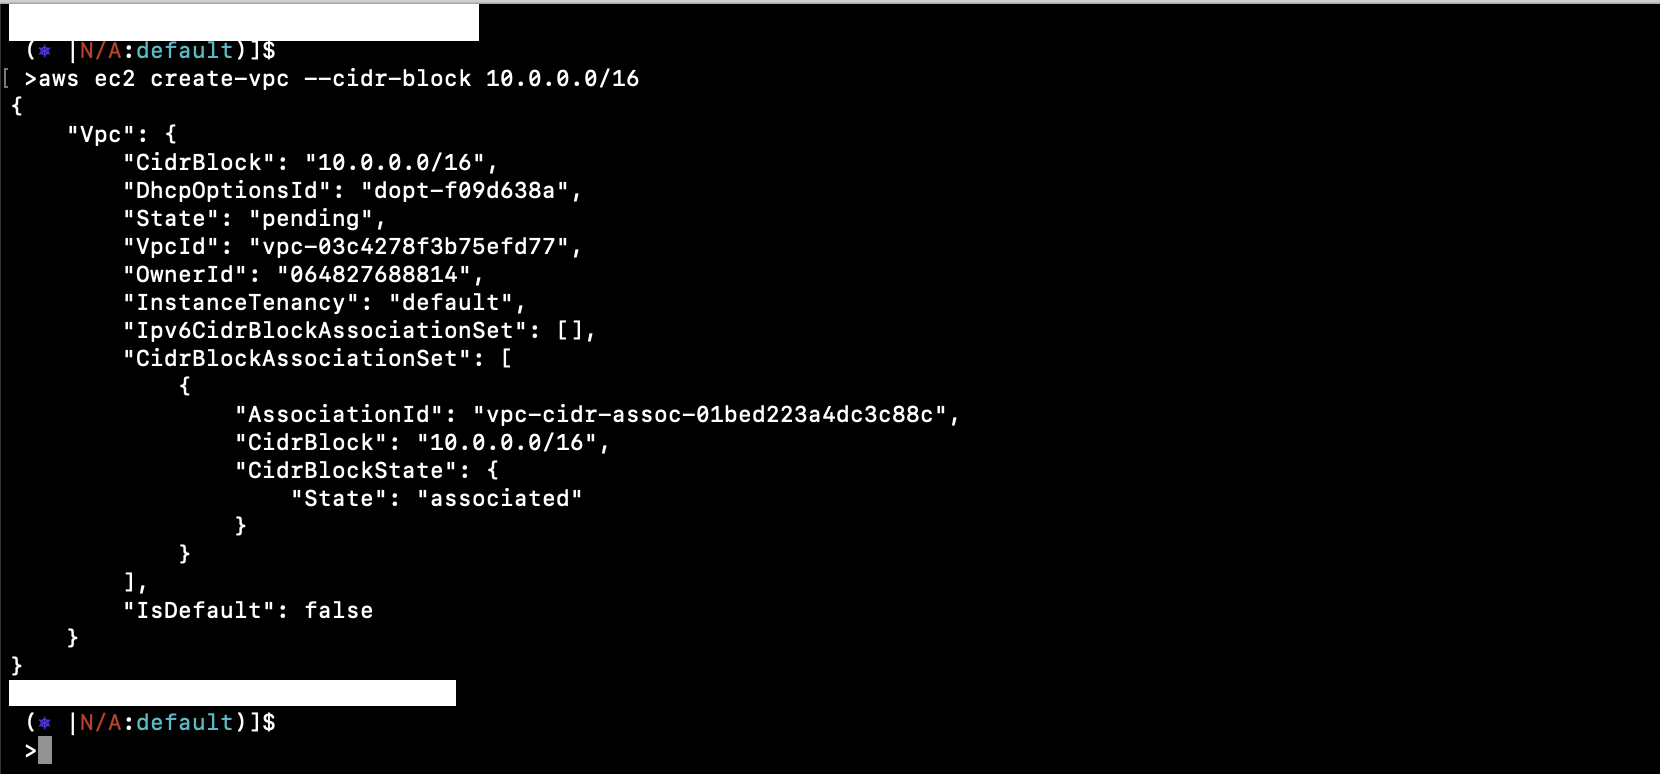
Create a VPC using the following command, it will not create a default VPC. 10.0.0.0/16 will be the CIDR for the VPC that will be created. You can specify a valid CIDR as per your choice and requirement.
aws ec2 create-vpc --cidr-block 10.0.0.0/16Notice the VpcId in the above screenshot. You will see a different VpcId in your output. Make a note of the VpcId, we will need it in the next steps.
To describe all the VPCs from your current region, execute the following command.
aws ec2 describe-vpcsBy specifying the VpcId, you can describe the specific VPC
aws ec2 describe-vpcs --vpc-ids vpc-03c4278f3b75efd77Now, let’s create 2 Subnets in the VPC we created. Here, both the Subnets must have unique CIDR blocks in the VPC.
aws ec2 create-subnet --vpc-id vpc-03c4278f3b75efd77 --cidr-block 10.0.1.0/24aws ec2 create-subnet --vpc-id vpc-03c4278f3b75efd77 --cidr-block 10.0.2.0/24To make subnets Public, we need to create an Internet Gateway
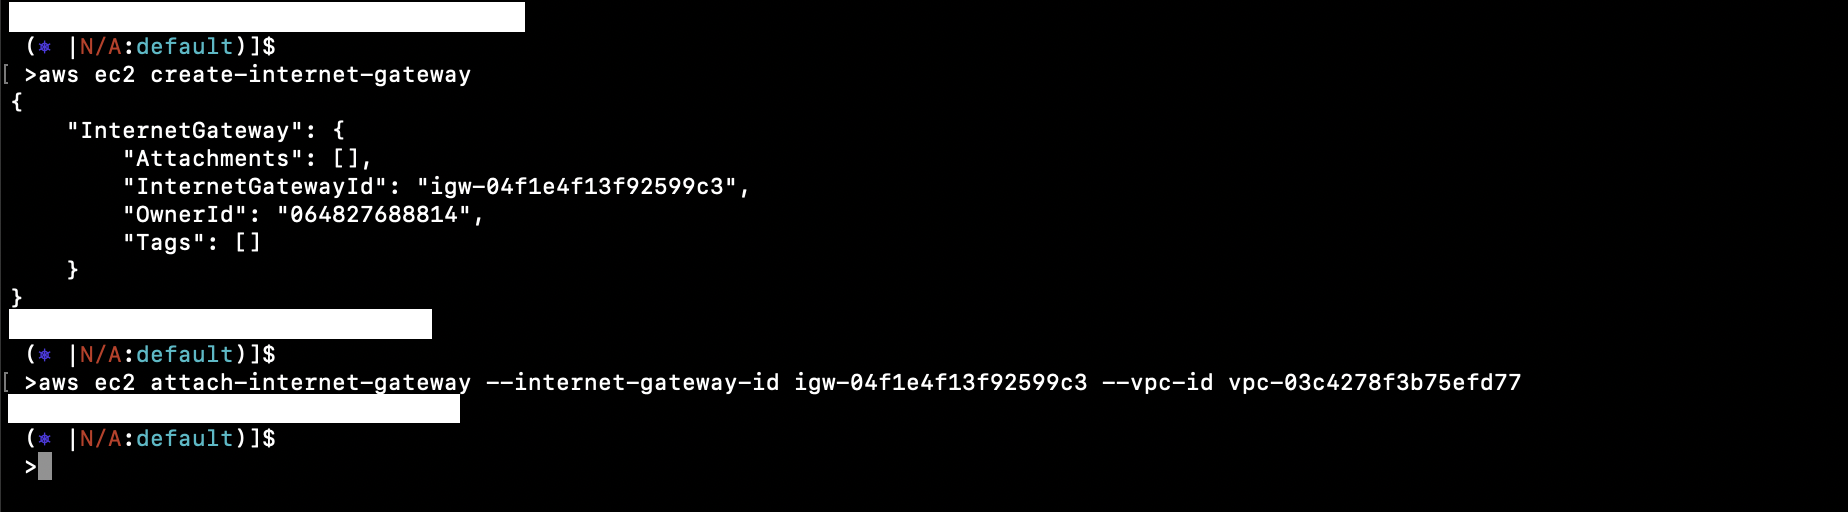
aws ec2 create-internet-gatewayAttach the Internet Gateway with the VPC we created earlier.
aws ec2 attach-internet-gateway --internet-gateway-id igw-04f1e4f13f92599c3 --vpc-id vpc-03c4278f3b75efd77Now, Let’s create a Route Table.
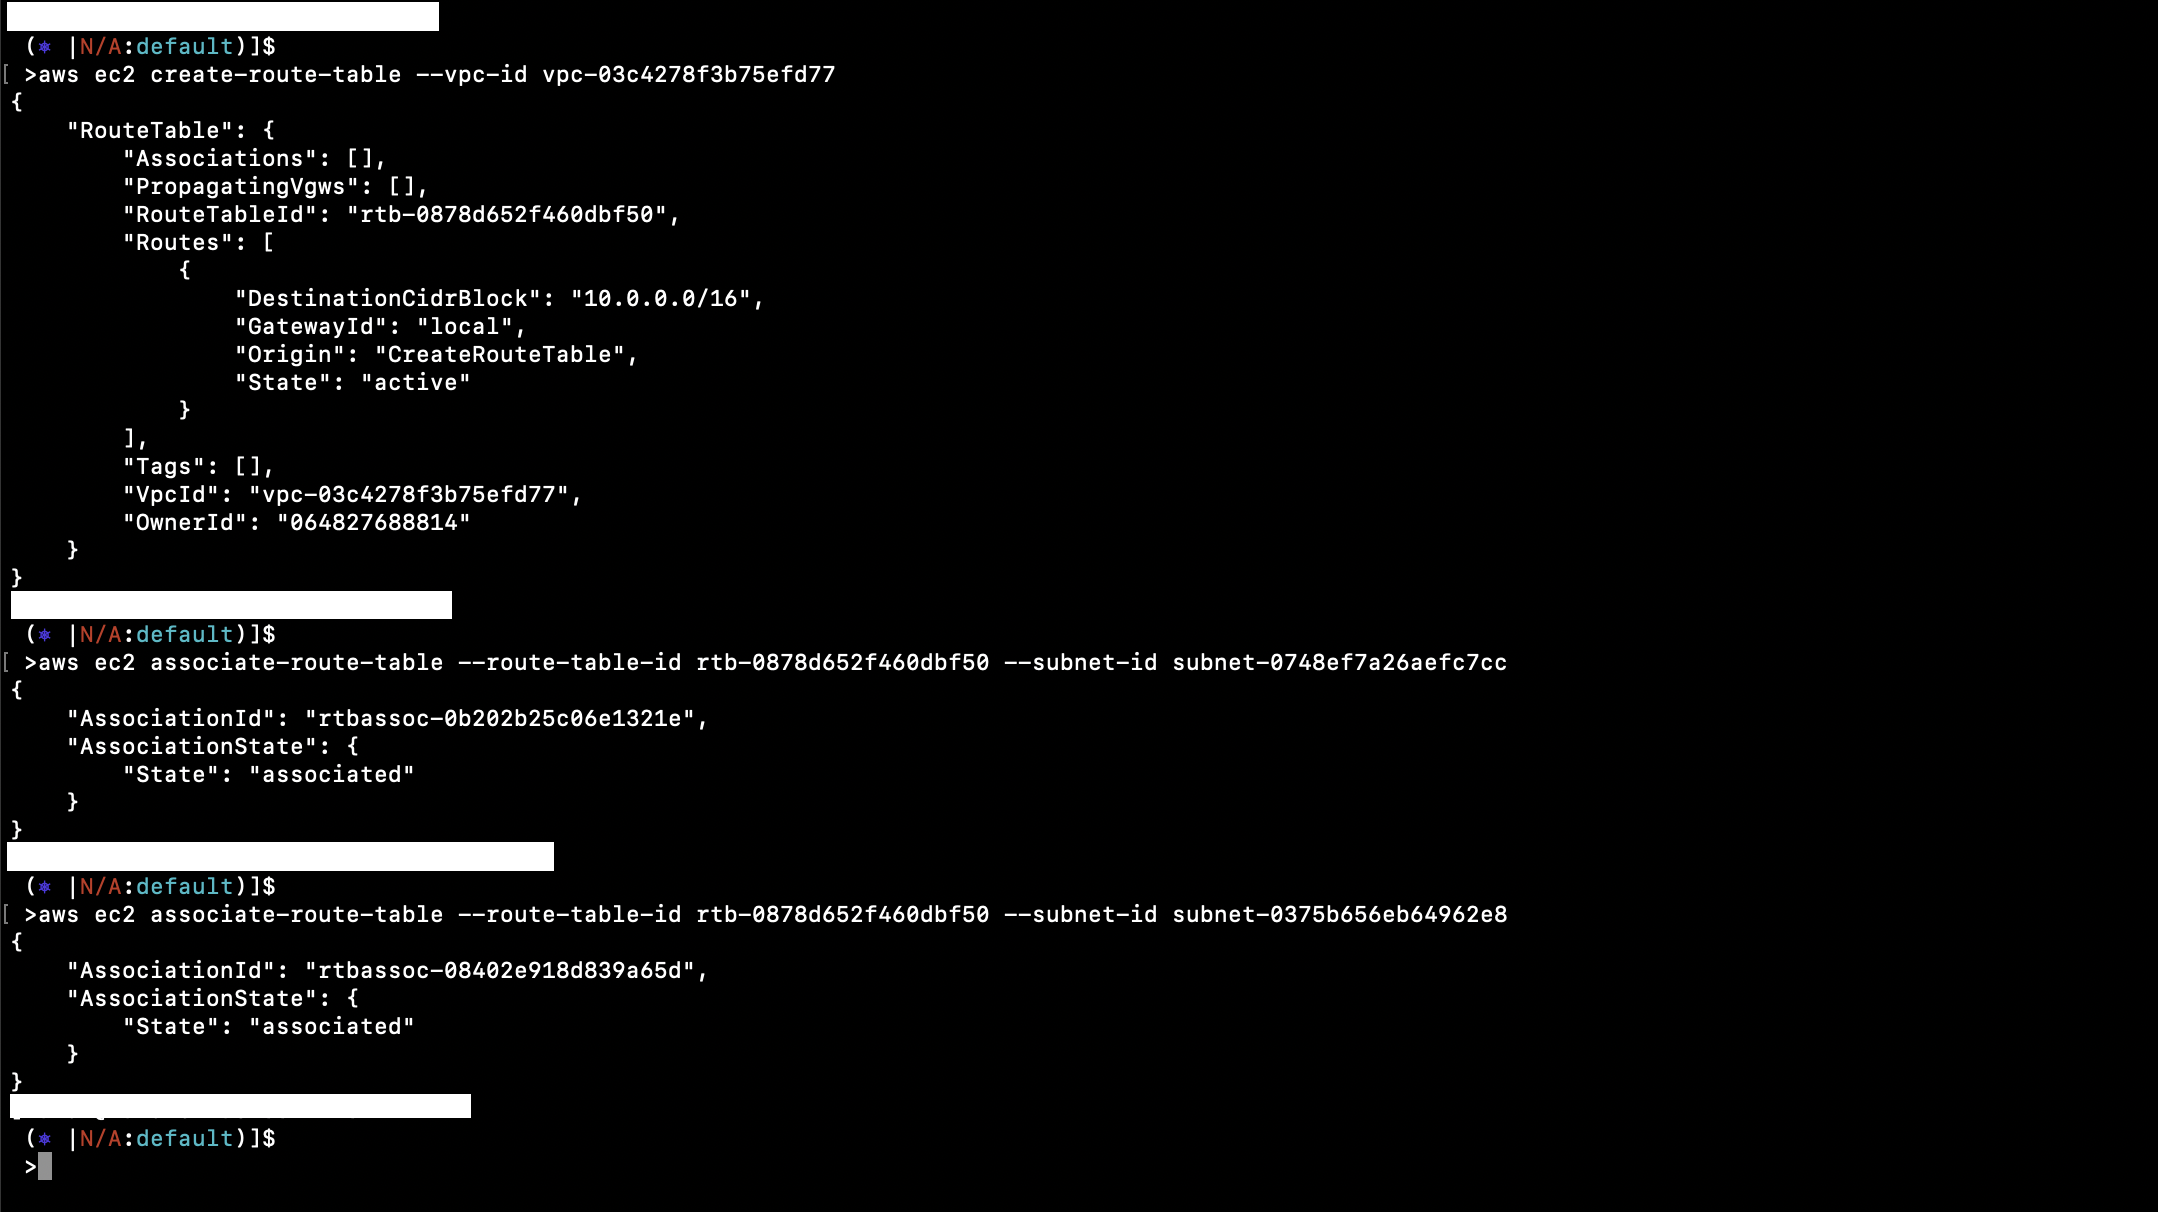
aws ec2 create-route-table --vpc-id vpc-03c4278f3b75efd77Associate the Route Table with both the Subnets
aws ec2 associate-route-table --route-table-id rtb-0878d652f460dbf50 --subnet-id subnet-0748ef7a26aefc7ccaws ec2 associate-route-table --route-table-id rtb-0878d652f460dbf50 --subnet-id subnet-0375b656eb64962e8Creating a Route from the Route table to the Internet Gateway will make the Subnets associated with the Route Table public
aws ec2 create-route --route-table-id rtb-0878d652f460dbf50 --destination-cidr-block 0.0.0.0/0 --gateway-id igw-04f1e4f13f92599c3We now have a VPC with 2 Subnets, 1 Route table, and a route from Route Table to Internet Gateway.
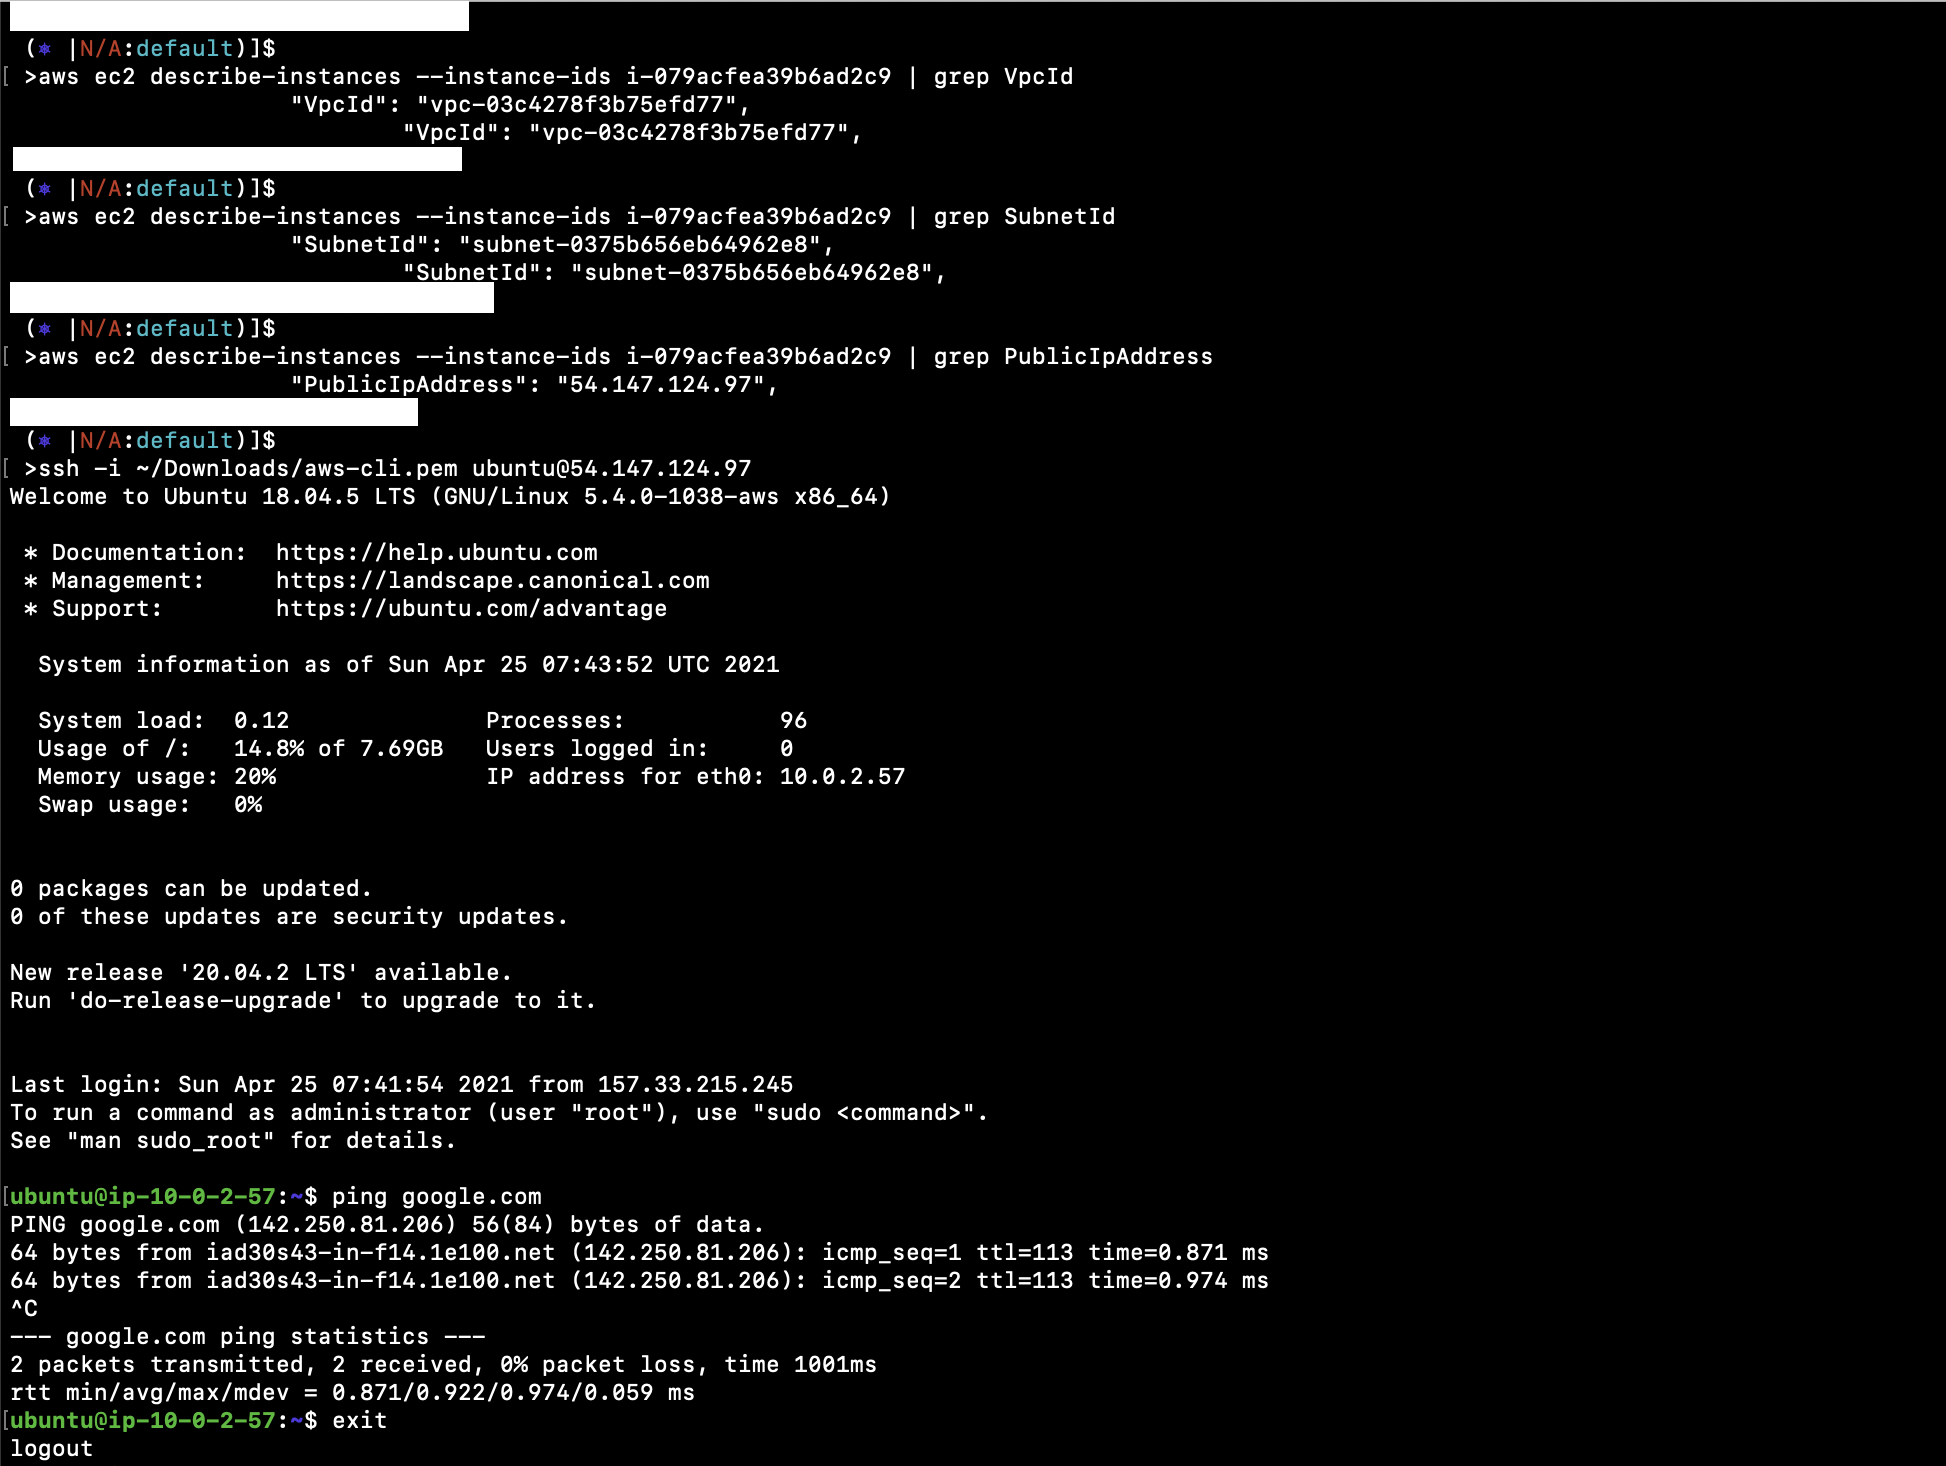
If we create an EC2 instance in this VPC and any one of the Subnets, the instance will be publicly reachable from the Internet. Refer to the document mentioned in the prerequisite to learn to create an Ubuntu EC2 instance. While creating an instance, specify the VPC that we just created.
aws ec2 describe-instances --instance-ids i-079acfea39b6ad2c9 | grep VpcIdaws ec2 describe-instances --instance-ids i-079acfea39b6ad2c9 | grep SubnetIdaws ec2 describe-instances --instance-ids i-079acfea39b6ad2c9 | grep PublicIpAddressssh -i ~/Downloads/aws-cli.pem [email protected]Conclusion
In this article, we saw the steps to create a VPC with 2 Subnets, 1 Route Table, Internet Gateway, and a route to the Internet Gateway from the Route Table. We also saw that the instance created in any one of the Subnets makes the instance publicly available as both the subnets are Public Subnets.


