In a Linux system, the cron daemon is used to execute scheduled commands or scripts. By default, cron jobs run as the root user. However, sometimes it is necessary to run cron jobs as a non-root user, such as the www-data user. The www-data user is often used by web servers to run web applications and is usually used for security reasons to limit the damage that could be done by a malicious cron job.
In this article, we will discuss the proper way to run crontab as the www-data user in a Linux system.
Step 1: Determine the User
Before we begin, we need to determine which user we want to run the cron job as. In this case, we want to run the cron job as the www-data user. To check which user your web server is running as, you can use the following command:
ps aux | grep apache2
The above command will list all of the processes running on your system and display the user for each process. Look for a process with “apache2” in its name and check the user associated with that process. In most cases, the user will be “www-data”.

In the above screenshot, the first row shows ‘root’ user for apache2. That is the main Apache processes started by the system deamon service. Rest are running with ‘www-data’ users.
Step 2: Schedule Cron Job
The next step is to create a crontab file for the www-data user. The crontab file is used to specify the commands or scripts that you want to run on a regular basis. To create a crontab file for the “www-data” user, you can use the following command:
sudo crontab -u www-data -e
Now that we have the crontab file open, we can add the cron job that we want to run. For example, your have a Laravel application configured on system and want to schedule the cron job to run every minute. you would add the following line to the crontab file:
|
## Laravel application cron to run every minute * * * * * cd /var/www/laravel–app && php artisan schedule:run >> /dev/null 2>&1 |
Once you have added the cron job, you can save and close the crontab file. To save the file in the nano editor, press “CTRL X”, then “Y”, and finally “ENTER”.
Step 3: Verify the Cron Job
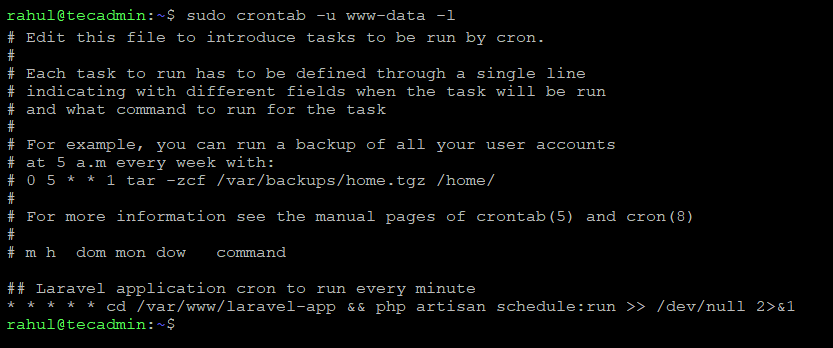
The final step is to verify that the cron job has been added correctly. To view the crontab file for the www-data user, you can use the following command:
sudo crontab -u www-data -l
This will display the contents of the crontab file for the www-data user. Check that the cron job has been added correctly.

You can see that the cron job for the Laravel application is correctly configured with www-data user.
Conclusion
In this article, we have discussed about running crontab as the www-data user in a Linux system is a useful method for limiting the damage that could be done by a malicious cron job. By following the steps outlined in this article, you can easily create a crontab file for the www-data user and schedule cron jobs to run as this user. The process involves determining the user, creating the crontab file, adding the cron job, saving and closing the crontab file, and finally verifying the cron job. With these steps, you can ensure that your cron jobs are running as the desired user and that your system is secure.


