
ISPConfig is a Hosting Control Panel that can be used to host websites, provide access by FTP and SSH, manage and provide email services, and run a DNS server. ISPConfig supports Debian, CentOS, and Ubuntu operating systems. We covered the steps to add a website in ISPConfig already in a separate guide. Now I will show you step-by-step how to add an email domain and email account in ISPConfig, how to configure spam filtering, and which login details to use in an email client like Thunderbird or Outlook.
Prerequisites
The following prerequisites must be met to follow this guide:
- ISPConfig must already be installed on your server or you must have an admin, client, or reseller login to an ISPConfig server. if you have not installed ISPConfig yet, please follow the ISPConfig installation guide.
- A domain must point with its DNS MX record to the server. In this guide, I will use the domain name “example.com”. Replace example.com with your own domain name wherever it occurs below.
Add Email Domain in ISPConfig
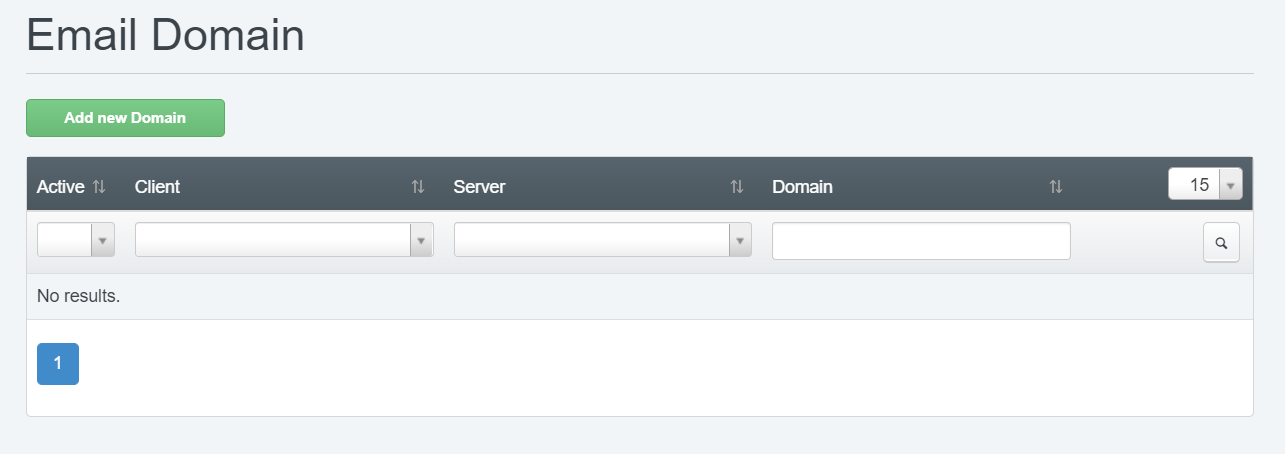
Log into ISPConfig and go to the email module by clicking on the word Email in the menu at the top of the page.
There you click on the green “Add new Domain” button.
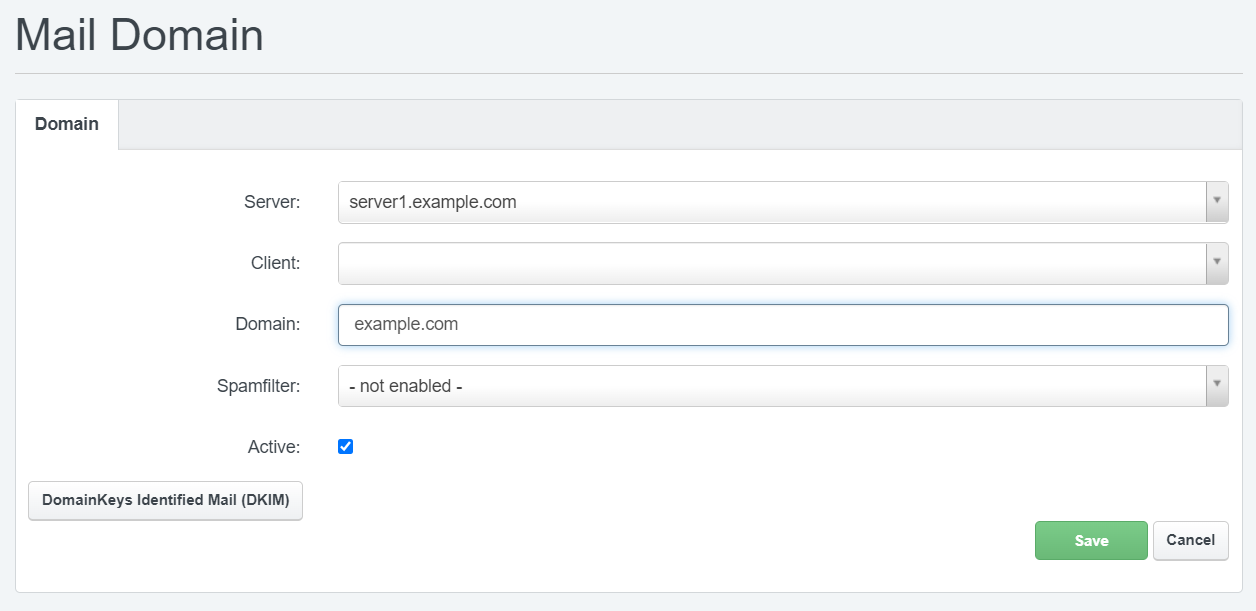
This opens the Email domain form:
The most important field to fill in is the Domain field, where you enter the domain name that you want to receive emails for.
Email fields explained:
- Server: The email server to which the email domain shall get added. This field is visible to administrators only, clients and resellers will not see it.
- Client: The client which owns this domain. This field is optional and you can select a client here only if you added one in the client module first. This field is visible to the administrator and resellers only.
- Domain: The email domain name.
- Spamfilter: here you can select a domain-wide spam filtering level. This level can be overridden in the mailbox settings later.
- Active: This must be checked to receive emails.
Now press the green save button to create the email Domain. Alternatively, you can click on the DomainKeys Identified Mail (DKIM) button and configure DKIM signing. DKIM signing is an optional feature and requires it also to set up an additional DNS record to use it, so it’s perfectly fine to leave it out now and enable it later if you want to use it.
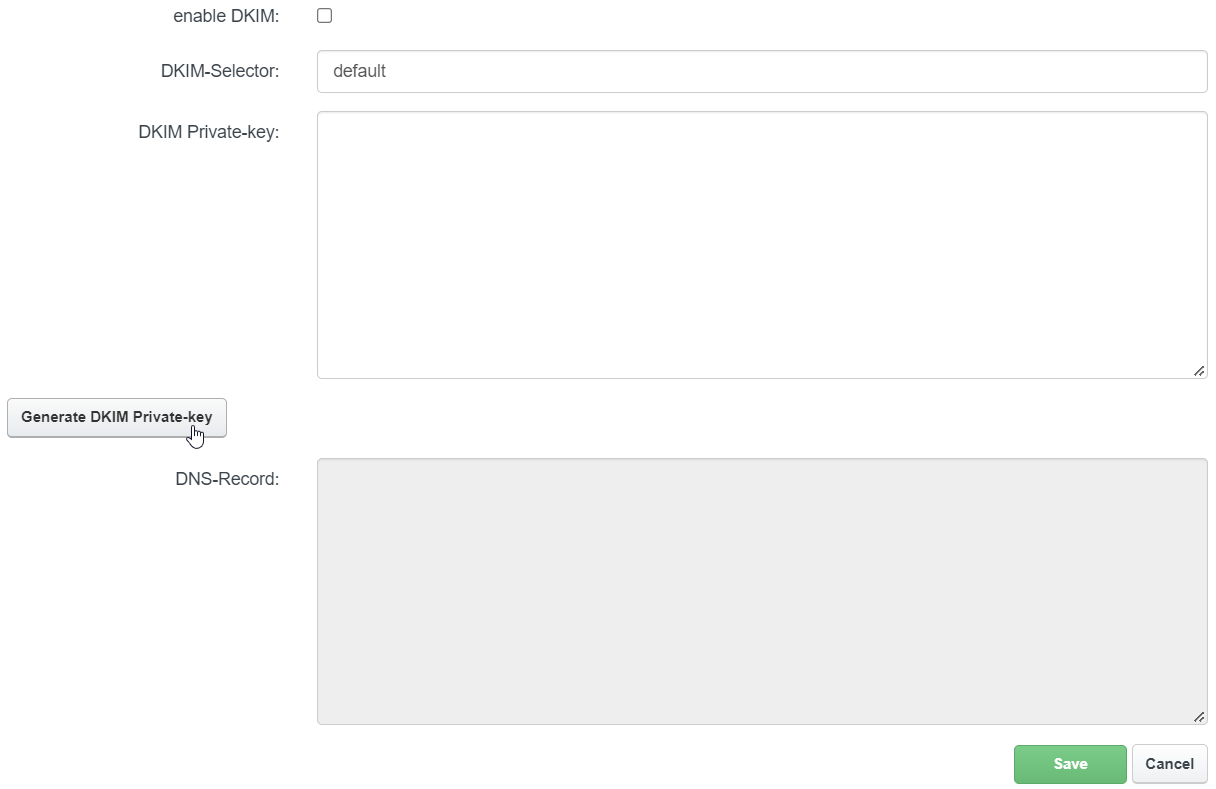
DKIM Email signing (optional)
Activating DKIM for an email domain is done in two steps: First, you create a DKIM key, then you publish the public key part in DNS as a DKIM record (DKIM Records are specially formatted TXT records). The DKIM key consists of two parts, the private and the public key. They are used to sign and verify emails sent from your server for this domain.
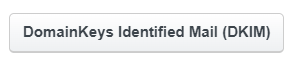
Click on the button DomainKeys Identified Mail (DKIM) on the email domain details page.
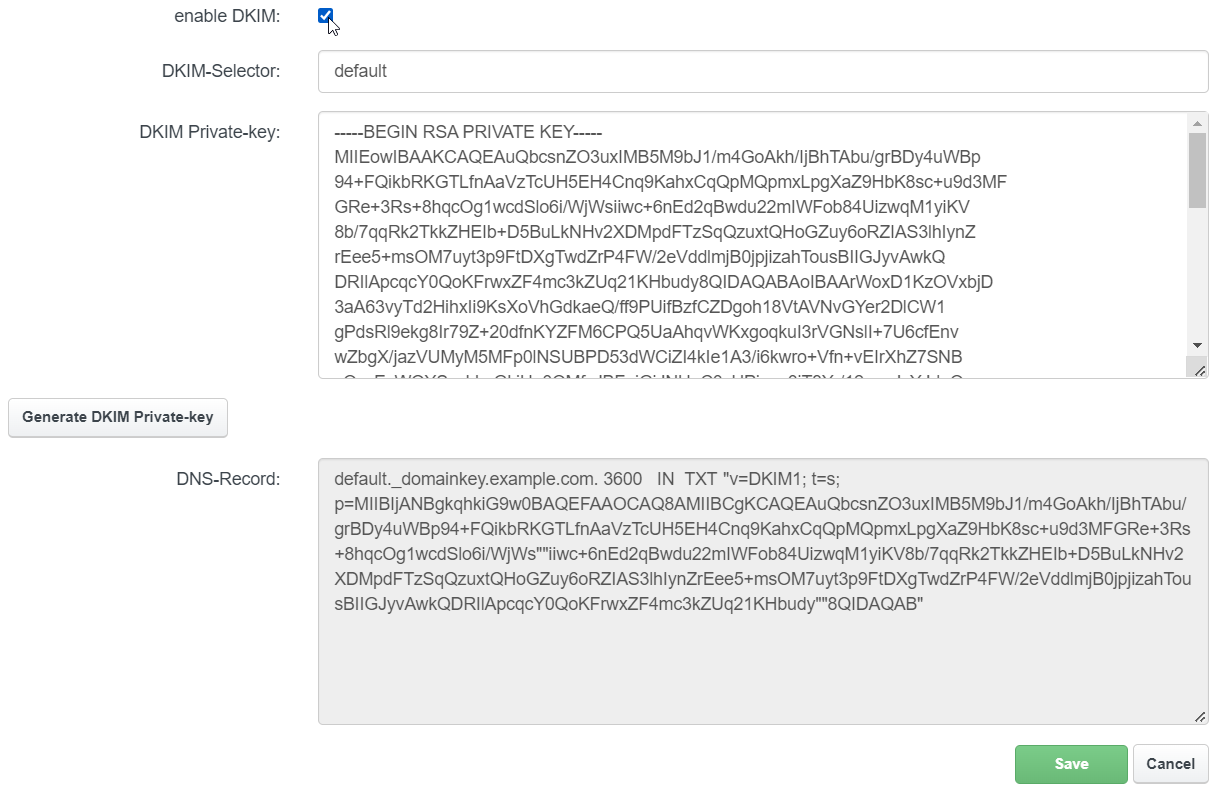
This will show the DKIM settings:
Click on the Generate DKIM Private-key button to create a DKIM public and private key pair.
Enable the Enable DKIM checkbox and press the green Save Button at the bottom to Save the DKIM key.
If your ISPConfig Server is also the DNS server of the email domain we just added, then the DKIM key will get added to DNS automatically. If you use an external DNS service, then go back to the email domain settings and copy the DNS record shown in DKIM settings and add it to the DNS zone of your domain. Please note, that the DNS record is shown in the split format, this means that you can see inside the key two pairs of double quotes “”. It might be that the DNS service you use does not support split DNS format, so in case you receive an error, remove the two pairs of double quotes from the key.
Add Mailbox in ISPConfig
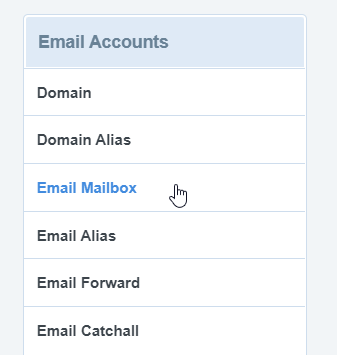
To add a mailbox (email account), click on Email mailbox in the menu on the left side:
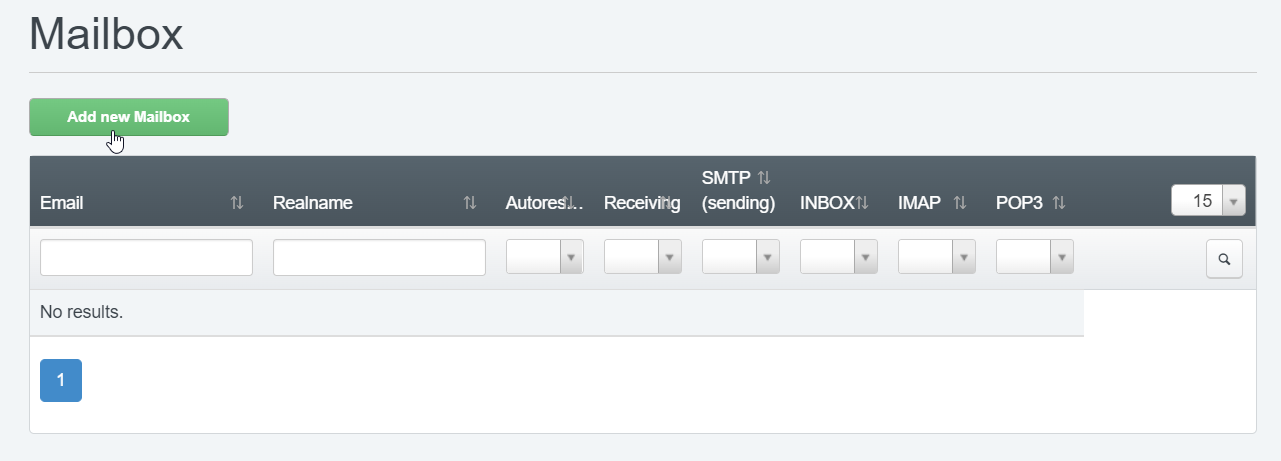
The list of email mailboxes will show up on the screen. There you click on the green Add new mailbox button.
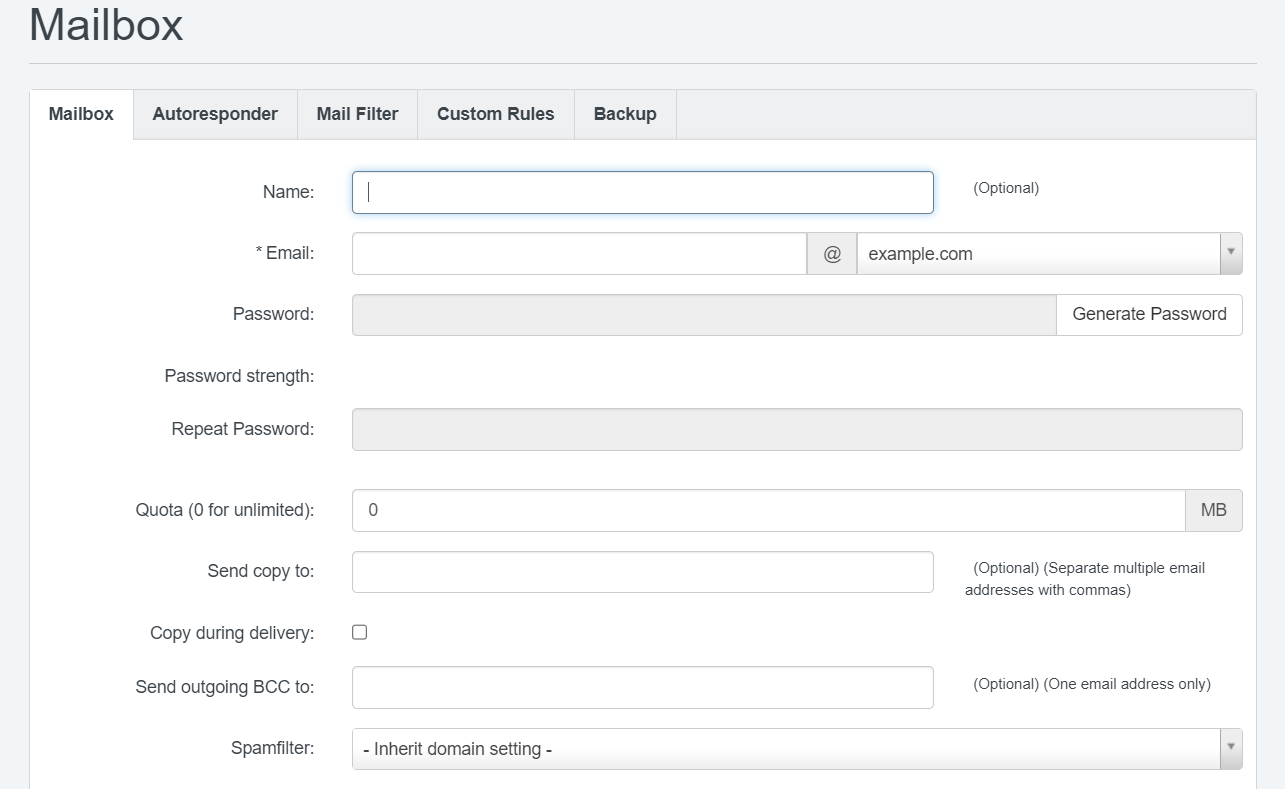
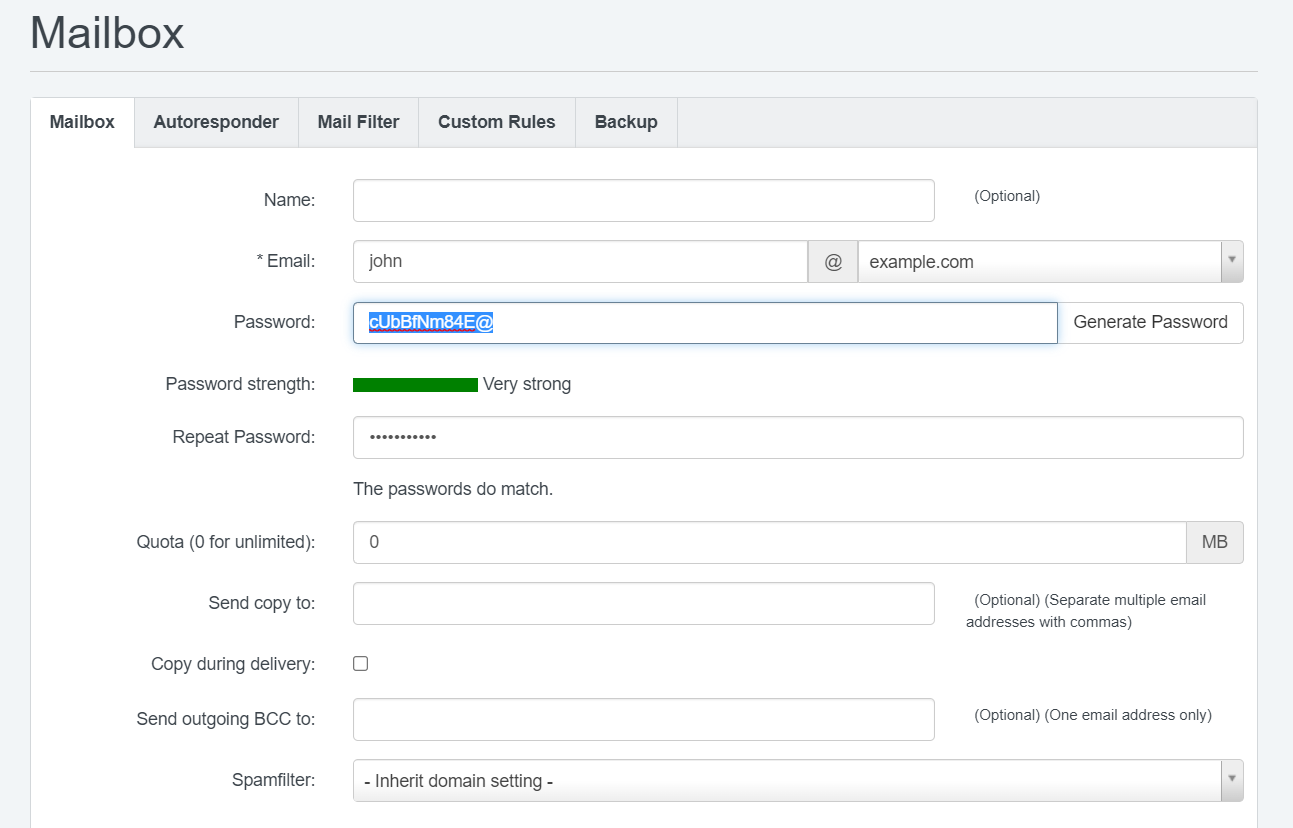
This opens the Mailbox details page.
There are just 3 fields that you must fill out to get a fully working mailbox. The first one is the email field, there you just enter the local part e.g. ‘john’, and then select the email domain in the select field on the right side of the @ sign. The other fields are the password and repeat password fields. Then press the green save button at the bottom of the page. All other fields are optional and can be left at their defaults.
Email Mailbox fields explained:
- Name: the name field is optional, it is just used to describe what this mailbox is for or who owns the mailbox. So you can enter there e.g. the of the user like “John Doe” or its purpose like “Business Email”.
- Email: The email setting is split into two parts, the local part before the @ sign and the domain. In the local part field, enter a name like ‘john’ or ‘info’. Then select the domain the mailbox shall be created under in the select field on the right side of the @.
- Password: Enter the password that the mailbox shall get (or use create password button to create a random password). Repeat the same password in the repeat password field.
- Quota: here you can set how many megabytes the mailbox can store. Set it to 0 to get unlimited storage (limited only by the size of your hard disk).
- Send copy to: Send a copy of each incoming email to this address. the setting is optional.
- Copy during delivery: If this option is enabled, the email gets copied by the MTA (Postfix) before any filtering takes place.
- Send outgoing BCC to: Send a copy of each outgoing email to this address, optional.
- Spamfilter: here you can set a spam filter policy for the mailbox. the default is to inherit the setting of the email domain.
- Enable Receiving: This checkbox must be enabled to receive email. if disabled, incoming emails will get rejected.
- Disable Sending: Disallow sending with this email address.
- Disable (local) Delivery: Emails from this mailbox will not be delivered locally into the mailbox but e.g. copies will get sent.
- Enable Greylisting: This enables greylisting for the email. Greylisting is a function to reduce spam by delaying email delivery and rejecting the first delivery attempt.
- Disable IMAP: Disables access via IMAP to the mailbox.
- Disable POP3: Disables pop3 access.
After pressing save, the email mailbox will get created. This may take up to 1 minute. The process is finished when the red dot in the upper menu of the ISPConfig GUI is gone.
Configure Email Client
Now as we have created an email account in ISPConfig, how to access it? You can use any email client which supports SMTP and POP3 or IMAP to send and receive emails. For Example Thunderbird, Outlook, Apple Mail, or the email client of your mobile device.
Email Login Details:
- Username: The username to be used in the email client is the complete email address. So you use “[email protected]” as username and not just “john”.
- Password: the password that you entered at the time you added the mailbox.
- Server name: the mail client also requires you to set a server name. The server name is typically the hostname of your server and not a subdomain of your email domain. So if the hostname of your server is e.g. server.somecompany.tld, then you use that and not a subdomain of your email domain like e.g. mail.example.com. The reason for that is that the SSL certs of the mail system include the server hostname only, if you would use another name, even if it points to the right server in DNS, you would get an SSL error. If you are not hosting your own server and only have access to the ISPConfig GUI on the client or reseller level, then ask the ISP which hosts your server for the correct mail server name.
- For sending emails, you choose SMTP, preferably an encrypted mode like SMTP over TLS
- For Receiving, you can use POP3 or IMAP. With POP3, all emails get fetched from the server and then removed from the server, with IMAP, emails stay on the server. Today, mostly IMAP is used. Here you should also use the encrypted versions which are called POP3S or IMAPS.
Video
This tutorial is also available as a screencast video here:


