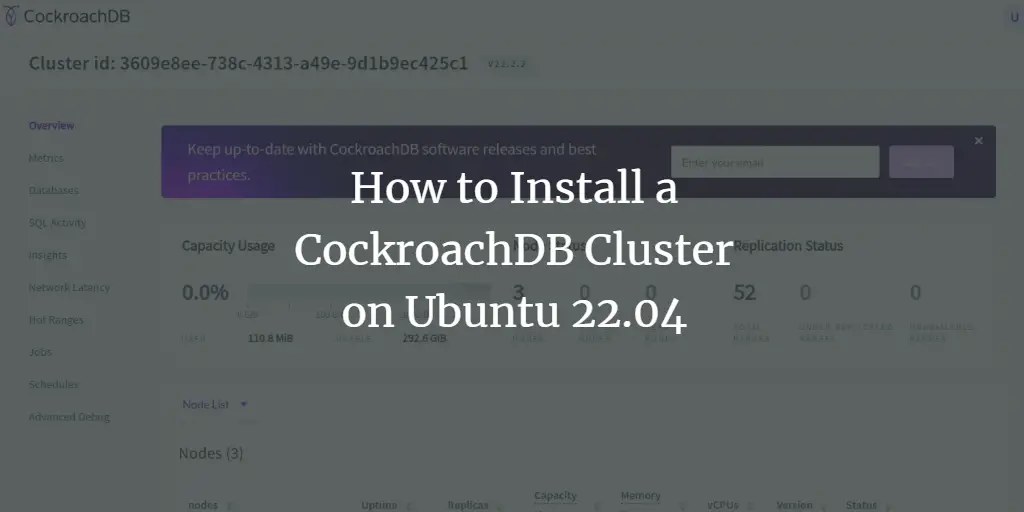
CockroachDB is a free and cloud-native distributed SQL database used to build and manage modern, scalable cloud services. It helps you to survive software and hardware failures. It stores copies of data in multiple locations to deliver speedy access. It is built on a transactional and strongly-consistent key-value store and is capable of surviving disk, machine, and data center failures with near-zero latency disruption and no manual intervention.
This tutorial will explain how to set up a three-node CockroachDB cluster on Ubuntu 22.04 server.
Prerequisites
- Three servers running Ubuntu 22.04.
- A root password is configured on each server.
In this tutorial, we will use the following setup:
hostname IP address
node1 192.168.10.10
node2 192.168.10.11
node3 192.168.10.12
Update Your System
Before starting, it is highly recommended to update and upgrade all nodes to the latest version. You can update all nodes one by one by running the following command:
apt update -y
apt upgrade -y
Once all the nodes are up-to-date, restart them to apply the changes.
Setup Time Synchronization
Before starting, you will need to set up a time synchronization between all nodes. You can do it using the chrony.
First, install chrony with the following command:
apt install chrony -y
Once installed, edit the chrony configuration file with the following command:
nano /etc/chrony/chrony.conf
Find the default pool and replace them with the following lines:
pool 0.id.pool.ntp.org iburst maxsources 4
pool 1.id.pool.ntp.org iburst maxsources 1
pool 2.id.pool.ntp.org iburst maxsources 1
pool 3.id.pool.ntp.org iburst maxsources 2
Save and close the file then restart the chrony service and enable it to start at system reboot with the following command:
systemctl restart chrony
systemctl enable chrony
Once you have finished, you can proceed to the next step.
Install CockroachDB on All Nodes
In this section, we will install CockroachDB on all nodes. Run the following commands on all nodes to install the CockroachDB.
First, download the latest version of CockroachDB from their official website using the following command:
wget https://binaries.cockroachdb.com/cockroach-latest.linux-amd64.tgz
Once the download is completed, extract the downloaded file with the following command:
tar -xvzf cockroach-latest.linux-amd64.tgz
Next, copy the CockroachDB binary to the /usr/local/bin directory with the following command:
cp cockroach-*/cockroach /usr/local/bin/
Next, verify the CockroachDB version using the following command:
cockroach version
You should get the following output:
Build Tag:        v22.2.2
Build Time:       2023/01/04 17:23:00
Distribution:     CCL
Platform:         linux amd64 (x86_64-pc-linux-gnu)
Go Version:       go1.19.1
C Compiler:       gcc 6.5.0
Build Commit ID:  07a53a36601e9ca5fcffcff55f69b43c6dfbf1c1
Build Type:       release
At this point, CockroachDB is installed on all nodes. You can now proceed to the next step.
Create Certificates
CockroachDB also required server and client certificates for a secure connection. First, create a directory to store certificate files on all nodes. Run the following command on all nodes to create a certs directory:
mkdir ~/certs
Next, you will need to create a CA certificate, root certificate, and client certificate.
Create CA Certificate
On the node1, create a CA certificate using the following command:
cockroach cert create-ca --certs-dir=certs --ca-key=certs/ca.key
This command will generate ca.key and ca.crt inside the ~/certs directory.
Then, copy the generated CA to both nodes using the following command:
scp ~/certs/ca.crt ~/certs/ca.key [email protected]:~/certs/
scp ~/certs/ca.crt ~/certs/ca.key [email protected]:~/certs/
Create Client Certificate
Next, you will need to generate a client certificate to secure the communication between SQL and the cluster.
Run the following command on all nodes to generate the client certificate:
cockroach cert create-client root --certs-dir=certs --ca-key=certs/ca.key
Once you are finished, you can proceed to create a server certificate.
Create Server Certificates
Next, you will need to generate the server certificate to secure communication between servers on the CockroachDB cluster.
On the node1, run the following command to generate the server certificate:
cockroach cert create-node localhost $(hostname) 192.168.10.10 --certs-dir=certs --ca-key=certs/ca.key
On the node2, run the following command to generate the server certificate:
cockroach cert create-node localhost $(hostname) 192.168.10.11 --certs-dir=certs --ca-key=certs/ca.key
On the node3, run the following command to generate the server certificate:
cockroach cert create-node localhost $(hostname) 192.168.10.12 --certs-dir=certs --ca-key=certs/ca.key
This will generate the node.key and node.crt file inside ~/certs directory.
You can list all certificates with the following command:
cockroach --certs-dir=certs cert list
You should get the following output:
Certificate directory: certs
  Usage  | Certificate File |    Key File     |  Expires   |                   Notes                    | Error
--------- ------------------ ----------------- ------------ -------------------------------------------- --------
  CA     | ca.crt           |                 | 2033/01/17 | num certs: 1                               |
  Node   | node.crt         | node.key        | 2028/01/14 | addresses: localhost,vultr,192.168.10.10 |
  Client | client.root.crt  | client.root.key | 2028/01/14 | user: root                                 |
(3 rows)
Once you are finished, you can proceed to the next step.
Start CockroachDB Cluster
At this point, all certificates are ready to start the CockroachDB cluster.
On the node1, run the following command to advertize the Secure CockroachDB Cluster:
cockroach start --background --certs-dir=certs --advertise-host=192.168.10.10 --join=192.168.10.10,192.168.10.11,192.168.10.12 --background
You should get the following output.
* WARNING: Running a server without --sql-addr, with a combined RPC/SQL listener, is deprecated.
* This feature will be removed in the next version of CockroachDB.
*
*
* INFO: initial startup completed.
* Node will now attempt to join a running cluster, or wait for `cockroach init`.
* Client connections will be accepted after this completes successfully.
* Check the log file(s) for progress.
Next, initialize the cluster with the following command.
cockroach init --certs-dir=certs --host=192.168.10.10
By default, the CockroachDB cluster listens on port 26257. You can check it with the following command.
ss -antpl | grep 26257
You will get the following output.
LISTEN 0 4096 *:26257 *:* users:(("cockroach",pid=86868,fd=25))
You can also check the status of the cluster with the following command:
cockroach node status --certs-dir=certs --host=192.168.10.10
You should get the following output:
  id |        address        |      sql_address      |  build  |              started_at              |              updated_at              | locality | is_available | is_live
----- ----------------------- ----------------------- --------- -------------------------------------- -------------------------------------- ---------- -------------- ----------
   1 | 192.168.10.10:26257 | 192.168.10.10:26257 | v22.2.2 | 2023-01-10 07:19:44.009519  0000 UTC | 2023-01-10 07:20:24.521341  0000 UTC |          | true         | true
(1 row)
Once you are finished, you can proceed to the next step.
Add Remaining Nodes to the Cluster
Next, you will need to add both nodes to the CockroachDB cluster.
On node2, run the following command to add it to the CockroachDB cluster.
cockroach start --background --certs-dir=certs --advertise-host=192.168.10.11 --listen-addr=192.168.10.11 --join=192.168.10.10:26257
On the node 3, run the following command to add it to the CockroachDB cluster.
cockroach start --background --certs-dir=certs --advertise-host=192.168.10.12 --listen-addr=192.168.10.12 --join=192.168.10.10:26257
Next, go back to the node1 and check the status of the cluster using the following command:
cockroach node status --certs-dir=certs --host=192.168.10.10
You should see that all nodes are added to the cluster.
  id |        address        |      sql_address      |  build  |              started_at              |              updated_at              | locality | is_available | is_live
----- ----------------------- ----------------------- --------- -------------------------------------- -------------------------------------- ---------- -------------- ----------
   1 | 192.168.10.10:26257 | 192.168.10.10:26257 | v22.2.2 | 2023-01-10 07:19:44.009519  0000 UTC | 2023-01-10 07:21:27.529911  0000 UTC |          | true         | true
   2 | 192.168.10.11:26257  | 192.168.10.11:26257  | v22.2.2 | 2023-01-10 07:21:04.206015  0000 UTC | 2023-01-10 07:21:26.718227  0000 UTC |          | true         | true
   3 | 192.168.10.12:26257 | 192.168.10.12:26257 | v22.2.2 | 2023-01-10 07:21:17.704146  0000 UTC | 2023-01-10 07:21:26.718768  0000 UTC |          | true         | true
At this point, the CockroachDB cluster is started and listening on port 8080. You can now proceed to the next step.
Access CockroachDB Dashboard
CockroachDB provides a simple and easy-to-use web interface to monitor the cluster. Before accessing the CockroachDB web interface, you will need to create an admin user and set a password for it.
On the node1, log into the cockroachdb SQL shell with the following command:
cockroach sql --certs-dir=certs --host=192.168.10.10
Next, create a user named user1 and set the password with the following command:
[email protected]:26257/defaultdb> CREATE USER user1 WITH PASSWORD 'securepassword';
Next, exit from the SQL shell using the following command.
[email protected]:26257/defaultdb> exit;
Now, open your web browser and access the CockroachDB web interface using the URL https://node1-ip-address:8080. You should see the following page:
Provide your admin username, password and click on the LOG IN button. You should see the CockroachDB dashboard on the following page:
Verify Database Replication in Custer
Next, you will need to verify whether the database is replicated among all nodes or not.
On node1, log into the SQL shell with the following command:
cockroach sql --certs-dir=certs --host=192.168.10.10
Next, create a database named wpdb1 and wpdb2 with the following command:
create database wpdb1;
create database wpdb2;
Next, verify the databases with the following command:
show databases;
You should see all databases in the following output:
  database_name | owner | primary_region | secondary_region | regions | survival_goal
---------------- ------- ---------------- ------------------ --------- ----------------
  defaultdb     | root  | NULL           | NULL             | {}      | NULL
  postgres      | root  | NULL           | NULL             | {}      | NULL
  system        | node  | NULL           | NULL             | {}      | NULL
  wpdb1         | root  | NULL           | NULL             | {}      | NULL
  wpdb2         | root  | NULL           | NULL             | {}      | NULL
(5 rows)


Time: 3ms total (execution 3ms / network 1ms)
Next, go to Node2 and verify whether the database is replicated or not.
On the node2, log into the SQL shell with the following command:
cockroach sql --certs-dir=certs --host=192.168.10.11
Run the following command to show the databases:
show databases;
You should see the wpdb1 and wpdb2 in the following output:
  database_name | owner | primary_region | secondary_region | regions | survival_goal
---------------- ------- ---------------- ------------------ --------- ----------------
  defaultdb     | root  | NULL           | NULL             | {}      | NULL
  postgres      | root  | NULL           | NULL             | {}      | NULL
  system        | node  | NULL           | NULL             | {}      | NULL
  wpdb1         | root  | NULL           | NULL             | {}      | NULL
  wpdb2         | root  | NULL           | NULL             | {}      | NULL
(5 rows)


Time: 7ms total (execution 6ms / network 1ms)
The above output indicates that the database replication is working on the CockroachDB Cluster.
Conclusion
This guide explained how to install and set up a secure CockroachDB Cluster on Ubuntu 22.04 server. You can now scale your cluster easily by adding additional nodes to the cluster. Feel free to ask me if you have any questions. For more information, you can visit the CockroachDB official documentation.


