Apache Solr or Solr is an enterprise-grade search platform based on the Apache Lucene library. Solr stands for Searching On Lucene with Replication and is a free, open-source search platform written in Java. Solr is one of the most popular search platforms in the industry and offers high availability with replication and automatic failover and recovery.
Solr is a highly scalable and reliable search platform for building enterprise applications and offers high performance. It supports distributed indexing and offers fault tolerance. Some major internet companies such as Adobe, Netflix, Instagram, Magento, and Bloomberg use Apache Solr as a product search engine platform.
In this guide, you will get Apache Solr running on the Ubuntu 22.04 server. You will also secure Apache Solr with the Basic Authentication module enabled.
Prerequisite
Before you start, you should fulfill the following requirements:
- An Ubuntu Server 22.04 – with at least 2 GB of memory.
- A non-root user with sudo administrator rights.
Installation of Java OpenJDK
Apache Solr is a Java-based software, so you must install Java on your Ubuntu server. The current version of Apache Solr requires at least Java OpenJDK 11 or higher. You will now install Java OpenJDK 11 on your Ubuntu system.
First, run the“apt” command below to update the Ubuntu package repositories and database.
sudo apt update
Now install the Java OpenJDK on your system using the “apt install” command (see below). Confirm the Java OpenJDK installation with Y and press ENTER. The installation will then begin.
sudo apt install default-jdk
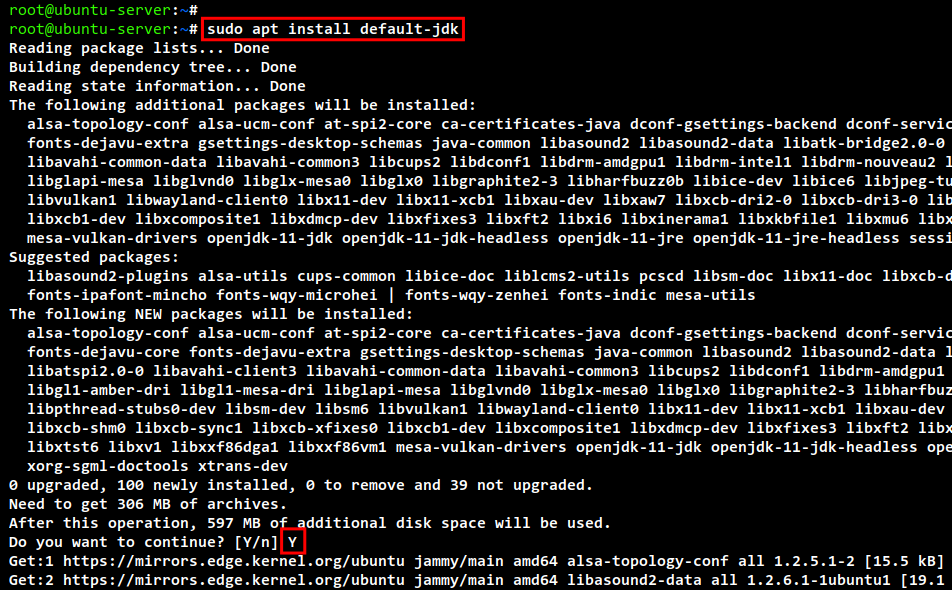
When installing, use the following command to check the Java version. You should get the output of the installed Java OpenJDK “11” on your terminal.
java -version

Installing Apache Solr with the installer script
Once the Java OpenJDK is installed, you can start installing Apache Solr. In this guide, you will install Apache Solr using the installer script in the Solr package.
Run the “wget” command below to download the Apache Solr package. At the time of this article, the latest version of Apache Solr is v8.11.2. You should now see the Apache Solr package “solr-8.11.2.tgz” in your current directory.
wget https://downloads.apache.org/lucene/solr/8.11.2/solr-8.11.2.tgz
Next, unzip the installer script from the Solr package “solr-8.11.2.tgz” using the command below. You should see the installer script “install_solr_service.sh” in your current working directory.
tar xzf solr-8.11.2.tgz solr-8.11.2/bin/install_solr_service.sh --strip-components=2
To start the installation of Apache Solr, run the install script “install_solr_service.sh” as follows. This command will install Apache Solr using the following configurations:
- The installation is based on the Apache Solr package“solr-8.11.2.tgz“.
- The target directory for the installation is“https://vitux.com/opt“, so the directory will be “https://vitux.com/opt/solr”.
- The data directory for Apache Solr is“https://vitux.com/var/solr“.
- Apache Solr will run under the user“solr“, which is automatically created by the installation program.
- The systemd service file for Apache Solr will be named“solr” so that you can easily manage the Apache Solr service with the“systemctl” command.
- Apache Solr will run on the TCP port“8983“.
sudo bash ./install_solr_service.sh solr-8.11.2.tgz -i /opt -d /var/solr -u solr -s solr -p 8983
The Apache Solr installation script will display the following message:
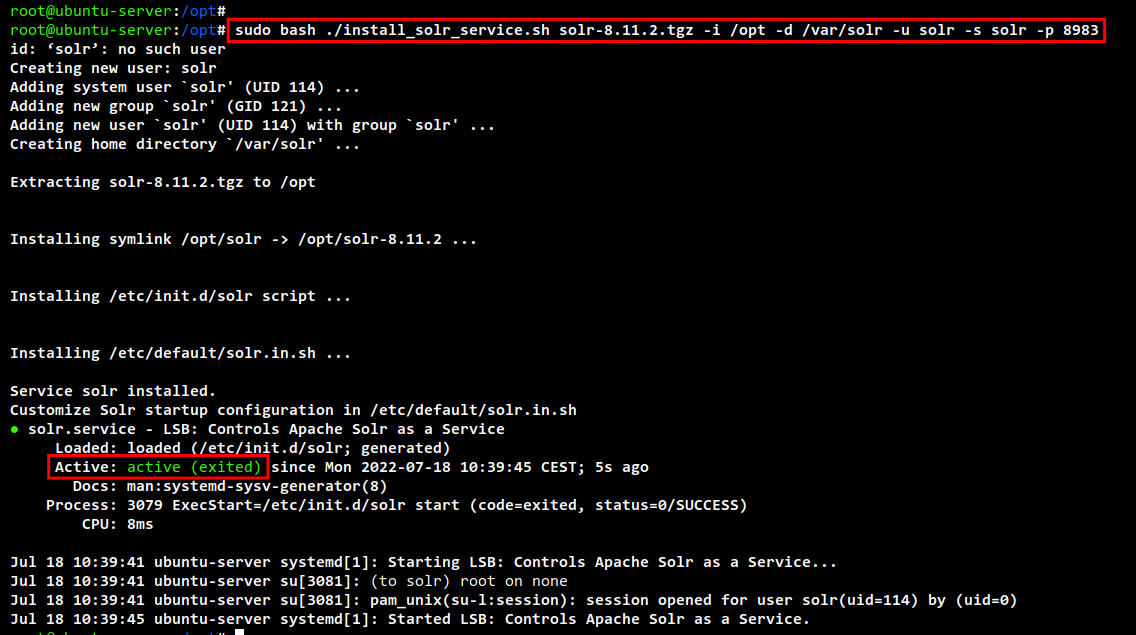
You can also see in your terminal that the “solr” service is running. The“exited” message is because systemd cannot find a daemon that monitors the “solr” service.
You can also check the open ports on your system with the“ss” command below. You should then see that the Java application Apache Solr is running on the TCP port “8983“.
ss -plnt

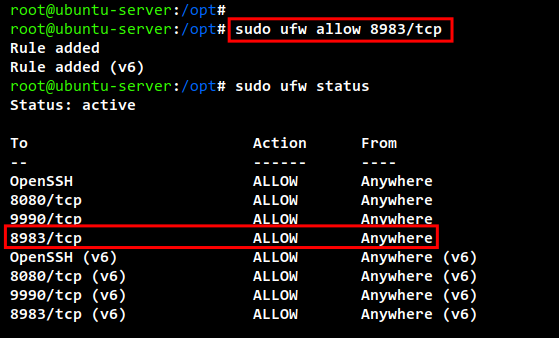
Before accessing the Apache Solr installation, you must add the new firewall rule to your system. On Ubuntu, the default firewall is “UFW“.
Execute the “ufw” command below to add the TCP port“8983” to your firewall rule. Then, check your firewall configuration. You will see that the Apache Solr port “8983” has been added to the UFW firewall.
sudo ufw allow 8983/tcp
sudo ufw status
Now open your web browser and go to the server’s IP address with the port“8983” (i.e. http://192.168.5.10:8983/). You should see the default Apache Solr administration page, delivered by default without authentication.
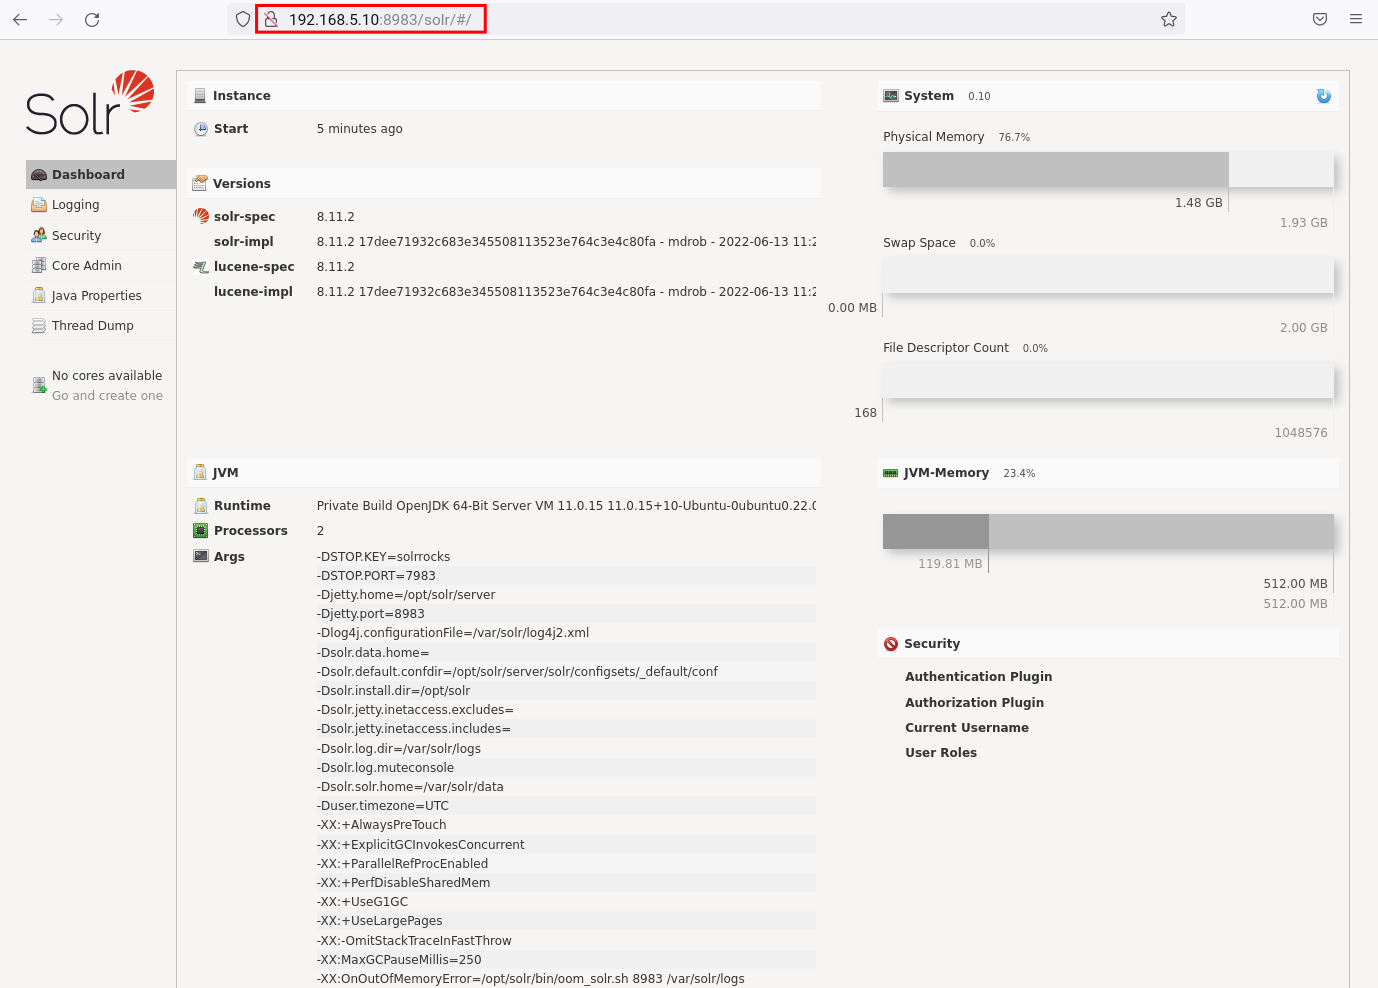
Setting up Ulimit for Apache Solr
When using Apache Solr on a Unix-like operating system, it is always recommended to permanently set up the system ulimit for the user “solr“, especially in the production environment.
This setting includes the maximum number of processes and open files. The value for both settings should be at least“65,000“. Two further settings are the virtual memory and the maximum memory size, which should ideally be set to unlimited.
Create a new configuration file “https://vitux.com/etc/security/limits.d/solr.conf” with the following command.
sudo nano /etc/security/limits.d/solr.conf
Add the following configuration to the file. This configuration only applies the Ulimit settings for the user “solr“, i.e. Apache Solr.
solr   soft   nofile   65000
solr   hard   nofile   65000
solr   soft   nproc    65000
solr   hard   nproc    65000
Save and close the file when you are finished.
Next, run the following command to check and verify the Ulimit settings for the “solr” user. You will see that the value for the maximum open files and maximum process size is “65000” and the value for the virtual memory and maximum memory size is“unlimited“.
sudo -H -u solr bash -c "ulimit -aH"
The command output looks similar to the following:
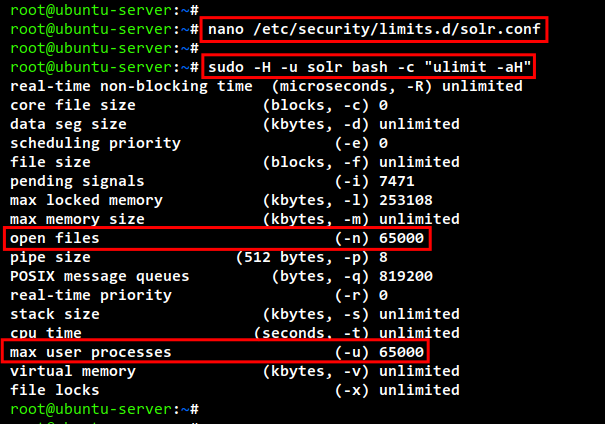
Finally, run the following“systemctl” command to restart the Apache Solr service so that the new changes take effect on the Ubuntu system.
sudo systemctl restart solr
Securing Apache Solr with the Basic Authentication Plugin
The default installation of Apache Solr does not have secure authentication. To secure your Solr installation, you can activate the “Basic Authentication” plugin for Apache Solr.
The Solr plugin “Basic Authentication” can be activated via the configuration file“security.json“, which you create in the Apache Solr data directory“https://vitux.com/var/lib/solr“.
Create a new configuration file “/var/solr/data/security.json” with the following command.
sudo nano /var/solr/data/security.json
Add the following configuration to the file. This configuration creates the administrator user for Apache Solr with the user name“solr” and the password“SolrRocks“.
{
  "authentication":{
    "blockUnknown": true,
    "class":"solr.BasicAuthPlugin",
    "credentials":{"solr":"IV0EHq1OnNrj6gvRCwvFwTrZ1 z1oBbnQdiVC3otuq0= Ndd7LKvVBAaZIF0QAVi1ekCfAJXr1GGfLtRUXhgrF8c="},
    "realm":"My Solr users",
    "forwardCredentials": false
  },
  "authorization":{
    "class":"solr.RuleBasedAuthorizationPlugin",
    "permissions":[{"name":"all", "role":"admin"}],
    "user-role":{"solr":"admin"}
  }
}
Save and close the file when you are finished.
Next, run the following“systemctl” command to apply the new configuration and changes.
sudo systemctl restart solr
Finally, go back to your web browser and call your server IP address with the port“8983” to access Apache Solr (i.e.: http://192.168.5.10:8983/).
You will get the Apache Solr login page like the following:
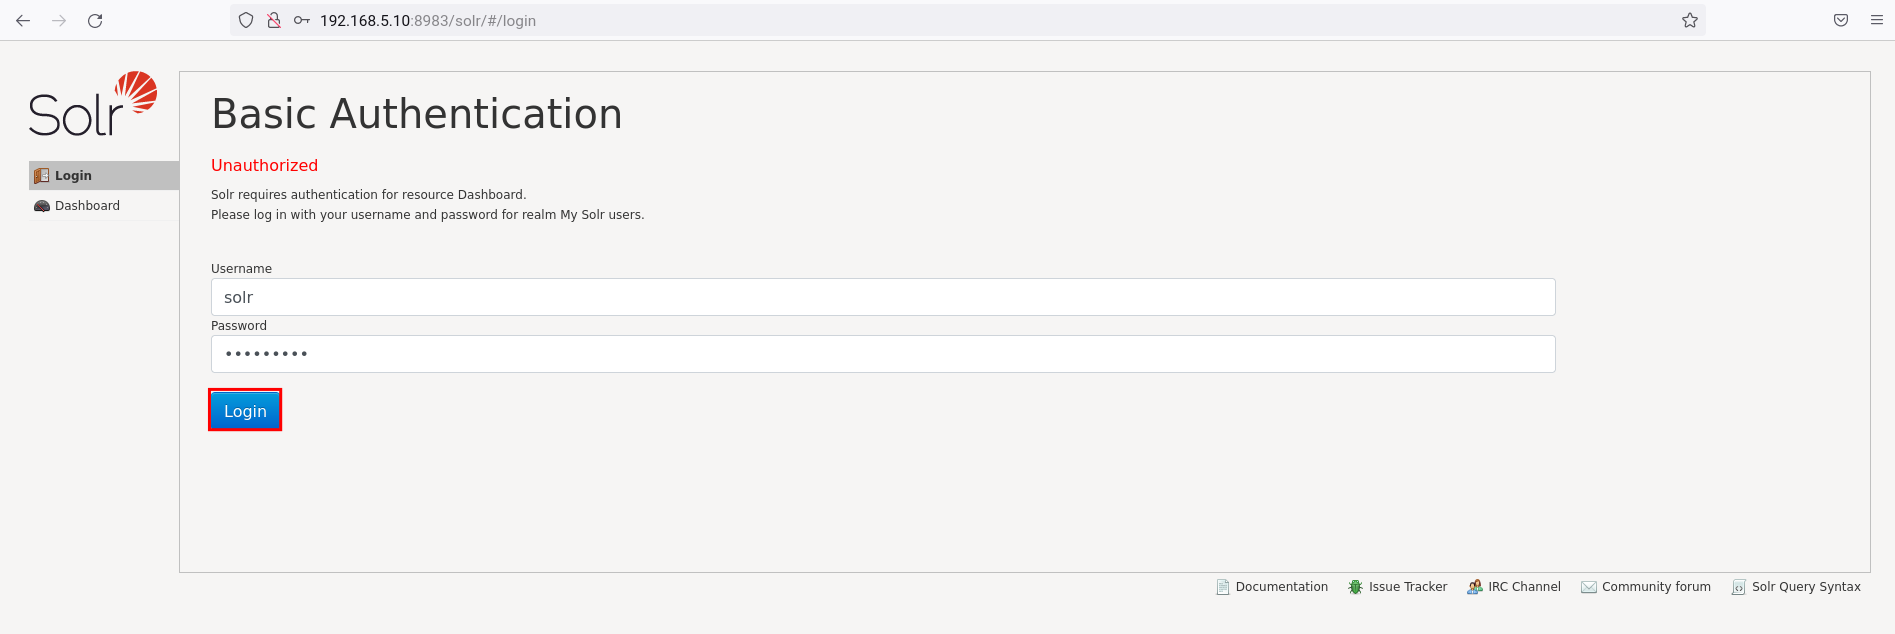
Enter the administrator user “solr” and password “SolrRocks” and click on the “Login” button. You will see the Apache Solr administration dashboard if the user and password are correct.
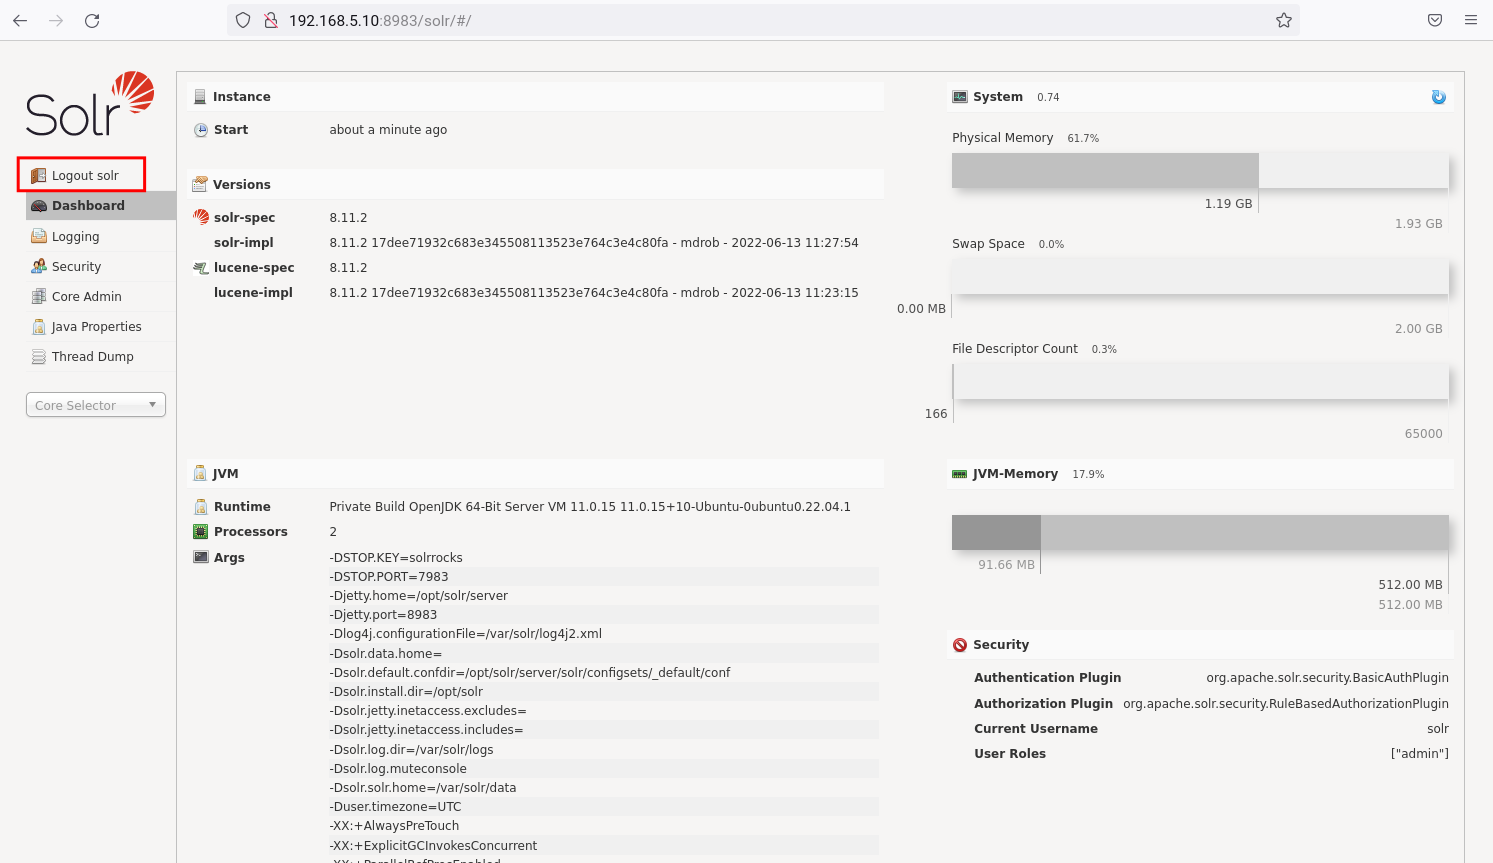
You will also see the security settings at the bottom right, informing you that the authentication plugin currently in use is “BasicAuthPlugin” and the user is “solr” with the role “admin“.

You have now configured“Basic Authentication” for Apache Solr, i.e. you will be prompted by the Solr login page every time you access the Apache Solr administration dashboard.
Creating the first core in Solr
In Apache Solr, you can also create and set up multiple cores with a single Apache Solr installation. The Solr core is called the Lucene index.
The Solr core contains transaction logs and configuration files such as “solrconfig.xml,” schema files, and more. In addition, the Solr core supports multiple data with different structures and can be set up for various applications or target groups.
The standard installation of Apache Solr contains the command line tool “solr“, which can be used to manage the cores. The“solr” command line is available in the“https://vitux.com/opt/solr/bin” directory and can be configured with the“Basic Authentication” plugin.
Execute the following command to copy the “solr” command line script.
cp /opt/solr/bin/solr.in.sh.orig /opt/solr/bin/solr.in.sh
Edit the “solr” command line script with the following command.
nano /opt/solr/bin/solr.in.sh
Remove the comment character in the“SOLR_AUTH_TYPE” option to set up the authentication plugin. Then, change the value to“basic” to use the“BasicAuthPlugin” plugin.
SOLR_AUTH_TYPE="basic"
Next, you need to comment on the “SOLR_AUTHENTICATION_OPTS” option to set the Solr user and password for authentication. In this example, the user is“solr” and the password is“SolrRocks“. The configuration should look like this.
SOLR_AUTHENTICATION_OPTS="-Dbasicauth=solr:SolrRocks"
Save and close the file when you are done.
To create a new core for Apache Solr, run the following“solr” command. In this demo, you will create a new core with the name“mycore” and the configuration name“MyConfig“. And you will see the output“Created new core ‘mycore‘”.
su - solr -c "https://vitux.com/opt/solr/bin/solr create -c mycore -n MyConfig"
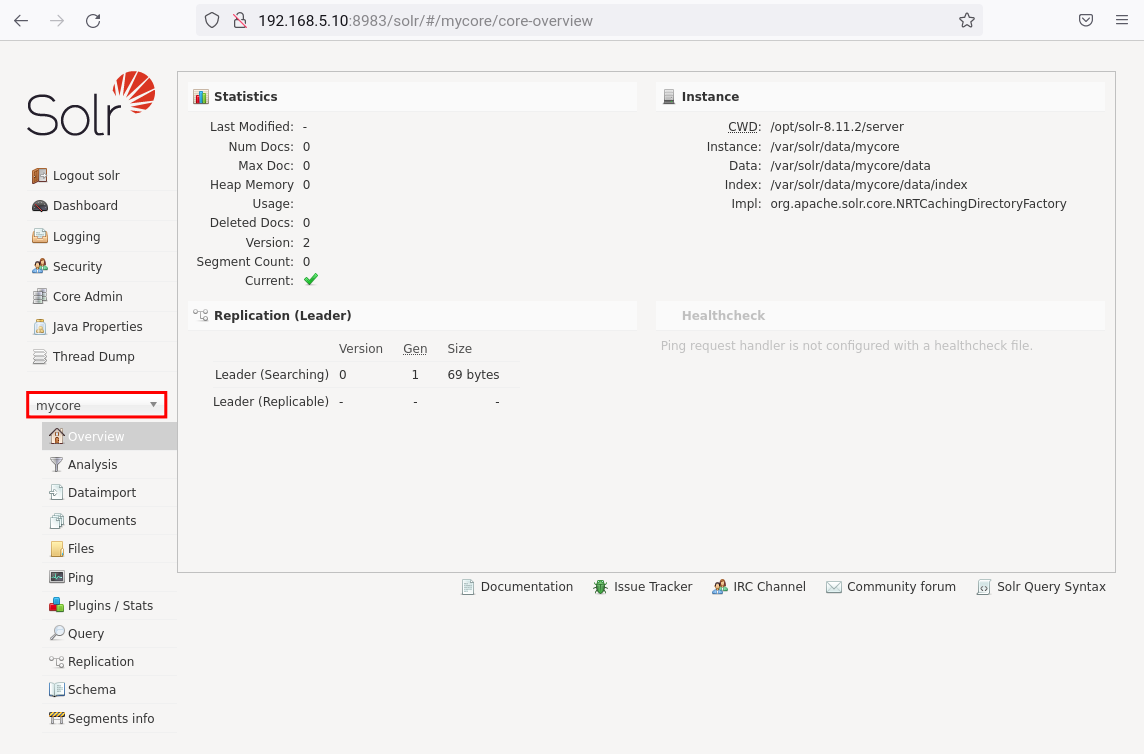
Finally, go back to the Apache Solr administration dashboard and you should see the core named “mycore” in the dropdown menu.
Select the Solr core “mycore” and you should get detailed information about the core.
Conclusion
In this tutorial, you have installed Apache Solr on Ubuntu 22.04 using the installation script. You have also learned some of the basic system configurations for using Apache Solr and activated the Basic Authentication Plugin for Apache Solr.
