
NodeBB is a modern forum software powered by Node.js framework. It uses MongoDB, PostgreSQL, or Redis database to store data. It utilizes web sockets for real-time notifications and instant interactions. It has modern features like social network integration, plugin support, mobile responsiveness, and full REST read/write APIs.
NodeBB is available as both an open-source self-hosting project and a cloud service. In this tutorial, you will learn how to install the NodeBB forum using Nginx on a Ubuntu 22.04 server. Ubuntu 22.04 doesn’t officially support MongoDB; therefore, we will use PostgreSQL to store data.
Prerequisites
-
A server running Ubuntu 22.04 with a minimum of 1GB of RAM.
-
A non-root user with sudo privileges.
-
The uncomplicated Firewall(UFW) is enabled and running.
-
A Fully Qualified domain name (FQDN) pointing to the server like,
forum.example.com. -
Everything is updated.
$ sudo apt update && sudo apt upgrade
Step 1 – Configure Firewall
Before installing any packages, the first step is configuring the firewall to allow HTTP and HTTPS connections.
Check the status of the firewall.
$ sudo ufw status
You should see something like the following.
Status: active

To                         Action      From
--                         ------      ----
OpenSSH                    ALLOW       Anywhere
OpenSSH (v6)               ALLOW       Anywhere (v6)
Allow HTTP and HTTPs ports.
$ sudo ufw allow http
$ sudo ufw allow https
Check the status again to confirm.
$ sudo ufw status
Status: active

To                         Action      From
--                         ------      ----
OpenSSH                    ALLOW       Anywhere
80/tcp                     ALLOW       Anywhere
443                        ALLOW       Anywhere
OpenSSH (v6)               ALLOW       Anywhere (v6)
80/tcp (v6)                ALLOW       Anywhere (v6)
443 (v6)                   ALLOW       Anywhere (v6)
Step 2 – Install PostgreSQL
The first step in installing PostgreSQL is to add its GPG key.
$ curl https://www.postgresql.org/media/keys/ACCC4CF8.asc | gpg --dearmor | sudo tee /usr/share/keyrings/postgresql-key.gpg >/dev/null
Add the APT repository to your sources list.
$ sudo sh -c 'echo "deb [signed-by=/usr/share/keyrings/postgresql-key.gpg arch=amd64] http://apt.postgresql.org/pub/repos/apt $(lsb_release -cs)-pgdg main" > /etc/apt/sources.list.d/pgdg.list'
Update the system repository.
$ sudo apt update
Now, you can install PostgreSQL.
$ sudo apt install postgresql postgresql-contrib
Check the status of the PostgreSQL service.
$ sudo systemctl status postgresql
? postgresql.service - PostgreSQL RDBMS
     Loaded: loaded (/lib/systemd/system/postgresql.service; enabled; vendor preset: enabled)
     Active: active (exited) since Sat 2022-09-10 06:25:11 UTC; 13s ago
    Process: 12083 ExecStart=/bin/true (code=exited, status=0/SUCCESS)
   Main PID: 12083 (code=exited, status=0/SUCCESS)
        CPU: 1ms

Sep 10 06:25:11 nodebb systemd[1]: Starting PostgreSQL RDBMS...
Sep 10 06:25:11 nodebb systemd[1]: Finished PostgreSQL RDBMS.
Step 3 – Configure PostgreSQL
We need to set a password for the Postgres default administrative user postgres. First, log in to the Postgres Shell.
$ sudo -u postgres psql
Enter the following command to change the password.
postgres=# password postgres
You will be prompted for a new password.
Enter new password for user "postgres":
Enter it again:
Create a new user for NodeBB.
postgres=# CREATE ROLE nbbuser WITH LOGIN ENCRYPTED PASSWORD 'YourNodeBBPassword';
Create a new database for NodeBB.
postgres=# CREATE DATABASE nodebbdb OWNER nbbuser;
Type q to exit the shell.
postgres=# q
Step 4 – Install Node.js
Since the Nodebb forum is written using the Node.js framework, we need to install it to make it work.
Issue the following commands to install the LTS(v16.x) version of Nodejs.
$ curl -sL https://deb.nodesource.com/setup_lts.x | sudo -E bash -
$ sudo apt install nodejs
Verify the installation of Node.js and NPM.
$ node -v
v16.17.0
$ npm -v
8.15.0
Step 5 – Install Git
Before we proceed to install NodeBB, we need to install Git. Run the following command to install Git.
$ sudo apt install git
Run the following commands to perform the initial configuration of Git.
$ git config --global user.name "Your Name"
$ git config --global user.email "[email protected]"
Step 6 – Install NodeBB
It is not advisable to run NodeBB as the root user. Create an unprivileged system user without a password.
$ sudo adduser nodebb --disabled-password
Skip through all the other options.
Create the directory where your NodeBB forum will live.
$ sudo mkdir /var/www/html/nodebb -p
Change the ownership of the folder to the newly created user.
$ sudo chown -R nodebb:nodebb /var/www/html/nodebb
Log in to the newly created user.
$ sudo su - nodebb
Switch to the NodeBB installation directory.
$ cd /var/www/html/nodebb
To install NodeBB, first, we need to clone its GitHub repository.
Clone NodeBB to the /var/www/nodebb directory. The dot at the end of the command refers to the current directory.
$ git clone -b v2.x https://github.com/NodeBB/NodeBB.git .
Here we have cloned the v2.x branch of NodeBB which houses the latest stable version of NodeBB. You can find the latest stable branch from NodeBB’s Latest Branches page.
NodeBB ships with a command-line utility. Use the following command to install NodeBB.
$ ./nodebb setup
You can press enter to choose the default value.
2022-09-10T10:10:27.957Z [2633] - info: NodeBB Setup Triggered via Command Line

Welcome to NodeBB v2.5.2!

This looks like a new installation, so you'll have to answer a few questions about your environment before we can proceed.
Press enter to accept the default setting (shown in brackets).
URL used to access this NodeBB (http://localhost:4567) https://forum.example.com
Please enter a NodeBB secret (44fd62bc-5047-4414-a4ca-83105740b624)
Would you like to submit anonymous plugin usage to nbbpm? (yes) no
Which database to use (mongo) postgres
2022-09-10T10:10:43.237Z [2633] - info:
Now configuring postgres database:
Host IP or address of your PostgreSQL instance (127.0.0.1)
Host port of your PostgreSQL instance (5432)
PostgreSQL username nbbuser
Password of your PostgreSQL database
PostgreSQL database name (nodebb) nodebbdb
Enable SSL for PostgreSQL database access (false)
........
For the value of the URL used to access this NodeBB, choose the final URL, you want to access the forum at. If you will access the forum via your server IP, enter that or enter the full domain of the forum. Here we will enter https://forum.example.com. Choose no as the answer to the question about submitting anonymous plugin usage. Type postgres as the database type.
Then choose the default Host IP and port by pressing enter and enter your PostgreSQL username which is when you enter nbbuser and the password you chose earlier for that username while configuring MongoDB. Your database nodebbdb should be chosen.
You will also be asked to create an administrator user and its details.
.....
2022-09-10T10:11:14.121Z [2633] - warn: No administrators have been detected, running initial user setup

Administrator username navjot
Administrator email address [email protected]
Password
Confirm Password
.....
....
2022-09-10T10:14:28.160Z [2633] - info: [build] Asset compilation successful. Completed in 118.777sec.

     =================================================================================================================================================================

NodeBB Setup Completed. Run "./nodebb start" to manually start your NodeBB server.
Once the setup is complete, run the following command to start NodeBB.
$ ./nodebb start
Starting NodeBB
  "./nodebb stop" to stop the NodeBB server
  "./nodebb log" to view server output
  "./nodebb help" for more commands
Exit the NodeBB user.
$ exit
Step 7 – Run NodeBB as a System Service
NodeBB service won’t run after a system reboot. To avoid starting NodeBB every time, we need to install it as a System Service.
Stop NodeBB service first. Switch to the NodeBB directory and then run the command directly by using the sudo -u command.
$ cd /var/www/html/nodebb
$ sudo -u nodebb ./nodebb stop
Run the following command to create and edit nodebb.service systemd unit configuration file.
$ sudo nano /etc/systemd/system/nodebb.service
Paste the following code in the editor.
[Unit]
Description=NodeBB
Documentation=https://docs.nodebb.org
After=system.slice multi-user.target postgresql.service

[Service]
Type=simple
User=nodebb

StandardError=syslog
SyslogIdentifier=nodebb

Environment=NODE_ENV=production
WorkingDirectory=/var/www/html/nodebb
ExecStart=/usr/bin/env node loader.js --no-silent --no-daemon
Restart=always

[Install]
WantedBy=multi-user.target
Here we have chosen the username as nodebb which we created in Step 6 and the path we have chosen to install NodeBB in it.
Enable the NodeBB service.
$ sudo systemctl enable nodebb
Start the NodeBB service.
$ sudo systemctl start nodebb
Check the status of the service.
$ sudo systemctl status nodebb
? nodebb.service - NodeBB
     Loaded: loaded (/etc/systemd/system/nodebb.service; enabled; vendor preset: enabled)
     Active: active (running) since Sun 2022-09-11 21:41:07 UTC; 2s ago
       Docs: https://docs.nodebb.org
   Main PID: 26844 (node)
      Tasks: 18 (limit: 2237)
     Memory: 94.1M
        CPU: 2.114s
     CGroup: /system.slice/nodebb.service
             ??26844 node loader.js --no-silent --no-daemon
             ??26855 /usr/bin/node /var/www/html/nodebb/app.js

Sep 11 21:41:07 forum systemd[1]: Started NodeBB.
Sep 11 21:41:07 forum nodebb[26844]: NodeBB v2.5.2 Copyright (C) 2013-2022 NodeBB Inc.
Sep 11 21:41:07 forum nodebb[26844]: This program comes with ABSOLUTELY NO WARRANTY.
Sep 11 21:41:07 forum nodebb[26844]: This is free software, and you are welcome to redistribute it under certain conditions.
Sep 11 21:41:07 forum nodebb[26844]: For the full license, please visit: http://www.gnu.org/copyleft/gpl.html
Sep 11 21:41:07 forum nodebb[26844]: Clustering enabled: Spinning up 1 process(es).
Sep 11 21:41:08 forum nodebb[26855]: 2022-09-11T21:41:08.002Z [4567/26855] - info: Initializing NodeBB v2.5.2 https://forum.example.com
Step 8 – Install Nginx
Ubuntu 22.04 ships with an older version of Nginx. To install the latest version, you need to download the official Nginx repository.
Import Nginx’s signing key.
$ curl https://nginx.org/keys/nginx_signing.key | gpg --dearmor
| sudo tee /usr/share/keyrings/nginx-archive-keyring.gpg >/dev/null
Add the repository for Nginx’s stable version.
$ echo "deb [signed-by=/usr/share/keyrings/nginx-archive-keyring.gpg arch=amd64]
http://nginx.org/packages/ubuntu `lsb_release -cs` nginx"
| sudo tee /etc/apt/sources.list.d/nginx.list
Update the system repositories.
$ sudo apt update
Install Nginx.
$ sudo apt install nginx
Verify the installation.
$ nginx -v
nginx version: nginx/1.22.0
Start the Nginx server.
$ sudo systemctl start nginx
Step 9 – Install SSL
We need to install Certbot to generate the SSL certificate. You can either install Certbot using Ubuntu’s repository or grab the latest version using the Snapd tool. We will be using the Snapd version.
Ubuntu 22.04 comes with Snapd installed by default. Run the following commands to ensure that your version of Snapd is up to date.
$ sudo snap install core
$ sudo snap refresh core
Install Certbot.
$ sudo snap install --classic certbot
Use the following command to ensure that the Certbot command can be run by creating a symbolic link to the /usr/bin directory.
$ sudo ln -s /snap/bin/certbot /usr/bin/certbot
Run the following command to generate an SSL Certificate.
$ sudo certbot certonly --nginx --agree-tos --no-eff-email --staple-ocsp --preferred-challenges http -m [email protected] -d forum.example.com
The above command will download a certificate to the /etc/letsencrypt/live/forum.example.com directory on your server.
Generate a Diffie-Hellman group certificate.
$ sudo openssl dhparam -dsaparam -out /etc/ssl/certs/dhparam.pem 4096
To check whether the SSL renewal is working fine, do a dry run of the process.
$ sudo certbot renew --dry-run
If you see no errors, you are all set. Your certificate will renew automatically.
Step 10 – Configure Nginx
Open the file /etc/nginx/nginx.conf for editing.
$ sudo nano /etc/nginx/nginx.conf
Add the following line before the line include /etc/nginx/conf.d/*.conf;.
server_names_hash_bucket_size 64;
Save the file by pressing Ctrl X and entering Y when prompted.
Create and open the file /etc/nginx/conf.d/nodebb.conf for editing.
$ sudo nano /etc/nginx/conf.d/nodebb.conf
Paste the following code in it. Replace forum.example.com with your domain name. Make sure the value of the client_max_body_size is set to 25MB to set the upload size for the forum.
server {
  listen 80 default_server;
  server_name forum.example.com;
  return 301 https://$server_name$request_uri;
}

server {
   listen 443 ssl http2;
   server_name forum.example.com;

   http2_push_preload on; # Enable HTTP/2 Server Push

   ssl_certificate /etc/letsencrypt/live/forum.example.com/fullchain.pem;
   ssl_certificate_key /etc/letsencrypt/live/forum.example.com/privkey.pem;
   ssl_trusted_certificate /etc/letsencrypt/live/forum.example.com/chain.pem;
   ssl_session_timeout 1d;

   # Enable TLS versions (TLSv1.3 is required upcoming HTTP/3 QUIC).
   ssl_protocols TLSv1.2 TLSv1.3;

   # Enable TLSv1.3's 0-RTT. Use $ssl_early_data when reverse proxying to
   # prevent replay attacks.
   #
   # @see: https://nginx.org/en/docs/http/ngx_http_ssl_module.html#ssl_early_data
   ssl_early_data on;

   ssl_ciphers 'ECDHE-ECDSA-AES256-GCM-SHA384:ECDHE-RSA-AES256-GCM-SHA384:ECDHE-ECDSA-CHACHA20-POLY1305:ECDHE-RSA-CHACHA20-POLY1305:ECDHE-ECDSA-AES256-SHA384:ECDHE-RSA-AES256-SHA384';
   ssl_prefer_server_ciphers on;
   ssl_session_cache shared:SSL:50m;

   # OCSP Stapling ---
   # fetch OCSP records from URL in ssl_certificate and cache them
   ssl_stapling on;
   ssl_stapling_verify on;
   ssl_dhparam /etc/ssl/certs/dhparam.pem;
   client_max_body_size 25M;

   gzip            on;
   gzip_min_length 1000;
   gzip_proxied    off;
   gzip_types      text/plain application/xml text/javascript application/javascript application/x-javascript text/css application/json;

   add_header X-Early-Data $tls1_3_early_data;

   location / {
       # Socket.IO Support
       proxy_set_header Connection "upgrade";
       proxy_set_header Upgrade $http_upgrade;
       proxy_http_version 1.1;

       proxy_set_header Host $http_host;
       proxy_set_header X-Real-IP $remote_addr;
       proxy_set_header X-Forwarded-For $proxy_add_x_forwarded_for;
       proxy_set_header X-Forwarded-Proto $scheme;
       proxy_set_header X-NginX-Proxy true;
       proxy_set_header X-Frame-Options SAMEORIGIN;

       proxy_pass http://127.0.0.1:4567;  # no trailing slash
       proxy_redirect off;
   }

   location @nodebb {
       proxy_pass http://127.0.0.1:4567;
   }

   location ~ ^/assets/(.*) {
       root /var/www/html/nodebb/;
       try_files /build/public/$1 /public/$1 @nodebb;
   }
}

# This block is useful for debugging TLS v1.3. Please feel free to remove this
# and use the `$ssl_early_data` variable exposed by NGINX directly should you
# wish to do so.
map $ssl_early_data $tls1_3_early_data {
  "~." $ssl_early_data;
  default "";
}
Save the file by pressing Ctrl X and entering Y when prompted.
Verify your Nginx configuration.
$ sudo nginx -t
Restart the Nginx server.
$ sudo systemctl restart nginx
Step 11 – Access and Configure Forum
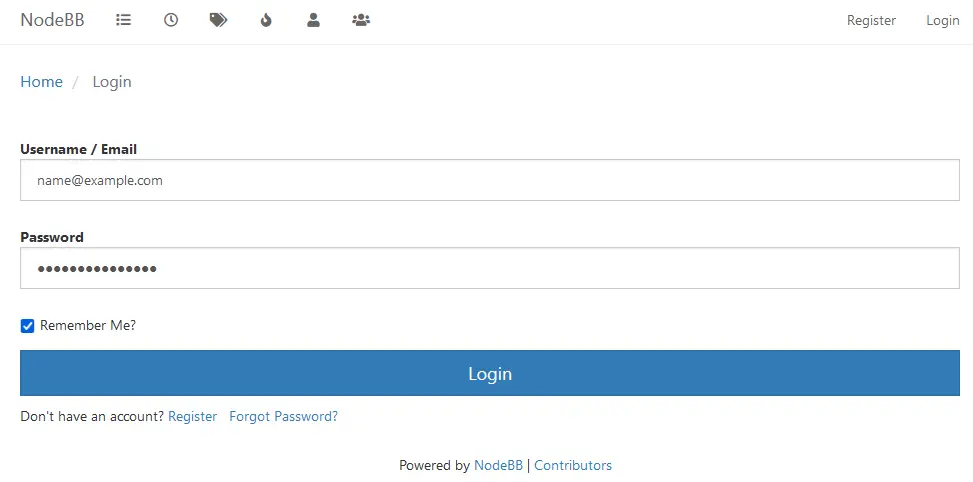
You can access the forum by visiting the URL https://forum.example.com in your browser. You will get the following page.
Click the login page and enter the administrator credentials you created in step 6.
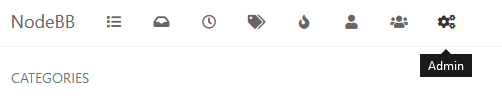
You will be logged in. Next, click the rightmost icon on top of the menu bar to access the administration panel.
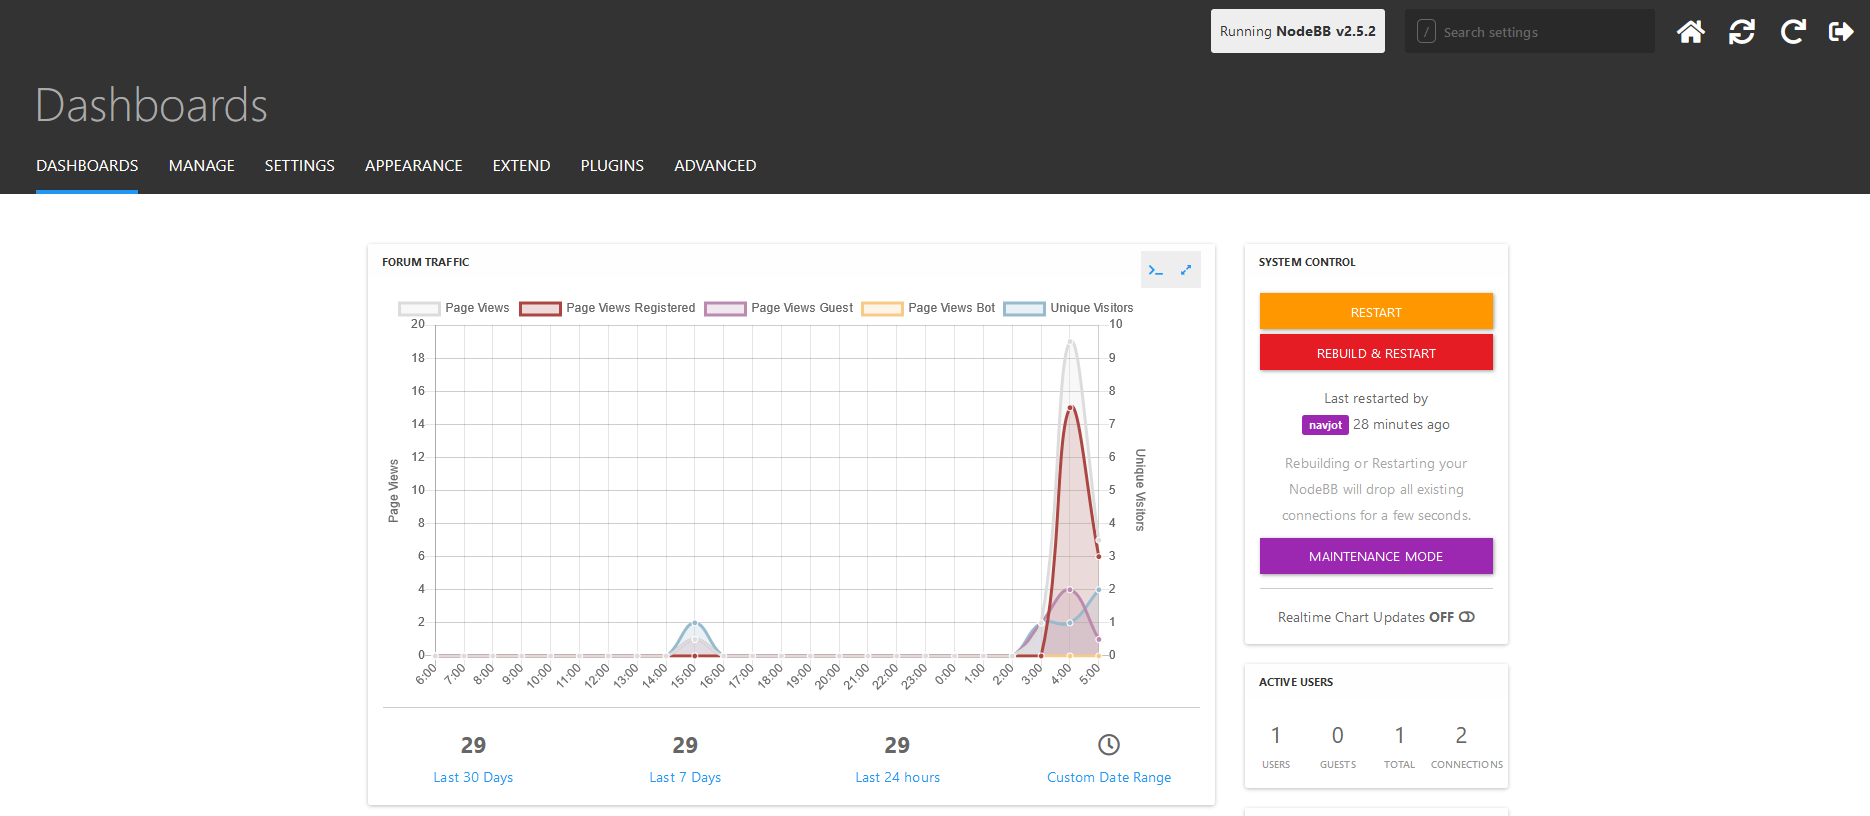
From here on, you can manage the forum. Extend it by installing themes and plugins.
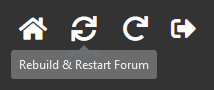
After installing any theme and plugin, you must rebuild and restart the forum using the button on the top right corner of the administration dashboard as shown here.
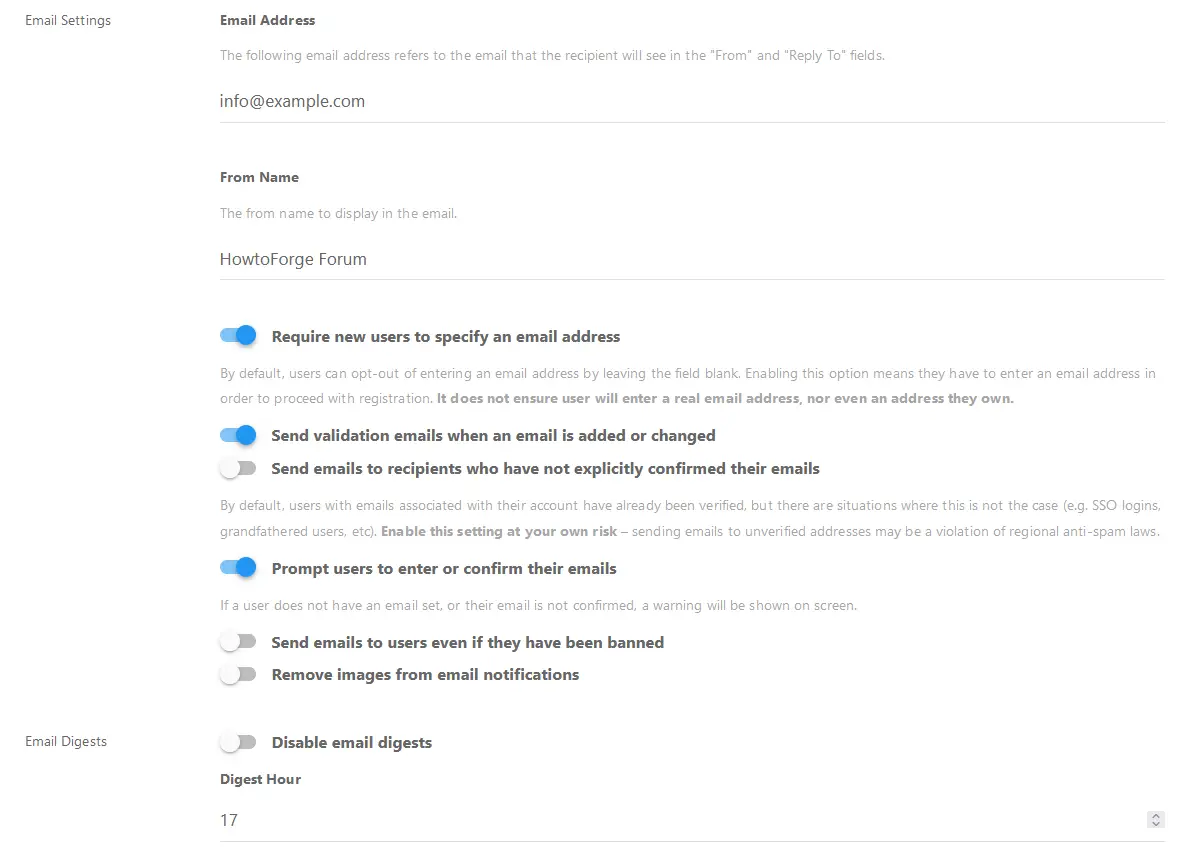
Make sure to configure your email service by going to Dashboard >> Settings >> Email so your forum users can receive emails. Select the following settings to ensure set optimum email delivery settings.
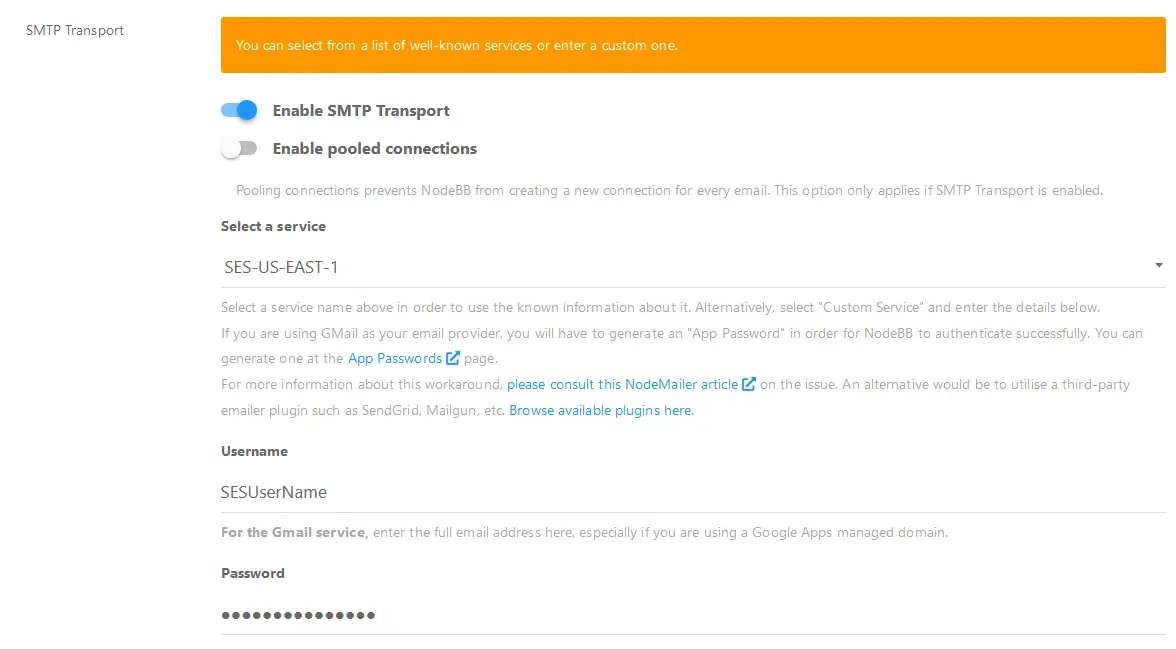
Scroll down to the page and select a custom mailer from the dropdown or use Custom mailer if your SMTP service is not in the list. For our tutorial, we are using the SES service.
Click the floppy save icon at the bottom right to save the settings.
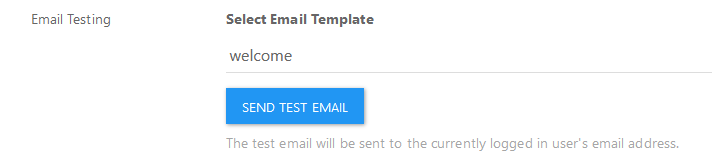
Scroll down to the bottom of the page to send a test email. By default, it will send a banned email template. You can select any other mail template to test. We will send the welcome mail.
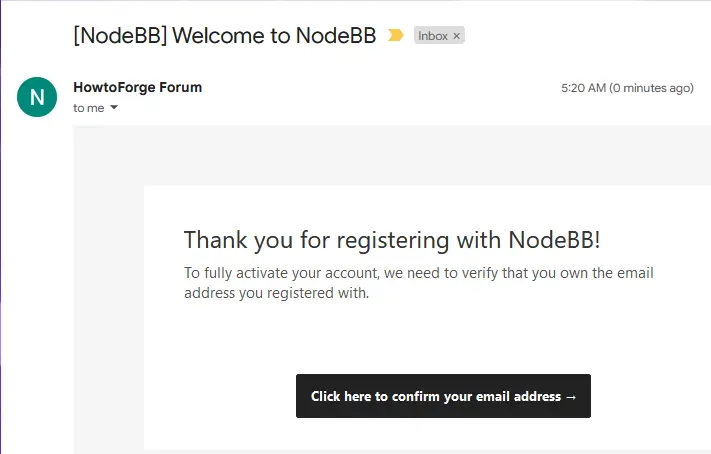
You will receive a test email as shown below confirming the settings.
Conclusion
This concludes our tutorial on installing the NodeBB forum using the PostgreSQL database and Nginx on a Ubuntu 22.04 server. If you have any questions, post them in the comments below.


