NVM stands for Node Version Manager, and that’s exactly what its name suggests.
With NVM, you can manage multiple Node.js versions of NodeJS and switch between them without uninstalling and reinstalling your Node environment.
This means, for example, if you’re working on a new project that requires a newer version than your previous projects, and a day later another developer comes along and says they need an older version because their toolset doesn’t work with the latest version of NodeJS but is compatible with another – we can easily do that with NVM.
In this tutorial we will guide you through the installation and use of NVM on a Debian 11 system.
This guide is written for Debian 11 (Bullseye), but should also be applicable to most other Debian-based distributions.
Prerequisites
- A server running Debian 11
- A non-root user with sudo privileges
Step 1: Update the system
Before we start installing packages and making changes to the system, we should make sure that everything is up to date.
sudo apt update && sudo apt upgrade
It will take a moment for this process to complete and then your system will be updated.
Step 2: Install NVM
Once the above command has been executed, we can install NVM.
We will use the cURL package. For this, we need to install it first.
sudo apt install curl -y
After that, we can download and run the installation file for NVM.
curl https://raw.githubusercontent.com/creationix/nvm/master/install.sh | bash
The above command downloads a short script from GitHub, runs it as root with bash and installs NVM.
To apply the changes, we need to close and reopen our terminal or run the following command.
source ~/.profile
Again, this won’t take too long and when it’s done, we can verify that NVM has been installed by running the command with the -v nvm argument. We cannot use the commandwhich with nvm as it is a user-installed script. It is not an actual application on the system.
command -v nvm
If it was successful, you will see output like the following. If not, repeat the installation steps above.

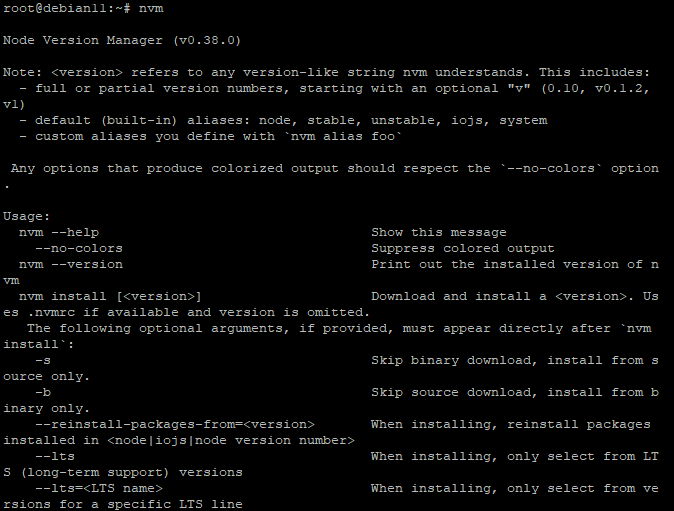
To check if the installation worked, you can run the following command which will show you all available subcommands for NVM.
nvm
As you can see on the screenshot below, the installation was successful and there are subcommands available for NVM.
Step 3: Installing Node.js with NVM
Once NVM is installed, installing Node.js is pretty straightforward. With NVM, you can install multiple versions of Node.js in a single user account – you don’t have to uninstall and reinstall Node.js or go through other hassles usually associated with repeatedly installing different versions of the same application.
To install the latest version of Node.js, run the following command.
nvm install node
The above command uses NVM’s standard installation mechanisms to download and install the latest version of Node.js: v16.10.0 (at the time of writing).
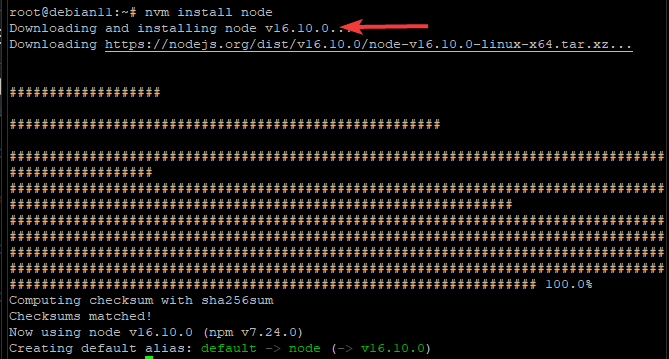
To install the latest stable version of Node.js, you can use the –lts flag .
nvm install --lts
This command installs v14.18.0, the latest LTS version of Node.js at the time of writing.

To get a specific version of Node.js, you can use the nvm ls-remote command to get a list of all available versions and then select one from that list.
nvm ls-remote
The output of this command looks something like the following. The screenshot below shows only a small portion of the versions in the list.
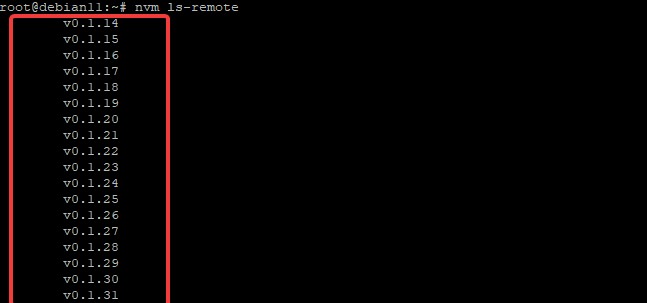
Once you have found the version you want, run the following command to install it.
nvm install
Where stands for the version of Node.js you want to install.
For example, if I want to install version 0.1.14, you need to run the following command.
nvm install 0.1.14
To get a complete list of all installed Node.js versions on your server, run the command below.
nvm ls
Sample output:
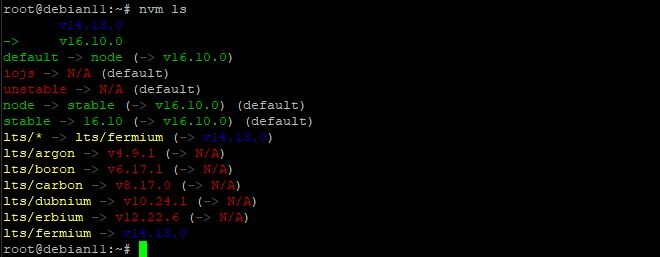
You can also switch to a different version of Node.js for the current user account/activeshell.
nvm use
For example, to change the version of Node.js to v10.24.1 , run the command below.
nvm use v10.24.1
Sample output:
![]()
To find the default version of Node.js that the current user account is using, run the following command.
nvm run default --version
Sample output:

Step 4: Test Node.js
So far we’ve installed Node.js using NVM, which creates a new version of Node.js, but how do we know it’s installed correctly?
In this step, we will create a simple Hello World project to test the Node.js installation with NVM.
To do this, create a file called hello.js in your home directory.
cd
sudo nano hello.js
Fill the file with the following content. Don’t forget to save the file and exit when you’re done by pressing CTRL X, then Y and then ENTER.
const http = require('http');
const hostname = 'localhost';
const port = 3000;
const server = http.createServer((req, res) => {
res.statusCode = 200;
res.setHeader('Content-Type', 'text/plain');
 res.end('Howtoforge-Hello World!n');
});
server.listen(port, hostname, () => {
 console.log(`Server running at http://${hostname}:${port}/`);
});
Run your Node application with the command below.
nodejs hello.js
You should see output like the following on your screen, telling you that your Node.js application has started correctly.
![]()
To test that your Node.js installation is working properly, open another terminal window on the same computer and try running the curl command below to print “Hello World!”.
curl http://localhost:3000/
Your output should look something like this. If you don’t get any errors, your Node.js installation is fine.

Now remove your Node.js application with the rm command (see below):
sudo rm -rf hello.js
Don’t forget to exit the Node.js application by pressing CTRL C. Otherwise, all further commands will be blocked. And the Node.js application running on your server may remain in a zombie state.
Congratulations! You have successfully installed and tested NVM and Node.js on your server.
Conclusion
In this tutorial, you learned how to install Node.js on Debian 11 with NVM and tested whether your installation was successful. If you have any questions or need further tips, feel free to leave us a comment below.

