
OpenSearch is an open-source fork of Elasticsearch and Kibana developed by Amazon. It is a real-time, distributed, and scalable search engine that allows for full-text search as well as analytics. It is used to index and search through large amounts of data. It is commonly deployed alongside OpenSearch Dashboards (a fork of Kibana), a powerful data visualization dashboard for OpenSearch. OpenSearch Dashboards allows you to explore the OpenSearch log data, and build dashboards and queries to gain insight into your application.
This tutorial will show you how to install OpenSearch on a Debian 12 server. You will also learn how to secure your installation with custom TLS certificates and enable authentication on OpenSearch.
Prerequisites
-
A server running Debian 12 with a minimum of 4GB of RAM.
-
A non-root user with sudo privileges.
-
The uncomplicated Firewall(UFW) is enabled and running.
-
A Fully Qualified Domain Name (FQDN) like
opensearch.example.compointing to your server. This is beneficial if you want to serve OpenSearch Dashboards via SSL using a proxy server. -
Everything is updated.
$ sudo apt update && sudo apt upgrade
-
A few essential packages are required for the tutorial and Craft CMS to run. Some of these will already be on your server.
$ sudo apt install curl wget nano software-properties-common dirmngr apt-transport-https ca-certificates lsb-release debian-archive-keyring gnupg2 ufw unzip -y
Step 1 – Configure Firewall
The first step before installing any packages is to configure the firewall to allow HTTP and HTTPS connections.
Check the status of the firewall.
$ sudo ufw status
You should see something like the following.
Status: active

To                         Action      From
--                         ------      ----
OpenSSH                    ALLOW       Anywhere
OpenSSH (v6)               ALLOW       Anywhere (v6)
Allow HTTP and HTTPs ports.
$ sudo ufw allow http
$ sudo ufw allow https
Check the status again to confirm.
$ sudo ufw status
Status: active

To                         Action      From
--                         ------      ----
OpenSSH                    ALLOW       Anywhere
80/tcp                     ALLOW       Anywhere
443/tcp                    ALLOW       Anywhere
OpenSSH (v6)               ALLOW       Anywhere (v6)
80/tcp (v6)                ALLOW       Anywhere (v6)
443/tcp (v6)               ALLOW       Anywhere (v6)
Step 2 – Prepare System
Before installing OpenSearch, we need to prepare and optimize our system for it. There are several steps involved which include disabling any swap memory if you have it, setting the number of memory maps for your system, and setting up the system hostname.
First, check if you have swap memory enabled.
$ free -m
If you have swap enabled, then you should see a similar output.
               total        used        free      shared  buff/cache   available
Mem:            7945        1083        6492          34         636        6861
Swap:           4242           0        4242
Run the following commands to disable swap space permanently.
$ sudo swapoff -a
$ sudo sed -i '/ swap / s/^(.*)$/#1/g' /etc/fstab
Check for swap memory again and it should show the following.
               total        used        free      shared  buff/cache   available
Mem:            7945        1113        6449          37         651        6831
Swap:              0           0           0
OpenSearch uses a mapfs directory by default to store its indices. The default operating system limits on nmap counts are too low which can cause out of memory errors.
Check the existing value for the vm.max_map_count variable.
$ sysctl -n vm.max_map_count
65530
To increase the number of memory maps used by each process, run the following command.
$ sudo sysctl -w vm.max_map_count=262144
This will work only till the system is restarted. To make this value permanent, add the line vm.max_map_count=262144 in the /etc/sysctl.conf file using the following command.
$ echo "vm.max_map_count=262144" | sudo tee -a /etc/sysctl.conf
You can make the change permanent by either rebooting the system or running the following command.
$ sudo sysctl -p
The final step is setting up the hostname. Depending upon where you are hosting your server, some cloud companies allow you to set your hostname directly via their control panel. However, it is better to do it via the terminal.
Run the following command to set the hostname.
$ sudo hostnamectl set-hostname opensearch
Add the FQDN (Fully qualified domain name) to the /etc/hosts file. In here, we map the hostname opensearch to the domain name opensearch.example.com and point it to the server IP address. Replace in the command below with the IP address of your server.
$ echo " opensearch.example.com opensearch" | sudo tee -a /etc/hosts
Check the hostname and the FQDN using the following commands.
$ hostname
opensearch
$ hostname -f
opensearch.example.com
This finishes the process of optimizing our system to work with OpenSearch.
Step 3 – Install OpenSearch
Import the OpenSearch GPG key used for signing the installation package.
$ curl -o- https://artifacts.opensearch.org/publickeys/opensearch.pgp | sudo gpg --dearmor --batch --yes -o /usr/share/keyrings/opensearch-keyring
Create the OpenSearch APT repository file.
$ echo "deb [signed-by=/usr/share/keyrings/opensearch-keyring] https://artifacts.opensearch.org/releases/bundle/opensearch/2.x/apt stable main" | sudo tee /etc/apt/sources.list.d/opensearch-2.x.list
Update the system repository list.
$ sudo apt update
Check all the available versions of OpenSearch available.
$ sudo apt list -a opensearch
Listing... Done
opensearch/stable 2.12.0 amd64
opensearch/stable 2.11.1 amd64
opensearch/stable 2.11.0 amd64
opensearch/stable 2.10.0 amd64
opensearch/stable 2.9.0 amd64
opensearch/stable 2.8.0 amd64
opensearch/stable 2.7.0 amd64
opensearch/stable 2.6.0 amd64
opensearch/stable 2.5.0 amd64
The latest version of OpenSearch v2.12.0 requires you to set the admin demo password before the installation or it will fail.
You can install the latest version of OpenSearch using the following command. We can set the admin demo password using the environment variable in the installation command itself. Choose a strong password.
$ sudo env OPENSEARCH_INITIAL_ADMIN_PASSWORD= apt install opensearch
If you see the following warning during the installation, you can safely ignore it.
......
chown: warning: '.' should be ':': ‘opensearch.opensearch’
chown: warning: '.' should be ':': ‘opensearch.opensearch’
chown: warning: '.' should be ':': ‘opensearch.opensearch’
chown: warning: '.' should be ':': ‘opensearch.opensearch’
chown: warning: '.' should be ':': ‘opensearch.opensearch’
......
Or you can install a specific version.
$ sudo apt install opensearch=2.11.1
Reload the service daemon.
$ sudo systemctl daemon-reload
Enable the OpenSearch service.
$ sudo systemctl enable opensearch
Start the OpenSearch service.
$ sudo systemctl start opensearch
Verify the status of the OpenSearch service.
$ sudo systemctl status opensearch
You should get the following output.
? opensearch.service - OpenSearch
     Loaded: loaded (/lib/systemd/system/opensearch.service; enabled; preset: enabled)
     Active: active (running) since Sat 2024-03-02 06:37:01 UTC; 5s ago
       Docs: https://opensearch.org/
   Main PID: 31109 (java)
      Tasks: 75 (limit: 4652)
     Memory: 1.3G
        CPU: 1min 3.128s
     CGroup: /system.slice/opensearch.service
             ??31109 /usr/share/opensearch/jdk/bin/java -Xshare:auto -Dopensearch.networkaddress.cache.ttl=60 -Dopensearch.networkaddress.cache.negative.ttl=10 -XX: AlwaysPreTouch -Xss1m -Djava.awt.headless=true...
Step 4 – Test OpenSearch
Before proceeding any further, let us check if the installation is working fine or not. Run the following command to verify if OpenSearch is running as intended.
$ curl -X GET https://localhost:9200 -u 'admin:' --insecure
You should get a similar output.
{
  "name" : "opensearch",
  "cluster_name" : "opensearch",
  "cluster_uuid" : "3oFvYn96St2MOpDP3Sf29g",
  "version" : {
    "distribution" : "opensearch",
    "number" : "2.12.0",
    "build_type" : "deb",
    "build_hash" : "2c355ce1a427e4a528778d4054436b5c4b756221",
    "build_date" : "2024-02-20T02:18:31.541484890Z",
    "build_snapshot" : false,
    "lucene_version" : "9.9.2",
    "minimum_wire_compatibility_version" : "7.10.0",
    "minimum_index_compatibility_version" : "7.0.0"
  },
  "tagline" : "The OpenSearch Project: https://opensearch.org/"
}
Query the OpenSearch plugins endpoint to see the list of available plugins.
$ curl -X GET https://localhost:9200/_cat/plugins?v -u 'admin:' --insecure
You can also use the following command for the same.
$ /usr/share/opensearch/bin/opensearch-plugin list
You should get a similar output.
name       component                            version
opensearch opensearch-alerting                  2.12.0.0
opensearch opensearch-anomaly-detection         2.12.0.0
opensearch opensearch-asynchronous-search       2.12.0.0
opensearch opensearch-cross-cluster-replication 2.12.0.0
opensearch opensearch-custom-codecs             2.12.0.0
opensearch opensearch-flow-framework            2.12.0.0
opensearch opensearch-geospatial                2.12.0.0
opensearch opensearch-index-management          2.12.0.0
opensearch opensearch-job-scheduler             2.12.0.0
opensearch opensearch-knn                       2.12.0.0
opensearch opensearch-ml                        2.12.0.0
opensearch opensearch-neural-search             2.12.0.0
opensearch opensearch-notifications             2.12.0.0
opensearch opensearch-notifications-core        2.12.0.0
opensearch opensearch-observability             2.12.0.0
opensearch opensearch-performance-analyzer      2.12.0.0
opensearch opensearch-reports-scheduler         2.12.0.0
opensearch opensearch-security                  2.12.0.0
opensearch opensearch-security-analytics        2.12.0.0
opensearch opensearch-skills                    2.12.0.0
opensearch opensearch-sql                       2.12.0.0
You can install additional plugins using the following command.
$ /usr/share/opensearch/bin/opensearch-plugin install
You can find the list of available OpenSearch plugins on their official website.
Step 5 – Configure OpenSearch
OpenSearch’s default settings are not fit for a production environment. By default, OpenSearch is not bound to a network interface and is unreachable from outside. Furthermore, default user names and passwords are being used which can cause security issues if used directly in a production environment.
OpenSearch stores its configuration in the /etc/opensearch/opensearch.yml file. Open it for editing.
$ sudo nano /etc/opensearch/opensearch.yml
Find the #network.host: 192.168.0.1 line and uncomment it by removing the hash (#) in front of it and changing its value as shown. This binds OpenSearch to all available interfaces. You can also choose to enter a specific IP to bind it to a specific interface.
# Set the bind address to a specific IP (IPv4 or IPv6):
#
network.host: 0.0.0.0
Add the following lines at the bottom of the file.
# Unless you have already configured a cluster, you should set
# discovery.type to single-node, or the bootstrap checks will
# fail when you try to start the service.
discovery.type: single-node

# If you previously disabled the Security plugin in opensearch.yml,
# be sure to re-enable it. Otherwise you can skip this setting.
plugins.security.disabled: false
Since we are installing on a single server, we have set discovery.type to single-node. Setting the plugins.security.disabled to false enables OpenSearch security plugin.
Save the file by pressing Ctrl X and entering Y when prompted.
We also need to specify initial and maximum JVM (Java Virtual Memory) heap sizes. This setting depends on your server’s RAM size. For example, we are using a server with 4GB of RAM so we are setting the heap size to 3GB.
Create and open the heapsize.options in the /etc/opensearch/jvm.options.d directory for editing. It will overwrite the default value set in the /etc/opensearch/jvm.options file.
$ sudo nano /etc/opensearch/jvm.options.d/heapsize.options
Add the following lines to it.
-Xms3g
-Xmx3g
Save the file by pressing Ctrl X and entering Y when prompted.
Restart the OpenSearch service to implement the changes.
$ sudo systemctl restart opensearch
You can check the current heap size and maximum memory using the following command.
$ curl -sS "https://localhost:9200/_cat/nodes?h=heap*&v" -u 'admin:' --insecure
You should get the following output.
heap.current heap.percent heap.max
     345.5mb           11      3gb
Step 6 – Configure TLS for OpenSearch
Here we will be generating certificates to secure OpenSearch. TLS certificates provide security by allowing clients to confirm the identity of hosts and encrypt traffic between a client and the host. We will generate the following certificates
- Root CA Certificates – These are the primary certificates that will sign all other certificates.
- Admin certificates – These certificates are used to gain elevated rights for performing administrative tasks related to the Security plugin.
- Node certificates – These certificates are used for communication between a node and the client.
All the OpenSearch certificates are stored in the /etc/opensearch directory. The first step is to remove the default certificates set during OpenSearch’s installation.
Switch to the OpenSearch directory.
$ cd /etc/opensearch
Remove the default certificates.
$ sudo rm -f *.pem
Open the OpenSearch configuration file for editing.
$ sudo nano opensearch.yml
Comment out the following code at the bottom of the file by putting a hash in front of each line inside the OpenSearch Security Demo Configuration section as shown below.
######## Start OpenSearch Security Demo Configuration ########
# WARNING: revise all the lines below before you go into production
#plugins.security.ssl.transport.pemcert_filepath: esnode.pem
#plugins.security.ssl.transport.pemkey_filepath: esnode-key.pem
#plugins.security.ssl.transport.pemtrustedcas_filepath: root-ca.pem
#plugins.security.ssl.transport.enforce_hostname_verification: false
#plugins.security.ssl.http.enabled: true
#plugins.security.ssl.http.pemcert_filepath: esnode.pem
#plugins.security.ssl.http.pemkey_filepath: esnode-key.pem
#plugins.security.ssl.http.pemtrustedcas_filepath: root-ca.pem
#plugins.security.allow_unsafe_democertificates: true
#plugins.security.allow_default_init_securityindex: true
#plugins.security.authcz.admin_dn: ['CN=kirk,OU=client,O=client,L=test,C=de']
#plugins.security.audit.type: internal_opensearch
#plugins.security.enable_snapshot_restore_privilege: true
#plugins.security.check_snapshot_restore_write_privileges: true
#plugins.security.restapi.roles_enabled: [all_access, security_rest_api_access]
#plugins.security.system_indices.enabled: true
#plugins.security.system_indices.indices: [.plugins-ml-config, .plugins-ml-connector,
#  .plugins-ml-model-group, .plugins-ml-model, .plugins-ml-task, .plugins-ml-conversation-meta,
#  .plugins-ml-conversation-interactions, .plugins-ml-memory-meta, .plugins-ml-memory-message,
#  .opendistro-alerting-config, .opendistro-alerting-alert*, .opendistro-anomaly-results*,
#  .opendistro-anomaly-detector*, .opendistro-anomaly-checkpoints, .opendistro-anomaly-detection-state,
#  .opendistro-reports-*, .opensearch-notifications-*, .opensearch-notebooks, .opensearch-observability,
#  .ql-datasources, .opendistro-asynchronous-search-response*, .replication-metadata-store,
#  .opensearch-knn-models, .geospatial-ip2geo-data*, .plugins-flow-framework-config,
#  .plugins-flow-framework-templates, .plugins-flow-framework-state]
#node.max_local_storage_nodes: 3
######## End OpenSearch Security Demo Configuration ########
Save the file by pressing Ctrl X and entering Y when prompted.
Next, create a directory to store certificates inside the /etc/opensearch directory.
$ sudo mkdir /etc/opensearch/certs
Change the permission of the directory to the currently logged-in user to avoid using sudo while generating the certificates.
$ sudo chown $USER:$USER /etc/opensearch/certs -R
Switch to the certificate directory.
$ cd /etc/opensearch/certs
Generate Root Certificates
Generate a private key for the root certificate.
$ openssl genrsa -out root-ca-key.pem 2048
Generate a self-signed root CA certificate. We are using the -subj parameter to provide information that is embedded in the certificate. If you don’t use the -subj flag, you will be asked for all this information.
$ openssl req -new -x509 -sha256 -key root-ca-key.pem -subj "https://www.howtoforge.com/C=CA/ST=ONTARIO/L=TORONTO/O=ORG/OU=UNIT/CN=ROOT" -out root-ca.pem -days 730
You can change the information to suit your specific host.
The variables in the -subj parameter mean the following.
C = Country Name (2 letter code), ST = State or Province Name (Full name), L = Locality Name (e.g, city), O = Organization Name, OU = Organizational Unit Name (e.g, section), CN = Common Name (e.g., server FQDN)
Your root certificate is now live.
Generate Admin Certificates
Generate the private key for the Admin certificate using the following command.
$ openssl genrsa -out admin-key-temp.pem 2048
Convert the private key to the PKCS#8 format for use in Java using a PKCS#12 compatible algorithm(3DES).
$ openssl pkcs8 -inform PEM -outform PEM -in admin-key-temp.pem -topk8 -nocrypt -v1 PBE-SHA1-3DES -out admin-key.pem
Generate the Admin CSR (Certificate Signing Request) from the private key. Since this certificate is not tied to any hosts and is used for authenticating elevated access, we are using a value of A for the Common Name (CN).
$ openssl req -new -key admin-key.pem -subj "https://www.howtoforge.com/C=CA/ST=ONTARIO/L=TORONTO/O=ORG/OU=UNIT/CN=A" -out admin.csr
Sign the Admin CSR with the root certificate and private key you just created.
$ openssl x509 -req -in admin.csr -CA root-ca.pem -CAkey root-ca-key.pem -CAcreateserial -sha256 -out admin.pem -days 730
Certificate request self-signature ok
subject=C = CA, ST = ONTARIO, L = TORONTO, O = ORG, OU = UNIT, CN = A
Generate Node Certificates
Generate a private key for the node certificate.
$ openssl genrsa -out node1-key-temp.pem 2048
Convert the node private key to the PKCS#8 format.
$ openssl pkcs8 -inform PEM -outform PEM -in node1-key-temp.pem -topk8 -nocrypt -v1 PBE-SHA1-3DES -out node1-key.pem
Create a new CSR for the Node certificate from the private key. Make sure to change the value of CN variable with the hostname of your node. This certificate is tied to your hosts and it should match with the hostname or the IP address of the node.
$ openssl req -new -key node1-key.pem -subj "https://www.howtoforge.com/C=CA/ST=ONTARIO/L=TORONTO/O=ORG/OU=UNIT/CN=opensearch.example.com" -out node1.csr
Create a SAN (Subject Alternative Name) extension file that contains the node hostname or FQDN or IP address.
$ sh -c 'echo subjectAltName=DNS:opensearch.example.com > node1.ext'
Sign the node certificate CSR with the root certificate and private key you just created.
$ openssl x509 -req -in node1.csr -CA root-ca.pem -CAkey root-ca-key.pem -CAcreateserial -sha256 -out node1.pem -days 730 -extfile node1.ext
Certificate request self-signature ok
subject=C = CA, ST = ONTARIO, L = TORONTO, O = ORG, OU = UNIT, CN = opensearch.example.com
Preparing Certificates for Installation
Remove any temporary certificate, CSR, and the SAN extension file.
$ rm -f *temp.pem *csr *ext
Next, we will install the root CA certificate on the server. For that, convert the root CA certificate to the .crt format.
$ openssl x509 -outform der -in root-ca.pem -out root-ca.crt
Copy the root-ca.crt file to the /usr/local/share/ca-certificates/ directory.
$ sudo cp root-ca.crt /usr/local/share/ca-certificates/
Add the root CA certificate to your Debian server using the following command.
$ sudo update-ca-certificates
You should see the following output ( 1 added) confirming that the root CA certificate is added to your system.
Updating certificates in /etc/ssl/certs...
rehash: warning: skipping ca-certificates.crt,it does not contain exactly one certificate or CRL
rehash: warning: skipping root-ca.pem,it does not contain exactly one certificate or CRL
1 added, 0 removed; done.
Running hooks in /etc/ca-certificates/update.d...
done.
Change the ownership of the directory back to the opensearch user.
$ sudo chown opensearch:opensearch /etc/opensearch/certs -R
Change the permission on the directory to 0700.
$ sudo chmod 0700 /etc/opensearch/certs
Change the permission on the certificates to 0600.
$ sudo chmod 0600 /etc/opensearch/certs/{admin-key,admin,node1-key,node1,root-ca-key,root-ca}.pem
$ sudo chmod 0600 /etc/opensearch/certs/root-ca.crt
Step 7 – Install TLS to OpenSearch
Now that all the certificates are generated and set up, it is time to install and add the certificates to your OpenSearch installation.
The first step is to create a bash script that will add all the created certificates and TLS security plugin settings to the OpenSearch configuration file (/etc/opensearch/opensearch.yml).
Create a file named add-opensearch-tls.sh and open it for editing.
$ cd ~
$ nano add-opensearch-tls.sh
Paste the following code in it.
#! /bin/bash

# Before running this script, make sure to replace the CN in the
# node's distinguished name with a real DNS A record.

echo "plugins.security.ssl.transport.pemcert_filepath: /etc/opensearch/certs/node1.pem" | sudo tee -a /etc/opensearch/opensearch.yml
echo "plugins.security.ssl.transport.pemkey_filepath: /etc/opensearch/certs/node1-key.pem" | sudo tee -a /etc/opensearch/opensearch.yml
echo "plugins.security.ssl.transport.pemtrustedcas_filepath: /etc/opensearch/certs/root-ca.pem" | sudo tee -a /etc/opensearch/opensearch.yml
echo "plugins.security.ssl.http.enabled: true" | sudo tee -a /etc/opensearch/opensearch.yml
echo "plugins.security.ssl.http.pemcert_filepath: /etc/opensearch/certs/node1.pem" | sudo tee -a /etc/opensearch/opensearch.yml
echo "plugins.security.ssl.http.pemkey_filepath: /etc/opensearch/certs/node1-key.pem" | sudo tee -a /etc/opensearch/opensearch.yml
echo "plugins.security.ssl.http.pemtrustedcas_filepath: /etc/opensearch/certs/root-ca.pem" | sudo tee -a /etc/opensearch/opensearch.yml
echo "plugins.security.allow_default_init_securityindex: true" | sudo tee -a /etc/opensearch/opensearch.yml
echo "plugins.security.authcz.admin_dn:" | sudo tee -a /etc/opensearch/opensearch.yml
echo "  - 'CN=A,OU=UNIT,O=ORG,L=TORONTO,ST=ONTARIO,C=CA'" | sudo tee -a /etc/opensearch/opensearch.yml
echo "plugins.security.nodes_dn:" | sudo tee -a /etc/opensearch/opensearch.yml
echo "  - 'CN=opensearch.example.com,OU=UNIT,O=ORG,L=TORONTO,ST=ONTARIO,C=CA'" | sudo tee -a /etc/opensearch/opensearch.yml
echo "plugins.security.audit.type: internal_opensearch" | sudo tee -a /etc/opensearch/opensearch.yml
echo "plugins.security.enable_snapshot_restore_privilege: true" | sudo tee -a /etc/opensearch/opensearch.yml
echo "plugins.security.check_snapshot_restore_write_privileges: true" | sudo tee -a /etc/opensearch/opensearch.yml
echo "plugins.security.restapi.roles_enabled: ["all_access", "security_rest_api_access"]" | sudo tee -a /etc/opensearch/opensearch.yml
Save the file by pressing Ctrl X and entering Y when prompted.
Make the file executable.
$ chmod x add-opensearch-tls.sh
Run the script.
$ ./add-opensearch-tls.sh
You should get the following output.
plugins.security.ssl.transport.pemcert_filepath: /etc/opensearch/certs/node1.pem
plugins.security.ssl.transport.pemkey_filepath: /etc/opensearch/certs/node1-key.pem
plugins.security.ssl.transport.pemtrustedcas_filepath: /etc/opensearch/certs/root-ca.pem
plugins.security.ssl.http.enabled: true
plugins.security.ssl.http.pemcert_filepath: /etc/opensearch/certs/node1.pem
plugins.security.ssl.http.pemkey_filepath: /etc/opensearch/certs/node1-key.pem
plugins.security.ssl.http.pemtrustedcas_filepath: /etc/opensearch/certs/root-ca.pem
plugins.security.allow_default_init_securityindex: true
plugins.security.authcz.admin_dn:
  - 'CN=A,OU=UNIT,O=ORG,L=TORONTO,ST=ONTARIO,C=CA'
plugins.security.nodes_dn:
  - 'CN=opensearch.example.com,OU=UNIT,O=ORG,L=TORONTO,ST=ONTARIO,C=CA'
plugins.security.audit.type: internal_opensearch
plugins.security.enable_snapshot_restore_privilege: true
plugins.security.check_snapshot_restore_write_privileges: true
plugins.security.restapi.roles_enabled: ["all_access", "security_rest_api_access"]
Open the file /etc/opensearch/opensearch.yml file to check whether your settings have been applied.
$ sudo nano /etc/opensearch/opensearch.yml
Scroll to the bottom of the file and you should see the following.
# If you previously disabled the Security plugin in opensearch.yml,
# be sure to re-enable it. Otherwise you can skip this setting.
plugins.security.disabled: false
....
plugins.security.ssl.transport.pemcert_filepath: /etc/opensearch/certs/node1.pem
plugins.security.ssl.transport.pemkey_filepath: /etc/opensearch/certs/node1-key.pem
plugins.security.ssl.transport.pemtrustedcas_filepath: /etc/opensearch/certs/root-ca.pem
plugins.security.ssl.http.enabled: true
plugins.security.ssl.http.pemcert_filepath: /etc/opensearch/certs/node1.pem
plugins.security.ssl.http.pemkey_filepath: /etc/opensearch/certs/node1-key.pem
plugins.security.ssl.http.pemtrustedcas_filepath: /etc/opensearch/certs/root-ca.pem
plugins.security.allow_default_init_securityindex: true
plugins.security.authcz.admin_dn:
  - 'CN=A,OU=UNIT,O=ORG,L=TORONTO,ST=ONTARIO,C=CA'
plugins.security.nodes_dn:
  - 'CN=opensearch.example.com,OU=UNIT,O=ORG,L=TORONTO,ST=ONTARIO,C=CA'
plugins.security.audit.type: internal_opensearch
plugins.security.enable_snapshot_restore_privilege: true
plugins.security.check_snapshot_restore_write_privileges: true
plugins.security.restapi.roles_enabled: ["all_access", "security_rest_api_access"]
Once you are satisfied, save the file by pressing Ctrl X.
Step 8 – Creating OpenSearch User
In this step, we will remove all the demo users except for the admin user and replace the default admin password using a script.
Switch to the OpenSearch security plugins tools directory.
$ cd /usr/share/opensearch/plugins/opensearch-security/tools
Run the hash.sh script to generate a new password.
$ ./hash
The script will fail and you will get the following error because the path to the Java executable (JDK) has not been defined.
**************************************************************************
** This tool will be deprecated in the next major release of OpenSearch **
** https://github.com/opensearch-project/security/issues/1755           **
**************************************************************************
WARNING: nor OPENSEARCH_JAVA_HOME nor JAVA_HOME is set, will use
./hash.sh: line 35: java: command not found
Run the command again by declaring the environment variable OPENSEARCH_JAVA_HOME with the location of the JDK.
$ OPENSEARCH_JAVA_HOME=/usr/share/opensearch/jdk ./hash.sh
You will get a similar output.
**************************************************************************
** This tool will be deprecated in the next major release of OpenSearch **
** https://github.com/opensearch-project/security/issues/1755           **
**************************************************************************
[Password:]
$2y$12$4NL0LqEnN4FXaUdQQC.gOupeCQT2IuMo9gN0b5d3nxdMVbLX088f2
It will generate the password hash which we will need later.
Open the OpenSearch User configuration file internal_users.yml in the /etc/opensearch/opensearch-security/ directory for editing.
$ sudo nano /etc/opensearch/opensearch-security/internal_users.yml
Comment out all the demo users by adding hash in front of them as shown.
---
# This is the internal user database
# The hash value is a bcrypt hash and can be generated with plugin/tools/hash.sh

_meta:
  type: "internalusers"
  config_version: 2

# Define your internal users here

## Demo users

#admin:
#  hash: "$2y$12$Twy84uxOX0SQ1QMQ68og8O/i1MvqWItt/phZX3DiJMjpBoT9u9KX6"
#  reserved: true
#  backend_roles:
#  - "admin"
#  description: "Demo admin user"

#anomalyadmin:
Add the admin user with the hash you generated above as shown.
---
# This is the internal user database
# The hash value is a bcrypt hash and can be generated with plugin/tools/hash.sh

_meta:
  type: "internalusers"
  config_version: 2

# Define your internal users here

admin:
  hash: "$2y$12$4NL0LqEnN4FXaUdQQC.gOupeCQT2IuMo9gN0b5d3nxdMVbLX088f2"
  reserved: true
  backend_roles:
  - "admin"
  description: "Admin user"

## Demo users

#admin:
Once finished, save the file by pressing Ctrl X and entering Y when prompted.
Now that the TLS certificates are installed and the demo users removed or assigned new passwords, it is time to apply the configuration changes. To apply the changes, we will invoke the securityadmin.sh script inside the /usr/share/opensearch/plugins/opensearch-security/tools directory. The script requires the OpenSearch service to run.
Restart the OpenSearch service.
$ sudo systemctl restart opensearch
Switch to the /usr/share/opensearch/plugins/opensearch-security/tools directory.
$ cd /usr/share/opensearch/plugins/opensearch-security/tools
Run the script using the following command.
$ sudo OPENSEARCH_JAVA_HOME=/usr/share/opensearch/jdk ./securityadmin.sh -h opensearch.nspeaks.com -p 9200 -cd /etc/opensearch/opensearch-security/ -cacert /etc/opensearch/certs/root-ca.pem -cert /etc/opensearch/certs/admin.pem -key /etc/opensearch/certs/admin-key.pem -icl -nhnv
The security plugin stores its configuration – including users, permissions, roles, and backend settings in a system index on the OpenSearch cluster. Storing these settings in the cluster allows you to change settings without restarting the cluster and eliminates the need to edit the configuration file on every node. This is accomplished by running the securityadmin.sh script.
- The
-cdoption specifies where the security plugin configuration files are located. - The
-icl(--ignore-clustername) option tells the security plugin to upload the configuration regardless of the cluster name. You can also specify the cluster name instead of using the-cn(--clustername) option. - Since the certificates are self-signed, we use the
-nhnv(--disable-host-name-verification) option. - The
--cacert,--cert, and--keyoptions define the location of the root certificate, the admin certificate, and the private key for the admin certificate. If the private key has a password, you can define it using the-keypassoption.
You can learn more about the security plugin configuration in the OpenSearch documentation.
You should have gotten a similar output as shown below with the above command.
**************************************************************************
** This tool will be deprecated in the next major release of OpenSearch **
** https://github.com/opensearch-project/security/issues/1755           **
**************************************************************************
Security Admin v7
Will connect to opensearch:9200 ... done
Connected as "CN=A,OU=UNIT,O=ORG,L=TORONTO,ST=ONTARIO,C=CA"
OpenSearch Version: 2.12.0
Contacting opensearch cluster 'opensearch' and wait for YELLOW clusterstate ...
Clustername: opensearch
Clusterstate: GREEN
Number of nodes: 1
Number of data nodes: 1
.opendistro_security index already exists, so we do not need to create one.
Populate config from /etc/opensearch/opensearch-security/
Will update '/config' with /etc/opensearch/opensearch-security/config.yml
   SUCC: Configuration for 'config' created or updated
Will update '/roles' with /etc/opensearch/opensearch-security/roles.yml
   SUCC: Configuration for 'roles' created or updated
Will update '/rolesmapping' with /etc/opensearch/opensearch-security/roles_mapping.yml
   SUCC: Configuration for 'rolesmapping' created or updated
Will update '/internalusers' with /etc/opensearch/opensearch-security/internal_users.yml
   SUCC: Configuration for 'internalusers' created or updated
Will update '/actiongroups' with /etc/opensearch/opensearch-security/action_groups.yml
   SUCC: Configuration for 'actiongroups' created or updated
Will update '/tenants' with /etc/opensearch/opensearch-security/tenants.yml
   SUCC: Configuration for 'tenants' created or updated
Will update '/nodesdn' with /etc/opensearch/opensearch-security/nodes_dn.yml
   SUCC: Configuration for 'nodesdn' created or updated
Will update '/whitelist' with /etc/opensearch/opensearch-security/whitelist.yml
   SUCC: Configuration for 'whitelist' created or updated
Will update '/audit' with /etc/opensearch/opensearch-security/audit.yml
   SUCC: Configuration for 'audit' created or updated
Will update '/allowlist' with /etc/opensearch/opensearch-security/allowlist.yml
   SUCC: Configuration for 'allowlist' created or updated
SUCC: Expected 10 config types for node {"updated_config_types":["allowlist","tenants","rolesmapping","nodesdn","audit","roles","whitelist","internalusers","actiongroups","config"],"updated_config_size":10,"message":null} is 10 (["allowlist","tenants","rolesmapping","nodesdn","audit","roles","whitelist","internalusers","actiongroups","config"]) due to: null
Done with success
Verify the new credentials using the following command.
During the previous test, we directed requests to localhost. Now that the TLS certificates are set up and the new certificates refer to the host’s actual DNS record, the requests to localhost will fail the CN check, and the certificate will be considered invalid. Therefore, add your actual DNS record in the command below to verify.
$ curl https://your.host.address:9200 -u admin:yournewpassword -k
You should see the following response.
{
  "name" : "opensearch",
  "cluster_name" : "opensearch",
  "cluster_uuid" : "3oFvYn96St2MOpDP3Sf29g",
  "version" : {
    "distribution" : "opensearch",
    "number" : "2.12.0",
    "build_type" : "deb",
    "build_hash" : "2c355ce1a427e4a528778d4054436b5c4b756221",
    "build_date" : "2024-02-20T02:18:31.541484890Z",
    "build_snapshot" : false,
    "lucene_version" : "9.9.2",
    "minimum_wire_compatibility_version" : "7.10.0",
    "minimum_index_compatibility_version" : "7.0.0"
  },
  "tagline" : "The OpenSearch Project: https://opensearch.org/"
}
Step 9 – Install OpenSearch Dashboards
Since we installed OpenSearch already, we can skip the step of importing the OpenSearch GPG key.
To install OpenSearch dashboards, run the following command to create an APT repository for it.
$ echo "deb [signed-by=/usr/share/keyrings/opensearch-keyring] https://artifacts.opensearch.org/releases/bundle/opensearch-dashboards/2.x/apt stable main" | sudo tee /etc/apt/sources.list.d/opensearch-dashboards-2.x.list
Update the system repository list.
$ sudo apt update
List all the available versions of OpenSearch Dashboards.
$ sudo apt list -a opensearch-dashboards
You should see a similar output.
Listing... Done
opensearch-dashboards/stable 2.12.0 amd64
opensearch-dashboards/stable 2.11.1 amd64
opensearch-dashboards/stable 2.11.0 amd64
opensearch-dashboards/stable 2.10.0 amd64
opensearch-dashboards/stable 2.9.0 amd64
opensearch-dashboards/stable 2.8.0 amd64
opensearch-dashboards/stable 2.7.0 amd64
opensearch-dashboards/stable 2.6.0 amd64
opensearch-dashboards/stable 2.5.0 amd64
Install the latest version of OpenSearch Dashboard.
$ sudo apt install opensearch-dashboards
Or install a specific version of OpenSearch Dashboard.
$ sudo apt install opensearch-dashboards=2.12.0
The version of OpenSearch dashboards and OpenSearch should be the same otherwise you can face multiple issues.
Reload the service daemon.
$ sudo systemctl daemon-reload
Enable the OpenSearch Dashboards service.
$ sudo systemctl enable opensearch-dashboards
Start the OpenSearch Dashboards service.
$ sudo systemctl start opensearch-dashboards
Verify the status of the OpenSearch Dashboards service.
$ sudo systemctl status opensearch-dashboards
You should see the following output.
? opensearch-dashboards.service - "OpenSearch Dashboards"
     Loaded: loaded (/lib/systemd/system/opensearch-dashboards.service; enabled; preset: enabled)
     Active: active (running) since Sat 2024-03-02 16:01:25 UTC; 4s ago
   Main PID: 7098 (node)
      Tasks: 11 (limit: 9484)
     Memory: 175.4M
        CPU: 5.389s
     CGroup: /system.slice/opensearch-dashboards.service
             ??7098 /usr/share/opensearch-dashboards/node/bin/node /usr/share/opensearch-dashboards/src/cli/dist

Mar 02 16:01:25 opensearch systemd[1]: Started opensearch-dashboards.service - "OpenSearch Dashboards".
Step 10 – Configure OpenSearch Dashboards
OpenSearch Dashboards stores its configuration in the /etc/opensearch-dashboards/opensearch_dashboards.yml file. Open it for editing.
$ sudo nano /etc/opensearch-dashboards/opensearch_dashboards.yml
Find the line # server.host: "localhost" and uncomment it by removing the hash in front of it and changing its value as shown.
# Specifies the address to which the OpenSearch Dashboards server will bind. IP addresses and host names are both valid values.
# The default is 'localhost', which usually means remote machines will not be able to connect.
# To allow connections from remote users, set this parameter to a non-loopback address.
server.host: 0.0.0.0
Setting the value of server.host to 0.0.0.0 binds OpenSearch Dashboard to any external IP which makes it accessible over the World Wide Web. If you want to serve the Dashboards over SSL using a reverse proxy, then leave this value unchanged.
Scroll down to find the following section.
opensearch.hosts: [https://localhost:9200]
opensearch.ssl.verificationMode: none
opensearch.username: kibanaserver
opensearch.password: kibanaserver
opensearch.requestHeadersWhitelist: [authorization, securitytenant]
Change the values as configured for our OpenSearch installation.
opensearch.hosts: [https://opensearch:9200]
opensearch.ssl.verificationMode: none
opensearch.username: admin
opensearch.password:
opensearch.requestHeadersWhitelist: [authorization, securitytenant]
Once finished, save the file by pressing Ctrl X and entering Y when prompted.
Restart the OpenDashboards service.
$ sudo systemctl restart opensearch-dashboards
Open port 5601 in the UFW firewall.
$ sudo ufw allow 5601
Open the URL http://:5601 or http://opensearch.example.com:5601 to launch the OpenSearch Dashboards website.
If you are content accessing OpenSearch Dashboards over HTTP and with a port number in the URL, you can stop here. However, it is better to serve Dashboards over SSL. For this, we will install Nginx as a reverse proxy and serve SSL over it.
Step 11 – Install Nginx
Debian 12 ships with an older version of Nginx. You need to download the official Nginx repository to install the latest version.
Import Nginx’s signing key.
$ curl https://nginx.org/keys/nginx_signing.key | gpg --dearmor
    | sudo tee /usr/share/keyrings/nginx-archive-keyring.gpg >/dev/null
Add the repository for Nginx’s mainline version.
$ echo "deb [signed-by=/usr/share/keyrings/nginx-archive-keyring.gpg]
http://nginx.org/packages/mainline/debian `lsb_release -cs` nginx"
    | sudo tee /etc/apt/sources.list.d/nginx.list
Update the system repositories.
$ sudo apt update
Install Nginx.
$ sudo apt install nginx
Verify the installation. On Debian systems, the following command will only work with sudo.
$ sudo nginx -v
nginx version: nginx/1.25.4
Start the Nginx server.
$ sudo systemctl start nginx
Check the service status.
$ sudo systemctl status nginx
? nginx.service - nginx - high performance web server
     Loaded: loaded (/lib/systemd/system/nginx.service; enabled; preset: enabled)
     Active: active (running) since Sat 2024-03-02 12:53:57 UTC; 4s ago
       Docs: https://nginx.org/en/docs/
    Process: 3976 ExecStart=/usr/sbin/nginx -c /etc/nginx/nginx.conf (code=exited, status=0/SUCCESS)
   Main PID: 3977 (nginx)
      Tasks: 3 (limit: 9484)
     Memory: 2.7M
        CPU: 9ms
     CGroup: /system.slice/nginx.service
             ??3977 "nginx: master process /usr/sbin/nginx -c /etc/nginx/nginx.conf"
             ??3978 "nginx: worker process"
             ??3979 "nginx: worker process"

Mar 02 12:53:57 opensearch systemd[1]: Starting nginx.service - nginx - high performance web server...
Mar 02 12:53:57 opensearch systemd[1]: Started nginx.service - nginx - high performance web server.
Step 12 – Install SSL
We need to install Certbot to generate the SSL certificate. You can either install Certbot using Debian’s repository or grab the latest version using the Snapd tool. We will be using the Snapd version.
Debian 12 comes doesn’t come with Snapd installed. Install Snapd package.
$ sudo apt install snapd
Run the following commands to ensure that your version of Snapd is up to date.
$ sudo snap install core && sudo snap refresh core
Install Certbot.
$ sudo snap install --classic certbot
Use the following command to ensure that the Certbot command can be run by creating a symbolic link to the /usr/bin directory.
$ sudo ln -s /snap/bin/certbot /usr/bin/certbot
Verify if Certbot is functioning correctly.
$ certbot --version
certbot 2.9.0
Run the following command to generate an SSL Certificate.
$ sudo certbot certonly --nginx --agree-tos --no-eff-email --staple-ocsp --preferred-challenges http -m [email protected] -d craftcms.example.com
The above command will download a certificate to the /etc/letsencrypt/live/craftcms.example.com directory on your server.
Generate a Diffie-Hellman group certificate.
$ sudo openssl dhparam -dsaparam -out /etc/ssl/certs/dhparam.pem 4096
Check the Certbot renewal scheduler service.
$ sudo systemctl list-timers
You will find snap.certbot.renew.service as one of the services scheduled to run.
NEXT                        LEFT           LAST                        PASSED    UNIT                         ACTIVATES                   ---------------------------------------------------------------------------------------------------------------------------------------
Sat 2024-03-02 16:25:00 UTC 3h 27min left  -                           -         snap.certbot.renew.timer     snap.certbot.renew.service
Sat 2024-03-02 23:00:51 UTC 10h left       Sat 2024-03-02 06:29:02 UTC 6h ago    apt-daily.timer              apt-daily.service
Sun 2024-03-03 00:00:00 UTC 11h left       -                           -         dpkg-db-backup.timer         dpkg-db-backup.service
.....
Do a dry run of the process to check whether the SSL renewal is working fine.
$ sudo certbot renew --dry-run
If you see no errors, you are all set. Your certificate will renew automatically.
Step 13 – Configure Nginx
Open the file /etc/nginx/nginx.conf for editing.
$ sudo nano /etc/nginx/nginx.conf
Add the following line before the line include /etc/nginx/conf.d/*.conf;.
server_names_hash_bucket_size 64;
Save the file by pressing Ctrl X and entering Y when prompted.
Create and open the file /etc/nginx/conf.d/opensearch.conf for editing.
$ sudo nano /etc/nginx/conf.d/opensearch.conf
Paste the following code in it. Replace opensearch.example.com with your domain name.
server {

    listen 443 ssl;
    listen [::]:443 ssl;

    http2 on;
    http3 on;
    quic_retry on;

    server_name opensearch.example.com;

    access_log  /var/log/nginx/opensearch.access.log;
    error_log   /var/log/nginx/opensearch.error.log;

    ssl_certificate      /etc/letsencrypt/live/opensearch.example.com/fullchain.pem;
    ssl_certificate_key  /etc/letsencrypt/live/opensearch.example.com/privkey.pem;
    ssl_trusted_certificate /etc/letsencrypt/live/opensearch.example.com/chain.pem;

    ssl_session_timeout  5m;
    ssl_session_cache shared:MozSSL:10m;
    ssl_session_tickets off;
    ssl_early_data on;

    ssl_protocols TLSv1.2 TLSv1.3;
    ssl_prefer_server_ciphers on;
    ssl_ciphers ECDHE-ECDSA-AES128-GCM-SHA256:ECDHE-RSA-AES128-GCM-SHA256:ECDHE-ECDSA-AES256-GCM-SHA384:ECDHE-RSA-AES256-GCM-SHA384:ECDHE-ECDSA-CHACHA20-POLY1305:ECDHE-RSA-CHACHA20-POLY1305:DHE-RSA-AES128-GCM-SHA256:DHE-RSA-AES256-GCM-SHA384;
    ssl_ecdh_curve X25519:prime256v1:secp384r1:secp521r1;
    ssl_stapling on;
    ssl_stapling_verify on;
    ssl_dhparam /etc/ssl/certs/dhparam.pem;

    location / {
        proxy_pass http://localhost:5601;
        proxy_set_header Host $host;
        proxy_set_header X-Real-IP $remote_addr;
        proxy_set_header X-Forwarded-For $proxy_add_x_forwarded_for;
        proxy_set_header X-Forwarded-Proto $scheme;
    }
}
# enforce HTTPS
server {
    listen 80;
    listen [::]:80;
    server_name  opensearch.example.com;
    return 301   https://$host$request_uri;
}
Save the file by pressing Ctrl X and entering Y when prompted.
Verify your Nginx configuration.
$ sudo nginx -t
Restart the Nginx server.
$ sudo systemctl restart nginx
Visit https://opensearch.example.com in your browser to launch OpenSearch Dashboards.
Step 14 – Access and use OpenSearch Dashboards
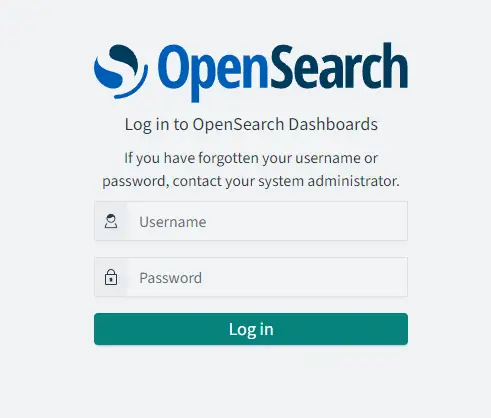
If you used Nginx, then access the Dashboards via the URL https://opensearch.example.com or use http://opensearch.example.com:5601 and you should get the login page.
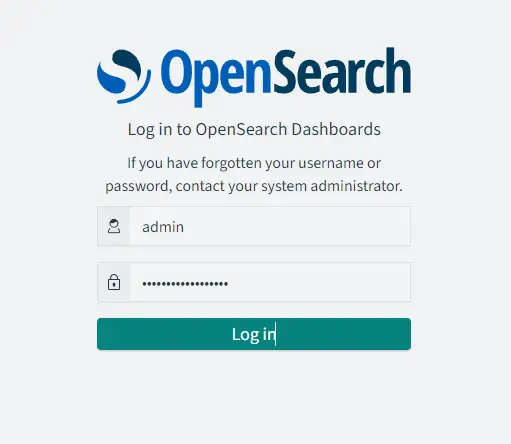
Enter admin and the custom admin password you configured for OpenSearch in step 4 and click the Log in button to proceed.
Click the Add data button to start adding data directly or click the Explore on my own link if you want to browse first. We will browse first and it should take you to a popup that talks about OpenSearch Dashboards’ dark mode.
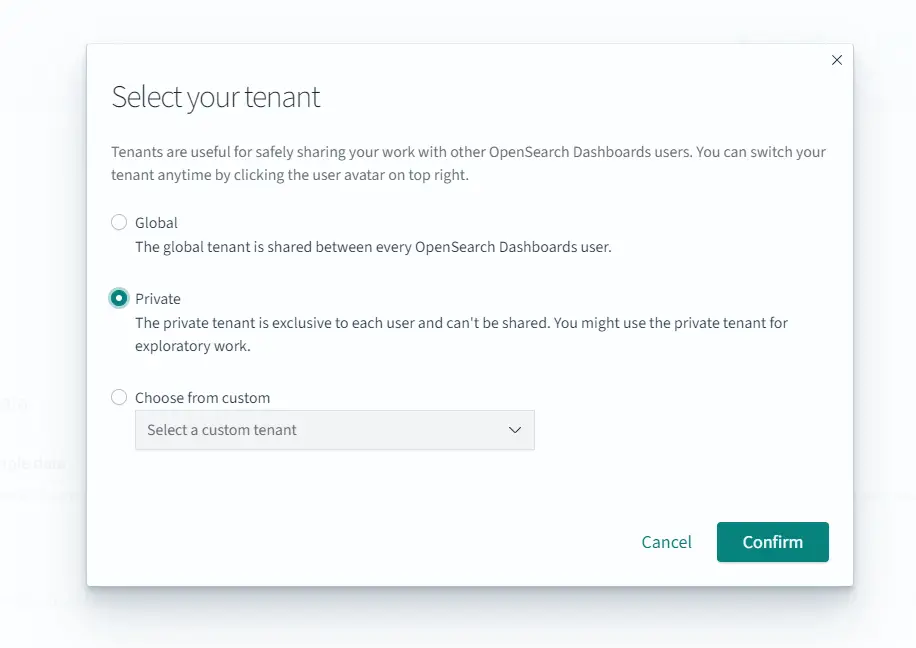
Click the Dismiss button to proceed. Next, you will be asked to choose a tenant.
Tenants in OpenSearch Dashboards are spaces for saving index patterns, visualizations, dashboards, and other OpenSearch Dashboards objects. Each user can create multiple tenants for multiple uses. Tenants are useful for safely sharing your work with other OpenSearch Dashboards’ users. OpenSearch gives you the option of choosing between three options.
- Global – This tenant is shared between every OpenSearch Dashboards user.
- Private – This tenant is exclusive to each user and can’t be shared.
- Custom – Administrators can create custom tenants and assign them to specific roles. Once created, you can use these tenants to provide spaces to a specific set of users.
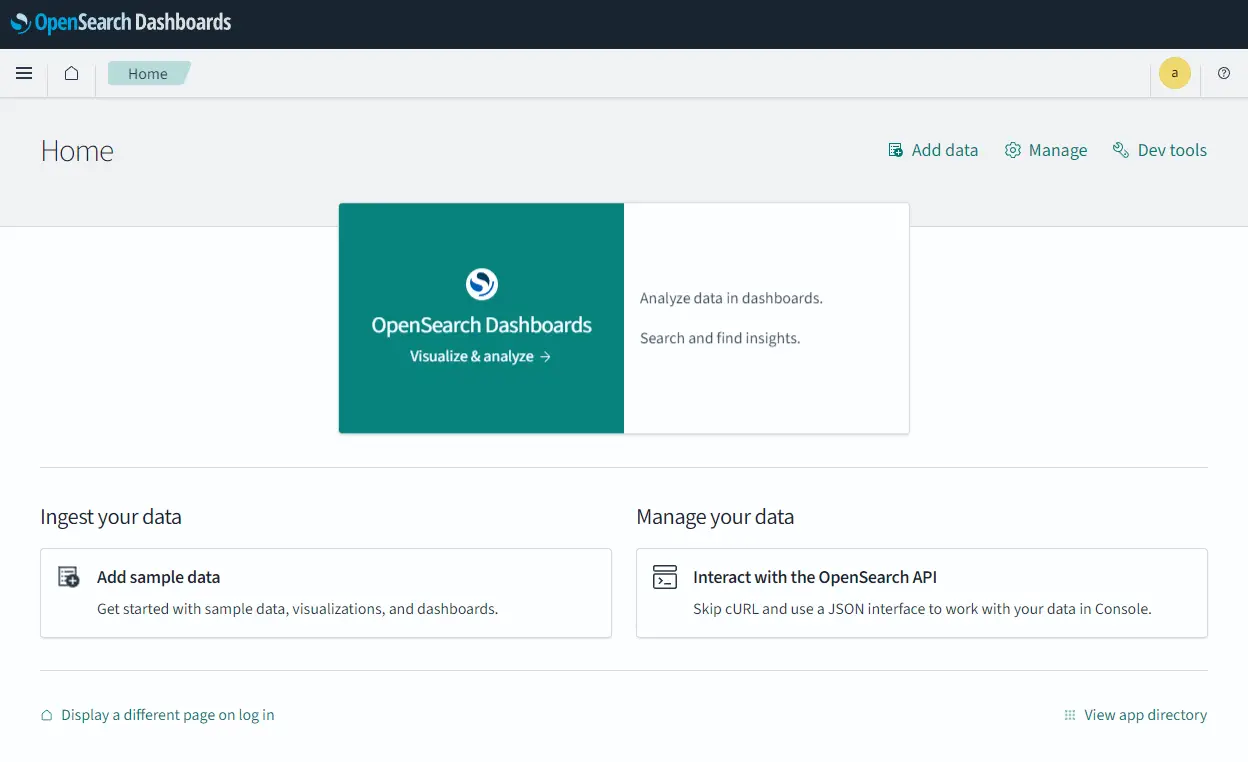
For now, we will stick with the default option of a Private tenant. Click the Confirm button to proceed. You will be greeted with the following page.
Next, we will verify the connection between OpenSearch and the OpenSearch Dashboards.
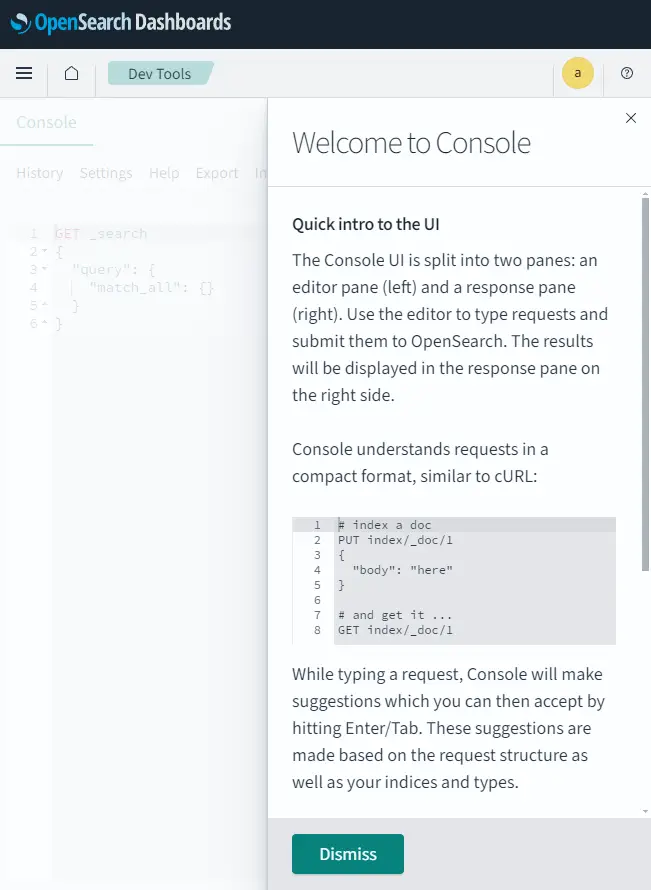
Click the Dev Tools button on the top right and you will be shown a mini popup about the console UI for the OpenSearch Dashboards.
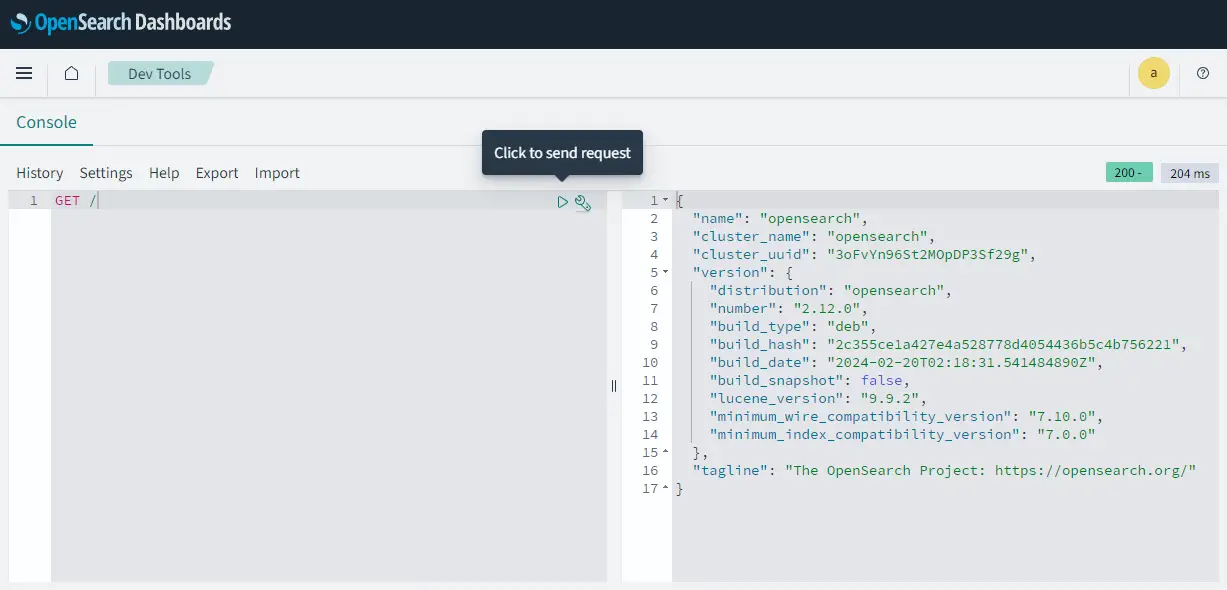
Click the Dismiss button, input the query GET / in the console on the left, and click the small play button in the middle. You should see the following output on the right.
This confirms that OpenSearch Dashboards is receiving data from OpenSearch and both are working fine. You can start adding data from here on.
Conclusion
This concludes the tutorial on installing OpenSearch on a Debian 12 server. If you have any questions, post them in the comments below.


