phpBB is a free, open-source, and one of the most comprehensive forum bulletin software. It is fully scalable and customizable and is based on PHP and MySQL. It provides a space for users to meet and communicate with each other. It offers hundreds of style and image packs that allow you to customize your forum to your liking. It is used by millions of people every day, making it the world’s most widely used open-source bulletin board system. It’s a great tool for people who want to create forum-style discussion boards.
In this post, we’ll show you how to install the phpBB forum on Alma Linux 8.
Requirements
- A server running Alma Linux 8.
- A valid domain name pointing to the IP of your server.
- A root password is set up on the server.
Install Nginx, MariaDB and PHP
First, install the Nginx web server, MariaDB database server, PHP and other required PHP extensions by running the following command:
dnf install nginx mariadb-server php php-mysqli php-json php-gd php-curl php-mbstring php-fpm unzip -y
Once all packages are installed, edit the PHP configuration file and change some default settings:
nano /etc/php.ini
Change the following lines:
max_execution_time = 180
max_input_time = 90
memory_limit = 256M
upload_max_filesize = 64M
Save and close the file, then edit the PHP FPM configuration file and change the user and group in Nginx:
nano /etc/php-fpm.d/www.conf
Change the following lines:
user = nginx
group = nginx
Save and close the file. Then start and activate the Nginx, MariaDB and PHP-FPM service with the following command:
systemctl start nginx mariadb php-fpm
systemctl enable nginx mariadb php-fpm
When you’re done, you can proceed to the next step.
Create a database for phpBB
phpBB uses MariaDB as its database backend. So you need to create a database and a user for phpBB.
First, log in to MariaDB with the following command:
mysql
Once you are logged in, create a database and user for phpBB using the following command:
MariaDB [(none)]> CREATE DATABASE phpbbdb;
MariaDB [(none)]> CREATE USER 'phpbbuser'@'localhost' IDENTIFIED BY 'password';
Next, grant the phpBB database all permissions with the following command:
MariaDB [(none)]> GRANT ALL ON phpbbdb.* TO 'phpbbuser'@'localhost' IDENTIFIED BY 'password' WITH GRANT OPTION;
Next, delete the permissions and exit MariaDB with the following command:
MariaDB [(none)]> FLUSH PRIVILEGES;
MariaDB [(none)]> EXIT;
When you’re done, you can proceed to the next step.
Download phpBB
First, download the latest version of phpBB from the official website by entering the following command:
wget https://download.phpbb.com/pub/release/3.3/3.3.7/phpBB-3.3.7.zip
Once the download is complete, unzip the downloaded file with the following command:
unzip phpBB-3.3.7.zip
Next, move phpBB to the Nginx web root directory:
mv phpBB3 /var/www/html/phpbb
Then use the following command to set the correct permissions and owners:
chown -R nginx:nginx /var/www/html/phpbb
chmod -R 755 /var/www/html/phpbb
Once you’re done with that, you can move on to the next step.
Configure Nginx for phpBB
Next, you’ll need to create a configuration file for the Nginx virtual host for phpBB. You can create it with the following command:
nano /etc/nginx/conf.d/phpbb.conf
Paste the following lines:
server {
   listen 80;
   server_name phpbb.exampledomain.com;
   root /var/www/html/phpbb;
   index index.php index.html index.htm;

    access_log /var/log/nginx/phpbb-access.log;
    error_log /var/log/nginx/phpbb-error.log;

location / {
	try_files $uri $uri/ @rewriteapp;

	# Pass the php scripts to FastCGI server specified in upstream declaration.
	location ~ .php(/|$) {
		include fastcgi.conf;
                fastcgi_pass unix:/run/php-fpm/www.sock;
		fastcgi_split_path_info ^(. .php)(/.*)$;
		fastcgi_param PATH_INFO $fastcgi_path_info;
		fastcgi_param SCRIPT_FILENAME $realpath_root$fastcgi_script_name;
		fastcgi_param DOCUMENT_ROOT $realpath_root;
		try_files $uri $uri/ /app.php$is_args$args;
		fastcgi_intercept_errors on;
	}

	# Deny access to internal phpbb files.
	location ~ /(config.php|common.php|cache|files|images/avatars/upload|includes|(?<!ext/)phpbb(?!w )|store|vendor) {
		deny all;
		# deny was ignored before 0.8.40 for connections over IPv6.
		# Use internal directive to prohibit access on older versions.
		internal;
	}
}

location @rewriteapp {
	rewrite ^(.*)$ /app.php/$1 last;
}

# Correctly pass scripts for installer
location /install/ {
	try_files $uri $uri/ @rewrite_installapp =404;

	# Pass the php scripts to fastcgi server specified in upstream declaration.
	location ~ .php(/|$) {
		include fastcgi.conf;
                fastcgi_pass unix:/run/php-fpm/www.sock;
		fastcgi_split_path_info ^(. .php)(/.*)$;
		fastcgi_param PATH_INFO $fastcgi_path_info;
		fastcgi_param SCRIPT_FILENAME $realpath_root$fastcgi_script_name;
		fastcgi_param DOCUMENT_ROOT $realpath_root;
		try_files $uri $uri/ /install/app.php$is_args$args =404;
		fastcgi_intercept_errors on;
	}
}

location @rewrite_installapp {
	rewrite ^(.*)$ /install/app.php/$1 last;
}

# Deny access to version control system directories.
location ~ /.svn|/.git {
	deny all;
	internal;
}

 gzip on;
 gzip_comp_level 6;
 gzip_min_length 1000;
 gzip_proxied any;
 gzip_disable "msie6";
 gzip_types
     application/atom xml
     application/geo json
     application/javascript
     application/x-javascript
     application/json
     application/ld json
     application/manifest json
     application/rdf xml
     application/rss xml
     application/xhtml xml
     application/xml
     font/eot
     font/otf
     font/ttf
     image/svg xml
     text/css
     text/javascript
     text/plain
     text/xml;

  # assets, media
  location ~* .(?:css(.map)?|js(.map)?|jpe?g|png|gif|ico|cur|heic|webp|tiff?|mp3|m4a|aac|ogg|midi?|wav|mp4|mov|webm|mpe?g|avi|ogv|flv|wmv)$ {
      expires    90d;
      access_log off;
  }

  # svg, fonts
  location ~* .(?:svgz?|ttf|ttc|otf|eot|woff2?)$ {
      add_header Access-Control-Allow-Origin "*";
      expires    90d;
      access_log off;
  }
}
Save and close the file and check the Nginx configuration with the following command:
nginx -t
You should get the following output:
nginx: the configuration file /etc/nginx/nginx.conf syntax is ok
nginx: configuration file /etc/nginx/nginx.conf test is successful
Finally, restart the Nginx service to apply the changes:
systemctl restart nginx
You can also check the status of the Nginx service with the following command:
systemctl status nginx
You’ll get the following output:
? nginx.service - The nginx HTTP and reverse proxy server
   Loaded: loaded (/usr/lib/systemd/system/nginx.service; disabled; vendor preset: disabled)
  Drop-In: /usr/lib/systemd/system/nginx.service.d
           ??php-fpm.conf
   Active: active (running) since Sat 2022-04-02 11:50:20 UTC; 4s ago
  Process: 4558 ExecStart=/usr/sbin/nginx (code=exited, status=0/SUCCESS)
  Process: 4556 ExecStartPre=/usr/sbin/nginx -t (code=exited, status=0/SUCCESS)
  Process: 4554 ExecStartPre=/usr/bin/rm -f /run/nginx.pid (code=exited, status=0/SUCCESS)
 Main PID: 4560 (nginx)
    Tasks: 2 (limit: 11412)
   Memory: 3.8M
   CGroup: /system.slice/nginx.service
           ??4560 nginx: master process /usr/sbin/nginx
           ??4561 nginx: worker process

Apr 02 11:50:20 linux systemd[1]: nginx.service: Succeeded.
Apr 02 11:50:20 linux systemd[1]: Stopped The nginx HTTP and reverse proxy server.
Apr 02 11:50:20 linux systemd[1]: Starting The nginx HTTP and reverse proxy server...
Apr 02 11:50:20 linux nginx[4556]: nginx: the configuration file /etc/nginx/nginx.conf syntax is ok
Apr 02 11:50:20 linux nginx[4556]: nginx: configuration file /etc/nginx/nginx.conf test is successful
Apr 02 11:50:20 linux systemd[1]: nginx.service: Failed to parse PID from file /run/nginx.pid: Invalid argument
Apr 02 11:50:20 linux systemd[1]: Started The nginx HTTP and reverse proxy server.
When you’re done, you can proceed to the next step.
Accessing the phpBB web interface
Now open your web browser and access the phpBB web interface via the URL http://phpbb.example.com. You will see the following page:
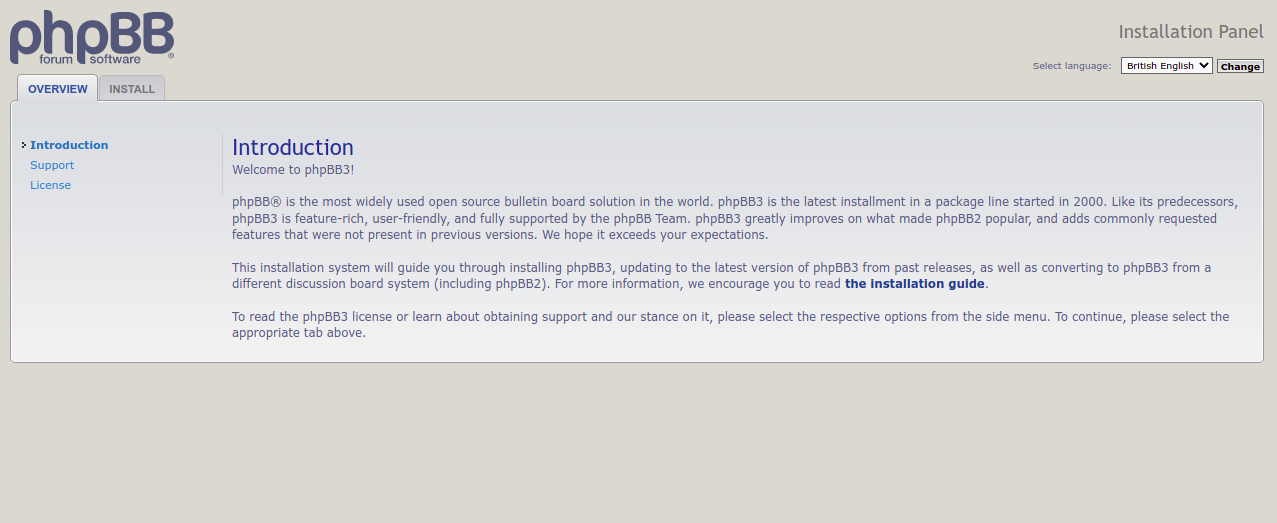
Click on the INSTALL tab. You should see the installation page:
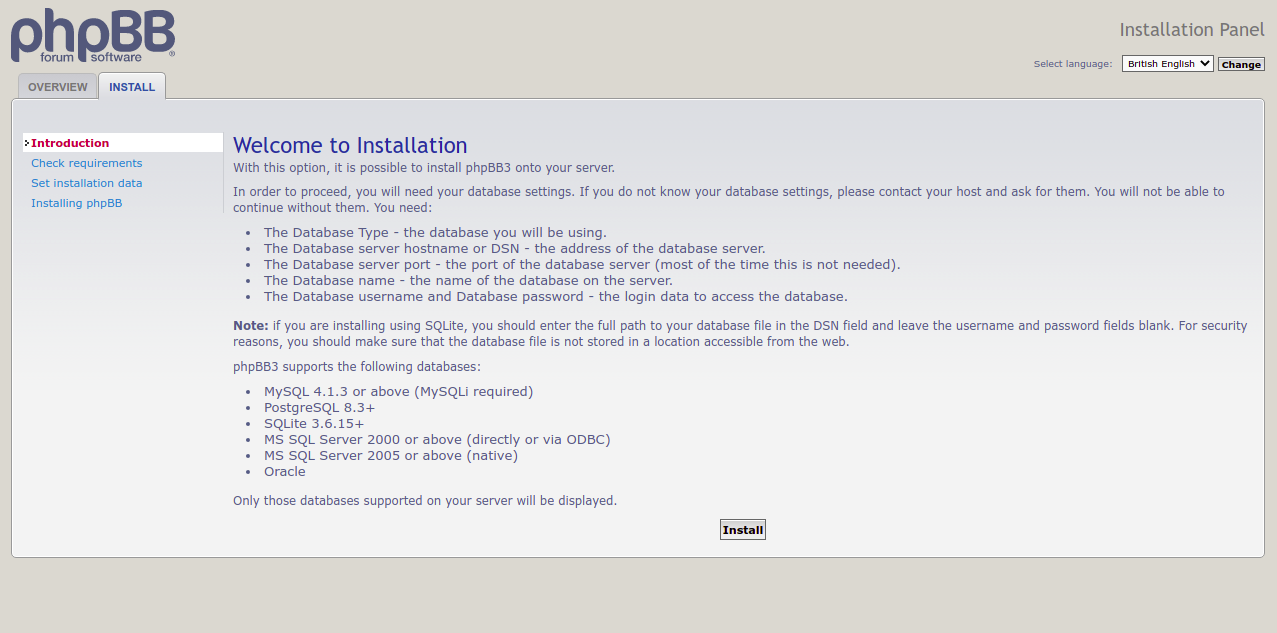
Click on the Install button. You should see the following page:
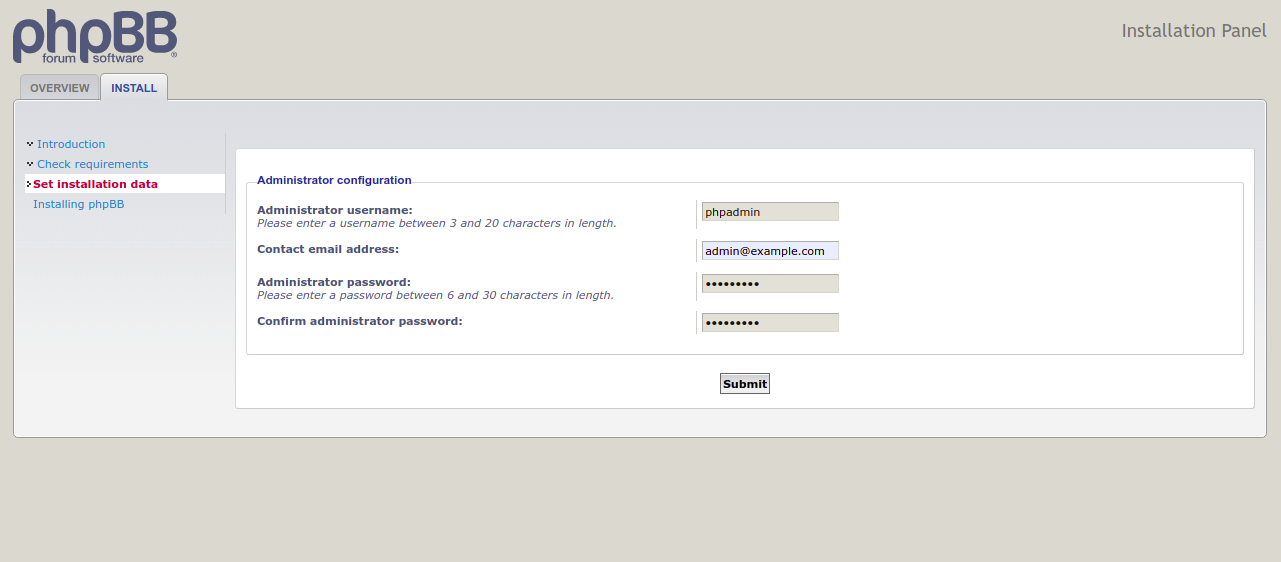
Enter your admin username, password and email address and click the Submit button. You should see the following page:
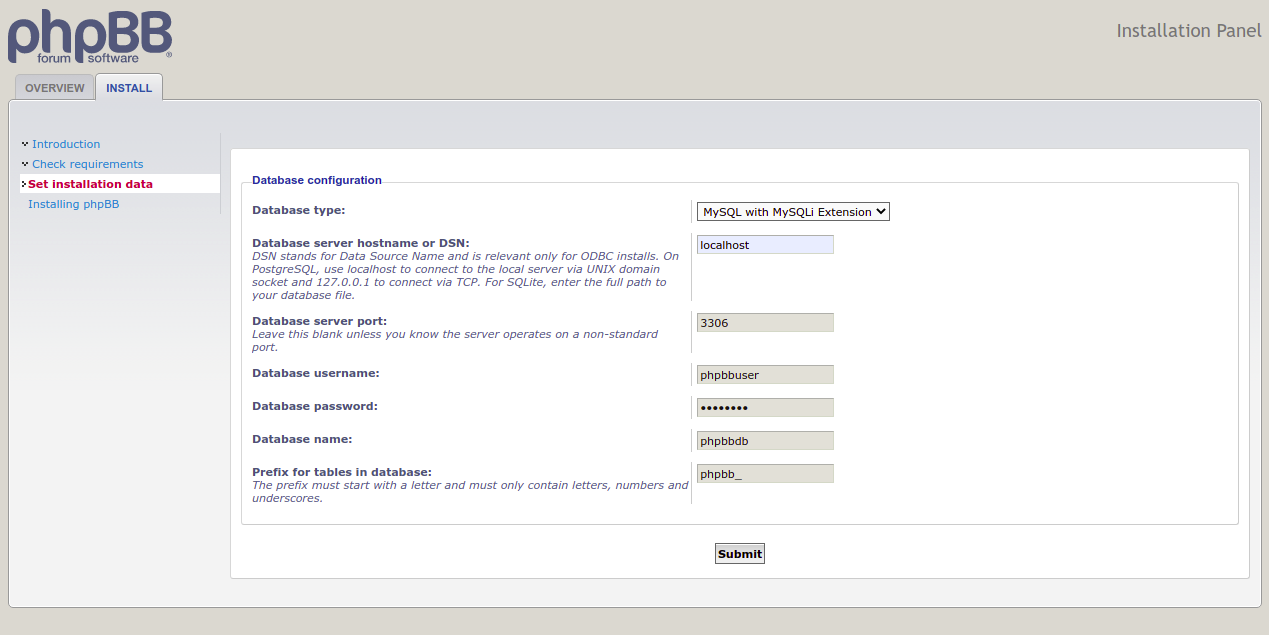
Enter your MySQL database username and password and click the Submit button. You should see the following page:
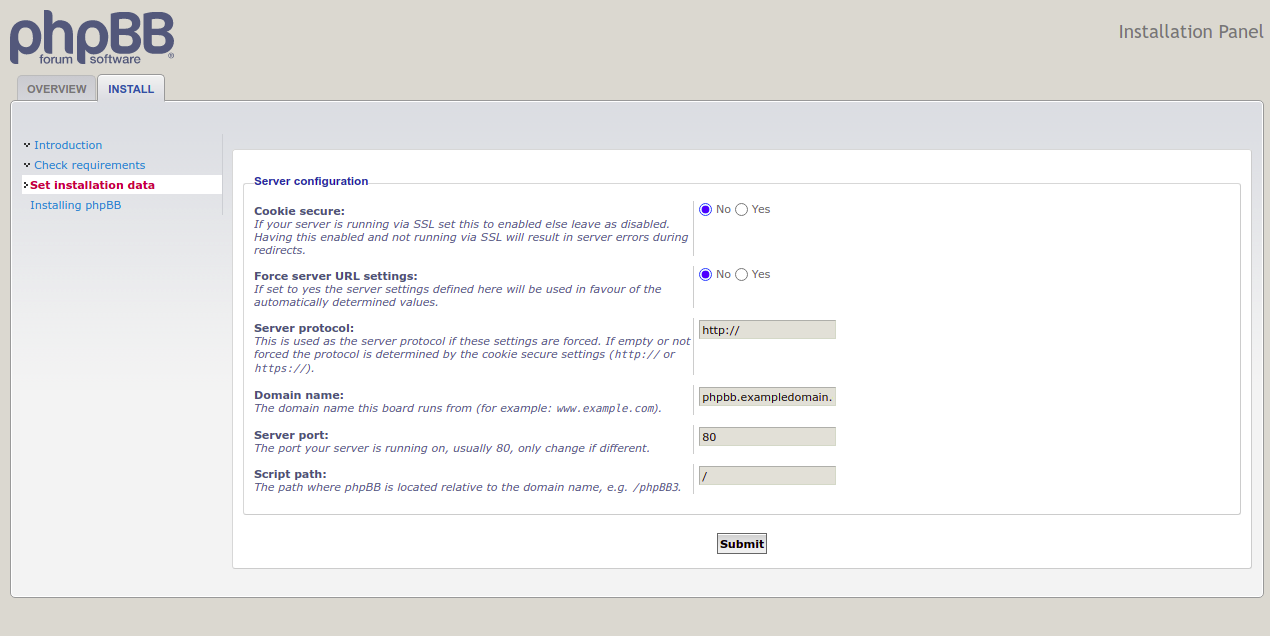
Enter your server configuration details and click the Submit button. You should see the following page:
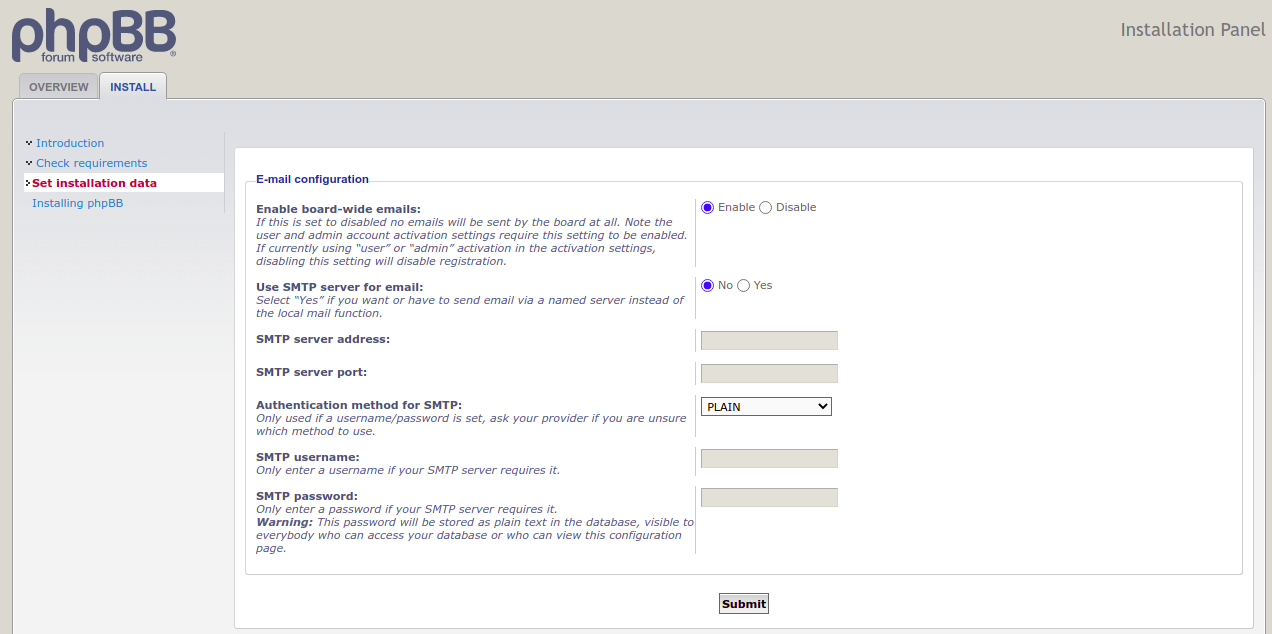
Enter your email configuration details and click the Submit button. You should see the following page:
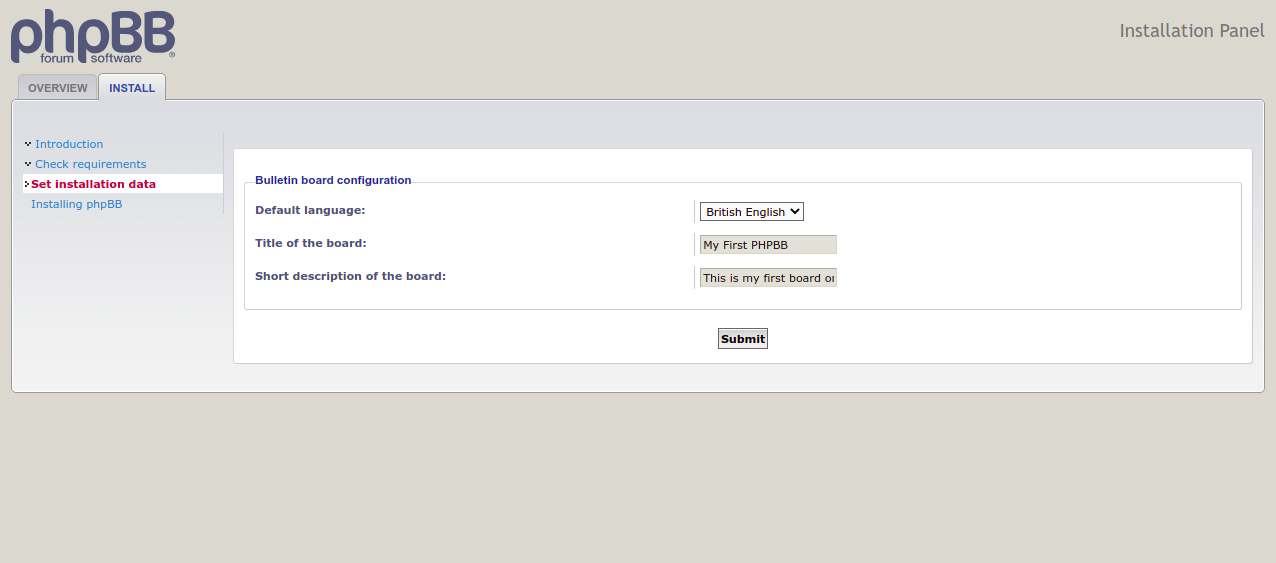
Enter the board configuration information and click the Submit button. Once the installation is complete, the following page will be displayed:
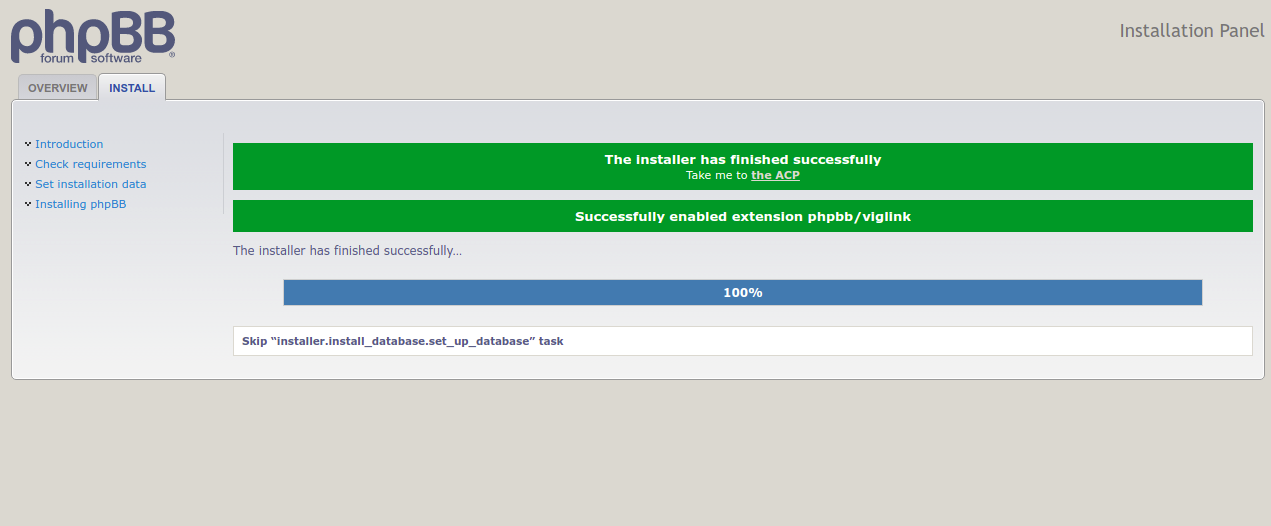
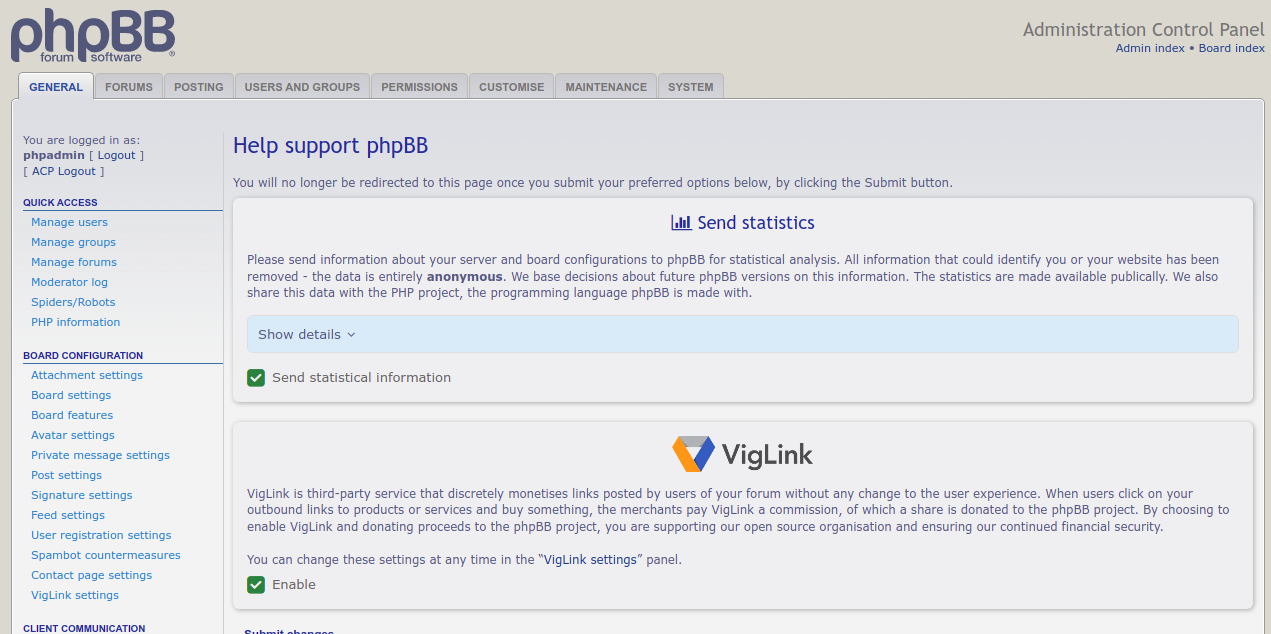
Click on the Take me to the ACP button. On the following page you should see the phpBB Dashboard:
Conclusion
Congratulations! You have successfully installed the phpBB forum on Alma Linux 8. Now you can design your forums and set up your community. You can find more information on the official phpBB website. If you have any questions, please feel free to contact me.
