
Lemmy is an open-source Reddit-like content aggregator and microblogging platform for the fediverse. It allows you to create and moderate communities and can communicate with other ActivityPub services including Mastodon, Pleroma, and Peertube.
While there are popular instances of Lemmy you can join and use, you can also run your own Lemmy instance for your friends and family. In this tutorial, you will learn how to install Lemmy on an Ubuntu 22.04 server.
Prerequisites
-
A server running Ubuntu 22.04.
-
A non-root sudo user.
-
A fully qualified domain name (FQDN) like
example.com. -
Make sure everything is updated.
$ sudo apt update
$ sudo apt upgrade
-
Few packages that your system needs.
$ sudo apt install wget curl nano ufw software-properties-common dirmngr apt-transport-https gnupg2 ca-certificates lsb-release ubuntu-keyring unzip -y
Some of these packages may already be installed on your system.
Step 1 – Configure Firewall
The first step is to configure the firewall. Ubuntu comes with ufw (Uncomplicated Firewall) by default.
Check if the firewall is running.
$ sudo ufw status
You will get the following output.
Status: inactive
Allow SSH port so that the firewall doesn’t break the current connection upon enabling it.
$ sudo ufw allow OpenSSH
Allow HTTP and HTTPS ports as well.
$ sudo ufw allow http
$ sudo ufw allow https
Enable the Firewall
$ sudo ufw enable
Command may disrupt existing ssh connections. Proceed with operation (y|n)? y
Firewall is active and enabled on system startup
Check the status of the firewall again.
$ sudo ufw status
You should see a similar output.
Status: active

To                         Action      From
--                         ------      ----
OpenSSH                    ALLOW       Anywhere
80/tcp                     ALLOW       Anywhere
443                        ALLOW       Anywhere
OpenSSH (v6)               ALLOW       Anywhere (v6)
80/tcp (v6)                ALLOW       Anywhere (v6)
443 (v6)                   ALLOW       Anywhere (v6)
Step 2 – Install Docker and Docker Compose
Ubuntu 22.04 ships with an older version of Docker. To install the latest version, first, import the Docker GPG key.
$ curl -fsSL https://download.docker.com/linux/ubuntu/gpg | sudo gpg --dearmor -o /usr/share/keyrings/docker.gpg
Create a Docker repository file.
$ echo
  "deb [arch="$(dpkg --print-architecture)" signed-by=/usr/share/keyrings/docker.gpg] https://download.docker.com/linux/ubuntu
  "$(. /etc/os-release && echo "$VERSION_CODENAME")" stable" |
  sudo tee /etc/apt/sources.list.d/docker.list > /dev/null
Update the system repository list.
$ sudo apt update
Install the latest version of Docker.
$ sudo apt install docker-ce docker-ce-cli containerd.io docker-buildx-plugin docker-compose-plugin
Verify that it is running.
$ sudo systemctl status docker
? docker.service - Docker Application Container Engine
     Loaded: loaded (/lib/systemd/system/docker.service; enabled; vendor preset: enabled)
     Active: active (running) since Fri 2023-08-04 07:48:20 UTC; 4min 29s ago
TriggeredBy: ? docker.socket
       Docs: https://docs.docker.com
   Main PID: 2372 (dockerd)
      Tasks: 8
     Memory: 23.9M
        CPU: 295ms
     CGroup: /system.slice/docker.service
             ??2372 /usr/bin/dockerd -H fd:// --containerd=/run/containerd/containerd.sock
By default, Docker requires root privileges. If you want to avoid using sudo every time you run the docker command, add your username to the docker group.
$ sudo usermod -aG docker $(whoami)
You will need to log out of the server and back in as the same user to enable this change or use the following command.
$ su - ${USER}
Confirm that your user is added to the Docker group.
$ groups
navjot wheel docker
Step 3 – Create and download Lemmy files
Create a folder for Lemmy.
$ mkdir ~/lemmy
Switch to the directory.
$ cd ~/lemmy
Grab the custom Nginx file to work with Docker.
$ wget https://raw.githubusercontent.com/LemmyNet/lemmy-ansible/main/templates/nginx_internal.conf
Grab the Docker compose file.
$ wget https://raw.githubusercontent.com/LemmyNet/lemmy-ansible/main/templates/docker-compose.yml
Create a folder for the Pictrs application.
$ mkdir -p volumes/pict-rs
Set the correct permissions for the directory.
$ sudo chown -R 991:991 volumes/pict-rs
Step 4 – Configure Lemmy
Before proceeding with the installation, we need to edit the files we downloaded.
Open the Docker compose file for editing.
$ nano docker-compose.yml
Make the following changes in the file:
-
Replace the variable
{{ lemmy_port }}with8536in the file. -
Replace the variable
{{ lemmy_docker_image }}withdessalines/lemmy:0.18.3in the file. You can get the latest version of Lemmy’s Docker image from its Docker Hub page. The page requires you to have a Docker account. Alternatively, you can get the version from its Github releases page. -
Replace the variable
{{ lemmy_docker_ui_image }}withdessalines/lemmy-ui:0.18.3in the file. Make sure the version matches with Lemmy’s docker image otherwise, it won’t work. -
Generate an API key for pict-rs using the following command.
$ openssl rand -base64 32
lRLcaM5rovxzmztlDvtkGijJyBtg4KlEKC6HRb3dn7s=
The
PICTRS__API_KEYkey under the environment attribute under thepictrsservice is wrongly configured to say it should be the PostgreSQL password. Replace the{{ postgres_password }}variable across the API key variable with the key generated in the above command. -
Replace the
{{ domain }}variable in the file with your fully qualified domain name for your Lemmy instance. -
Replace the
{{ postgres_password }}with a strong password of your choice for the PostgreSQL server. -
Replace the existing environment variable
RUST_LOGwith the following.- RUST_LOG="warn,lemmy_server=debug,lemmy_api=debug,lemmy_api_common=debug,lemmy_api_crud=debug,lemmy_apub=debug,lemmy_db_schema=debug,lemmy_db_views=debug,lemmy_db_views_actor=debug,lemmy_db_views_moderator=debug,lemmy_routes=debug,lemmy_utils=debug,lemmy_websocket=debug" - RUST_BACKTRACE=full
-
Add the following section under the
hostnameproperty under the PostgreSQL service.command: [ "postgres", "-c", "session_preload_libraries=auto_explain", "-c", "auto_explain.log_min_duration=5ms", "-c", "auto_explain.log_analyze=true", "-c", "track_activity_query_size=1048576", ] ports: # use a different port so it doesnt conflict with potential postgres db running on the host - "5433:5432"
Save the file by pressing Ctrl X and entering Y when prompted once finished. Next, create and open the file lemmy.hjson for editing.
$ nano lemmy.hjson
Paste the following code.
{
  # for more info about the config, check out the documentation
  # https://join-lemmy.org/docs/en/administration/configuration.html

  database: {
    host: "postgres"
    user: "lemmy"
    password: "yourpsqlpassword"
    database: "lemmy"
    port: 5432
  }
  hostname: "example.com"
  pictrs: {
    url: "http://pictrs:8080/"
     # Set a custom pictrs API key. ( Required for deleting images )
    api_key: "lRLcaM5rovxzmztlDvtkGijJyBtg4KlEKC6HRb3dn7s="
  }
  email: {
    smtp_server: "email-smtp.us-west-2.amazonaws.com:465"
    smtp_login: "AmazonSESUserID"
    smtp_password:"AmazonSESPassword"
    smtp_from_address: "[email protected]"
    # Whether or not smtp connections should use tls. Can be none, tls, or starttls
    tls_type: "tls"
  }
  setup: {
    # Username for the admin user
    admin_username: "admin"
    # Password for the admin user. It must be at least 10 characters.
    admin_password: "tf6HHDS4RolWfFhk4Rq9"
    # Name of the site (can be changed later)
    site_name: "Howtoforge Lemmy"
    # Email for the admin user (optional, can be omitted and set later through the website)
    admin_email: "[email protected]"
  }
}
Save the file by pressing Ctrl X and entering Y when prompted once finished.
The next step is to create a custom PostgreSQL configuration file to optimize the database. Visit the PGTune website to generate values depending on your server size.
Enter the server values and click the Generate button and create the custom configuration.
Create and open the customPostgresql.conf file for editing.
$ nano customPostgresql.conf
Paste the code you got from PGTune.
# DB Version: 15
# OS Type: linux
# DB Type: web
# Total Memory (RAM): 2 GB
# CPUs num: 2
# Connections num: 100
# Data Storage: ssd

max_connections = 100
shared_buffers = 512MB
effective_cache_size = 1536MB
maintenance_work_mem = 128MB
checkpoint_completion_target = 0.9
wal_buffers = 16MB
default_statistics_target = 100
random_page_cost = 1.1
effective_io_concurrency = 200
work_mem = 2621kB
min_wal_size = 1GB
max_wal_size = 4GB
Save the file by pressing Ctrl X and entering Y when prompted.
Step 5 – Install Lemmy
Now that all files are configured, it is time to run Lemmy. Run the following command to launch the docker containers.
$ docker compose up -d
Check the status of the containers.
$ docker ps
CONTAINER ID   IMAGE                        COMMAND                  CREATED          STATUS          PORTS                                               NAMES
75443bb3db3e   nginx:1-alpine               "https://www.howtoforge.com/docker-entrypoint.…"   32 seconds ago   Up 29 seconds   80/tcp, 0.0.0.0:8536->8536/tcp, :::8536->8536/tcp   lemmy-proxy-1
8393c8d625af   dessalines/lemmy-ui:0.18.1   "docker-entrypoint.s…"   32 seconds ago   Up 30 seconds   1234/tcp                                            lemmy-lemmy-ui-1
ea743c8279f7   dessalines/lemmy:0.18.1      "https://www.howtoforge.com/app/lemmy"             32 seconds ago   Up 26 seconds                                                       lemmy-lemmy-1
78855ae7871e   postgres:15-alpine           "docker-entrypoint.s…"   33 seconds ago   Up 31 seconds   5432/tcp                                            lemmy-postgres-1
9556b57afdb9   asonix/pictrs:0.4.0          "https://www.howtoforge.com/sbin/tini -- /usr/…"   33 seconds ago   Up 31 seconds   6669/tcp, 8080/tcp                                  lemmy-pictrs-1
You can also check the status using Docker Compose.
$ docker compose ps
NAME                IMAGE                        COMMAND                  SERVICE             CREATED              STATUS              PORTS
lemmy-lemmy-1       dessalines/lemmy:0.18.1      "https://www.howtoforge.com/app/lemmy"             lemmy               About a minute ago   Up About a minute
lemmy-lemmy-ui-1    dessalines/lemmy-ui:0.18.1   "docker-entrypoint.s…"   lemmy-ui            About a minute ago   Up About a minute   1234/tcp
lemmy-pictrs-1      asonix/pictrs:0.4.0          "https://www.howtoforge.com/sbin/tini -- /usr/…"   pictrs              About a minute ago   Up About a minute   6669/tcp, 8080/tcp
lemmy-postgres-1    postgres:15-alpine           "docker-entrypoint.s…"   postgres            About a minute ago   Up About a minute   5432/tcp
lemmy-proxy-1       nginx:1-alpine               "https://www.howtoforge.com/docker-entrypoint.…"   proxy               About a minute ago   Up About a minute   80/tcp, 0.0.0.0:8536->8536/tcp, :::8536->8536/tcp
You can test by opening the URL http://:8536/ and you should see Lemmy’s homepage. That concludes everything is okay. The next step is to install Nginx and Certbot to serve Lemmy via a domain name.
Step 6 – Install Nginx
Ubuntu 22.04 ships with an older version of Nginx. To install the latest version, you need to download the official Nginx repository.
Import Nginx’s signing key.
$ curl https://nginx.org/keys/nginx_signing.key | gpg --dearmor
| sudo tee /usr/share/keyrings/nginx-archive-keyring.gpg >/dev/null
Add the repository for Nginx’s stable version.
$ echo "deb [signed-by=/usr/share/keyrings/nginx-archive-keyring.gpg arch=amd64]
http://nginx.org/packages/ubuntu `lsb_release -cs` nginx"
| sudo tee /etc/apt/sources.list.d/nginx.list
Update the system repositories.
$ sudo apt update
Install Nginx.
$ sudo apt install nginx
Verify the installation.
$ nginx -v
nginx version: nginx/1.24.0
Start Nginx.
$ sudo systemctl start nginx
Check the status of the service.
$ sudo systemctl status nginx
? nginx.service - nginx - high performance web server
     Loaded: loaded (/lib/systemd/system/nginx.service; enabled; vendor preset: enabled)
     Active: active (running) since Fri 2023-08-04 09:01:56 UTC; 3s ago
       Docs: https://nginx.org/en/docs/
    Process: 5297 ExecStart=/usr/sbin/nginx -c /etc/nginx/nginx.conf (code=exited, status=0/SUCCESS)
   Main PID: 5298 (nginx)
      Tasks: 2 (limit: 2308)
     Memory: 1.9M
        CPU: 7ms
     CGroup: /system.slice/nginx.service
             ??5298 "nginx: master process /usr/sbin/nginx -c /etc/nginx/nginx.conf"
             ??5299 "nginx: worker process" "" "" "" "" "" "" "" "" "" "" "" "" "" "" "" "" "" "" ""
Step 7 – Install SSL
We need to install Certbot to generate the SSL certificate. You can either install Certbot using Ubuntu’s repository or grab the latest version using the Snapd tool. We will be using the Snapd version.
Ubuntu 22.04 comes with Snapd installed by default. Run the following commands to ensure that your version of Snapd is up to date.
$ sudo snap install core && sudo snap refresh core
Install Certbot.
$ sudo snap install --classic certbot
Use the following command to ensure that the Certbot command can be run by creating a symbolic link to the /usr/bin directory.
$ sudo ln -s /snap/bin/certbot /usr/bin/certbot
Run the following command to generate an SSL Certificate.
$ sudo certbot certonly --nginx --agree-tos --no-eff-email --staple-ocsp --preferred-challenges http -m [email protected] -d example.com
The above command will download a certificate to the /etc/letsencrypt/live/example.com directory on your server.
Generate a Diffie-Hellman group certificate.
$ sudo openssl dhparam -dsaparam -out /etc/ssl/certs/dhparam.pem 4096
Check the Certbot renewal scheduler service.
$ sudo systemctl list-timers
You will find snap.certbot.renew.service as one of the services scheduled to run.
NEXT                        LEFT          LAST                        PASSED       UNIT                       ACTIVATES
Fri 2023-08-04 09:50:30 UTC 46min left    Fri 2023-08-04 01:49:37 UTC 7h ago       apt-daily.timer            apt-daily.service
Sat 2023-08-05 00:00:00 UTC 14h left      Wed 2023-06-28 04:41:28 UTC 5h 7min ago  dpkg-db-backup.timer       dpkg-db-backup.service
Fri 2023-08-04 18:54:00 UTC 9h left       n/a                         n/a          snap.certbot.renew.timer   snap.certbot.renew.service
Do a dry run of the process to check whether the SSL renewal is working fine.
$ sudo certbot renew --dry-run
If you see no errors, you are all set. Your certificate will renew automatically.
Step 8 – Configure Nginx
Create and open the file /etc/nginx/conf.d/lemmy.conf for editing.
$ sudo nano /etc/nginx/conf.d/lemmy.conf
Paste the following code in it.
limit_req_zone $binary_remote_addr zone=example.com_ratelimit:10m rate=1r/s;

server {
    listen 80;
    listen [::]:80;
    server_name example.com;
    # Hide nginx version
    server_tokens off;
    location / {
        return 301 https://$host$request_uri;
    }
}

server {
    listen 443 ssl http2;
    listen [::]:443 ssl http2;
    server_name example.com;

    access_log  /var/log/nginx/lemmy.access.log;
    error_log   /var/log/nginx/lemmy.error.log;

    ssl_certificate /etc/letsencrypt/live/example.com/fullchain.pem;
    ssl_certificate_key /etc/letsencrypt/live/example.com/privkey.pem;
    ssl_trusted_certificate /etc/letsencrypt/live/example.com/chain.pem;

    ssl_protocols TLSv1.2 TLSv1.3;
    ssl_prefer_server_ciphers off;
    ssl_ciphers ECDHE-ECDSA-AES128-GCM-SHA256:ECDHE-RSA-AES128-GCM-SHA256:ECDHE-ECDSA-AES256-GCM-SHA384:ECDHE-RSA-AES256-GCM-SHA384:ECDHE-ECDSA-CHACHA20-POLY1305:ECDHE-RSA-CHACHA20-POLY1305:DHE-RSA-AES128-GCM-SHA256:DHE-RSA-AES256-GCM-SHA384:DHE-RSA-CHACHA20-POLY1305;
    ssl_ecdh_curve X25519:prime256v1:secp384r1:secp521r1;
    ssl_session_timeout 1d;
    ssl_session_cache shared:SSL:10m;
    ssl_session_tickets off;
    ssl_stapling on;
    ssl_stapling_verify on;
    ssl_dhparam /etc/ssl/certs/dhparam.pem;
    # use https://blog.cloudflare.com/announcing-1111 Cloudfare Apnic labs, It is free and secure
    resolver 1.1.1.1 1.0.0.1 [2606:4700:4700::1111] [2606:4700:4700::1001] valid=300s;

    # Hide nginx version
    server_tokens off;

    # Enable compression for JS/CSS/HTML bundle, for improved client load times.
    # It might be nice to compress JSON, but leaving that out to protect against potential
    # compression encryption information leak attacks like BREACH.
    gzip on;
    gzip_types text/css application/javascript image/svg xml;
    gzip_vary on;

    # Various content security headers
    add_header Referrer-Policy "same-origin";
    add_header X-Content-Type-Options "nosniff";
    add_header X-Frame-Options "DENY";
    add_header X-XSS-Protection "1; mode=block";


    location / {
      proxy_pass http://localhost:8536;
      proxy_http_version 1.1;
      proxy_set_header Upgrade $http_upgrade;
      proxy_set_header Connection "upgrade";
      proxy_set_header X-Real-IP $remote_addr;
      proxy_set_header Host $host;
      proxy_set_header X-Forwarded-For $proxy_add_x_forwarded_for;
    }
}
Notice the root directory to be used in the Nginx configuration is /var/www/html/Lemmy/public/.
Save the file by pressing Ctrl X and entering Y when prompted once finished.
Open the file /etc/nginx/nginx.conf for editing.
$ sudo nano /etc/nginx/nginx.conf
Add the following line before the line include /etc/nginx/conf.d/*.conf;.
server_names_hash_bucket_size 64;
Save the file by pressing Ctrl X and entering Y when prompted.
Verify the Nginx configuration file syntax.
$ sudo nginx -t
nginx: the configuration file /etc/nginx/nginx.conf syntax is ok
nginx: configuration file /etc/nginx/nginx.conf test is successful
Restart the Nginx service.
$ sudo systemctl restart nginx
Step 9 – Access Lemmy
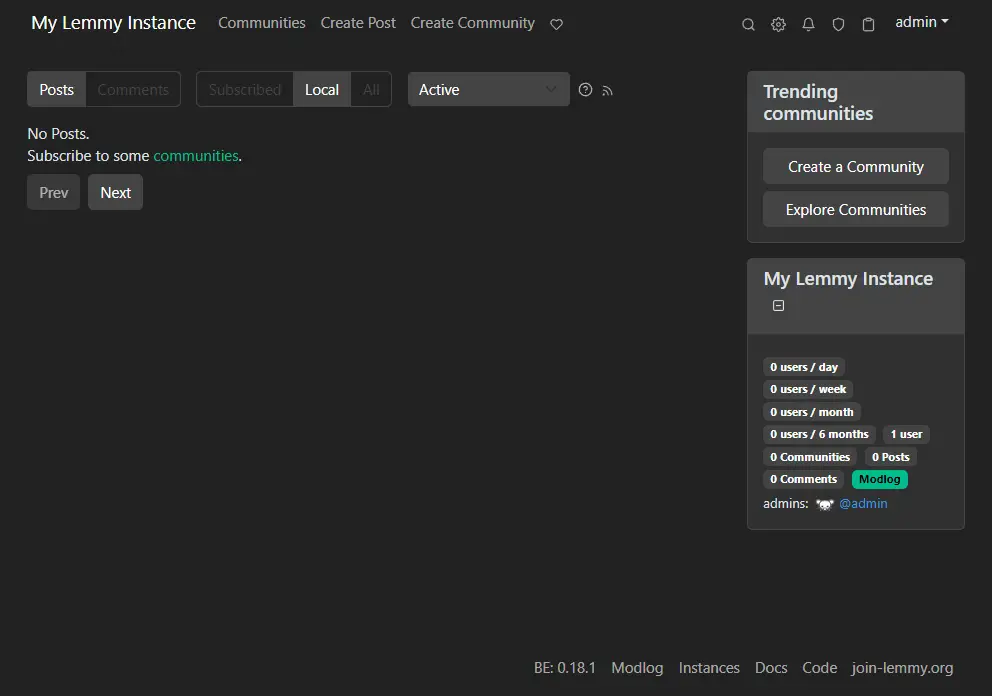
Open the URL https://example.com and you will get the following Lemmy homepage.
Click the Login link at the top to bring up the login page.
Enter the credentials used in step 4 and click the Login button to proceed. You will be taken back to the Lemmy homepage. You can start using Lemmy from hereon.
Step 10 – Upgrade Lemmy
To upgrade Lemmy, open the docker-compose.yml file in the ~/lemmy folder.
$ cd ~/lemmy
$ nano docker-compose.yml
Change the version numbers of the apps, Lemmy, Lemmy-UI, and Pictrs in the file. Save the file by pressing Ctrl X and entering Y when prompted once finished.
Power down the Lemmy containers.
$ docker compose down --remove-orphan
Start the containers back up using the new configuration.
$ docker compose up -d
Step 11 – Backup and Restore Lemmy
To back up Lemmy, we have to take a dump of both the database and the volumes folder. Run the following commands to back up the database.
$ cd ~/lemmy
$ docker compose exec postgres pg_dumpall -c -U lemmy | gzip > lemmy_dump_`date  %Y-%m-%d"_"%H_%M_%S`.sql.gz
In the above command postgres is the service name for PostgreSQL in the compose file.
Next, back up the volumes folder using the following command.
$ sudo rsync -avP volumes ~/backup/lemmy
You can use the following backup script and run it from your local system to take the backup remotely.
#!/bin/sh
# DB Backup
ssh USERNAME@SERVER_IP "docker-compose exec postgres pg_dumpall -c -U lemmy" | gzip > ~/BACKUP_LOCATION/INSTANCE_NAME_dump_`date  %Y-%m-%d"_"%H_%M_%S`.sql.gz

# Volumes folder Backup
rsync -avP -zz --rsync-path="sudo rsync" USERNAME@SERVER_IP:/LEMMY_LOCATION/volumes ~/BACKUP_LOCATION/FOLDERNAME
Restore Lemmy Database
To restore the database on a new Lemmy installation, run the following set of commands.
# Start only the PostgreSQL container first
$ docker compose up -d postgres

# Restore from the .sql.gz backup
$ gunzip < db_dump.sql  |  docker-compose exec -T postgres psql -U lemmy

# Note: You may need to change the permissions on the postgres directory, depending on your system.
$ chown -R $USER volumes
$ docker compose restart postgres

# Continue with the startup
$ docker compose up -d
If by mistake you have started Lemmy first, you need to clear the existing database using the following commands.
# Drop the existing DB
docker exec -i FOLDERNAME-postgres-1 psql -U lemmy -c "DROP SCHEMA public CASCADE; CREATE SCHEMA public;"

# This also might be necessary when doing a db import with a different password.
docker exec -i FOLDERNAME-postgres-1 psql -U lemmy -c "alter user lemmy with password 'bleh'"
Now you can go through with the restore commands above.
Conclusion
This concludes our tutorial on installing Reddit-like Content Aggregator Lemmy on a Ubuntu 22.04 server. If you have any questions, post them in the comments below.


