
Redmine is a free and open-source project management application written in Ruby. It provides a web-based interface that allows you to manage your project from the web browser. It is a cross-platform, and cross-database application that provides free and paid tools, and supports for wikis, forums, calendars, etc.
Features
- Gantt chart and calendar
- Support multiple projects
- Role-based access control
- Email notification
- Issue tracking system
- SCM integration
- Support multiple language and database
In this post, we will show you how to install Redmine on Ubuntu 20.04 server.
Prerequisites
- A server running Ubuntu 20.04.
- A valid domain name pointed with your server IP.
- A root password is configured on the server.
Getting Started
First, you will need to update the APT package cache to your system. You can update it with the following command:
apt-get update -y
Once the APT cache is updated, install other required tools with the following command:
apt-get install build-essential libmysqlclient-dev libmysqlclient-dev imagemagick libmagickwand-dev libmagickcore-dev apt-transport-https ca-certificates dirmngr gnupg2 -y
Once all the packages are installed, you can proceed to the next step.
Install Apache, MariaDB, and Passenger
Next, you will need to install the Apache web server, MariaDB database, and Passenger to your system. You can install all of them with the following command:
apt-get install apache2 apache2-dev libapache2-mod-passenger mariadb-server mariadb-client -y
Once all the packages are installed, start the Apache and MariaDB service:
systemctl start apache2
systemctl start mariadb
Once you are finished, you can proceed to the next step.
Configure MariaDB Database
First, you will need to set a MariaDB root password and secure the installation. You can do it with the following command:
mysql_secure_installation
Answer all the questions as shown below:
Set root password? [Y/n] y
Remove anonymous users? [Y/n] y
Disallow root login remotely? [Y/n] y
Remove test database and access to it? [Y/n] y
Reload privilege tables now? [Y/n] y
Next, log in to MariaDB with the following command:
mysql -u root -p
Once you are login, create a database and user with the following command:
MariaDB [(none)]> CREATE DATABASE redmine CHARACTER SET utf8mb4;
MariaDB [(none)]> GRANT ALL PRIVILEGES ON redmine.* TO 'redmine'@'localhost' IDENTIFIED BY 'password';
Next, flush the privileges and exit from the MariaDB with the following command:
MariaDB [(none)]> FLUSH PRIVILEGES;
MariaDB [(none)]> EXIT;
Once you are finished, you can proceed to the next step.
Install Redmine
By default, the Redmine package is available in the Ubuntu default repository. You can install it with the following command:
apt-get install redmine redmine-mysql -y
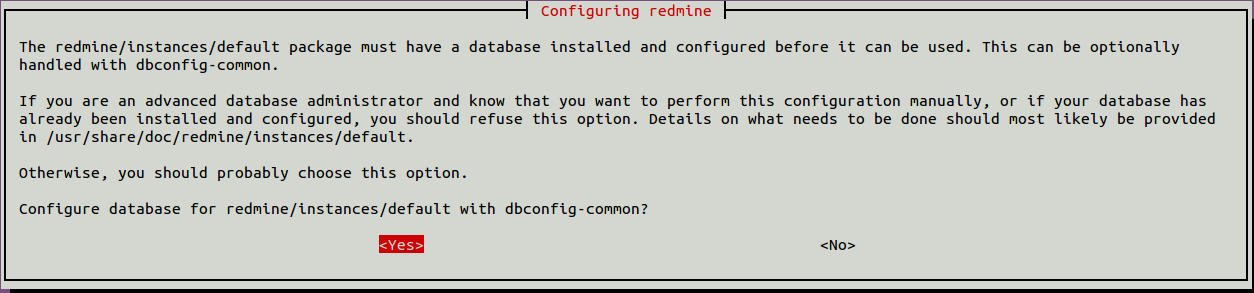
During the installation, you will be asked to configure a database for Redmine as shown below:
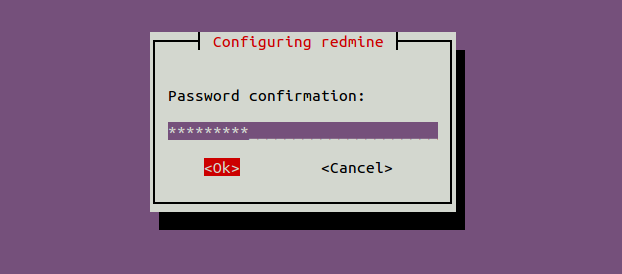
Select yes and hit Enter to continue. You will be asked to set a MySQL application password as shown below:
Set your password and click on the OK button to finish the installation.
Next, update the gem package with the following command:
gem update
Once the gem is updated, install the bundler package with the following command:
gem install bundler
Once you are finished, you can proceed to the next step.Advertisement
Configure Passenger
Next, you will need to configure Passenger to run as a www-data user. You can do it by editing the file passenger.conf:
nano /etc/apache2/mods-available/passenger.conf
Change the file as shown below:
  PassengerDefaultUser www-data
  PassengerRoot /usr/lib/ruby/vendor_ruby/phusion_passenger/locations.ini
  PassengerDefaultRuby /usr/bin/ruby
Save and close the file when you are finished.
Next, create a symbolic link of redmine to Apache web root directory:
ln -s /usr/share/redmine/public /var/www/html/redmine
Next, set proper ownership to the redmine directory with the following command:
chown -R www-data:www-data /var/www/html/redmine
Once you are finished, you can proceed to the next step.
Configure Apache for Redmine
Next, you will need to create an Apache virtual host configuration file for Redmine. You can create it with the following command:
nano /etc/apache2/sites-available/redmine.conf
Add the following lines:
  ServerAdmin [email protected]
  DocumentRoot /var/www/html/redmine
  ServerName redmine.example.com

    RailsBaseURI /redmine
    PassengerResolveSymlinksInDocumentRoot on


  ErrorLog ${APACHE_LOG_DIR}/error.log
  CustomLog ${APACHE_LOG_DIR}/access.log combined
Save and close the file when you are finished.
Next, enable the Apache rewrite module and Redmine virtual host file with the following command:
a2enmod rewrite*
a2ensite redmine.conf
Next, restart the Apache service to apply the changes.
systemctl restart apache2
You can now check the status of the Apache service with the following command:
systemctl status apache2
You should see the following output:
? apache2.service - The Apache HTTP Server
     Loaded: loaded (/lib/systemd/system/apache2.service; enabled; vendor preset: enabled)
     Active: active (running) since Wed 2021-06-09 04:01:29 UTC; 9min ago
       Docs: https://httpd.apache.org/docs/2.4/
    Process: 27698 ExecReload=/usr/sbin/apachectl graceful (code=exited, status=0/SUCCESS)
      Tasks: 77 (limit: 4691)
     Memory: 12.5M
     CGroup: /system.slice/apache2.service
             ??21346 /usr/sbin/apache2 -k start
             ??27703 Passenger watchdog
             ??27706 Passenger core
             ??27711 Passenger ust-router
             ??27729 /usr/sbin/apache2 -k start
             ??27730 /usr/sbin/apache2 -k start
Access Redmine Web UI
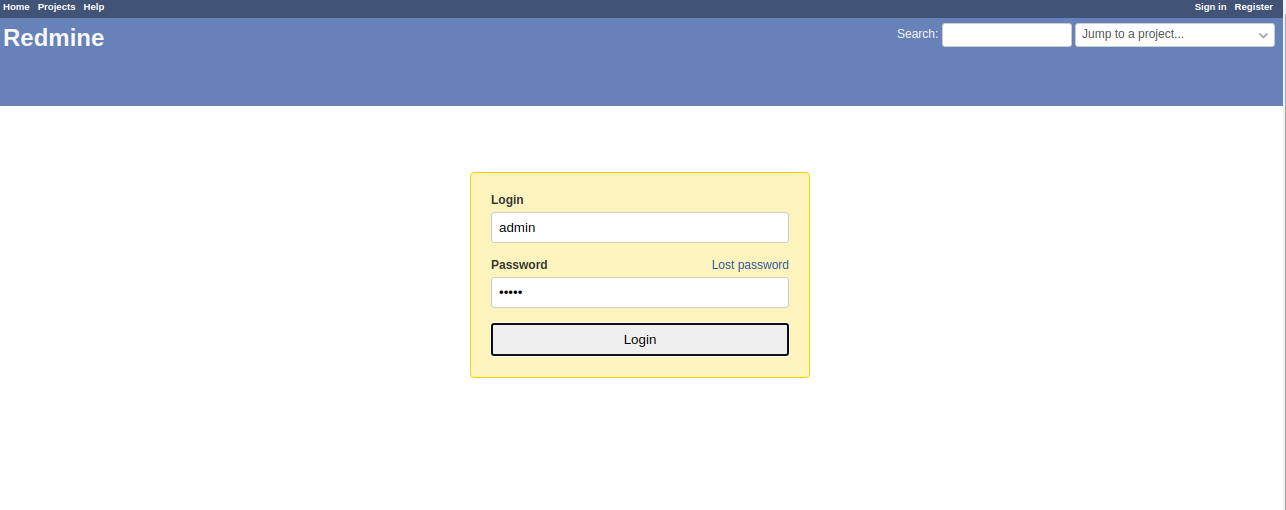
Now, open your web browser and access the Redmine web interface using the URL http://redmine.example.com. You should see the following page:
Click on the Sign in button. You should see the Redmine login page:
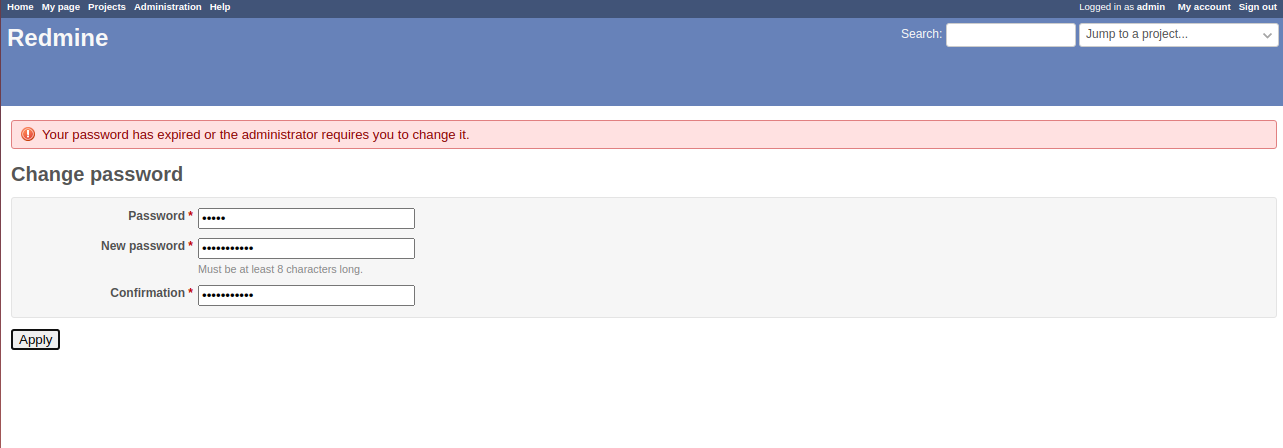
Provide default username as admin and the password as admin then click on the Login button. You should see the password reset screen:
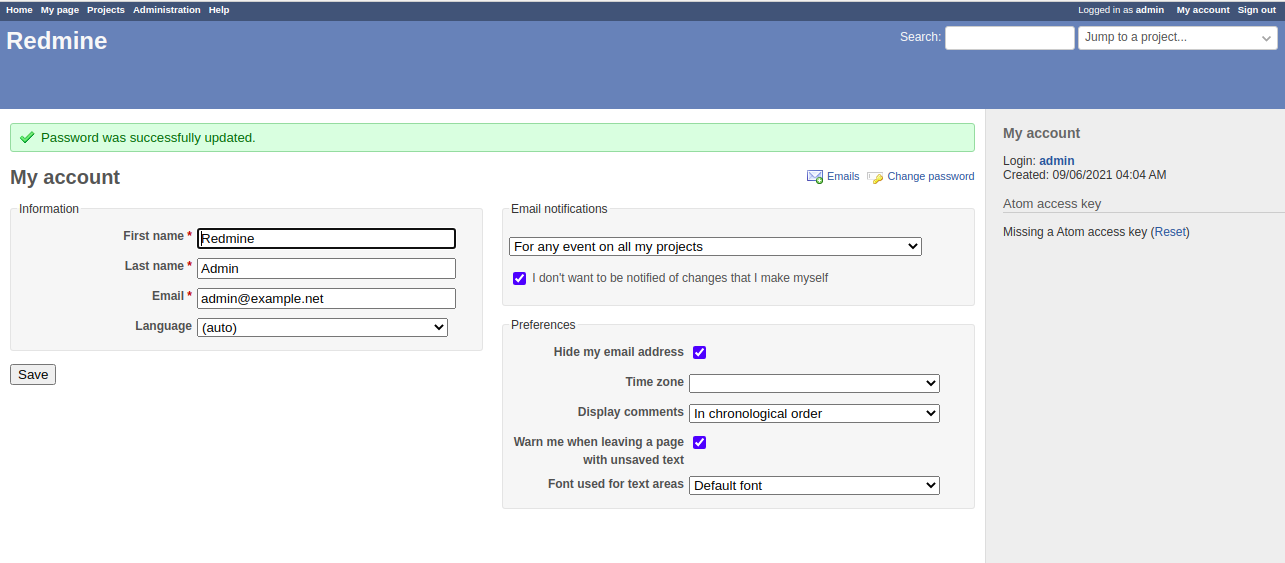
Provide your new password and click on the Apply button to apply the changes. You should see the following page:
Conclusion
Congratulations! you have successfully installed Redmine with Apache on Ubuntu 20.04. For more information, visit the Redmine documentation at Redmine doc.


