
File Transfer Protocol or FTP is a very old and one of the most well-known network protocols. It is not secure compared to SFTP or SCP these days but is still the first choice of many users for transferring files between a server and a client. FTP is known as insecure because it transfers data along with user credentials without any type of encryption.
We have a wild range of open-source FTP servers available nowadays like FTPD, VSFTPD, PROFTPD, and pureftpd. Among all of them, VSFTPD is a very secure, fast, and most wildly used protocol for transferring files between two systems.
VSFTPD is also known as “Very Secure File Transfer Protocol Daemon” with support of SSL, IPv6, explicit and implicit FTPS.
In this guide, We will show you How to Install vsftpd FTP Server on Debian 11.
Prerequisites
A server running Debian 11.
A non-root user with sudo privileges.
1. Install Vsftpd
Before you start the installation, update your Debian 11 server by executing the following command in the terminal:
sudo apt update -y
sudo apt upgrade -y
Debian has a very large repository and The vsftpd package is available in the official repository, So you can easily install the vsftpd by running the following command:
sudo apt install vsftpd -y
After package installation, start Vsftpd service, check service status and enable the service at startup.
sudo systemctl start vsftpdsudo systemctl status vsftpd
systemctl enable vsftpd.service
2. Create an FTP user and configure for FTP login
Now, create a new user account for FTP, using this user we will log in to the FTP server later.
sudo adduser sohan
Users added in vsftpd.userlist file has permission to access the FTP server.
Next, we need to add sohan user in vsftpd user list. Open the file and add a user by executing the following command:
echo "sohan" | sudo tee -a /etc/vsftpd.userlist
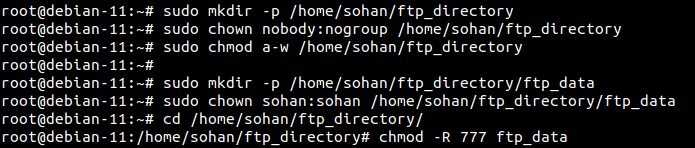
3. Create FTP user directory
Next, we need to create an FTP directory for our FTP user and set ownership with the following command:
sudo mkdir -p /home/sohan/ftp_directorysudo chown nobody:nogroup /home/sohan/ftp_directory
sudo chmod a-w /home/sohan/ftp_directory
Now, create a directory where files can be uploaded and give ownership to sohan user by executing command:
sudo mkdir -p /home/sohan/ftp_directory/ftp_data
sudo chown sohan:sohan /home/sohan/ftp_directory/ftp_data
cd /home/sohan/ftp_directory/
chmod -R 777 ftp_data
4. Configure Vsftpd
Next, you need to change some default parameters to set up an FTP server.
First, create a backup copy of the original vsftpd configuration file.
sudo cp /etc/vsftpd.conf /etc/vsftpd.conf.bak
In the FTP server, anonymous users are granted access by default. For making the FTP server more secure, we will disable anonymous user login and only grant access to the specific user.
Next, open vsftpd.conf file and make changes as below:
vim /etc/vsftpd.conf
anonymous_enable=NOlocal_enable=YES
There are some other changes that we need to make in configuration, First Open vsftpd.conf
sudo vim /etc/vsftpd.conf
Next, make sure vsftpd.conf should contain the following lines:
listen=NO
listen_ipv6=YES
anonymous_enable=NO
write_enable=YES
local_umask=022
dirmessage_enable=YES
use_localtime=YES
xferlog_enable=YES
connect_from_port_20=YES
chroot_local_user=YES
secure_chroot_dir=/var/run/vsftpd/empty
pam_service_name=vsftpd
user_sub_token=$USER
local_root=/home/$USER/ftp_directory
userlist_enable=YES
userlist_file=/etc/vsftpd.userlist
userlist_deny=NO
Save and close the file. You can change the above configuration according to your needs.
Now restart vsftpd service and check service status by executing the following commands:
sudo systemctl restart vsftpd
Next, ensure that vsftpd service is in its running status by executing the following command in Terminal:
sudo systemctl status vsftpd
5. allow vsftpd in firewall and access the vsftpd server
Next, if you are using firewall then allow port 21 and port 22 by running the following command:
sudo ufw allow 21/tcpsudo ufw allow 22/tcp
Then reload the firewall to apply the changes:
sudo ufw reload
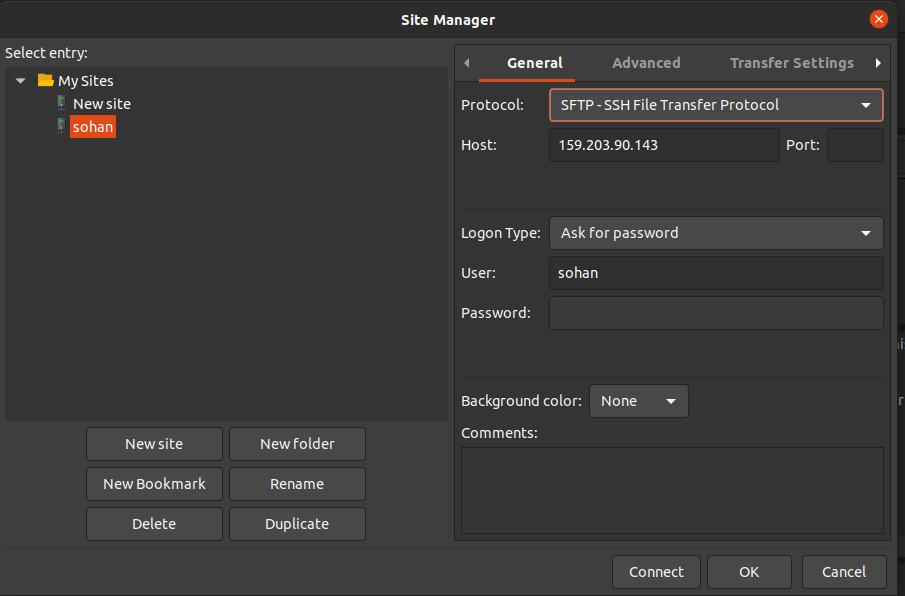
Next, Open any FTP client like FileZilla and enter your server details, Like Protocol, Host , User:
<img alt="Configure the Firewall" data-ezsrc="https://kirelos.com/wp-content/uploads/2022/01/echo/2.png61dc39db83c6d.jpg" ezimgfmt="rs rscb5 src ng ngcb5" height="493" loading="lazy" src="data:image/svg xml,” width=”750″>
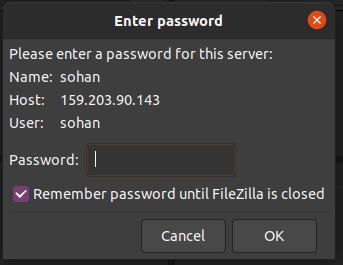
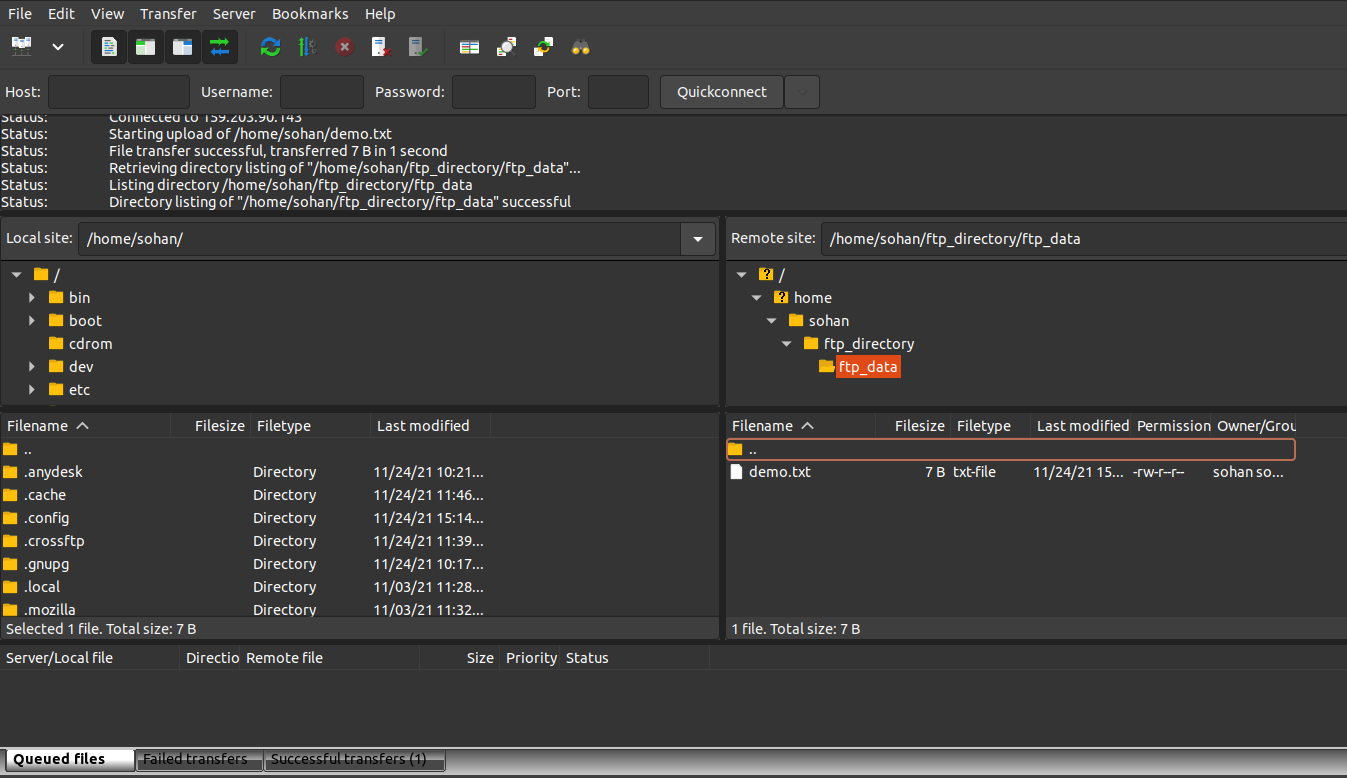
Now, click on connect, then enter your password:
Then, It will show details like below, click on OK.
At this point, You are connected to the FTP server, and you can upload and download files/folders.
6. Secure Vsftpd using SSL/TLS
Let’s say that you want to transfer encrypted data via FTP, to do so you need to create SSL certificate and need to enable SSL/TLS connection.
You can create a certificate using OpenSSL using the following command:
sudo mkdir /etc/cert
sudo openssl req -x509 -nodes -days 365 -newkey rsa:2048 -keyout /etc/cert/vsftpd.pem -out /etc/cert/vsftpd.pem
Now, you will need to edit vsftpd.conf file and make some changes:
sudo vim /etc/vsftpd.conf
Add the following lines at last:
rsa_cert_file=/etc/cert/vsftpd.pem
rsa_private_key_file=/etc/cert/vsftpd.pem
ssl_enable=YES
allow_anon_ssl=NO
force_local_data_ssl=YES
force_local_logins_ssl=YES
ssl_tlsv1=YES
ssl_sslv2=NO
ssl_sslv3=NO
require_ssl_reuse=NO
ssl_ciphers=HIGH
Save and exit the file, then restart Vsftpd using the following command:
sudo systemctl restart vsftpd
7. Access FTP over SSL/TLS
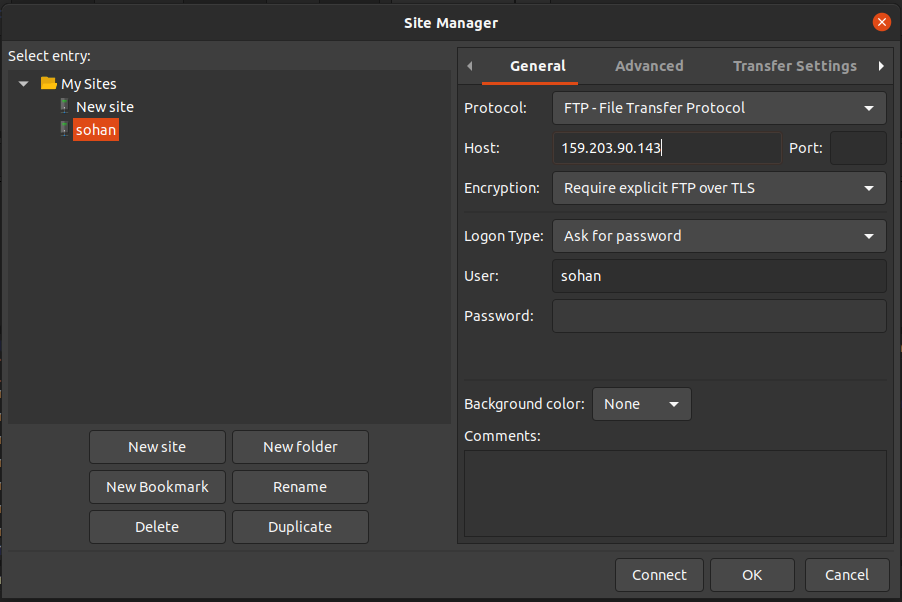
Open FileZilla FTP client and go to File>Sites Manager. Here, click on add New site and enter the host/site name, add the IP address, define the protocol to use, Encryption: Require to explicate FTP over TLS and logon type. Then click on the Connect button. You should see the following image:
Next, enter your password:
<img alt="Enter password" data-ezsrc="https://kirelos.com/wp-content/uploads/2022/01/echo/ssl3.png61dc39dc97eec.jpg" ezimgfmt="rs rscb5 src ng ngcb5" height="263" loading="lazy" src="data:image/svg xml,” width=”340″>
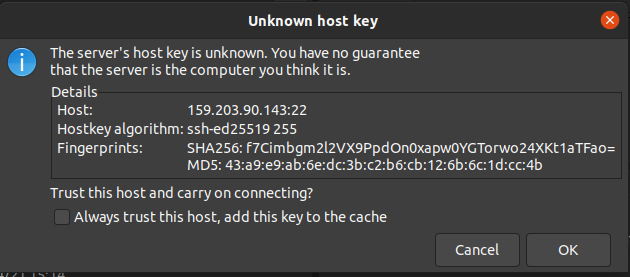
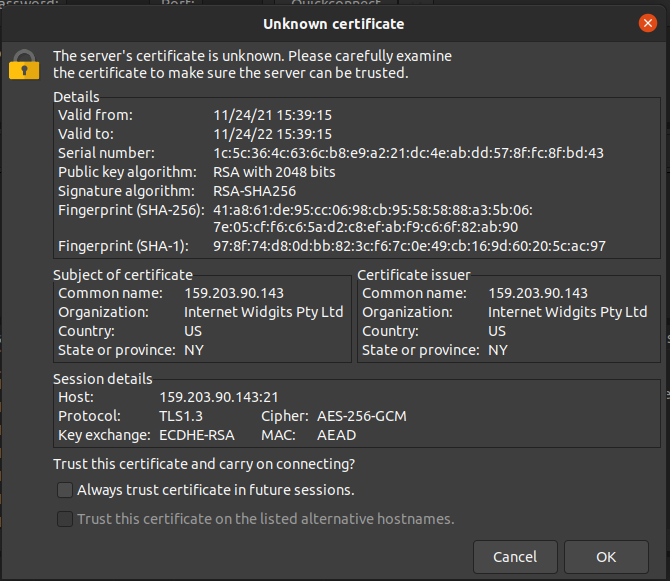
Next, you will see the SSL certificate, verify certificate details and click on OK.
<img alt="Accept SSL cert" data-ezsrc="https://kirelos.com/wp-content/uploads/2022/01/echo/ssl4.png61dc39dcd354f.jpg" ezimgfmt="rs rscb5 src ng ngcb5" height="581" loading="lazy" src="data:image/svg xml,” width=”670″>
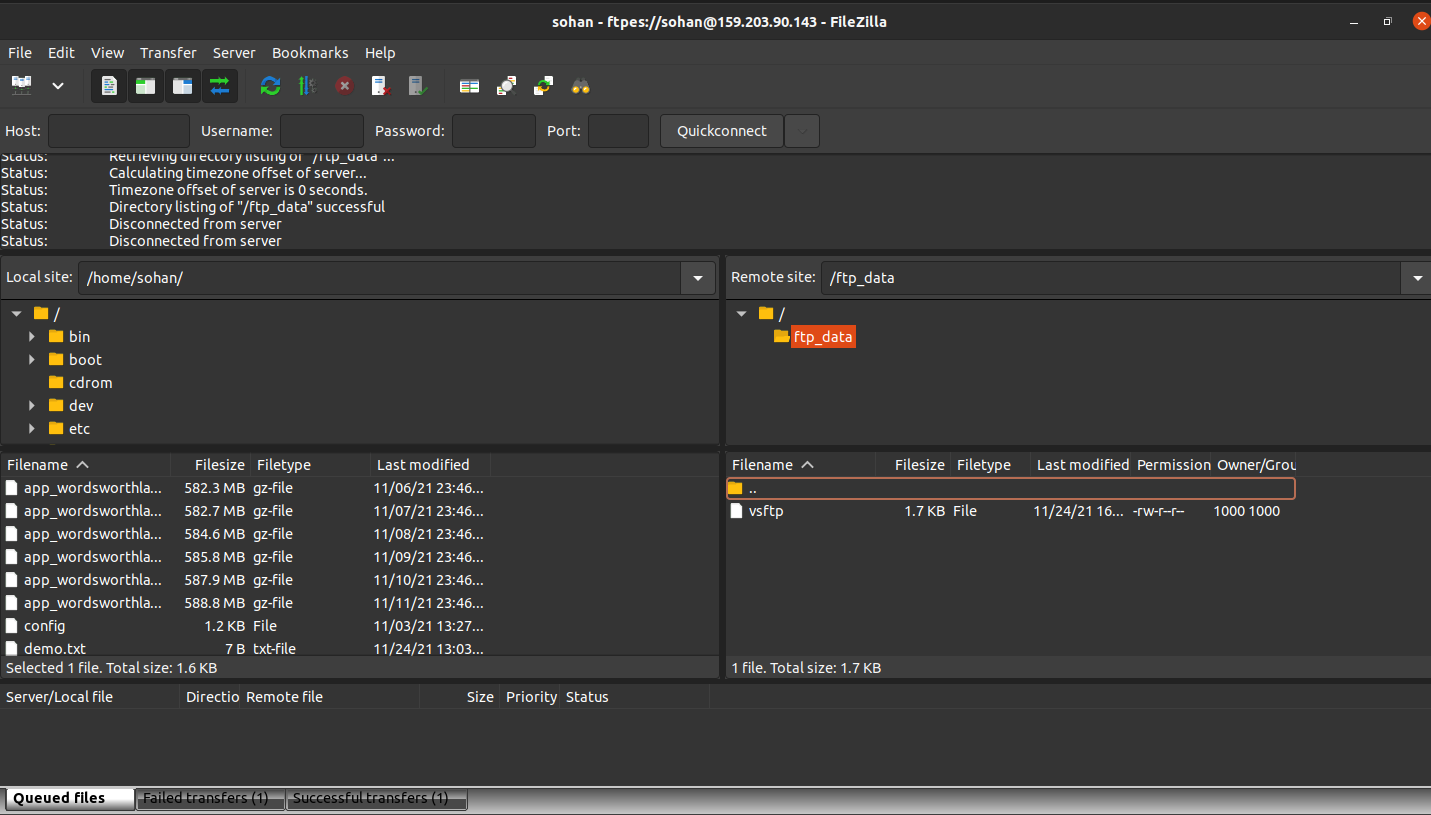
At last, you will see your FTP server contents and can securely transfer your data from one system to another.
Conclusion
In the above guide, we have installed the VSFTPD server on Debian 11. We also learn how to connect via non-encrypted and via encrypted connection using an SSL certificate.


