
A portable disk with a full featured self-contained installation of Ubuntu can be useful in scenarios where you don’t have access to OS of your choice. It can be used for teaching purposes, showing off some project, doing a presentation and so on. This article will explain how to permanently install Ubuntu on an external USB drive using VirtualBox.
A few things to note about this method:
- Unlike live ISO image, this disk will have full persistent storage so you don’t have to worry about losing stored files and data on next reboot
- Ubuntu’s performance on external drive will depend on read and write speeds of the disk, choose a USB 3.x drive if possible
- The external drive will be erased completely during the installation, so make sure that it doesn’t have any important files
Prerequisites
To install VirtualBox on Ubuntu, run the commands below one by one:
$ sudo apt install virtualbox virtualbox-guest-additions-iso virtualbox-ext-pack
$ sudo usermod -a -G vboxusers $USER
$ sudo modprobe vboxdrv
Reboot the system to complete the installation.
Connect external USB drive where you want to install Ubuntu and then run the command below:
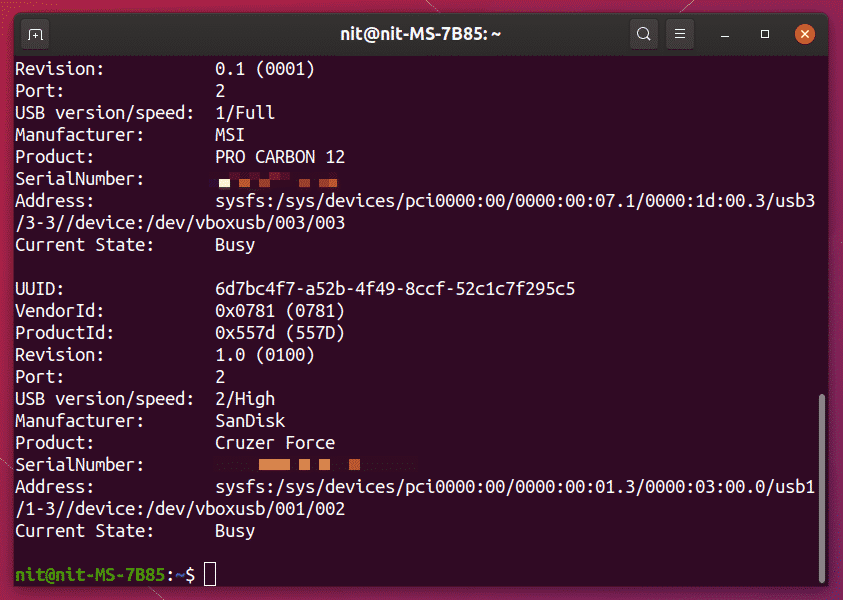
$ VBoxManage list usbhost
You should see your external drive listed in the terminal output:
I prepared SanDisk Cruzer Force external USB drive for installing Ubuntu and it is listed correctly by the VBoxManage command.
Note that these steps are absolutely necessary to complete for this tutorial to work. If external USB drive is not listed in the terminal output shown above, you won’t be able to install Ubuntu on it. This guide has been tested with Ubuntu 19.10 and it may or may not work on older versions.
Preparing the Virtual Machine
In order to install Ubuntu on an external drive using VirtualBox, you will have to boot into Ubuntu live ISO mode in a virtual machine. With Ubuntu running in live mode in a VirtualBox machine, you can use the default installer shipped with Ubuntu to install it in an external USB drive.
Launch VirtualBox from the application launcher and click on “New” button to add a new virtual machine. Assign a name of your choice but make sure that “Type” is set to Linux. Click on the “Next >” button to proceed.
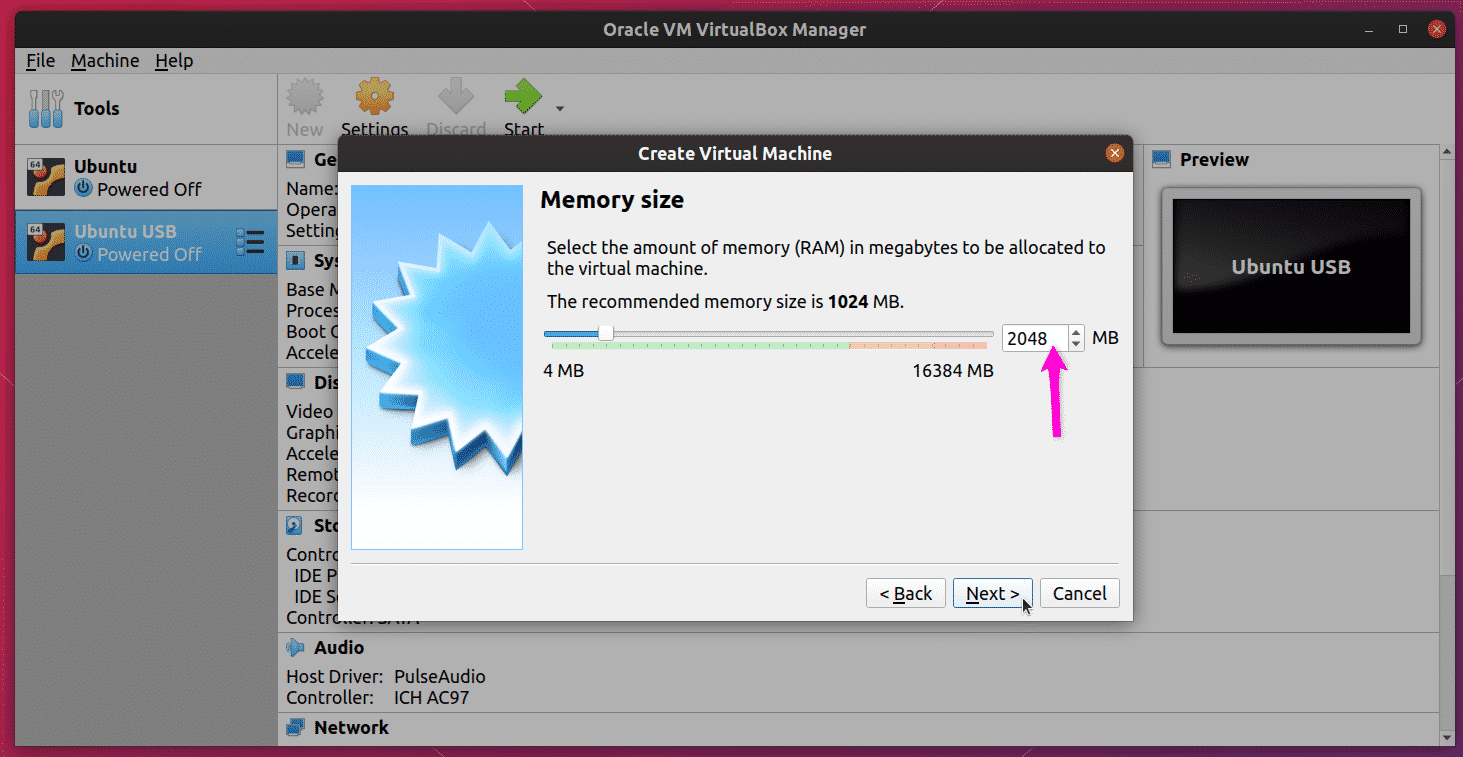
On the next window, set the RAM amount for the Ubuntu virtual machine. Make sure that you assign a generous amount for the default Ubuntu installer to work without issues in the virtual machine.
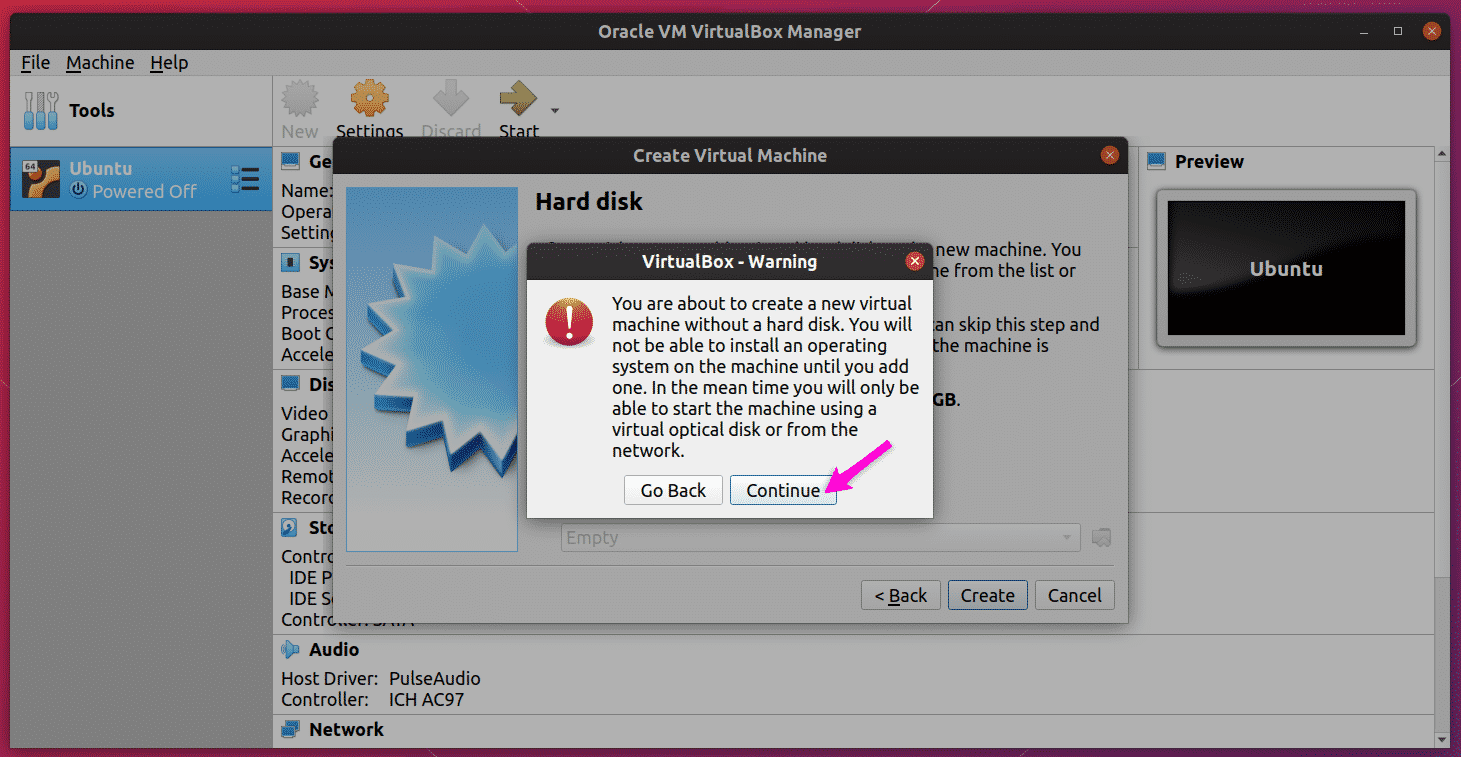
On the next screen, make sure that “Do not add a virtual hard disk” radiobox is checked. Since you are going to install Ubuntu on external drive, there is no need to create a virtual hard disk. This will minimize the chances of installing Ubuntu on a wrong disk.
Ignore the “without a hard disk” warning and click on “Continue” button to finish the process of creating an Ubuntu virtual machine.
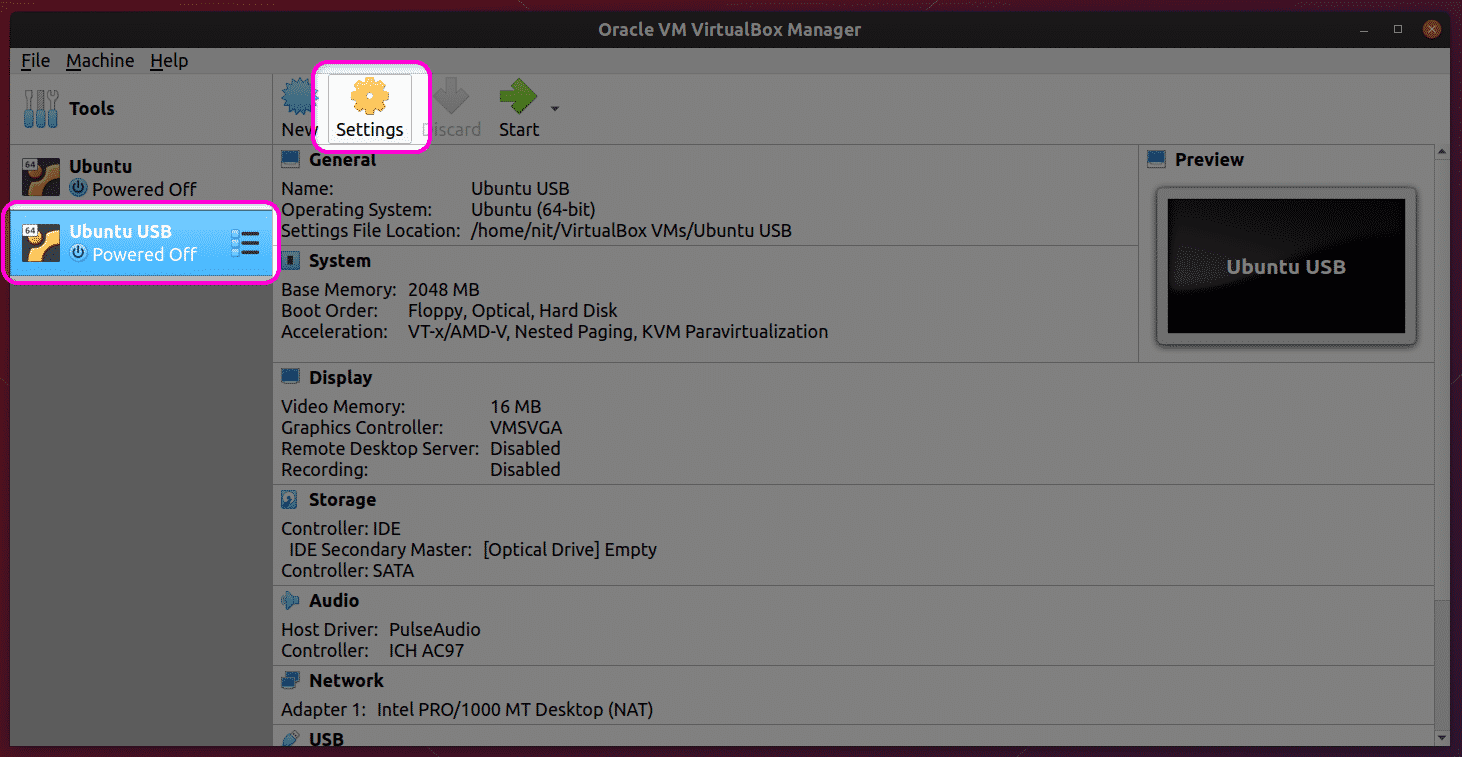
Select your newly created virtual machine, and then click on “Settings” button to start configuring the virtual machine.
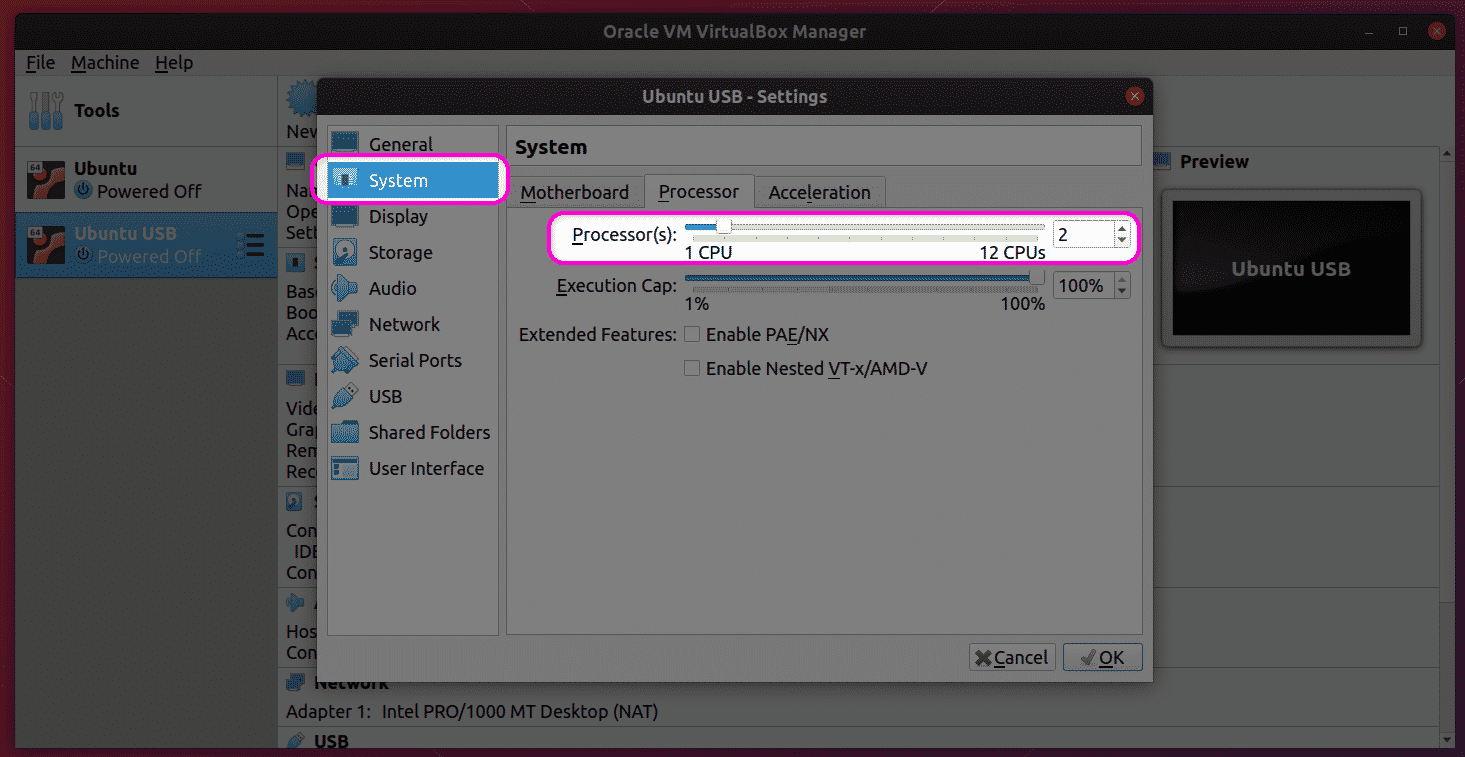
Go to “System” tab and choose appropriate number of CPU processors keeping in mind your hardware capability. As stated earlier, the installer will run in a virtual machine. Assigning more power to virtual machine will ensure faster installation on the external drive.
Go to “Display” tab, choose appropriate video memory and click on “Enable 3D Acceleration” checkbox. These settings will also improve performance of Ubuntu in the virtual machine.
Click on “Storage” tab and click on small plus icon in front of “Controller: IDE” entry.
Click on “Choose disk” on next window.
On the next screen, either select an existing ISO image that you may have used while creating another virtual machine or add a new ISO image using “Add” button.
Once you have selected an ISO image, make sure that it appears in “Storage” section.
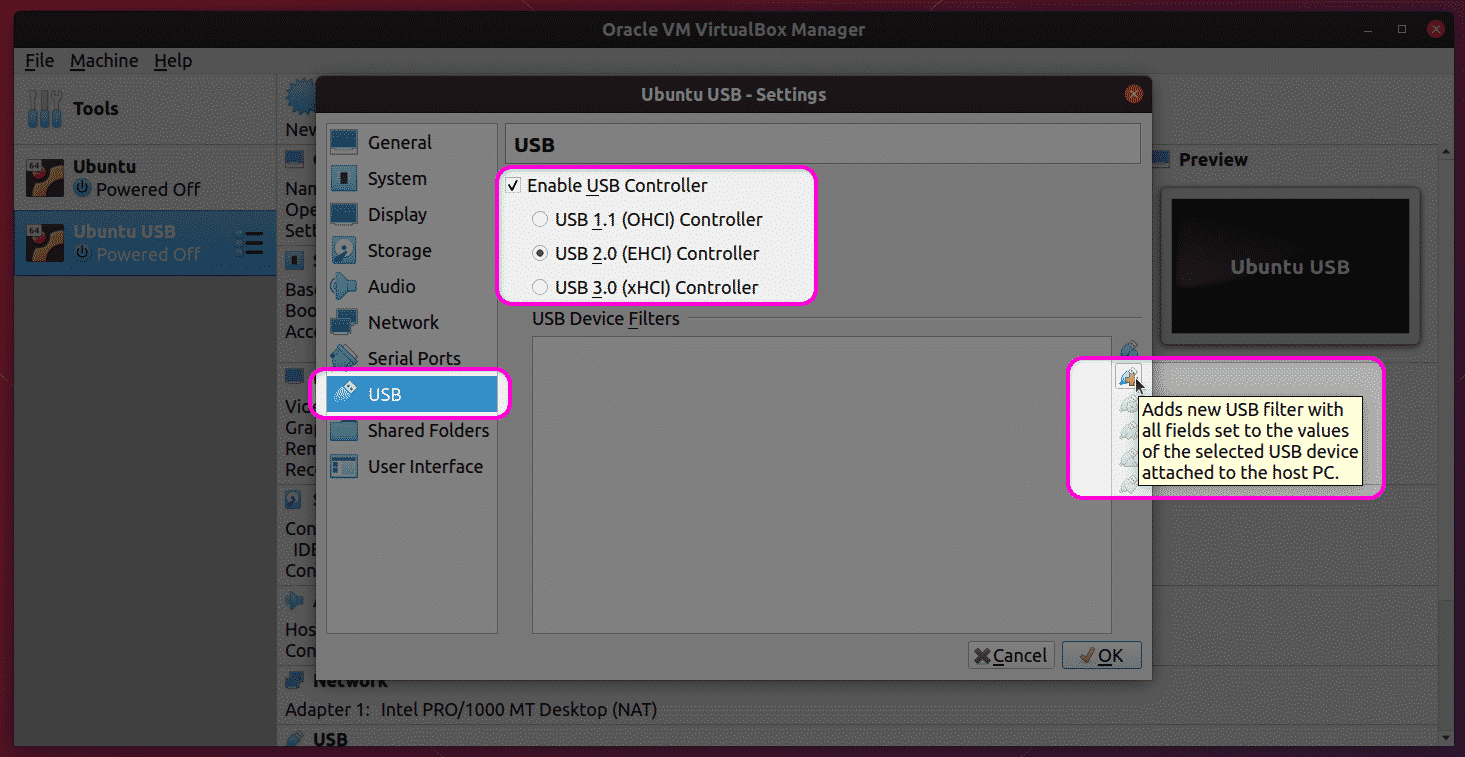
Go to “USB” tab and click on “Enable USB Controller”. Choose appropriate USB version and click on the plus icon to add a new device from the small popup menu.
Lastly, make sure that your selected USB device appears in the list.
If you have followed all the steps correctly so far, your Ubuntu virtual machine is all set and you are ready to boot it.
Booting the Virtual Machine to Install Ubuntu on USB Drive
Select the new virtual machine from the left sidebar and click on “Start” button to boot it. The process of installing Ubuntu inside a virtual machine is pretty straightforward and it is identical to installing Ubuntu on a real PC. For the sake of completion, I am mentioning a couple of steps here (tested with Xubuntu 19.10 because I had some issues with GNOME shell in virtual machine).
Click on “Install Xubuntu” (or Ubuntu) button to start the installation process.
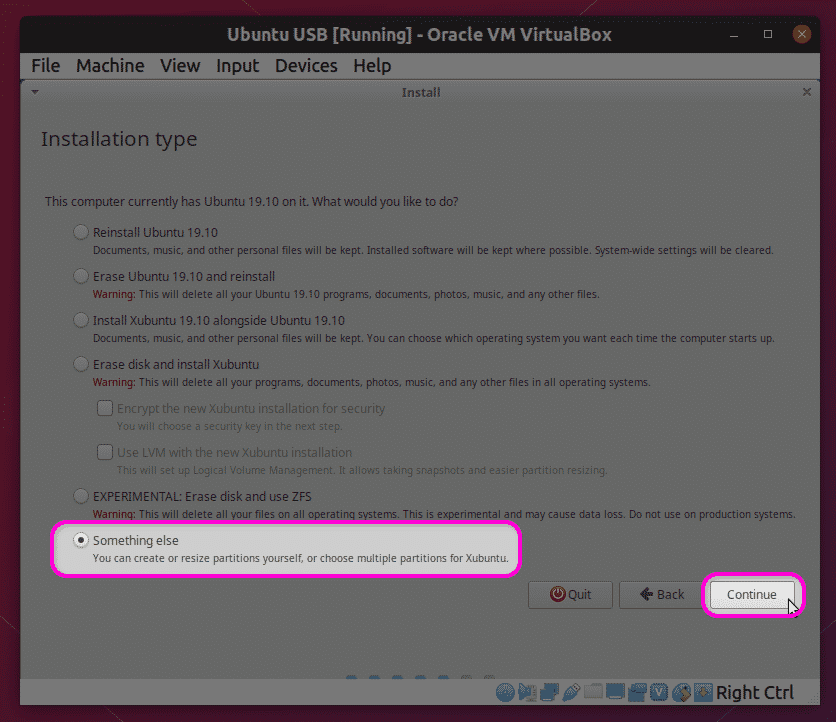
Keep following on screen instructions till you reach “Installation type” screen. To install Xubuntu on external USB drive along with a fully working GRUB bootloader on the drive itself, you have to click on “Erase disk and install Xubuntu” radiobox. You can also click on “Something else” to go to advanced settings and partition manager.
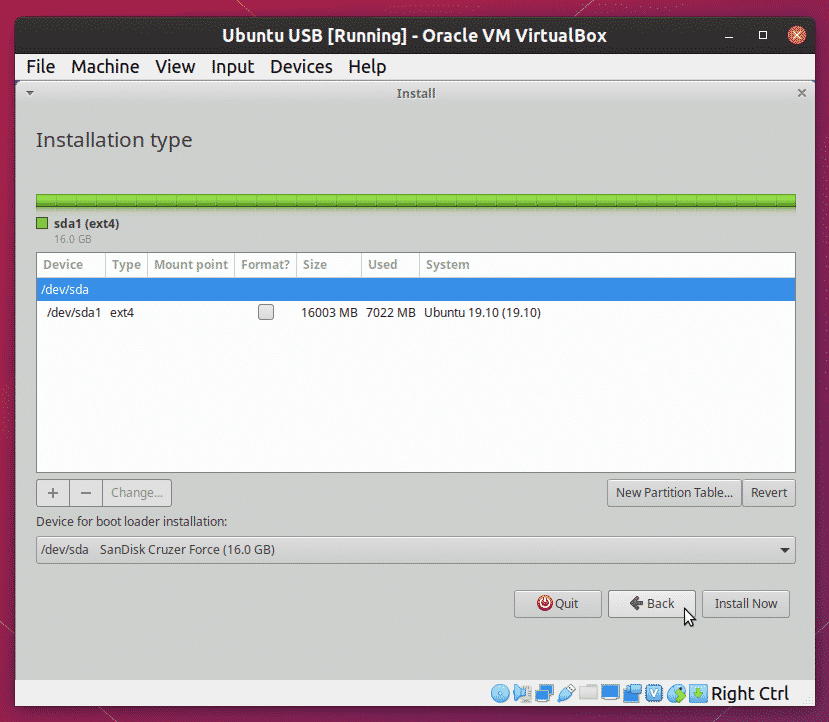
The partition manager will only list the external USB drive as a valid installation destination, as shown in the screenshot below. “Device for boot loader installation” option will also show external drive only. As only two media disks are exposed to the virtual machine: Xubuntu ISO image and the external USB drive, there is no chance of installing the OS on internal drive or wrong partition.
Wait for the installer to finish and then unplug the USB drive. That’s it, you now have complete Ubuntu installed on an external drive and you can boot it from any system that has a USB port.
Note that the installation process in virtual machine will be slower than that on a real hardware. The time taken will depend on your hardware and virtual machine configuration and it may even take hours to finish.
Conclusion
It is possible to install Ubuntu on external drive from a bootable live USB stick itself. However, there is always a chance of either the OS or bootloader getting installed on wrong partition, especially if there are multiple drives connected to the system. This method is much safer as only a limited number of drives are exposed to the virtual machine, making it less error prone. As there is no need to boot a real USB stick, you can continue to use the host OS as well while the installation finishes in background in a virtual machine.
About the author
Nitesh Kumar
I am a freelancer software developer and content writer who loves Linux, open source software and the free software community. I maintain a blog that lists new Android deals everyday.


