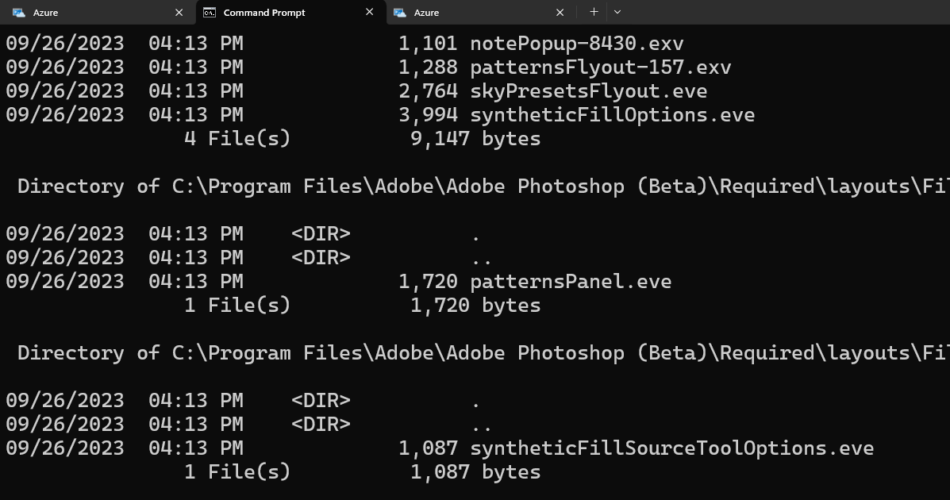
<img alt="Windows Terminal tabbed interface with command results" data- data-src="https://kirelos.com/wp-content/uploads/2023/10/echo/windows-terminal.png/w=800" data- decoding="async" height="420" src="data:image/svg xml,” width=”800″>
Windows Terminal is a command-line tool available in Windows 10 and Windows 11. Other command-line utilities, like Command Prompt and PowerShell, still exist in these Windows versions, but Terminal is a potential replacement.
The free Terminal utility from Microsoft actually combines these other utilities into one application. It’s like a central hub for all things command-line, and it features capabilities never before seen in these Windows tools, like a multi-tabbed interface and in-depth customization options.
Below is everything you need to know to get started with Terminal, including how to install it, how to use its various unique features, and how to customize Windows Terminal to make it work perfectly for you.
How to Get Windows Terminal
Windows 11 includes Terminal by default, so there’s nothing you need to do! See the next section to learn how it works.
If you’re on Windows 10, however, you’ll need to install Windows Terminal. Don’t worry, it’s totally free, and it only took me two minutes to get it going.
Here’s how to download Windows Terminal:
#1. Search for Microsoft Store from the taskbar. Or, visit the download page for Terminal directly, and then skip down to Step 3.
#2. Use the search box at the top of the store to search for Terminal.
#3. Select Windows Terminal from the results.
#4. Select Get to start the download.
Note: Your computer must be updated to at least Windows 10 v19041.0 in order to use Terminal. Update Windows via the Settings app if you can’t install Windows Terminal.
How to Open & Use Windows Terminal
You use Terminal in much the same way you use Command Prompt or PowerShell. It’s an application that starts up like any other.
There are several ways to open Windows Terminal:
- Search for Terminal from the Start menu.
- Execute the wt command from the Run dialog box.
- Right-click the Start button and select Terminal.
It’s also important to know how to open Windows Terminal with admin rights. One quick way to do that is through the Start menu. Either right-click the Start button and select Terminal (Admin), or follow these steps:
#1. Search for Terminal, but right-click it instead of left-click.
#2. Select Run as administrator from the context menu.
#3. Accept the UAC prompt to start using Terminal as an administrator.
Windows Terminal comes with lots of really great features, including the ability to navigate quickly with keyboard shortcuts, zoom up with the mouse to make the text larger, enter full screen mode, and export command results to a text file. But its biggest feature is probably the tabs, which lets you manage multiple instances simultaneously in the same window.
To open a new tab in Terminal, just press the button at the top. The arrow next to the plus sign is how you open other command-line tools, like Azure Cloud Shell or PowerShell. This arrow is also where you go to customize Terminal.
How to Customize Windows Terminal
There’s a lot you can customize in Windows Terminal. To see all your options, select the arrow at the top of the program, and then choose Settings.
Following are just a few examples of the powerful options you’re given in this program:
- Choose a default profile, useful if you prefer to use Command Prompt, for example, over PowerShell. The one you choose will open automatically with Terminal.
- Auto-open Terminal when you first log in to your user account.
- Auto-copy the selection to the clipboard to more easily paste results and commands elsewhere.
- Auto-detect URLs to make them clickable.
- Force a confirmation prompt when you attempt to close Terminal when multiple tabs are open.
- Keep Terminal on top of every other open window.
- Customize all the keyboard shortcuts.
One huge area you can customize involves profiles. Command Prompt and PowerShell are two of the default profiles, which means they’re available from the button. But — and this is really cool — you can create your own profiles to really make Terminal a powerful custom utility.
For example, say you’re always working in the Downloads folder of your user profile. You could build a new profile that forces the starting directory to be that folder. Then, each time you open your custom profile, you can start executing commands within that directory immediately.
Here’s an example of how to do that:
#1. Open the Terminal settings as I described above.
#2. On the left panel, below the existing profiles, choose Add a new profile.
#3. Fill out the Name section with however you’d like to identify your profile. In my example, I’ll write Downloads.
#4. For Starting directory, enter the folder you’ll be working in. For example:
%USERPROFILE%/Downloads#5. Optionally, fill out any other details on this screen, like to always run the profile with admin rights, or to pick a different icon. Don’t overlook the Additional settings options at the bottom; these advanced options let you use the AtlasEngine text renderer, modify the history size of the profile, edit the font face, and lots more!
#6. Press Save at the bottom to build your new profile.
Final Thoughts
Windows Terminal has definitely been a positive addition to my own workflow. Namely, the tabbed user interface, which lets me organize all my various command-line tools in one utility.
The fact that Terminal is included in Windows 11 means it works right out of the box. I haven’t been one to customize much of the program, but if you like to make your software feel like yours, you’ll like the color scheme options and freedom to customize the hotkeys.


