DHCP server is used to automatically assign IP addresses to servers, laptops, desktops, and other devices on the network.
In this article, I am going to show you how to configure DHCP server on CentOS 8. So, let’s get started
Network Topology:
Here, I have a dhcp-server where a static IP 192.168.15.1 is configured. The DHCP server will automatically assign IP addresses, default route address, DNS server address to other devices on the network 192.168.15.0/24.
Setting Up Static IP:
First, you have to set up a static IP on the network interface of your CentOS 8 machine which you will be configuring as a DHCP server.
The network interface name in my case is ens256.
You can run the following command to find out yours.
You can set up a static IP address on your CentOS 8 machine very easily using nmtui command. For a detailed instruction on this, check my article Configuring Static IP on CentOS 8.
At this point, the static IP 192.168.15.1 is set on the CentOS 8 machine.
Installing DHCP Server:
DHCP server package is available in the official package repository of CentOS 8. So, it is very easy to install.
First, update the DNF package repository cache with the following command:
Now, install DHCP server package with the following command:
$ sudo dnf install dhcp-server
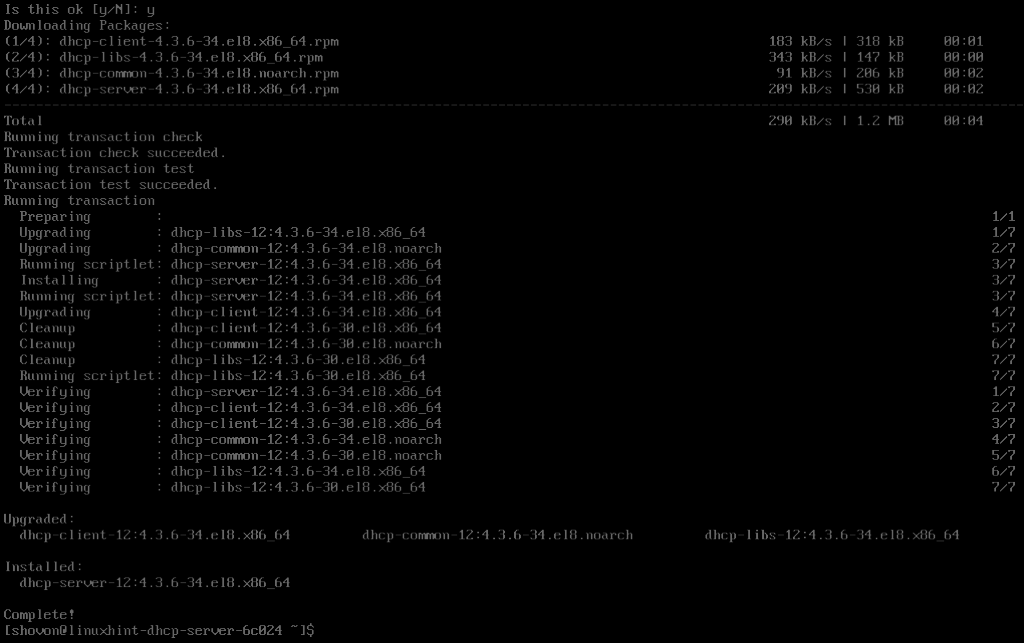
Now, to confirm the installation, press Y and then press .
DHCP server should be installed.
Configuring DHCP Server:
The main configuration file of the DHCP server is /etc/dhcp/dhcpd.conf.
To configure the DHCP server, edit the /etc/dhcp/dhcpd.conf configuration file with the following command:
$ sudo vim /etc/dhcp/dhcpd.conf
Now, type in the following lines in the /etc/dhcp/dhcpd.conf file.
default-lease-time 600;
max-lease-time 7200;
ddns-update-style none;
authoritative;
subnet 192.168.15.0 netmask 255.255.255.0 {
range 192.168.15.50 192.168.15.200;
option routers 192.168.15.1;
option subnet-mask 255.255.255.0;
option domain-name-servers 8.8.8.8, 8.8.4.4;
}
Here, the DHCP server will reserve the IP address for at least 600 seconds or 10 minutes (default-lease-time) and at max 7200 seconds or 2 hours (max-lease-time) for a specific device.
The subnet section defines the DHCP configuration for the network subnet 192.168.15.0/24.
range defines the assignable IP address range of the DHCP pool.
routers defines the default gateway.
subnet-mask defines the default subnet mask that will be assigned to each host.
domain-name-servers defines the DNS nameservers which will be assigned to each host.
You can add one or more subnets in the same configuration file. Just add as many subnet blocks as you need.
Once you’re done working with the configuration file, start the dhcpd service with the following command:
$ sudo systemctl start dhcpd
As you can see, the dhcpd service is running.
$ sudo systemctl status dhcpd
Now, add the dhcpd service to the system startup of CentOS 8. This will automatically start the dhcpd service on boot.
$ sudo systemctl enable dhcpd
If you make any changes to the DHCP server configuration file while the dhcpd service is running, make sure to restart the dhcpd service for the changes to take effect.
$ sudo systemctl restart dhcpd
Configuring the Firewall:
Once you start the dhcpd service, the DHCP server should be running on UDP port 67 as you can see in the screenshot below.
Now, allow access to the DHCP server running on the UDP port 67 through the firewall with the following command:
$ sudo firewall-cmd –add-service=dhcp –permanent
Now, for the changes to take effect, run the following command:
$ sudo firewall-cmd –reload
Testing the DHCP Server:
As you can see, the Linux Mint 19.3 machine automatically got the IP address 192.168.15.50 from the DHCP server.
The Windows 10 computer also got an IP address 192.168.15.51 from the DHCP server.
Checking Hosts Information from the DHCP Server:
You can check the information about the hosts assigned IP addresses via the DHCP server very easily by reading the /var/lib/dhcpd/dhcpd.leases file.
As you can see, a lot of information about the hosts which assigned IP addresses via the DHCP server is stored in the file /var/lib/dhcpd/dhcpd.leases.
Here, the IP address leased to the host is displayed.
Here, the datetime when the IP address is leased to the host is stored in the starts section. The datetime when the lease will expire is stored in the ends section. The datetime when the host contacted the DHCP server is stored in the cltt section.
Here, binding state is active, which means the leased IP address is currently active for the host. next binding state is free, which means once the lease is expired, the IP address will be free to be leased to other devices.
Here, hardware ethernet stores the MAC address of the network interface of the host. The client-hostname stores the hostname of the host.
So, this is how you configure DHCP server on CentOS 8. Thanks for reading this article.
About the author

Shahriar Shovon
Freelancer & Linux System Administrator. Also loves Web API development with Node.js and JavaScript. I was born in Bangladesh. I am currently studying Electronics and Communication Engineering at Khulna University of Engineering & Technology (KUET), one of the demanding public engineering universities of Bangladesh.


