A Load Balancer is used to evenly distribute the load on the backend servers. It acts as the single point of contact for clients requesting it. It operates at a Transport Layer of the Open Systems Interconnection (OSI) model.
Load Balancer can be either Public or Private.
- Public Load Balancer: External connection can reach to the Virtual Machines in the backend, it is used to balance the internet traffic to the internal VMs.
- Private Load Balancer: External connection can not reach to the Virtual Machines in the backend.
A load balancer can be used to scale our applications and create highly available services.
Before we create a Load Balancer, let’s understand a few basic concepts related to it.
- Backend pool: It is a collection of Virtual Machine IP configurations to which the load will be distributed.
- Health probe: It is used by the load balancer to determine if the instance is healthy or not.
- Load Balancer rule: It is used to define how traffic coming to the load balancer is distributed to the VMs.
With Azure Load Balancer, we only need to pay for what you use, there are no upfront charges. To know about pricing, click here.
In this article, we will create a Public Load Balancer and add a Virtual Machine to its Backend Pool. This Virtual Machine will have Apache running on it.
Pre-requisites
- Azure Account (Create if you don’t have one).
- 1 or more Azure Virtual Machines with Apache installed on it (Search for “How to create a Virtual Machine on Azure?” to learn to create a Virtual Machine on Azure).
What will we do?
- Login to Azure.
- Create a Load Balancer
Login to Azure
Click here to go Azure portal and click on Portal.
<img alt="" data-ezsrc="https://kirelos.com/wp-content/uploads/2022/02/echo/screenshot_2020-06-11_at_104222_am.png61fa705507c4b.jpg" ezimgfmt="rs rscb5 src ng ngcb5" height="468" loading="lazy" src="data:image/svg xml,” width=”750″>
Use your credentials to log in to the account.
<img alt="" data-ezsrc="https://kirelos.com/wp-content/uploads/2022/02/echo/screenshot_2020-06-11_at_104231_am.png61fa7055a4d95.jpg" ezimgfmt="rs rscb5 src ng ngcb5" height="468" loading="lazy" src="data:image/svg xml,” width=”750″>
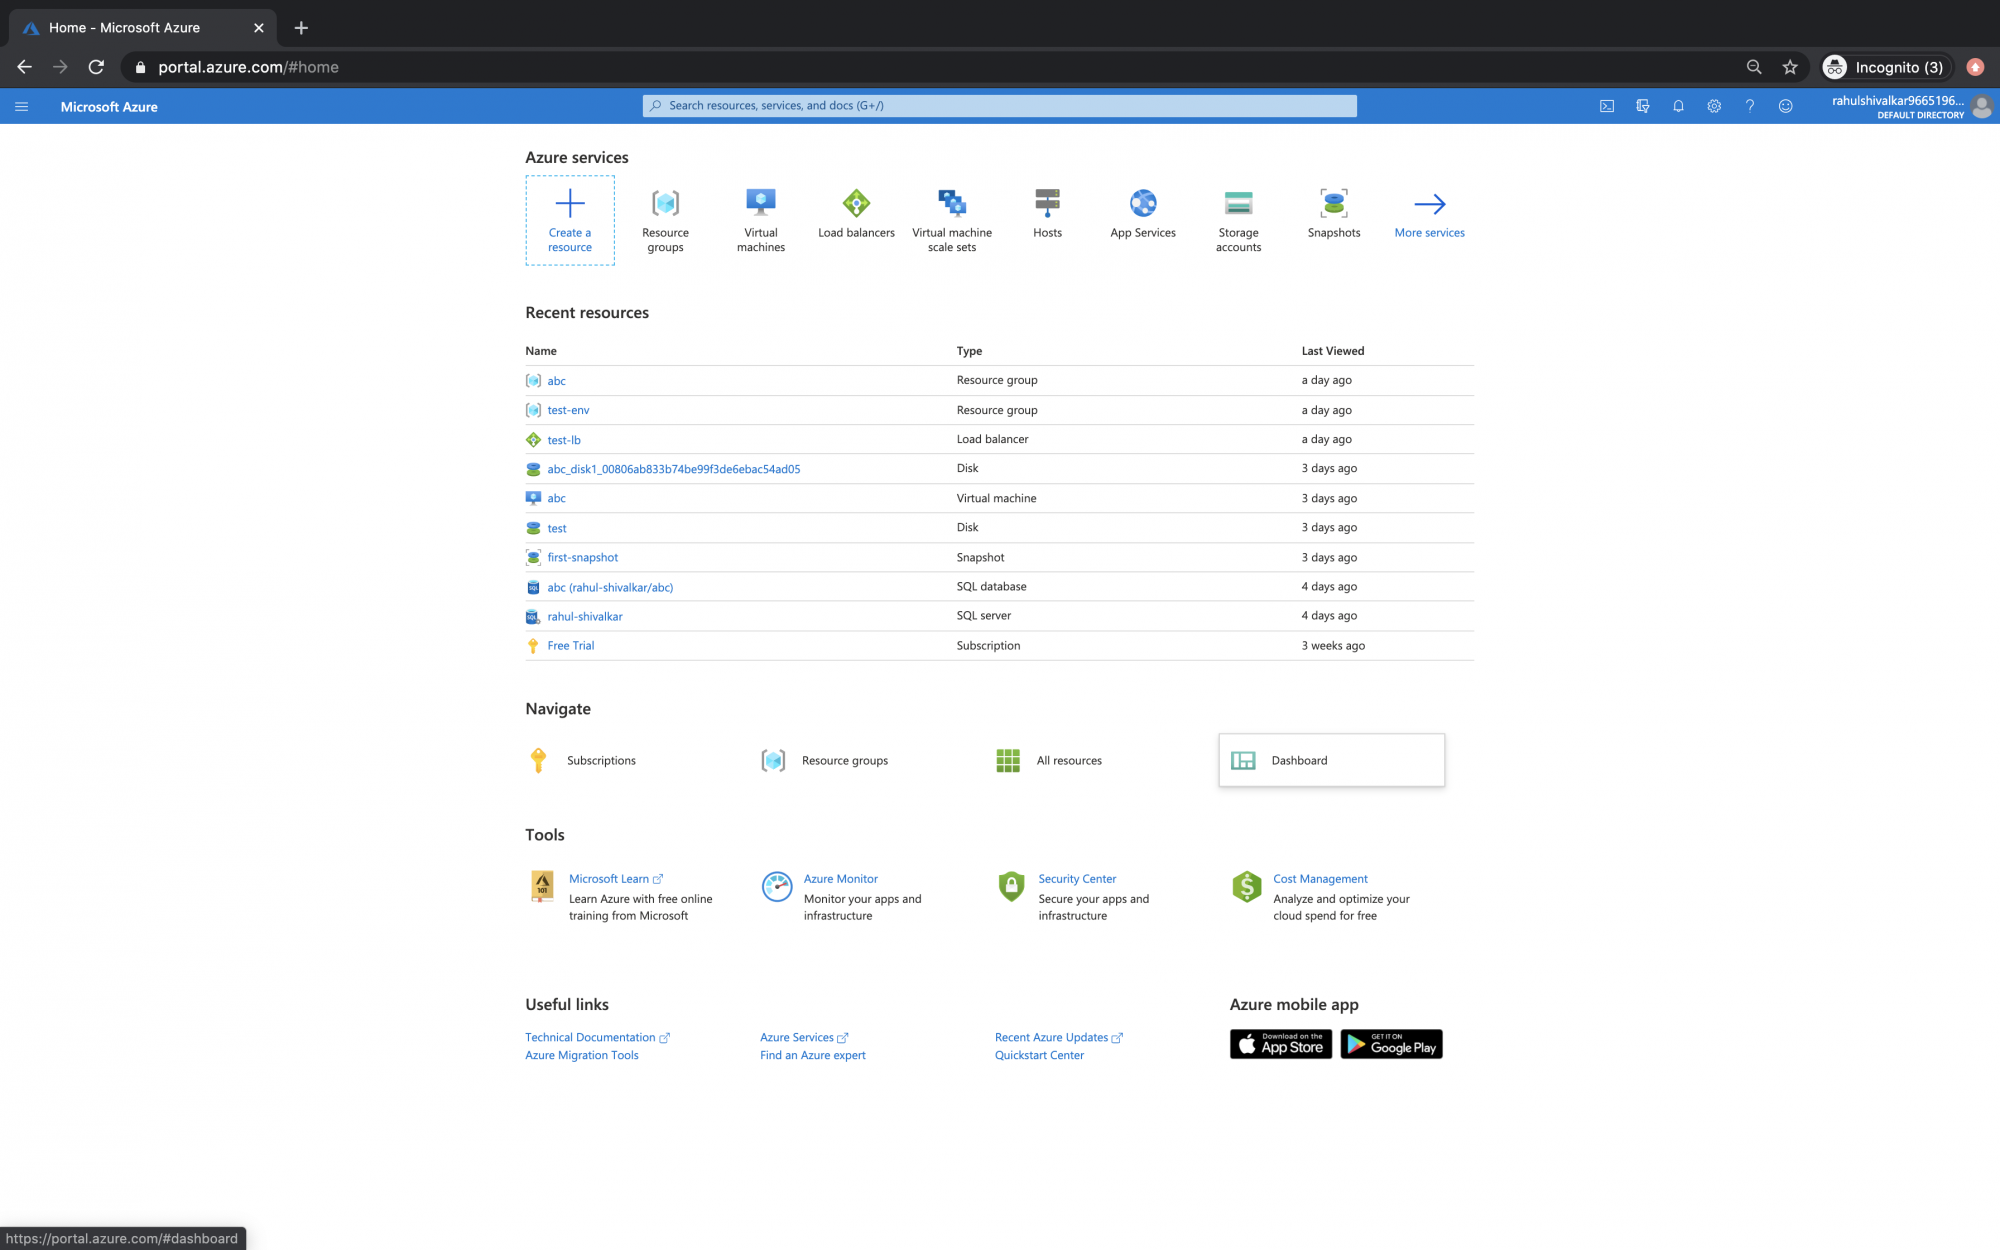
You will see the main page as follows once you successfully login to your account. Click on 3 lines near “Microsoft Azure” in the upper left-hand corner of the Azure portal to show the portal menu.
<img alt="" data-ezsrc="https://kirelos.com/wp-content/uploads/2022/02/echo/screenshot_2020-06-11_at_104258_am.png61fa70564f2b8.jpg" ezimgfmt="rs rscb5 src ng ngcb5" height="468" loading="lazy" src="data:image/svg xml,” width=”750″>
Create a Load Balancer
To create a Load Balancer, click on “All Services” from the left panel.
<img alt="" data-ezsrc="https://kirelos.com/wp-content/uploads/2022/02/echo/screenshot_2020-06-11_at_104312_am.png61fa705721cda.jpg" ezimgfmt="rs rscb5 src ng ngcb5" height="468" loading="lazy" src="data:image/svg xml,” width=”750″>
You will find Load Balancer under Networking, click on Load Balancer under Networking.
<img alt="" data-ezsrc="https://kirelos.com/wp-content/uploads/2022/02/echo/screenshot_2020-06-11_at_104707_am.png61fa7057c3cd4.jpg" ezimgfmt="rs rscb5 src ng ngcb5" height="345" loading="lazy" src="data:image/svg xml,” width=”750″>
On the Main Dashboard for Load Balancer, click on the Add button.
<img alt="" data-ezsrc="https://kirelos.com/wp-content/uploads/2022/02/echo/screenshot_2020-06-11_at_104714_am.png61fa705862e83.jpg" ezimgfmt="rs rscb5 src ng ngcb5" height="261" loading="lazy" src="data:image/svg xml,” width=”750″>
Here, select the existing “Resource Group” name which contains your Virtual Machines.
Here it is “test”, name the Load Balancer as test-lb, select the Region, keep the type as Public, for Public IP address select “Create new” name it as test-pub-add and click on “Next- Tags”.
<img alt="" data-ezsrc="https://kirelos.com/wp-content/uploads/2022/02/echo/screenshot_2020-06-11_at_104748_am.png61fa705914373.jpg" ezimgfmt="rs rscb5 src ng ngcb5" height="468" loading="lazy" src="data:image/svg xml,” width=”750″>
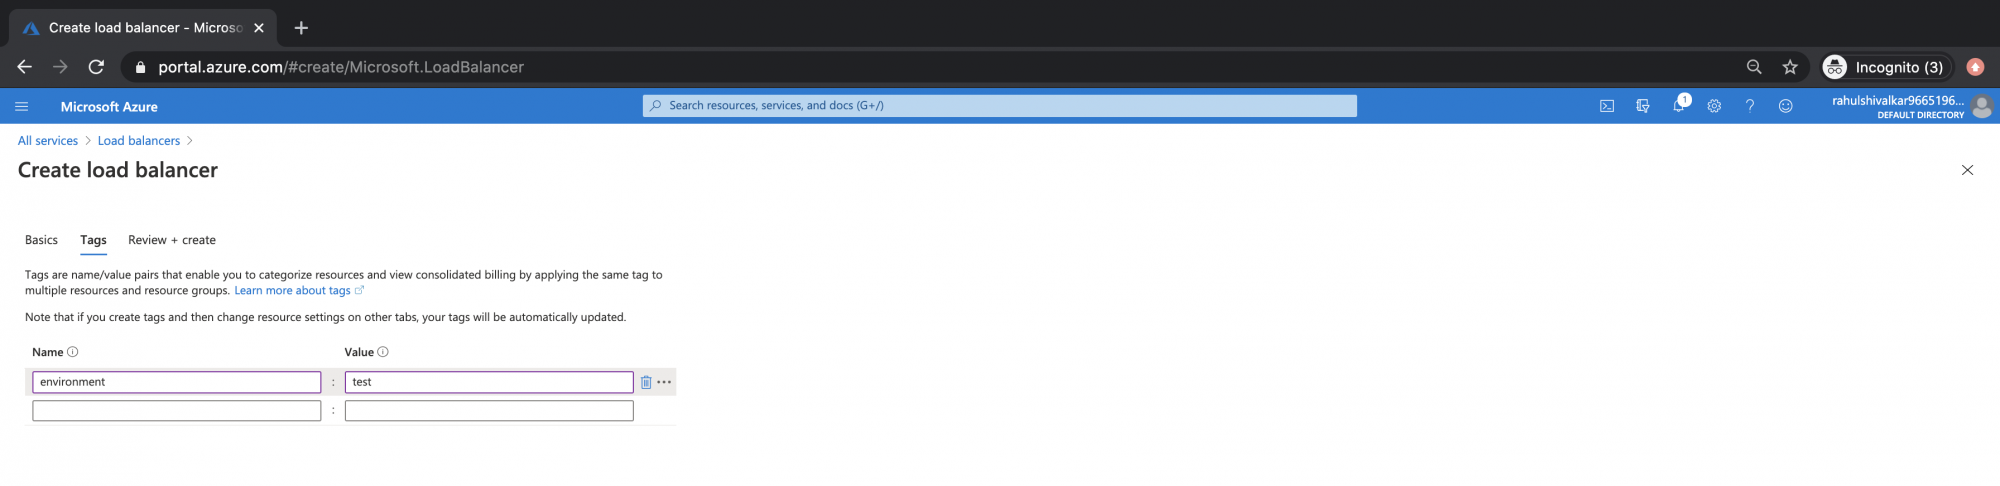
Add a tag as “environment: test”, you can add multiple tags as per your choice. Click on “Review create”.
<img alt="" data-ezsrc="https://kirelos.com/wp-content/uploads/2022/02/echo/screenshot_2020-06-11_at_104800_am.png61fa7059aaf86.jpg" ezimgfmt="rs rscb5 src ng ngcb5" loading="lazy" src="data:image/svg xml,”>
Once you see the message as “Validation passed”, click on “Create”.Advertisement
<img alt="" data-ezsrc="https://kirelos.com/wp-content/uploads/2022/02/echo/screenshot_2020-06-11_at_104818_am.png61fa705a4d701.jpg" ezimgfmt="rs rscb5 src ng ngcb5" height="468" loading="lazy" src="data:image/svg xml,” width=”750″>
In a few mins, the Load Balancer will ready. But this is not it, we need to now add “Backend Pools”.
Click on Resource group “test” to go to the Resource Group which will contain the Load Balancer in it.
<img alt="" data-ezsrc="https://kirelos.com/wp-content/uploads/2022/02/echo/screenshot_2020-06-11_at_104950_am.png61fa705b02ede.jpg" ezimgfmt="rs rscb5 src ng ngcb5" height="243" loading="lazy" src="data:image/svg xml,” width=”750″>
Under the resource, you can see the Load Balancer you created along with other resources.
You should also see your virtual machine which will be behind the load balancer.
Click on the load balancer.
<img alt="" data-ezsrc="https://kirelos.com/wp-content/uploads/2022/02/echo/screenshot_2020-06-11_at_105004_am.png61fa705b919b8.jpg" ezimgfmt="rs rscb5 src ng ngcb5" height="395" loading="lazy" src="data:image/svg xml,” width=”750″>
This is the overview page of the load balancer.
<img alt="" data-ezsrc="https://kirelos.com/wp-content/uploads/2022/02/echo/screenshot_2020-06-11_at_105015_am.png61fa705c4cf95.jpg" ezimgfmt="rs rscb5 src ng ngcb5" height="310" loading="lazy" src="data:image/svg xml,” width=”750″>Advertisement
Click on “Backend Pools”.
<img alt="" data-ezsrc="https://kirelos.com/wp-content/uploads/2022/02/echo/screenshot_2020-06-11_at_105024_am.png61fa705cd7baa.jpg" ezimgfmt="rs rscb5 src ng ngcb5" height="305" loading="lazy" src="data:image/svg xml,” width=”750″>
Here give a name to the Backend Pool as test-backend-pool, select a virtual network in which your virtual machines are available.
Select “Virtual machines” for the “Associated to” option.
Click on “Add” to add you Virtual Machines to this pool.
<img alt="" data-ezsrc="https://kirelos.com/wp-content/uploads/2022/02/echo/screenshot_2020-06-11_at_105105_am.png61fa705d884f1.jpg" ezimgfmt="rs rscb5 src ng ngcb5" height="233" loading="lazy" src="data:image/svg xml,” width=”750″>
Select the Virtual Machines which need to be added to the Pool.
Here, we are adding only 1 VM. Save this configuration.
Now we will add “Health Probe”.
<img alt="" data-ezsrc="https://kirelos.com/wp-content/uploads/2022/02/echo/screenshot_2020-06-11_at_105114_am.png61fa705e2942f.jpg" ezimgfmt="rs rscb5 src ng ngcb5" height="250" loading="lazy" src="data:image/svg xml,” width=”750″>
Click on “Health Probe” from the left panel.
<img alt="" data-ezsrc="https://kirelos.com/wp-content/uploads/2022/02/echo/screenshot_2020-06-11_at_105602_am.png61fa705ed21ad.jpg" ezimgfmt="rs rscb5 src ng ngcb5" height="316" loading="lazy" src="data:image/svg xml,” width=”750″>
Keep this configuration as is and save it.
<img alt="" data-ezsrc="https://kirelos.com/wp-content/uploads/2022/02/echo/screenshot_2020-06-11_at_105614_am.png61fa705f7f70b.jpg" ezimgfmt="rs rscb5 src ng ngcb5" height="199" loading="lazy" src="data:image/svg xml,” width=”750″>
Now, to add Load Balancing Rules, click on “Load balancing rules” in the left panel.
<img alt="" data-ezsrc="https://kirelos.com/wp-content/uploads/2022/02/echo/screenshot_2020-06-11_at_105626_am.png61fa706022f79.jpg" ezimgfmt="rs rscb5 src ng ngcb5" height="301" loading="lazy" src="data:image/svg xml,” width=”750″>
Click on “Add”.
<img alt="" data-ezsrc="https://kirelos.com/wp-content/uploads/2022/02/echo/screenshot_2020-06-11_at_105853_am.png61fa7060afe96.jpg" ezimgfmt="rs rscb5 src ng ngcb5" height="305" loading="lazy" src="data:image/svg xml,” width=”750″>
Give a name to the load balancing rule as “test-lb-rule”.
Since we have Apache running on Port 80 in the virtual machine added in the backend pool, no change in the rule is needed.
If you have service running on a different port, change the backend port.
Save this configuration.
<img alt="" data-ezsrc="https://kirelos.com/wp-content/uploads/2022/02/echo/screenshot_2020-06-11_at_105915_am.png61fa706147652.jpg" ezimgfmt="rs rscb5 src ng ngcb5" height="342" loading="lazy" src="data:image/svg xml,” width=”750″>
Now, it’s time to configure the Network Rule to allow connection on Port 80 of the Virtual Machines.
Go to the Virtual Machine, click on Networking and Add inbound security rule as follows which will allow incoming connection on Port 80 of the Virtual Machine from anywhere.
Save this rule.
<img alt="" data-ezsrc="https://kirelos.com/wp-content/uploads/2022/02/echo/screenshot_2020-06-11_at_110146_am.png61fa706212030.jpg" ezimgfmt="rs rscb5 src ng ngcb5" height="468" loading="lazy" src="data:image/svg xml,” width=”750″>
To test if the Service running on Port 80 of the Virtual Machine is accessible or not, try to access the service on the IP of the Virtual Machine.
Here, we can see Apache running and accessible.
Now, it’s the time to access the service through the Load Balancer we created.
<img alt="" data-ezsrc="https://kirelos.com/wp-content/uploads/2022/02/echo/screenshot_2020-06-11_at_110242_am.png61fa7062cf188.jpg" ezimgfmt="rs rscb5 src ng ngcb5" height="468" loading="lazy" src="data:image/svg xml,” width=”750″>
Go to the Load Balancer, copy its Public IP and access it on port 80.
<img alt="" data-ezsrc="https://kirelos.com/wp-content/uploads/2022/02/echo/screenshot_2020-06-11_at_110314_am.png61fa706370695.jpg" ezimgfmt="rs rscb5 src ng ngcb5" height="311" loading="lazy" src="data:image/svg xml,” width=”750″>
Here, you can see that the Service i.e. Apache is accessible from the Load Balancer which is running in the Virtual Machine in Port 80.
<img alt="" data-ezsrc="https://kirelos.com/wp-content/uploads/2022/02/echo/screenshot_2020-06-11_at_110324_am.png61fa706448976.jpg" ezimgfmt="rs rscb5 src ng ngcb5" height="468" loading="lazy" src="data:image/svg xml,” width=”750″>
Conclusion
In this article, we learned to create a Public Load Balancer, added a health probe to it.
We also add a Backend Pool which contains the Virtual Machine having the service Apache running on its Port 80. We saw how the Load Balancer can be used to redirect requests to its Backend Pool.


