
Ghost is an open-source blogging platform to help you create a professional-looking blog. It was launched in 2013 as an alternative to WordPress because it was getting overly complex. It is written in JavaScript and is powered by the Node.js library.
This tutorial will explore how to install Ghost CMS using Nginx and MySQL on a server powered by Rocky Linux 9. We will use the Nginx server to host the blog and the Let’s Encrypt SSL certificate to secure our installation.
Prerequisites
-
A server running Rocky Linux 9.
-
A non-root user with sudo privileges.
-
A fully qualified domain name (FQDN) pointing to your server. For our purposes, we will use
ghost.example.comas the domain name. -
Make sure everything is updated.
$ sudo dnf update
-
Install basic utility packages. Some of them may already be installed.
$ sudo dnf install wget curl nano unzip yum-utils -y
Step 1 – Configure Firewall
The first step is to configure the firewall. Rocky Linux uses Firewalld Firewall. Check the firewall’s status.
$ sudo firewall-cmd --state
running
The firewall works with different zones, and the public zone is the default one that we will use. List all the services and ports active on the firewall.
$ sudo firewall-cmd --permanent --list-services
It should show the following output.
cockpit dhcpv6-client ssh
Wiki.js needs HTTP and HTTPS ports to function. Open them.
$ sudo firewall-cmd --add-service=http --permanent
$ sudo firewall-cmd --add-service=https --permanent
Reload the firewall to apply the changes.
$ sudo firewall-cmd --reload
Step 2 – Install Nginx
Rocky Linux 9 ships with an older version of Nginx. You need to download the official Nginx repository to install the latest version.
Create and open the /etc/yum.repos.d/nginx.repo file for creating the official Nginx repository.
$ sudo nano /etc/yum.repos.d/nginx.repo
Paste the following code in it.
[nginx-stable]
name=nginx stable repo
baseurl=http://nginx.org/packages/centos/$releasever/$basearch/
gpgcheck=1
enabled=1
gpgkey=https://nginx.org/keys/nginx_signing.key
module_hotfixes=true

[nginx-mainline]
name=nginx mainline repo
baseurl=http://nginx.org/packages/mainline/centos/$releasever/$basearch/
gpgcheck=1
enabled=0
gpgkey=https://nginx.org/keys/nginx_signing.key
module_hotfixes=true
Save the file by pressing Ctrl X and entering Y when prompted.
Install the Nginx server.
$ sudo dnf install nginx -y
Verify the installation.
$ nginx -v
nginx version: nginx/1.22.1
Enable and start the Nginx server.
$ sudo systemctl enable nginx --now
Check the status of the server.
$ sudo systemctl status nginx
? nginx.service - nginx - high performance web server
     Loaded: loaded (/usr/lib/systemd/system/nginx.service; enabled; vendor preset: disabled)
     Active: active (running) since Tue 2022-10-25 08:27:47 UTC; 2s ago
       Docs: http://nginx.org/en/docs/
    Process: 1650 ExecStart=/usr/sbin/nginx -c /etc/nginx/nginx.conf (code=exited, status=0/SUCCESS)
   Main PID: 1651 (nginx)
      Tasks: 2 (limit: 5912)
     Memory: 1.9M
        CPU: 7ms
     CGroup: /system.slice/nginx.service
             ??1651 "nginx: master process /usr/sbin/nginx -c /etc/nginx/nginx.conf"
             ??1652 "nginx: worker process"

Oct 25 08:27:47 ghost.example.com systemd[1]: Starting nginx - high performance web server...
Step 3 – Install Node.js
Ghost Installer needs Nodejs to work. Run the following commands to install Node 16.
$ curl -fsSL https://rpm.nodesource.com/setup_16.x | sudo bash -
Install Node.
$ sudo dnf install -y nodejs
Verify Node installation.
$ node --version
v16.18.0
At the time of writing this tutorial, Node 18 is out and is the LTS version. Ghost is yet to add support for it. Do keep a check on the Ghost document about Node versions for the latest Node version supported. When Ghost adds support for Node 18, install Node 18 using the following commands instead.
$ curl -fsSL https://rpm.nodesource.com/setup_18.x | sudo bash -
$ sudo dnf install -y nodejs
Step 4 – Install MySQL
Rocky Linux 9 ships with the latest version of MySQL. You can install it with a single command.
$ sudo dnf install mysql-server
Check the version of MySQL.
$ mysql --version
mysql  Ver 8.0.30 for Linux on x86_64 (Source distribution)
Enable and start the MySQL service.
$ sudo systemctl enable mysqld --now
Check the service status.
$ sudo systemctl status mysqld
? mysqld.service - MySQL 8.0 database server
     Loaded: loaded (/usr/lib/systemd/system/mysqld.service; enabled; vendor preset: disabled)
     Active: active (running) since Tue 2022-10-25 09:00:26 UTC; 3s ago
    Process: 2920 ExecStartPre=/usr/libexec/mysql-check-socket (code=exited, status=0/SUCCESS)
    Process: 2942 ExecStartPre=/usr/libexec/mysql-prepare-db-dir mysqld.service (code=exited, status=0/SUCCESS)
   Main PID: 3021 (mysqld)
     Status: "Server is operational"
      Tasks: 39 (limit: 5912)
     Memory: 404.4M
        CPU: 4.686s
     CGroup: /system.slice/mysqld.service
             ??3021 /usr/libexec/mysqld --basedir=/usr

Oct 25 09:00:18 ghost.example.com systemd[1]: Starting MySQL 8.0 database server...
Oct 25 09:00:18 ghost.example.com mysql-prepare-db-dir[2942]: Initializing MySQL database
Oct 25 09:00:26 ghost.example.com systemd[1]: Started MySQL 8.0 database server.
You can log in to the MySQL shell using Unix authentication by default. But you cannot run the security setup wizard. Therefore, the following step is necessary for MySQL versions 8.0.28 and above. Enter the MySQL Shell.
$ sudo mysql
Run the following command to set the password for your root user. Make sure it has a mix of numbers, uppercase, lowercase, and special characters.
mysql> ALTER USER 'root'@'localhost' IDENTIFIED WITH mysql_native_password BY 'YourPassword12!';
Exit the shell. The caveat to this step is that you can no longer log in to the MySQL shell using Unix authentication.
mysql> exit
Run the MySQL secure install script.
$ sudo mysql_secure_installation
You will be asked to install the Validate Password Component. It checks the strength of passwords used in MySQL. Press Y to install it.
Securing the MySQL server deployment.

Connecting to MySQL using a blank password.

VALIDATE PASSWORD COMPONENT can be used to test passwords
and improve security. It checks the strength of password
and allows the users to set only those passwords which are
secure enough. Would you like to setup VALIDATE PASSWORD component?

Press y|Y for Yes, any other key for No: Y
Next, you will be asked to set the level of the password validation policy. Choose 2 as it is the strongest one. You will then be asked to create a root password. Enter a password with the given requirements. And when asked whether you want to continue with the password, press Y to proceed.
There are three levels of password validation policy:

LOW    Length >= 8
MEDIUM Length >= 8, numeric, mixed case, and special characters
STRONG Length >= 8, numeric, mixed case, special characters and dictionary                  file

Please enter 0 = LOW, 1 = MEDIUM and 2 = STRONG: 2
Please set the password for root here.

New password:

Re-enter new password:

Estimated strength of the password: 100
Do you wish to continue with the password provided?(Press y|Y for Yes, any other key for No) : Y
Finally, press Y to remove anonymous users, disallow remote root logins, remove the test database, and reload the privilege tables.
By default, a MySQL installation has an anonymous user,
allowing anyone to log into MySQL without having to have
a user account created for them. This is intended only for
testing, and to make the installation go a bit smoother.
You should remove them before moving into a production
environment.

Remove anonymous users? (Press y|Y for Yes, any other key for No) : Y
Success.


Normally, root should only be allowed to connect from
'localhost'. This ensures that someone cannot guess at
the root password from the network.

Disallow root login remotely? (Press y|Y for Yes, any other key for No) : Y
Success.

By default, MySQL comes with a database named 'test' that
anyone can access. This is also intended only for testing,
and should be removed before moving into a production
environment.


Remove test database and access to it? (Press y|Y for Yes, any other key for No) : Y
 - Dropping test database...
Success.

 - Removing privileges on test database...
Success.

Reloading the privilege tables will ensure that all changes
made so far will take effect immediately.

Reload privilege tables now? (Press y|Y for Yes, any other key for No) : Y
Success.

All done!
This completes the process of installing and securing MySQL.
Step 5 – Install Ghost
The Ghost installation will comprise three components – Ghost-CLI command line tool that installs and manages updates to the Ghost blog and the blog package itself.
Install Ghost-CLI
Run the following command to install the Ghost-CLI tool. Ignore any warnings you receive during the process.
$ sudo npm install [email protected] -g
Prepare Ghost Directory
Create the Ghost root directory.
$ sudo mkdir -p /var/www/html/ghost
Set the ownership of the directory to the current user.
$ sudo chown $USER:$USER /var/www/html/ghost
Set the correct directory permissions.
$ sudo chmod 755 /var/www/html/ghost
Switch to the Ghost directory.
$ cd /var/www/html/ghost
Install Ghost
Installing Ghost is a single command process.
$ ghost install
During the installation, the CLI tool will ask a number of questions to configure the blog.
- At the time of writing this tutorial, Ghost-CLI doesn’t support any other OS apart from Ubuntu. It will ask if you still want to continue with the installation. Press Y to continue.
- Blog URL: Enter your complete blog URL along with the https protocol. (
https://ghost.example.com) - MySQL Hostname: Press Enter to use the default value of
localhostsince our Ghost install and MySQL are on the same server. - MySQL Username: Enter
rootas your MySQL username. - MySQL Password: Enter your root password created before.
- Ghost database name: Give a name for your Ghost database. (
ghostdb) - Sudo password: Enter your system’s sudo password to perform elevated commands.
- Set up a ghost MySQL user?: The installer will ask if you want to create a separate MySQL user for Ghost. Press Y to proceed.
- Set up Nginx?: Usually, Ghost-CLI detects your Nginx installation and automatically configures it for your blog. But as of now, it can’t detect our Nginx install. Hence, the installer will automatically skip this step. We will configure Nginx manually.
- Set up SSL?: Since it skipped over the Nginx configuration, the CLI tool will also skip setting up an SSL.
- Set up systemd?: Ghost will ask if you want to set up a system service for Ghost. Press Y to proceed.
- Start Ghost?: Press Y to start your Ghost installation. The service will start but we will need to configure Nginx and SSL to make it work.
Step 6 – Install SSL
Before proceeding, we need to install the Certbot tool and an SSL certificate for our domain.
To install Certbot, we will use the Snapd package installer. Snapd always carries the latest stable version of Certbot, which you should use.
Snapd tool requires the Epel repository to work.
$ sudo dnf install epel-release -y
We will use Snapd to install Certbot. Install Snapd.
$ sudo dnf install snapd -y
Enable and Start the Snap service.
$ sudo systemctl enable snapd.socket --now
Create necessary links for Snapd to work.
$ sudo ln -s /var/lib/snapd/snap /snap
$ echo 'export PATH=$PATH:/var/lib/snapd/snap/bin' | sudo tee -a /etc/profile.d/snapd.sh
Ensure that your version of snapd is up to date.
$ sudo snap install core
$ sudo snap refresh core
Install Certbot.
$ sudo snap install --classic certbot
Use the following command to ensure that the Certbot command can be run by creating a symbolic link to the /usr/bin directory.
$ sudo ln -s /snap/bin/certbot /usr/bin/certbot
Generate an SSL certificate.
$ sudo certbot certonly --nginx --agree-tos --no-eff-email --staple-ocsp --preferred-challenges http -m [email protected] -d ghost.example.com
The above command will download a certificate to the /etc/letsencrypt/live/ghost.example.com directory on your server.
Generate a Diffie-Hellman group certificate.
$ sudo openssl dhparam -dsaparam -out /etc/ssl/certs/dhparam.pem 4096
Do a dry run of the process to check whether the SSL renewal is working fine.
$ sudo certbot renew --dry-run
If you see no errors, you are all set. Your certificate will renew automatically.
Step 7 – Configure Nginx
Create and open the file /etc/nginx/conf.d/ghost.conf for editing.
$ sudo nano /etc/nginx/conf.d/ghost.conf
Paste the following code in the ghost.conf file. Replace all instances of ghost.example.com with your domain.
## enforce HTTPS
server {
  listen 80;
  listen [::]:80;
  server_name ghost.example.com;
  return 301 https://$server_name$request_uri;
}

server {
  listen 443 ssl http2;
  listen [::]:443 ssl http2;
  server_name ghost.example.com;

  access_log /var/log/nginx/ghost.access.log;
  error_log /var/log/nginx/ghost.error.log;
  client_max_body_size 20m;

  http2_push_preload on; # Enable HTTP/2 Server Push

  ssl_certificate     /etc/letsencrypt/live/ghost.example.com/fullchain.pem;
  ssl_certificate_key /etc/letsencrypt/live/ghost.example.com/privkey.pem;
  ssl_trusted_certificate /etc/letsencrypt/live/ghost.example.com/chain.pem;
  ssl_session_timeout 1d;

  # Enable TLS versions (TLSv1.3 is required upcoming HTTP/3 QUIC).
  ssl_protocols TLSv1.2 TLSv1.3;

  # Enable TLSv1.3's 0-RTT. Use $ssl_early_data when reverse proxying to
  # prevent replay attacks.
  #
  # @see: https://nginx.org/en/docs/http/ngx_http_ssl_module.html#ssl_early_data
  ssl_early_data on;

  ssl_ciphers 'ECDHE-ECDSA-AES256-GCM-SHA384:ECDHE-RSA-AES256-GCM-SHA384:ECDHE-ECDSA-CHACHA20-POLY1305:ECDHE-RSA-CHACHA20-POLY1305:ECDHE-ECDSA-AES256-SHA384:ECDHE-RSA-AES256-SHA384';
  ssl_prefer_server_ciphers on;
  ssl_ecdh_curve X25519:prime256v1:secp384r1:secp521r1;
  ssl_session_cache shared:SSL:50m;
  ssl_session_tickets off;

  # OCSP Stapling ---
  # fetch OCSP records from URL in ssl_certificate and cache them
  ssl_stapling on;
  ssl_stapling_verify on;
  ssl_dhparam /etc/ssl/certs/dhparam.pem;

  add_header X-Early-Data $tls1_3_early_data;

  location / {
    proxy_set_header Host $http_host;
    proxy_set_header X-Real-IP $remote_addr;
    proxy_set_header X-Forwarded-Proto https;
    proxy_set_header X-Forwarded-For $proxy_add_x_forwarded_for;
    proxy_pass http://localhost:2368;
  }
}

# This block is useful for debugging TLS v1.3. Please feel free to remove this
# and use the `$ssl_early_data` variable exposed by NGINX directly should you
# wish to do so.
map $ssl_early_data $tls1_3_early_data {
  "~." $ssl_early_data;
  default "";
}
The above configuration will redirect all HTTP requests to HTTPS and will serve as a proxy for Ghost service to serve it via your domain.
Save the file by pressing Ctrl X and entering Y when prompted.
Open the file /etc/nginx/nginx.conf for editing.
$ sudo nano /etc/nginx/nginx.conf
Add the following line before the line include /etc/nginx/conf.d/*.conf;.
server_names_hash_bucket_size 64;
Save the file by pressing Ctrl X and entering Y when prompted.
Verify your Nginx configuration.
$ sudo nginx -t
If you see no errors, it means you are good to go. Reload the Nginx server.
$ sudo systemctl reload nginx
Step 8 – Configure SELinux
Allow Nginx to connect to the network.
$ sudo setsebool -P httpd_can_network_connect 1
Step 9 – Run the Site
Now, you can verify your installation by opening https://ghost.example.com in your web browser. You will get the following page indicating a successful installation.
Step 10 – Complete the Setup
To finish setting up your Ghost blog, visit https://ghost.example.com/ghost in your browser. The extra /ghost at the end of your blog’s domain redirects you to Ghost’s Admin Panel or, in this case, the setup since you are accessing it for the first time.
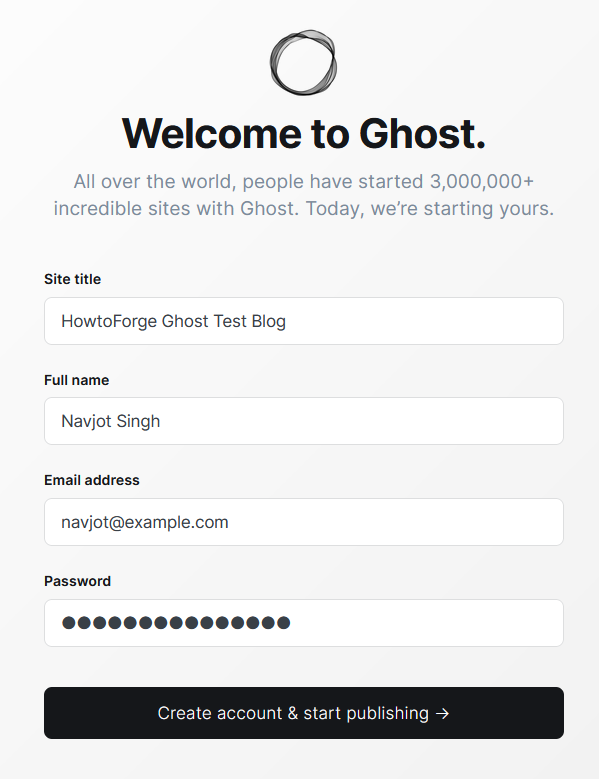
You will be required to create your Administrator account and choose a blog title.
Enter your details and click the Create account & start publishing button to proceed.
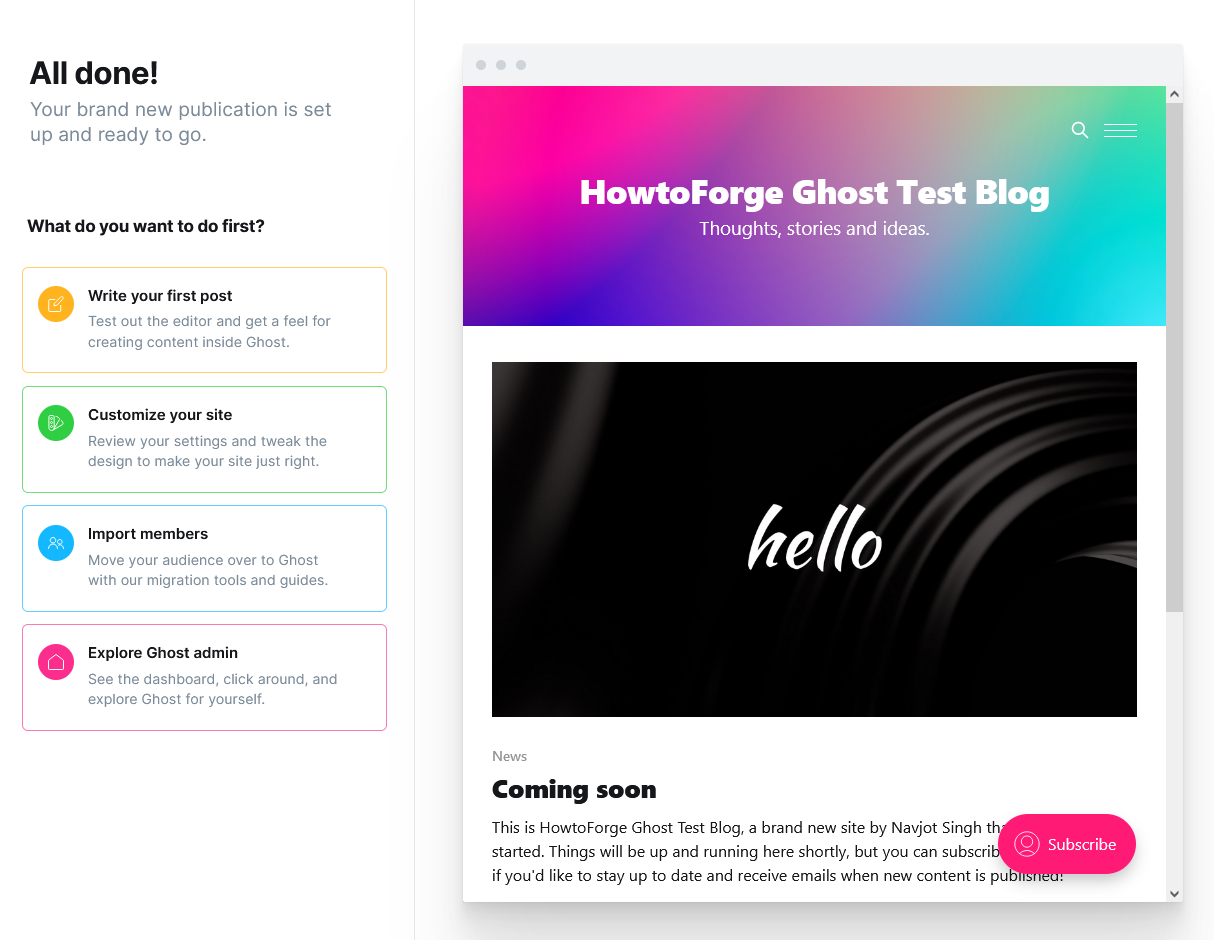
Next, you will be taken to the following screen, where you are given options such as writing your first post, customizing your site, and importing members.
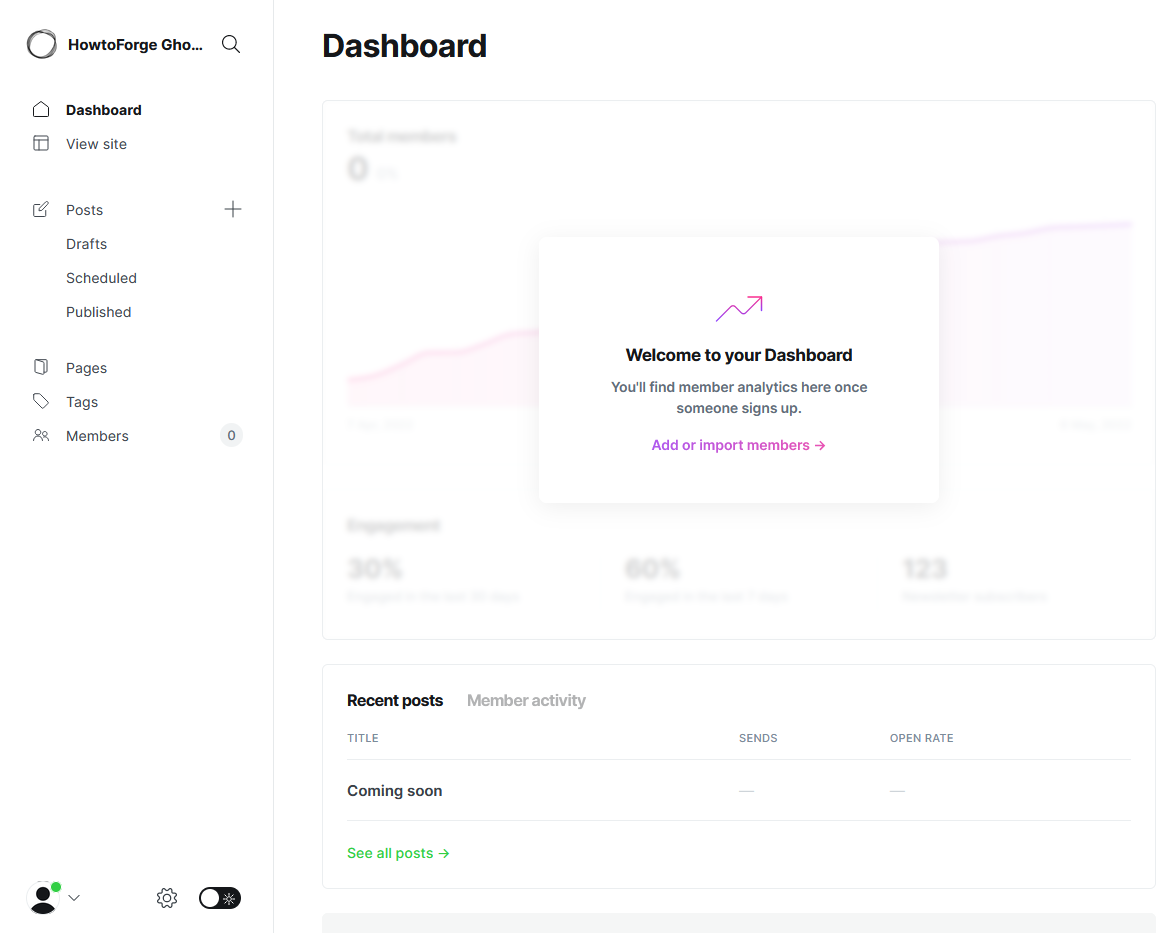
We will choose the Explore Ghost admin to explore and go to the dashboard directly. At the end of the setup, you will be greeted with the Ghost’s Administration panel.
If you want to switch to dark mode, you can do so by clicking on the toggle switch next to the settings gear button at the bottom of the settings page.
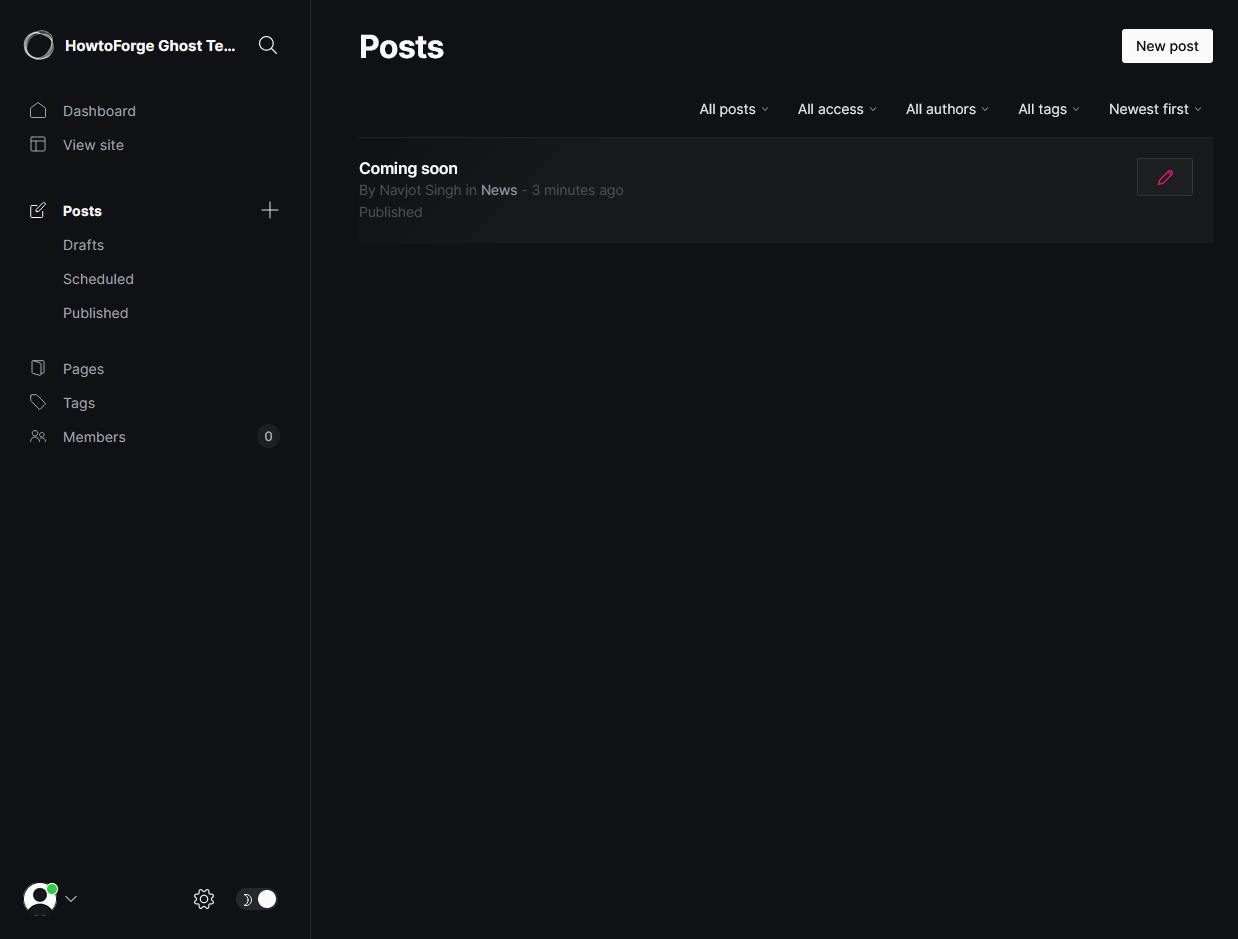
Switch to the Posts page and you will see a default post. You can unpublish or delete it and start posting.
Step 11 – Configure Mailer
Ghost not only acts as a blogging platform but also as a newsletter manager. For day-to-day operations, you can use any transactional mail service to work with Ghost for sending mail. But if you want to send newsletters via Ghost, the only official bulk mailer supported is Mailgun. You can use a different newsletter service too but for that, you will need to use the Zapier integration feature of Ghost.
Let us first configure an SMTP service for transactional emails. For this open the file /var/www/html/ghost/config.production.json file for editing.
$ nano /var/www/html/ghost/config.production.json
Find the following lines.
 "mail": {
    "transport": "Direct"
  },
Replace them with the following code.
"mail": {
    "from": "'Acme Support' [email protected]",
    "transport": "SMTP",
    "options": {
        "host": "YOUR-SES-SERVER-NAME",
        "port": 465,
        "service": "SES",
        "auth": {
            "user": "YOUR-SES-SMTP-ACCESS-KEY-ID",
            "pass": "YOUR-SES-SMTP-SECRET-ACCESS-KEY"
        }
    }
},
Here we are using the Amazon SES Mail service since it is very cheap and lifetime free if you are using their EC2 service.
If you want to use their newsletter service using Mailgun, enter the following code instead.
"mail": {
  "from": "'Acme Support' [email protected]",
  "transport": "SMTP",
  "options": {
    "service": "Mailgun",
    "host": "smtp.mailgun.org",
    "port": 587,
    "secure": true,
    "auth": {
      "user": "[email protected]",
      "pass": "1234567890"
    }
  }
},
Save the file by pressing Ctrl X and entering Y when prompted.
Once finished, restart the Ghost application for the changes to take effect.
$ ghost restart
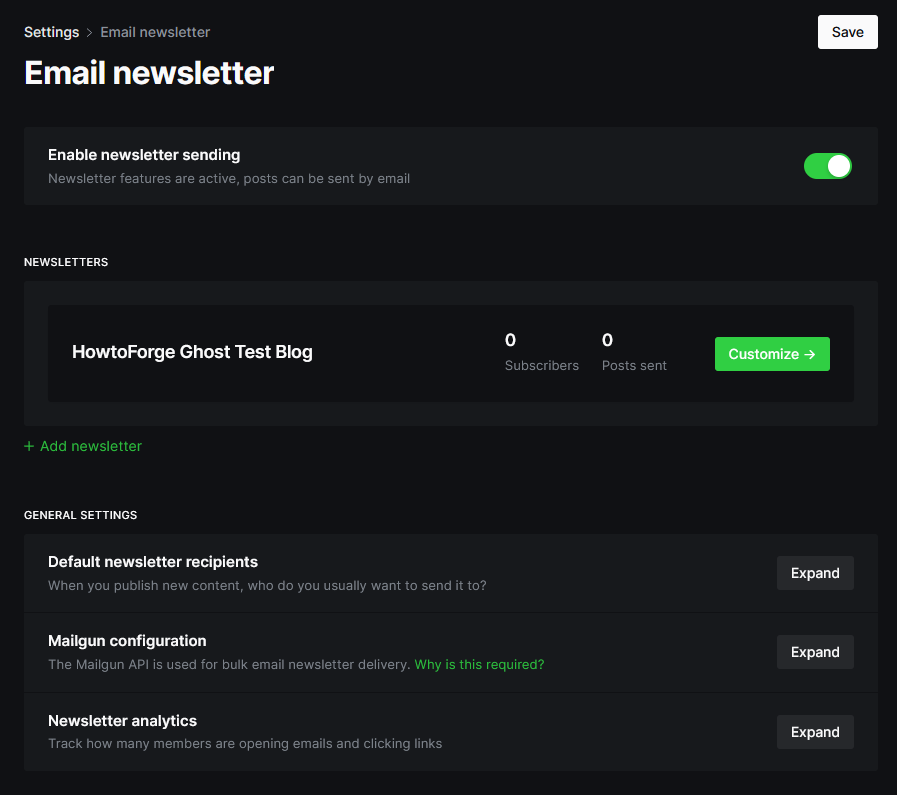
To configure the newsletter settings, visit the Settings >> Email newsletter section.
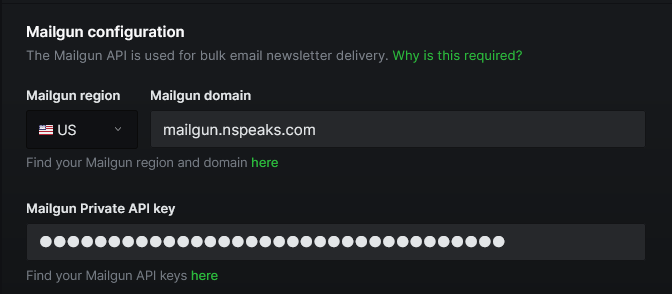
Click on the Mailgun configuration link to expand.
Fill in your Mailgun Region, domain, and API key.
Click the Save button on the top right to save the settings.
To test the newsletter delivery, open any post, open up its settings and click the Email newsletter option. Next, send a test email to check if it works. If you don’t get any errors, it means your newsletter delivery is working.
Step 12 – Update Ghost
There are two types of Ghost updates – Minor updates and Major updates.
First, take a full backup if you want to run a minor update.
$ cd /var/www/html/ghost
$ ghost backup
Run the update command to perform the minor update.
$ ghost update
To perform a major update, you should follow the official detailed update guide over at Ghost. Depending upon which version you are at currently and the major version you want to update to, steps will vary.
Conclusion
This concludes our tutorial on how to set up Ghost CMS on your Rocky Linux 9 server using Nginx. If you have any questions or feedback, share them in the comments below.


