BookStack is a self-hosted, open-source, easy-to-use platform for organizing and storing information. It can be used for multiple purposes like a Wiki, Documentation website and note-taking application. It is built using the Laravel PHP framework and uses MySQL to store the data. For editing purposes, it provides you with a choice between using a WYSIWYG or a Markdown editor. It supports multi-factor authentication and dark mode and is multi-lingual.
This tutorial will teach you how to install BookStack on a Ubuntu 20.04-based server.
Prerequisites
- A server running Ubuntu 20.04
- A Fully Qualified Domain Name(FQDN) pointing toward the server.
- A non-root user with sudo privileges.
- PHP version 7.3 or greater.
- MySQL>=5.6 and MariaDB>=10.0
- Git and Composer.
Step 1 – Configure Firewall
The first step is to configure the firewall. Ubuntu comes with ufw (Uncomplicated Firewall) by default.
Check if the firewall is running.
$ sudo ufw status
You should get the following output.
Status: inactive
Allow SSH port so that the firewall doesn’t break the current connection on enabling it.
$ sudo ufw allow OpenSSH
Allow HTTP and HTTPS ports as well.
$ sudo ufw allow 80
$ sudo ufw allow 443
Enable the Firewall
$ sudo ufw enable
Command may disrupt existing ssh connections. Proceed with operation (y|n)? y
Firewall is active and enabled on system startup
Check the status of the firewall again.
$ sudo ufw status
You should see a similar output.
Status: active

To                         Action      From
--                         ------      ----
OpenSSH                    ALLOW       Anywhere
80                         ALLOW       Anywhere
443                        ALLOW       Anywhere
OpenSSH (v6)               ALLOW       Anywhere (v6)
80 (v6)                    ALLOW       Anywhere (v6)
443 (v6)                   ALLOW       Anywhere (v6)
Step 2 – Install Git
The first step is to install Git. It will be required to download and update BookStack. Run the following command to install Git.
$ sudo apt install git
Verify the installation.
$ git --version
Step 3 – Install PHP and extensions
Since BookStack is dependent on PHP, you need to install PHP and its extensions.
Ubuntu ships with an outdated PHP version. First, we need to add Ondrej’s PHP repository.
$ sudo add-apt-repository ppa:ondrej/php
Next, install PHP and its extensions required by BookStack.
$ sudo apt install php7.4-fpm php7.4-mbstring php7.4-gd php7.4-xml unzip php7.4-bcmath php7.4-curl php7.4-mysql
Verify the installation.
$ php --version
PHP 7.4.25 (cli) (built: Oct 22 2021 12:34:33) ( NTS )
Copyright (c) The PHP Group
Zend Engine v3.4.0, Copyright (c) Zend Technologies
    with Zend OPcache v7.4.25, Copyright (c), by Zend Technologies
Step 4 – Install and Configure MariaDB
Ubuntu ships with an older version of MariaDB. To install the latest version, add the official MariaDB repository. Run the following commands to add the repository.
$ curl -LsS -O https://downloads.mariadb.com/MariaDB/mariadb_repo_setup
$ sudo bash mariadb_repo_setup --mariadb-server-version=10.6
Run the following command to install the MariaDB server.
$ sudo apt install mariadb-server
Secure the MariaDB install.
$ sudo mysql_secure_installation
You will face various prompts. Answer them as follows.
Enter current password for root (enter for none): Press Enter
Switch to unix_socket authentication [Y/n] Type y
Change the root password? [Y/n] Type n
Remove anonymous users? [Y/n] Type y
Disallow root login remotely? [Y/n] Type y
Remove test database and access to it? [Y/n] Type y
Reload privilege tables now? [Y/n] Type y
Connect to the MariaDB shell using the following command.
$ sudo mysql
Create a new database for Bookstack.
$ create database bookstack;
Create a new database user.
$ CREATE USER 'bookstackuser'@'localhost' identified by 'bookstackpassword';
Choose a strong password.
Grant permissions on the database to the user.
$ grant CREATE,ALTER,SELECT,INSERT,UPDATE,DELETE on `bookstack`.* to 'bookstackuser'@'localhost';
Exit the MySQL shell.
$ exit
Step 5 – Install Composer
Composer is a dependency management tool for PHP and is required by Laravel on which BookStack is based.
Download the Composer installer script.
$ curl -sS https://getcomposer.org/installer -o composer-setup.php
Run the following commands to verify the installer.
$ HASH=`curl -sS https://composer.github.io/installer.sig`
$ echo $HASH
$ php -r "if (hash_file('SHA384', 'composer-setup.php') === '$HASH') { echo 'Installer verified'; } else { echo 'Installer corrupt'; unlink('composer-setup.php'); } echo PHP_EOL;"
The above commands grab the hash value of the installer and match it with your downloaded script. You should see the following output if the installer is safe to run.
Installer verified
Install Composer.
$ sudo php composer-setup.php --install-dir=/usr/local/bin --filename=composer
Verify the installation by checking its version.
$ composer --version
Composer version 2.1.9 2021-10-05 09:47:38
Step 6 – Download and Install BookStack
Create the root folder for the BookStack app.
$ sudo mkdir -p /var/www/bookstack
Change the ownership of the /var/www/bookstack directory to the currently logged-in user.
$ sudo chown -R $USER:$USER /var/www/bookstack
Clone the release branch of the BookStack Github repository into the newly created folder.
$ cd /var/www/bookstack
$ git clone https://github.com/BookStackApp/BookStack.git --branch=release --single-branch .
Don’t miss the dot at the end of the clone command. It ensures that all the files are downloaded in the current directory instead of creating a new one.
Run the Composer installer from the /var/www/bookstack directory.
$ composer install --no-dev
Copy the .env.example file to .env to store environment variables for the installation.
$ cp .env.example .env
Open the file for editing.
$ sudo nano .env
Fill in the application URL and database details. If you are going to use the email features, fill in the SMTP details or else delete them from the file.
APP_URL=https://example.com
DB_HOST=localhost
DB_DATABASE=bookstack
DB_USERNAME=bookstackuser
DB_PASSWORD=bookstackpassword
Save the file by pressing Ctrl X and entering Y when prompted once finished. There are a lot more settings you can configure. To know more about them, open the file .env.example.complete and copy the ones you need to your .env file.
Generate a unique application key. This value gets automatically filled in the .env file. Type yes to proceed with the command.
$ php artisan key:generate
**************************************
*     Application In Production!     *
**************************************

 Do you really wish to run this command? (yes/no) [no]:
 > yes

Application key set successfully.
Update the Database.
$ php artisan migrate
**************************************
*     Application In Production!     *
**************************************

 Do you really wish to run this command? (yes/no) [no]:
 > yes
Migration table created successfully.
Migrating: 2014_10_12_000000_create_users_table
Migrated:  2014_10_12_000000_create_users_table (0.12 seconds)
.......
Change the ownership of the directory to the nginx user so that webserver can access and write to the folder.
$ sudo chown -R nginx:nginx /var/www/bookstack
Step 7 – Install Let’s Encrypt SSL
To install an SSL certificate using Let’s Encrypt, we need to install the Certbot tool.
We will use the Snapd package installer for that. Most Ubuntu servers don’t ship with the Snap tool. To fix that, install Snap.
$ sudo apt install snapd
Ensure that your version of Snapd is up to date.
$ sudo snap install core
$ sudo snap refresh core
Install Certbot.
$ sudo snap install --classic certbot
Use the following command to ensure that the Certbot command can be run by creating a symbolic link to the /usr/bin directory.
$ sudo ln -s /snap/bin/certbot /usr/bin/certbot
Verify the installation.
$ certbot --version
certbot 1.20.0
Generate the SSL certificate.
$ sudo certbot certonly --standalone --agree-tos --preferred-challenges http -m [email protected] -d example.com
The above command will download a certificate to the /etc/letsencrypt/live/etherpad.example.com directory on your server.
Generate a Diffie-Hellman group certificate.
$ sudo openssl dhparam -out /etc/ssl/certs/dhparam.pem 2048
Create a challenge web root directory for Let’s Encrypt auto-renewal.
$ sudo mkdir -p /var/lib/letsencrypt
Create a Cron Job to renew the SSL. It will run every day to check the certificate and renew if needed. For that, first, create the file /etc/cron.daily/certbot-renew and open it for editing.
$ sudo nano /etc/cron.daily/certbot-renew
Paste the following code.
#!/bin/sh
certbot renew --cert-name bookstack.example.com --webroot -w /var/lib/letsencrypt/ --post-hook "systemctl reload nginx"
Save the file by pressing Ctrl X and entering Y when prompted.
Change the permissions on the task file to make it executable.
$ sudo chmod x /etc/cron.daily/certbot-renew
Step 8 – Install and Configure Nginx
Ubuntu ships with an older version of Nginx. To install the latest version, you need to download the official Nginx repository.
Add the repository for Nginx’s stable version.
$ echo "deb [signed-by=/usr/share/keyrings/nginx-archive-keyring.gpg arch=amd64]
http://nginx.org/packages/ubuntu `lsb_release -cs` nginx"
    | sudo tee /etc/apt/sources.list.d/nginx.list
Install Nginx.
$ sudo apt install nginx
Verify the installation.
$ nginx -v
nginx version: nginx/1.20.1
Enable the Nginx service.
$ sudo systemctl enable nginx
Configure PHP-FPM
Open the file /etc/php/7.4/fpm/pool.d/www.conf.
$ sudo nano /etc/php/7.4/fpm/pool.d/www.conf
We need to set the Unix user/group of PHP processes to nginx. Find the user=www-data and group=www-data lines in the file and change them to nginx.
...
; Unix user/group of processes
; Note: The user is mandatory. If the group is not set, the default user's group
;       will be used.
user = nginx
group = nginx
...
Also, find the lines listen.owner=www-data and listen.group=www-data in the file and change them to nginx.
listen.owner = nginx
listen.group = nginx
Save the file by pressing Ctrl X and entering Y when prompted.
Restart the PHP-fpm process.
$ sudo systemctl restart php7.4-fpm
Configure Nginx
Create and open the file /etc/nginx/conf.d/bookstack.conf for editing.
$ sudo nano /etc/nginx/conf.d/bookstack.conf
Paste the following code in it.
server {
    listen       443 ssl http2;
    listen       [::]:443 ssl http2;
    server_name  bookstack.example.com;

    access_log  /var/log/nginx/bookstack.access.log;
    error_log   /var/log/nginx/bookstack.error.log;

    ssl_certificate      /etc/letsencrypt/live/bookstack.example.com/fullchain.pem;
    ssl_certificate_key  /etc/letsencrypt/live/bookstack.example.com/privkey.pem;
    ssl_trusted_certificate /etc/letsencrypt/live/bookstack.example.com/chain.pem;

    ssl_session_timeout  5m;
    ssl_session_cache shared:MozSSL:10m;
    ssl_session_tickets off;

    ssl_protocols TLSv1.2 TLSv1.3;
    ssl_prefer_server_ciphers on;
    ssl_ciphers ECDHE-ECDSA-AES128-GCM-SHA256:ECDHE-RSA-AES128-GCM-SHA256:ECDHE-ECDSA-AES256-GCM-SHA384:ECDHE-RSA-AES256-GCM-SHA384:ECDHE-ECDSA-CHACHA20-POLY1305:ECDHE-RSA-CHACHA20-POLY1305:DHE-RSA-AES128-GCM-SHA256:DHE-RSA-AES256-GCM-SHA384;
    ssl_ecdh_curve X25519:prime256v1:secp384r1:secp521r1;
    ssl_stapling on;
    ssl_stapling_verify on;
    ssl_dhparam /etc/ssl/certs/dhparam.pem;

    root /var/www/bookstack/public;
    index index.php index.html;

    location / {
      try_files $uri $uri/ /index.php?$query_string;
    }

    location ~ .php$ {
      fastcgi_split_path_info ^(. .php)(/. )$;
      include fastcgi_params;
      fastcgi_param SCRIPT_FILENAME $document_root$fastcgi_script_name;
      fastcgi_param PATH_INFO $fastcgi_path_info;
      fastcgi_pass unix:/run/php/php7.4-fpm.sock;
    }
}

# enforce HTTPS
server {
    listen       80;
    listen       [::]:80;
    server_name  bookstack.example.com;
    return 301   https://$host$request_uri;
}
Save the file by pressing Ctrl X and entering Y when prompted once finished.
Open the file /etc/nginx/nginx.conf for editing.
$ sudo nano /etc/nginx/nginx.conf
Add the following line before the line include /etc/nginx/conf.d/*.conf;.
server_names_hash_bucket_size 64;
Save the file by pressing Ctrl X and entering Y when prompted. Validate Nginx again.
Verify the Nginx configuration file syntax.
$ sudo nginx -t
nginx: the configuration file /etc/nginx/nginx.conf syntax is ok
nginx: configuration file /etc/nginx/nginx.conf test is successful
Finally, start the Nginx service to enable the new configuration.
$ sudo systemctl start nginx
Step 9 – Run BookStack
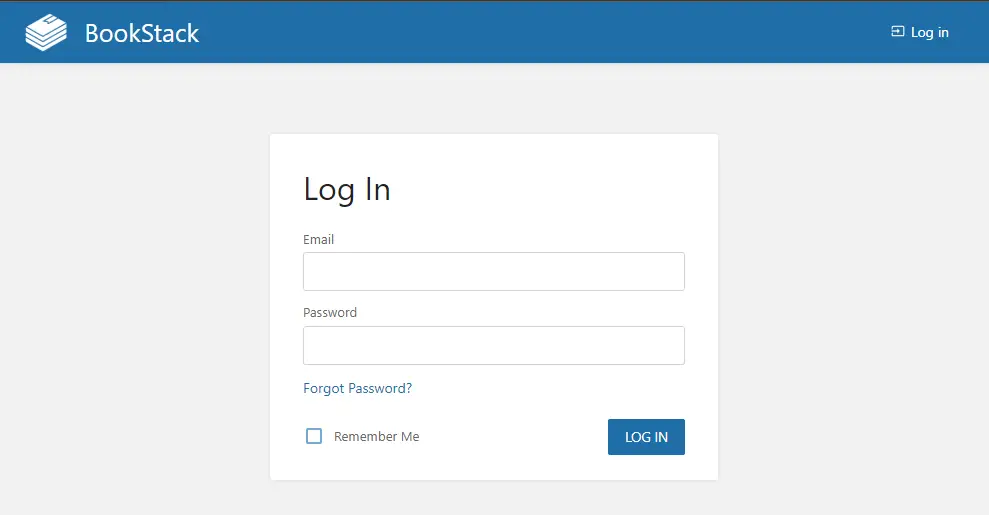
Your Bookstack is ready for use. Open the URL https://bookstack.example.com in your browser and you will get the login page.
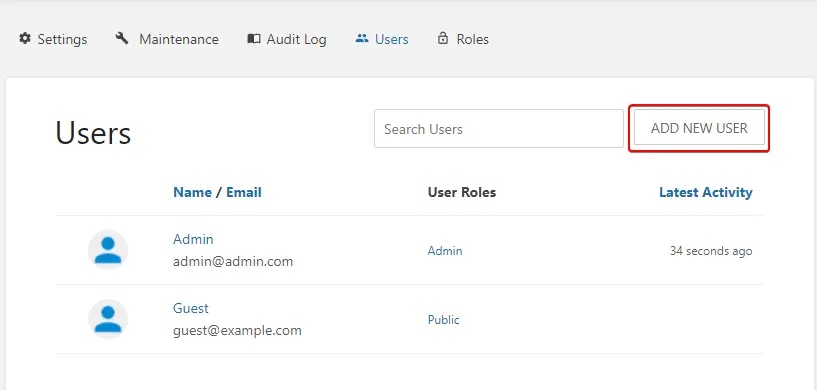
Login using the default administrator account [email protected] with a password of password. Open the Settings >> Users page and click on the ADD NEW USER button.
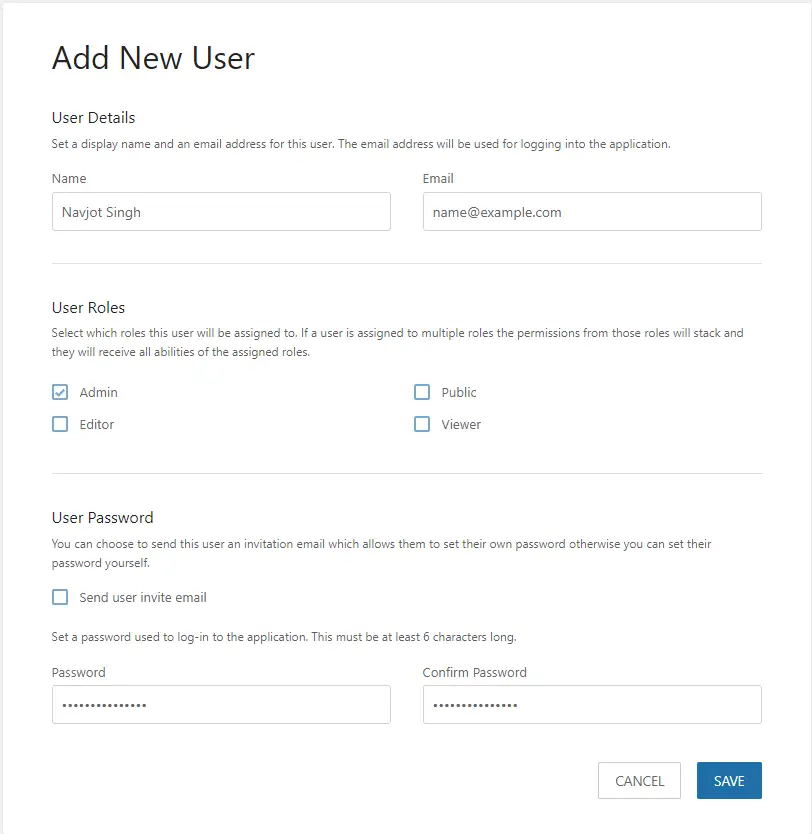
Fill in the user details, checkmark the Admin box under User Roles and uncheck Send user invite email since we didn’t set SMTP details. Select a strong password. Click Save when finished.
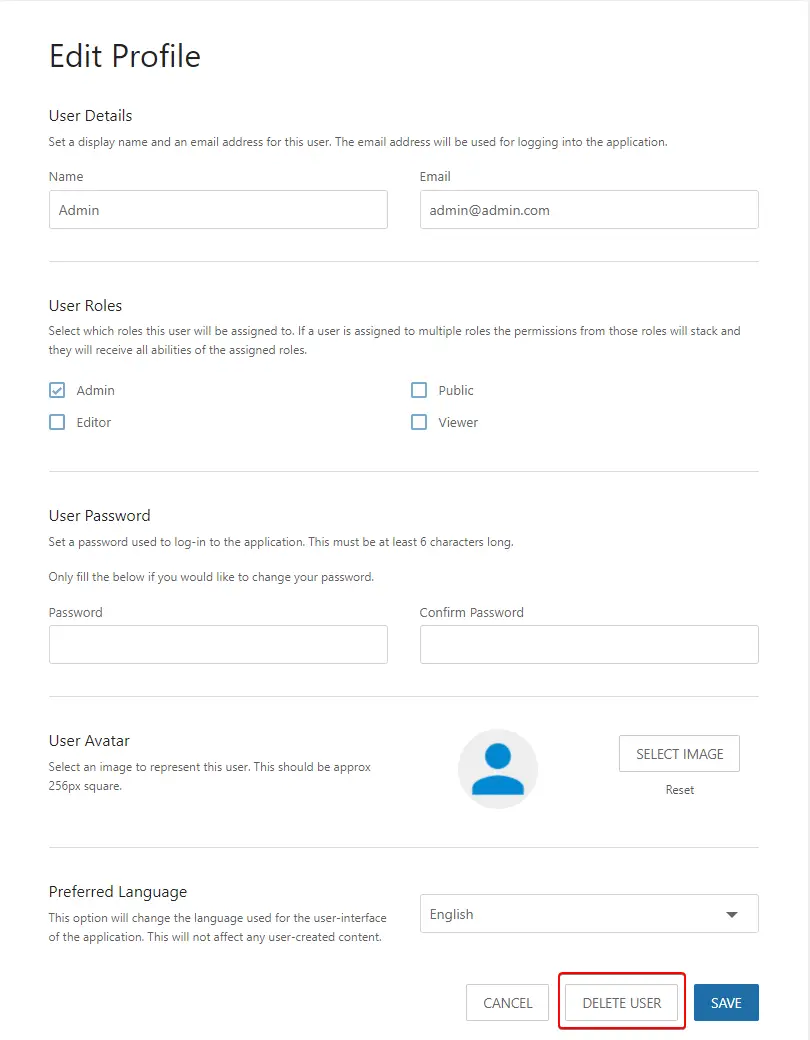
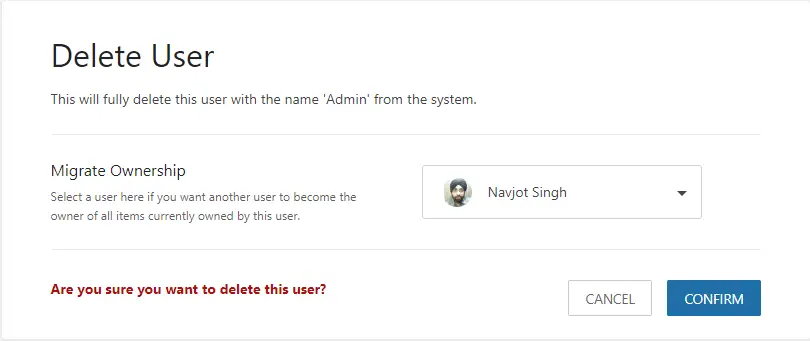
Next, click on the default Admin user and delete the user by clicking the Delete User button.
Transfer the ownership of the Admin user to your newly created user by selecting it from the dropdown menu before deleting it. Click Confirm to finish. If you are logged in with that user, you will be automatically logged out. You will need to login back in with the newly created user.
Backup and restore BookStack
Backup BookStack
You need to back up the database and files separately. To back up the database, use the mysqldump tool.
$ sudo mysqldump -u bookstackuser bookstack > bookstack.backup.sql
You need to back up the following files and folders as well.
.env– file containing important configuration.public/uploads– folder containing uploaded images.storage/uploads– folder containing uploaded page attachments.
Run the following command to create a compressed archive of the above files and folders.
$ sudo tar -czvf bookstack-files-backup.tar.gz .env public/uploads storage/uploads
Restore BookStack
Run the following command to restore the database.
$ sudo mysql -u bookstack < bookstack.backup.sql
If you are restoring to a new version of BookStack, you will have to run the sudo php artisan migrate command.
To restore the compressed files created above, use the following command.
$ sudo tar -xvzf bookstack-files-backup.tar.gz
You will also need to change permissions.
Update BookStack
Before updating BookStack, make sure you take a proper backup using the process mentioned earlier.
To update BookStack, pull the original files from its Git repository.
$ cd /var/www/bookstack
$ sudo git pull origin release
Run the following commands to continue the installation.
$ sudo composer install --no-dev
$ sudo php artisan migrate
You will also need to run the following commands to clear the cache.
$ sudo php artisan cache:clear
$ sudo php artisan config:clear
$ sudo php artisan view:clear
Conclusion
This concludes our tutorial on installing BookStack on a Ubuntu 20.04 server. If you have any questions, post them in the comments below.


 on Ubuntu 24.04")