
Centreon is an open-source tool that can monitor your entire infrastructure including network, system, and application. Using Centreon you can set notifications depending on thresholds, set email alerts, easily add any system for monitoring.
Some key features of Centreon monitoring tool are:
- Centreon is an AI-ready monitoring tool.
- Centreon monitors more than 470 components including cloud, Virtualization, Microservices, Databases, Networks, IoT, and many more.
- It has over 3000 pre-configured templates that automatically select the right protocol or monitoring method for each infrastructure component.
- You can create Custom Dashboards as per your needs.
- Fully compatible with third-party solutions and platforms like Nagios.
In this tutorial, I will show you how to install Centreon on Rocky Linux.
Prerequisites
- A server running Rocky Linux 8.
- A root password is configured on the server.
Step 1: Update OS
Before starting the installation, let’s update your system packages to the latest version. To do so, run the following command:
sudo dnf update -y
Step 2: Disable SELinux
Now check SELinux and disable it, if it is enabled.
Run the following command to check SELinux status.
getenforce
If it is enabled then disable it
vim /etc/selinux/config
SELINUX=disabled
Then save the file and reboot the system.
Step 3: Install PHP
Let’s Enable EPEL and PowerTools repositories by executing the following command in Terminal:
sudo dnf -y install dnf-plugins-core epel-releasesudo dnf config-manager --set-enabled powertools
Now install remirepo and enable it.
sudo dnf module reset -y php
sudo dnf install https://rpms.remirepo.net/enterprise/remi-release-8.rpm
sudo dnf module install php:remi-8.0
Next, install PHP and other extensions.
sudo dnf -y install php php-cli php-fpm php-mysqlnd php-zip php-devel php-gd php-mcrypt php-mbstring php-curl php-xml php-pear php-bcmath php-json php-opcache
Verify and check PHP version using the command below
php --version
Let’s create a Timezone for PHP:
sudo vim /etc/php.d/php-timezone.ini
date.timezone = Etc/UTC
Here we set UTC, You can set your time-zone.
After that, let’s increase PHP script execution timeout by editing max_execution_time and max_input_time in php.ini file.
sudo vim /etc/php.ini
max_execution_time = 300
max_input_time = 300
save the file, enable and restart the PHP-FPM service by executing the following command.
sudo systemctl enable php-fpm
sudo systemctl restart php-fpm
Step 4: Install MariaDB Database server
Install MariaDB server by executing the following command:
sudo dnf install mariadb-server
Now start MariaDB service and enable it to start at boot time, then check MariaDB service status with the following command:-
sudo systemctl start mariadb
sudo systemctl status mariadb
sudo systemctl enable mariadb
Next, you will need to secure the database server, to do so run the following command in Terminal:-
sudo mysql_secure_installation
Here, set up a strong password and answer questions as follows:
Change the root password? [Y/n] y
Remove anonymous users? [Y/n] y
Disallow root login remotely? [Y/n] n
Remove test database and access to it? [Y/n] y
After this, check MySQL connection by executing the command:
mysql -u root -p
Then you need to create a distant user with root privileges for Centreon installation later.
Login to MySQL by running command below:
mysql -u root -p
CREATE USER 'sohan'@'188.166.52.228' IDENTIFIED BY '123';
GRANT ALL PRIVILEGES ON *.* TO 'sohan'@'188.166.52.228' WITH GRANT OPTION;
FLUSH PRIVILEGES;
exit
Step 5: Install Centreon Packages
We are going to install Centreon repository
sudo dnf install https://yum.centreon.com/standard/21.10/el8/stable/noarch/RPMS/centreon-release-21.10-2.el8.noarch.rpm
Now Install Centreon packages on Rocky Linux 8 by running the below command in the terminal:
sudo dnf install centreon centreon-database
The package centreon-database set optimized MariaDB configuration for Centreon:Advertisement
cat /etc/systemd/system/mariadb.service.d/centreon.conf
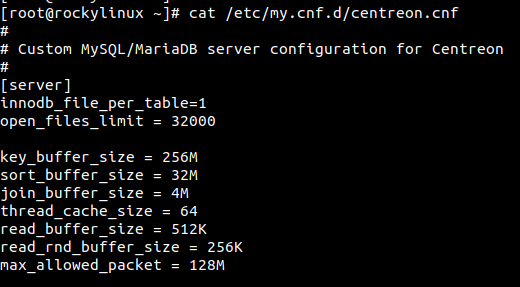
Let’s have a look at configuration file
cat /etc/my.cnf.d/centreon.cnf
Now reload daemon and restart MariaDB service.
sudo systemctl daemon-reload
sudo systemctl restart mariadb
Now enable all required services during system boot-up.
sudo systemctl enable mariadb
sudo systemctl enable php-fpm
sudo systemctl enable httpd
sudo systemctl enable centreon
sudo systemctl enable cbd
sudo systemctl enable centengine
sudo systemctl enable gorgoned
sudo systemctl enable snmptrapd
sudo systemctl enable centreontrapd
sudo systemctl enable snmpd
Step 6: Centreon Web installation
Before starting Centreon Web installation process, you need to execute the following commands:
sudo systemctl start mariadb
sudo systemctl start php-fpm
sudo systemctl start httpd
sudo systemctl start centreon
sudo systemctl start cbd
sudo systemctl start centengine
sudo systemctl start gorgoned
sudo systemctl start snmptrapd
sudo systemctl start centreontrapd
sudo systemctl start snmpd
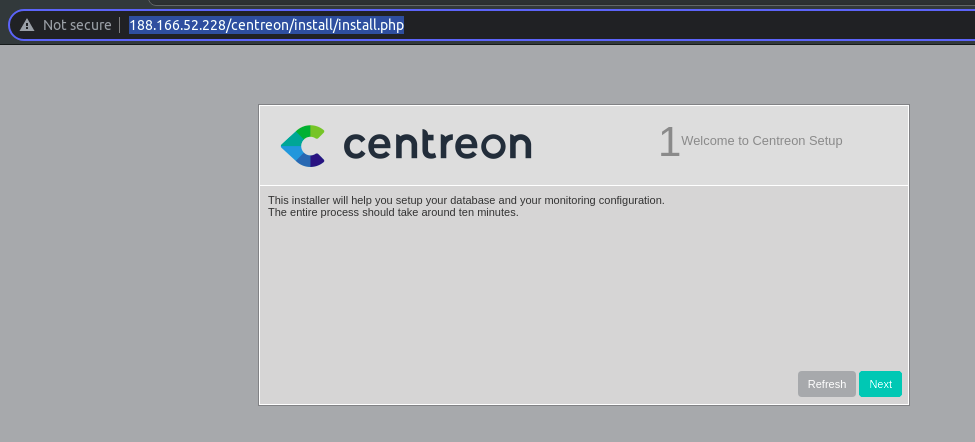
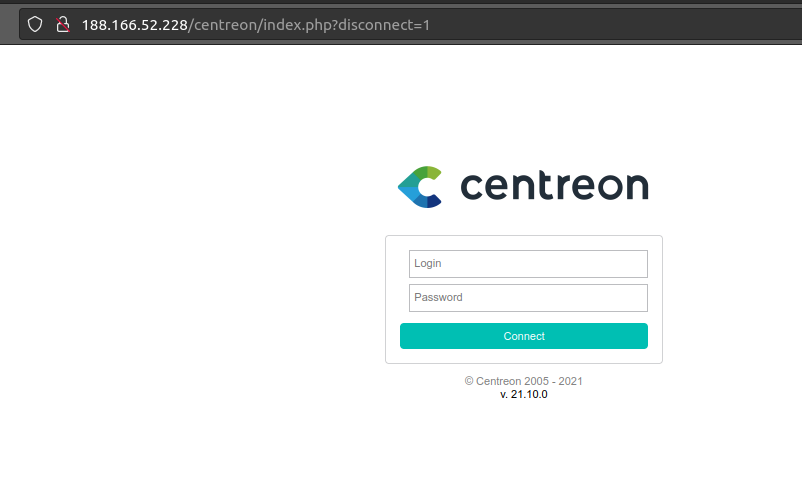
Now Login to Centreon Web interface and type the following:
http:///centreon
This will show you the Welcome to Centreon Setup screen as shown below:
Now follow the instruction
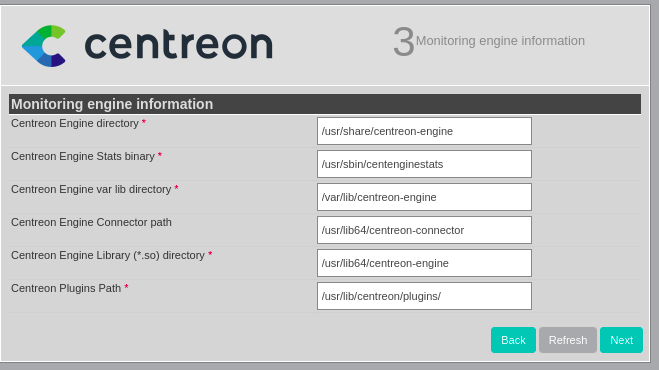
Enter monitoring engine information
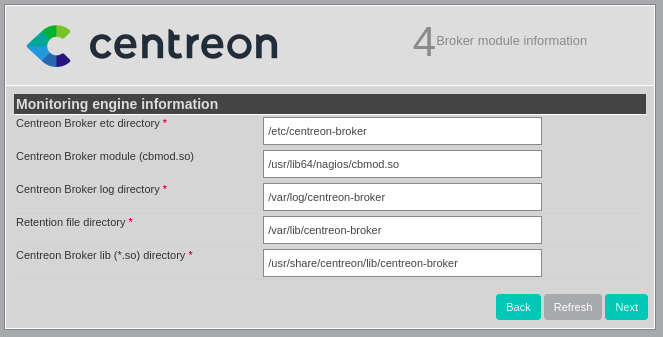
Here you will find Centreon Broker module information
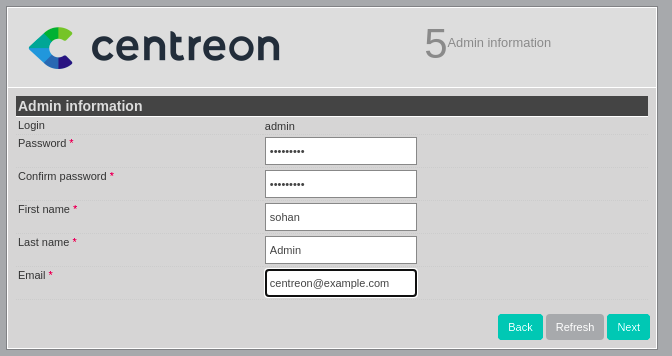
On next page you will see Admin information
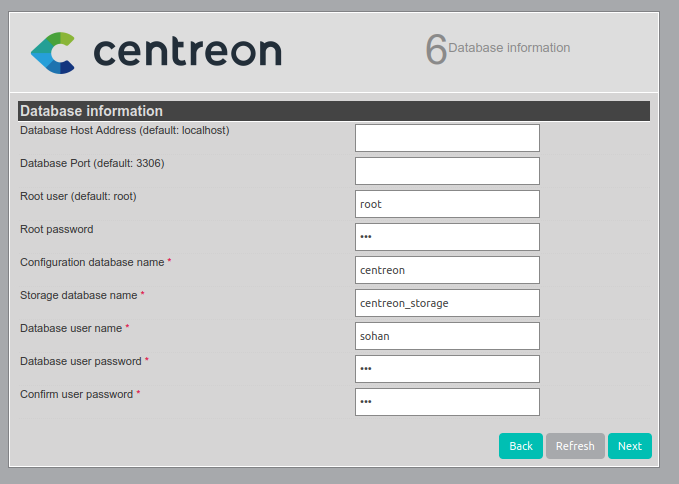
Here, enter the root password as you had set during sudo mysql_secure_installation and database user as we created previously.
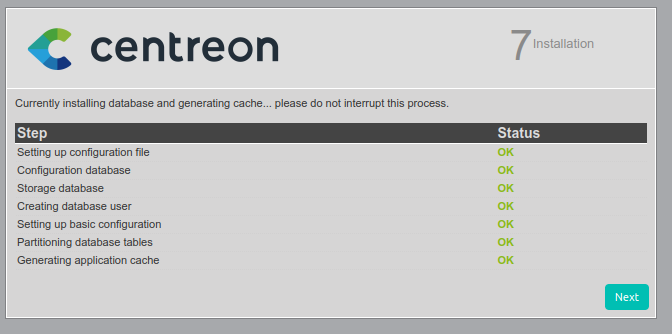
It will install the database and generate cache
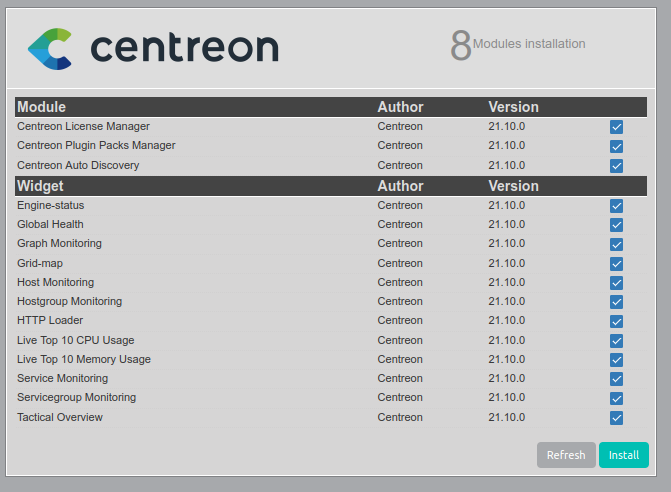
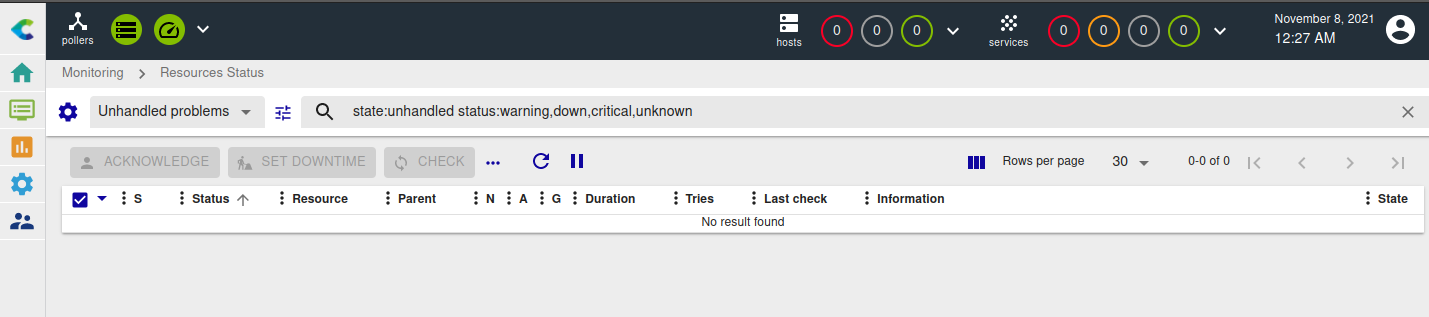
Click on the Finished button and login into Centreon admin user and password as we had set during installation.
After successfully login, you will see Centreon Dashboard like the below screenshot:
Conclusion
Congratulations! You have successfully installed Centreon Monitoring Tool on Rocky Linux. Now you can explore Centreon and learn how to monitor server infrastructure.


