
ClickHouse is a column-oriented database management system developed by ClickHouse, Inc. and written in C . It’s an Open Source OLAP database management system that is fast, fault-tolerant, easy to use, and highly reliable.
ClickHouse is a blazingly fast OLDAP database system for online analytical processing. It allows you to generate analytical reports using SQL queries in real-time.
In this tutorial, you will learn how to install the ClickHouse OLAP Database System on an Ubuntu 22.04 server. You’ll also learn how to set up authentication on ClickHouse and cover its basic usage and queries.
Prerequisites
To complete this tutorial, you’ll several prerequisites below:
- An Ubuntu 22.04 server – This example uses an Ubuntu system with the hostname ‘clickhouse-server’ and the IP address ‘192.168.5.100’.
- A non-root user with sudo/root administrator privileges.
Setting up System
Before starting the ClickHouse installation, you will ensure that the current CPU supports SSE 4.2 instruction set and disable SWAP on your system.
The official pre-built binary package for ClickHouse is compiled on the x86 (64-bit) architecture and the SSE 4.2. So, if you don’t have a CPU that supports SSE 4.2, you should build ClickHouse manually from the source.
Also, when using ClickHouse, it’s recommended to disable SWAP, especially in the production environment.
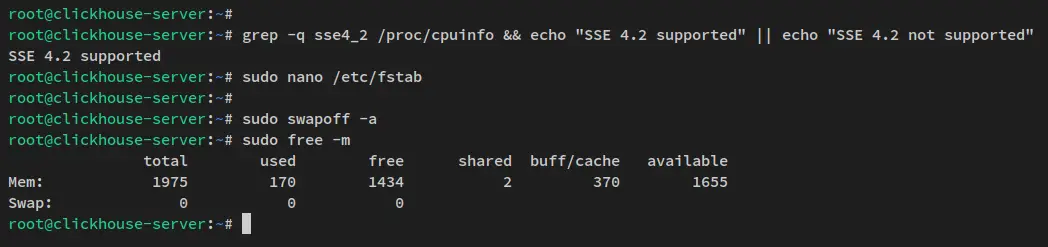
Run the below command to check that your CPU supports SSE 4.2 feature. You should receive the output ‘SSE 4.2 supported’ if your CPU is supported.
grep -q sse4_2 /proc/cpuinfo && echo "SSE 4.2 supported" || echo "SSE 4.2 not supported"
Next, run the below command to disable SWAP via the configuration ‘/etc/fstab‘ file. This command will put ‘#’ at the beginning of the SWAP configuration and disable SWAP in your system permanently.
sudo sed -i '/ swap / s/^(.*)$/#1/g' /etc/fstab
Now run the below command to turn off SWAP on the current session. Then verify the SWAP status.
sudo swapoff -a
sudo free -m
Below is the output you’ll receive if the SWAP is disabled – The SWAP size on the ‘total’ field is 0.
With the CPU that supports SSE 4.2 and WAP is disabled, you’ll now ready to install ClickHouse OLAP Database System.
Installing Clickhouse OLAP Database System
ClickHouse OLDAP Database System provides multiple installation methods. For Linux distributions, ClcikHouse provides repositories for both Debian-based and RPM-based distributions. Also, ClickHouse is available with installation via Docker or using a single binary package.
In this step, you will install the ClickHouse on an Ubuntu 22.04 system via the official repository. So, you’ll add the ClickHouse repository to your system, then install the ClickHouse package via APT.
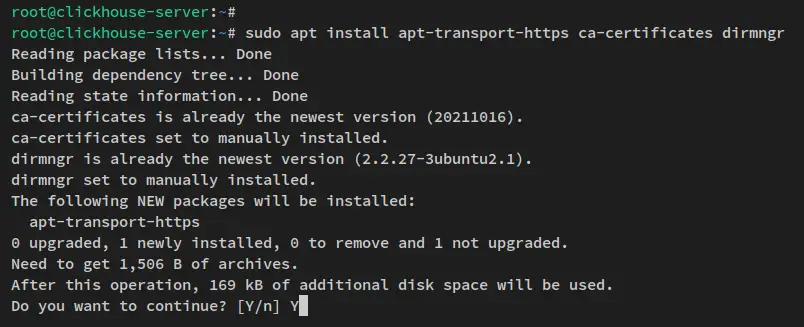
To start, run the apt command below to install some basic dependencies. When prompted, input y and press ENTER.
sudo apt install apt-transport-https ca-certificates dirmngr
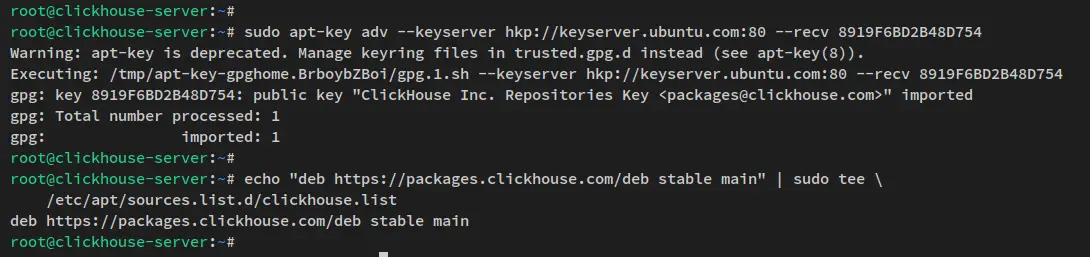
Now run the below command to add the GPG key and the ClickHouse repository to your system. In this example, you will install ClickHouse from the stable branch of the repository.
sudo apt-key adv --keyserver hkp://keyserver.ubuntu.com:80 --recv 8919F6BD2B48D754
echo "deb https://packages.clickhouse.com/deb stable main" | sudo tee
    /etc/apt/sources.list.d/clickhouse.list
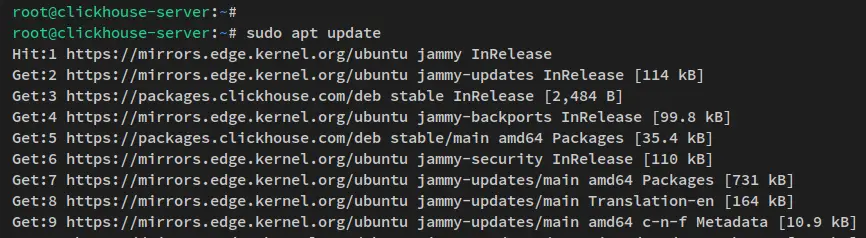
Next, update and refresh your package index via the apt command below.
sudo apt update
You’ll receive that the ClickHouse repository is added.
Now install the ‘clickhouse-server‘ as the database system and the ‘clickhouse-client‘ package via the apt command below.
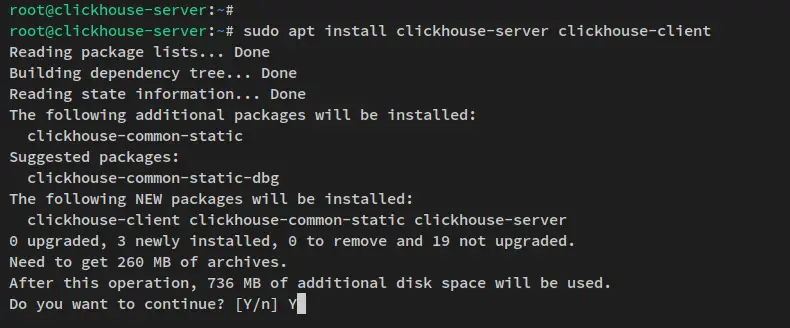
sudo apt install clickhouse-server clickhouse-client
Input Y when prompted for the confirmation and press ENTER to proceed.
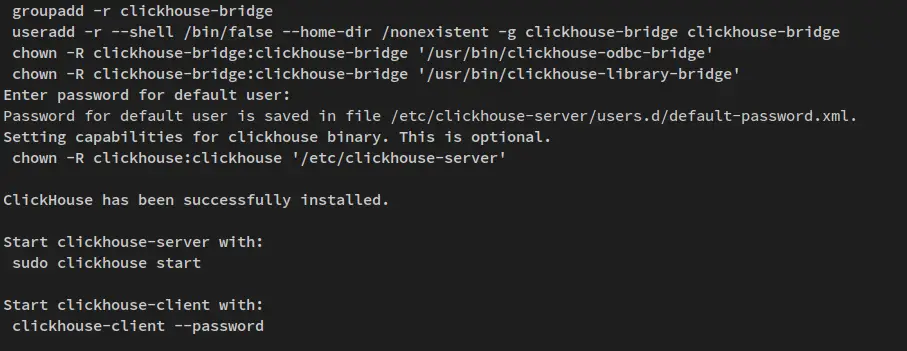
Also, during the CLickHouse installation, you’ll be prompted to set up a password for the ClickHouse default user. Input a new password for ClickHouse and you’ll receive the output like the following screenshot when installation is finished.
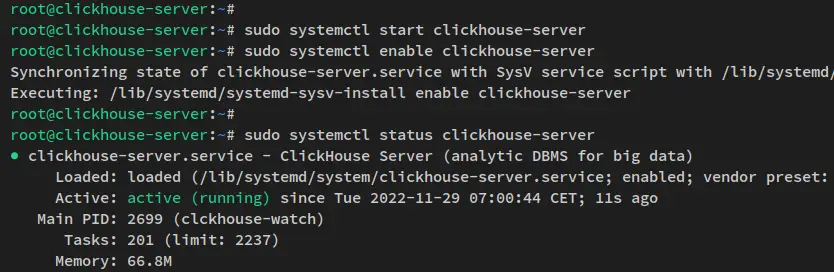
With the ClickHouse installed, run the below systemctl command utility to start and enable the ClickHouse service. This command will start the ClickHouse and enable the service to run automatically upon the bootup.
sudo systemctl start clickhouse-server
sudo systemctl enable clickhouse-server
Verify the ClicHouse service with the below command to ensure that the ClickHouse service is running.
sudo systemctl status clickhouse-server
You’ll receive the output like the following – The current status of the ClickHpouse service is running and it’s enabled and will be run automatically at startup.
You have finished the ClickHouse server installation. In the next step, you will learn how to access the ClickHouse server via the client application and set up password authentication for the ClickHouse administrator user.
Accessing ClickHouse via Command Line
With the ClickHouse server installed, you can access ClickHouse via the ‘clickhouse-client‘ you’ve also installed.
The ‘clickhouse-client’ is a command-line interface for interacting and managing the ClickHouse server. It is similar to the ‘mysql‘ client for the MySQL/MariaDB server, ‘psql‘ for the PostgreSQL server or ‘mongod‘ for the MongoDB server.
To access the ClickHouse server, you can use the ‘clickhouse-client‘ command below.
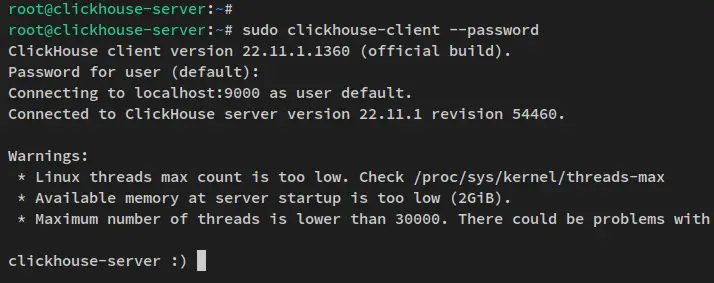
sudo clickhouse-client --password
When prompted for the password, input the password that you created during the installation.
After logging in, you should see the ClickHouse shell as the following.
From here, you can see that you’ve connected to the ClickHouse server v22.11 with the default ClickHouse user. The ClickHouse server is running by default on localhost with port 9000.
At this point, you installed the ClickHouse server and client and learned how to connect to the ClickHouse server via the command ‘clickhouse-client‘. In the next step, you’ll set up an administrator user for the ClickHouse server.
Setting up Administrator User on Clickhouse
In this step, you will create an administrator user for the ClickHouse server. But before that, you’ll enable the ‘Account Management’ for the ‘default’ user via the ClickHouse configuration.
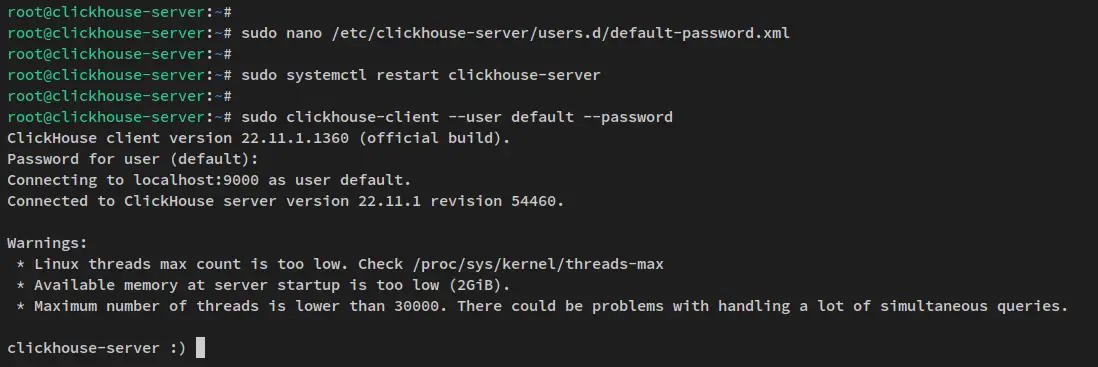
To begin, open the configuration ‘/etc/clickhouse-server/users.d/default_password.xml’ using the below nano editor command.
sudo nano /etc/clickhouse-server/users.d/default_password.xml
Add the following line between the ‘…‘ section. This will enable the ‘Access Management‘ for the user ‘default‘.
            ...
            1
Save the file and exit the editor when you’re finished.
Now run the below systemctl command utility to restart the ClickHouse service and apply the changes.
sudo systemctl restart clickhouse-server
Now that the ‘access_management’ is enabled for the ‘default’ user, you’ll then create a new administrator user for ClickHouse. The new user will be able to access all databases with all privileges on the ClickHouse server.
Run the below ‘clickhouse-client‘ command to connect to the ClickHouse server via the user ‘default‘.
sudo clickhouse-client --user default --password
When prompted for the password, input the password that you have configured. Now you’ll get the ClickHouse server console and log in as the ‘default‘ user with ‘access_management‘ enabled.
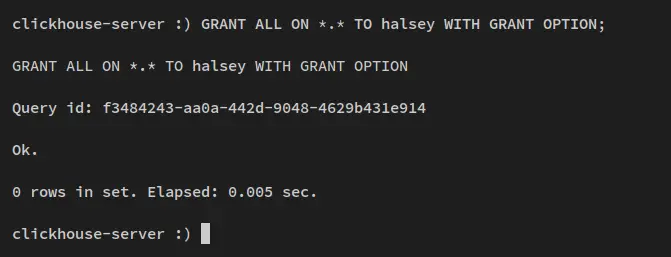
Next, run the following query to create a new ClickHouse user. And be sure to change the username, password, and host IP address. This example will create a new user ‘halsey‘ with the password ‘password’ and hashed with SHA256. The ‘HOST IP‘ option allows you to specify the IP address that will be used to connect to the ClickHouse server. In this example, only allowed from localhost or ‘127.0.0.1‘.
CREATE USER halsey HOST IP '127.0.0.1' IDENTIFIED WITH sha256_password BY 'password';
Now run the below query to grant all privileges on the ClickHouse server to the user ‘halsey‘.
GRANT ALL ON *.* TO halsey WITH GRANT OPTION;
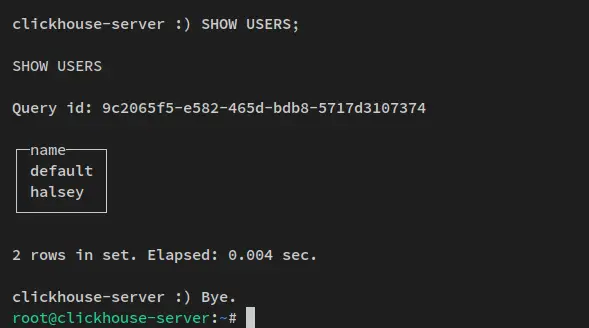
Next, verify the list of users on the ClickHouse server via the following query. You should see that the new user ‘halsey’ is added to the ClickHouse.
SHOW USERS;
Now type ‘quit’ on the ClickHouse console client to exit.
With the new database admin user created, you’ll then must disable the ‘access_management’ for the ‘default‘ user on your ClickHouse server.
Open the configuration ‘/etc/clickhouse-server/users.d/default_password.xml‘ using the below nano editor command.
sudo nano /etc/clickhouse-server/users.d/default_password.xml
Change the ‘access_management‘ option to ‘0‘ to disable the ‘Access Management’ for the ‘default‘ user.
            ...
            0
Save the file and exit the editor when you’re finished.
Restart the ClickHouse service to apply the changes via the systemctl command utility below.
sudo systemctl restart clickhouse-server
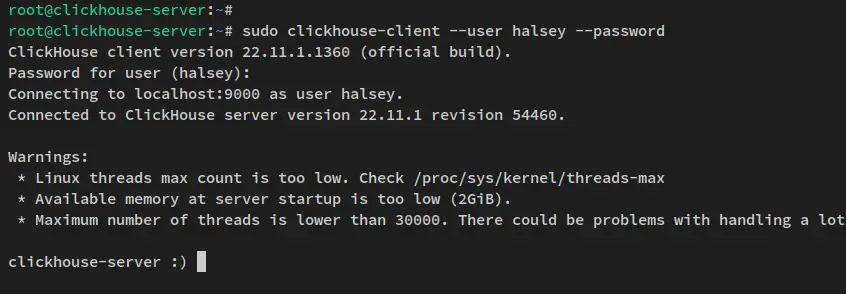
Lastly, run the following command to log in to the ClickHouse server as the user ‘halsey’. When prompted for the password, input your password and press ENTER to log in.
sudo clickhouse-client --user halsey --password
After logging in, you’ll receive the output like the following screenshot. The new admin user for ClickHouse ‘halsey’ is added and the login is successful.
With the new admin user of the ClickHouse server created, you’ll next learn how to use ClickHouse to create databases and tables and insert and retrieve data via the ClickHouse SQL query.
Basic Queries on ClickHouse Database System
In this step, you will learn the basic query of the ClickHouse Database System, which is similar to common SQL queries. You’ll learn how to create a database and table, insert and retrieve data from the database, then the basic usage of the ‘ALTER‘ query that you can use to change existing data on the ClickHouse server.
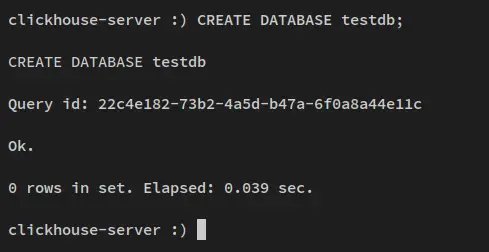
First, run the following query to create a new database. In this example, you’ll create a new database ‘testdb‘.
CREATE DATABASE testdb;
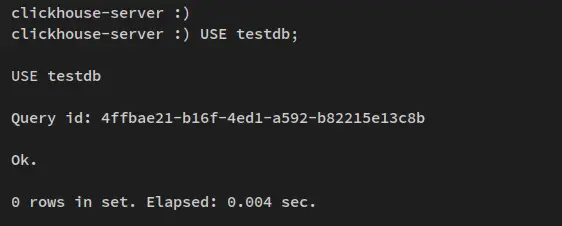
Switch to the ‘testdb‘ via the following query ‘USE dbname’.
USE testdb;
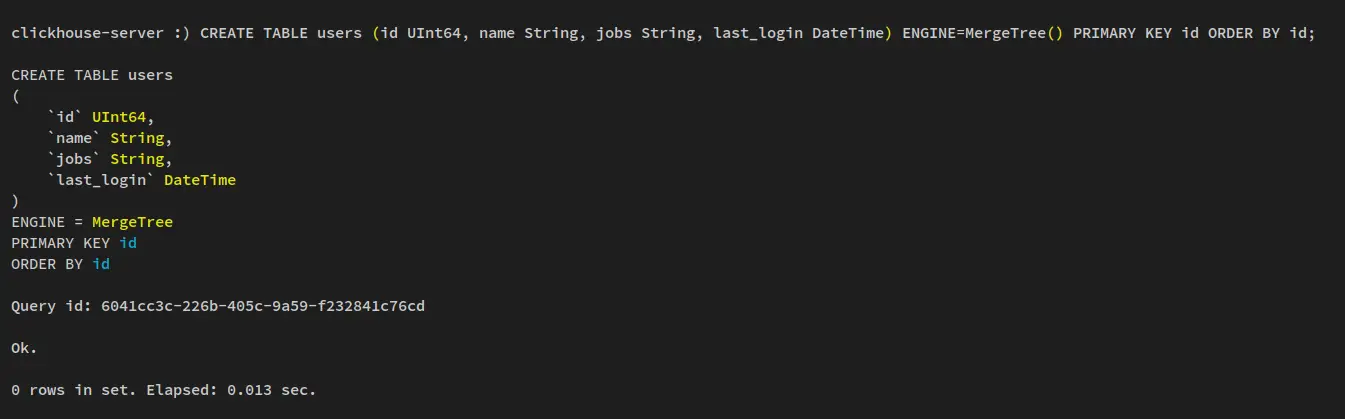
Now, create a new table, ‘users,’ with the following query. The table ‘users‘ will have some fields below:
- id with type ‘UInt64’ for storing integer values.
- name with type ‘String’ for storing string – length of character.
- last_login with type ‘DateTime’ for string date time format data.
- The engine here is ‘MergeTree’, mostly used on ClickHouse.
CREATE TABLE users (id UInt64, name String, jobs String, last_login DateTime) ENGINE=MergeTree() PRIMARY KEY id ORDER BY id;
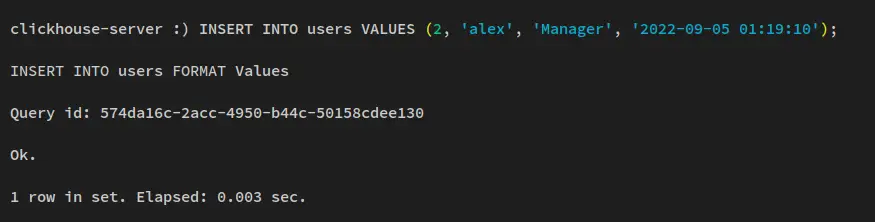
Next, run the following query to insert new data to the table ‘users’. In the below query, you’ll insert three different data to the table ‘users‘.
INSERT INTO users VALUES (1, 'alice', 'DevOps', '2022-10-10 00:10:10');
INSERT INTO users VALUES (2, 'alex', 'Manager', '2022-09-05 01:19:10');
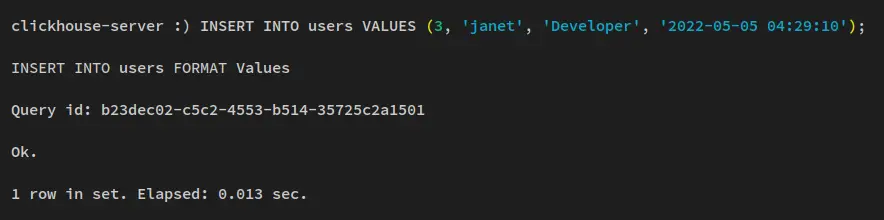
INSERT INTO users VALUES (3, 'janet', 'Developer', '2022-05-05 04:29:10');
Insert the first data.
Insert second data.
Insert third data.
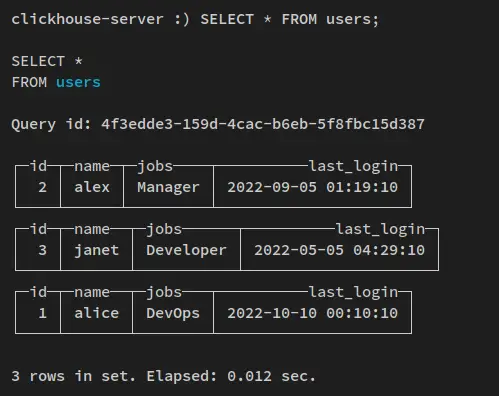
Run the following query to retrieve data from the table ‘users‘. You should see three new data fields that you just added.
SELECT * FROM users;
You have learned how to create the database, switch to the database, create the table, insert data, and retrieve data on the ClickHouse OLAP Database System. Next, you’ll learn to change data with the ‘ALTER‘ query.
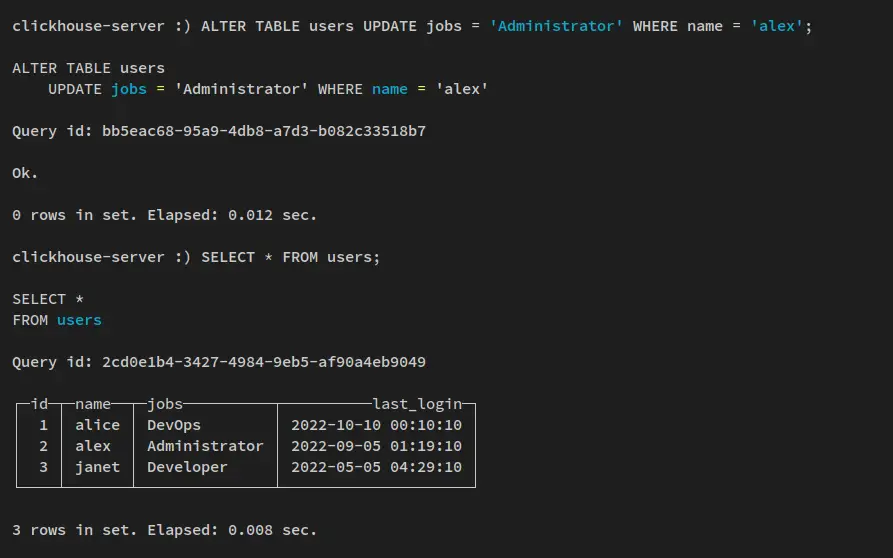
Run the following ‘ALTER TABLE’ query to update existing data on the table ‘users’. In this example, you’ll change the field ‘jobs’ for the user ‘alex‘ to ‘administrator‘.
ALTER TABLE users UPDATE jobs = 'Administrator' WHERE name = 'alex';
Verify the newly updated data on the table ‘users’ via the following query. You should now get the new data for the user ‘alex‘ updated to ‘Administrator‘.
SELECT * FROM users;
Now that you’ve learned the basic usage of ClickHouse query for creating and switching databases, creating tables, inserting data, and retrieving data. And also, you have learned how to use the ‘ALTER‘ query to change existing data on the ClickHouse database. You’ll next clean up your ClickHouse installation.
Clean-up Environment
With the new database and table created and random data inserted, in this last step, you’ll clean up the ClickHouse Database System installation by deleting the database and table that you just created.
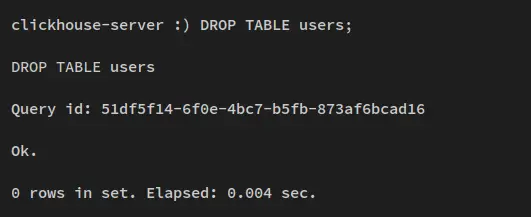
Run the following query, ‘DROP TABLE,’ to remove the users table from the testdb database.
DROP TABLE users;
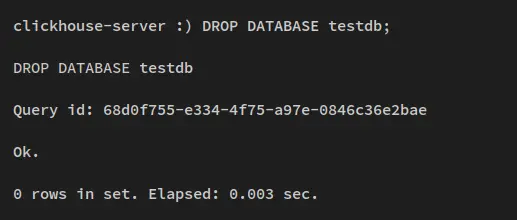
Now remove the database ‘testdb’ via the ‘DROP DATABASE‘ query below.
DROP DATABASE testdb;
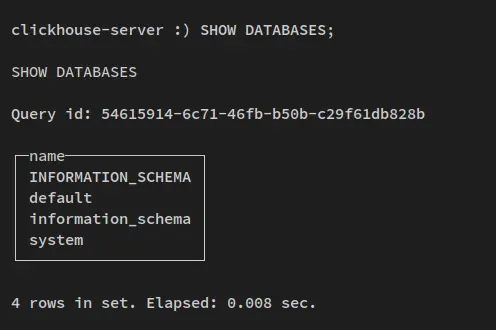
Lastly, verify the list of databases on the ClickHouse server via the following query. You should see that the database ‘testdb‘ is deleted from the ClickHouse server.
SHOW DATABASES;
Now your ClickHouse installation is cleaned with the admin user also configured.
Conclusion
Congratulations! You’ve finished the ClickHouse OLAP Database System installation and learned how to set up an administrator user on CLickHouse. And lastly, you’ve also learned the basic query for creating a database and table, inserting and retrieving data, changing existing data, and cleaning up the database and table.


