
Consul is a modern platform for service discovery that allows you to register services via DNS and HTTP interface. It also offers a Service mesh feature that enables secure connections via TLS and provides authorization between services.
Above that, the Consul also provides an API Gateway for managing access to services and a KV (Key/Value) store for storing service configuration.
In this tutorial, I will show you the installation of the Consul cluster on Ubuntu 22.04 servers.
Prerequisites
Before you begin, ensure that you have 3 Ubuntu 22.04 servers that can connect to each other via an internal network. Also, be sure that you have root privileges on each of your servers.
Now let’s get started.
Installing Consul
Consul is a free and open-source service discovery by Hoshicorp. It’s available on most Linux distributions, including Debian/Ubuntu, and RHEL/CentOS distributions.
In this section, you will install Consul to your Ubuntu system using the official Consul repository for Ubuntu.
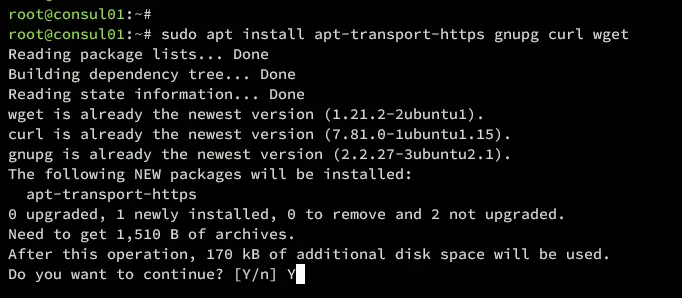
Before you start, run the command below to install some basic dependencies to your system. Type y to proceed with the installation.
sudo apt install apt-transport-https gnupg curl wget
Now run the command below to add the GPG key for the Consul repository.
wget -O- https://apt.releases.hashicorp.com/gpg | sudo gpg --dearmor -o /usr/share/keyrings/hashicorp-archive-keyring.gpg
Then add the Consul repository for Ubuntu using the command below.
echo "deb [signed-by=/usr/share/keyrings/hashicorp-archive-keyring.gpg] https://apt.releases.hashicorp.com $(lsb_release -cs) main" | sudo tee /etc/apt/sources.list.d/hashicorp.list
Next, update and refresh your Ubuntu package index with the following command.
sudo apt update
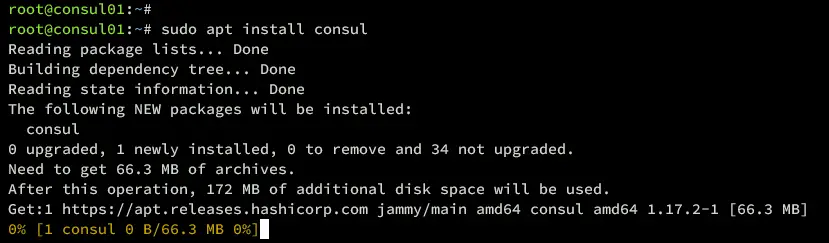
Once the repository is updated, install Consul using the following apt command. When prompted, input y to proceed and confirm the installation.
sudo apt install consul
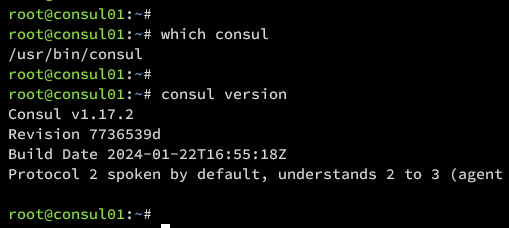
After installation is complete, run the command below to verify the Consul binary file and version.
which consul
consul version
You can see below Consul 1.17.2 is installed at /usr/bin/consul.
Setting Up UFW
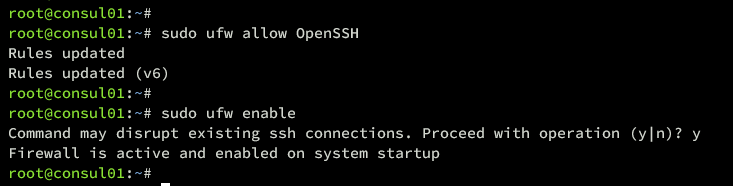
Before deploying the Consul cluster, you will open ports that will be used by the consul via UFW. Most Ubuntu systems come with pre-installed UFW packages, but they have not yet started.
To start UFW, run the ufw command below. With this, you will enable the OpenSSH profile that will open the default SSH port 22, then run and enable UFW.
sudo ufw allow OpenSSH
sudo ufw enable
Type y to confirm and you will see the confirmation like the following:
Next, you will need to open TCP ports 8300, 8301, 8302, 8400, 8500, and 8600 for Consul.
Run the command below to open those ports on all of your Ubuntu systems.
for i in 8300/tcp 8301/tcp 8302/tcp 8400/tcp 8500/tcp 8600/tcp
do sudo ufw allow $i
done
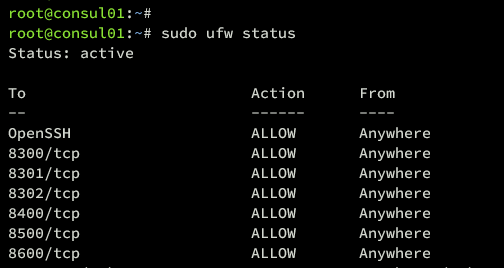
Lastly, run the command below to verify the UFW status on your Ubuntu servers. You will see UFW status active with open ports 8300, 8301, 8302, 8400, 8500, and 8600.
sudo ufw status
Creating Consul Cluster
After you have configured UFW, the next step is to create a Consul cluster. This can be done by creating a new HCL config file within the /etc/consul.d/ directory.
Before you begin, run the command below to stop the consul service. This will ensure that the Consul is stopped before start configuring it.
sudo systemctl stop consul
Now run the command below on the consul1 server to generate a random key for Consul. This key will be distributed to all Consul servers, so be sure to copy the generated key.
consul keygen
Now create a new Consul configuration /etc/consul.d/consul.hcl in all of your Consul servers. In this example, we will be using the nano editor command.
sudo nano /etc/consul.d/consul.hcl
Change the default Consul configuration and be sure to adjust some values like the following:
# Full configuration options can be found at https://www.consul.io/docs/agent/config# datacenter
datacenter = "my-dc-1"# data_dir
# This flag provides a data directory for the agent to store state.
data_dir = "https://www.howtoforge.com/opt/consul"# client_addr
# The address to which the Consul will bind client interfaces, including the HTTP and DNS
# servers.
client_addr = "0.0.0.0"# ui
# Enables the built-in web UI server and the required HTTP routes.
ui_config{
enabled = true
}# default domain
domain = "consul"# enable dns_config
dns_config{
enable_truncate = true
only_passing = true
}# server
# This flag is used to control if an agent is in server or client mode. When provided,
# an agent will act as a Consul server. Each Consul cluster must have at least one
# server and ideally no more than 5 per datacenter. All servers participate in the Raft
# consensus algorithm to ensure that transactions occur in a consistent, linearizable
# manner. Transactions modify cluster state, which is maintained on all server nodes to
# ensure availability in the case of node failure. Server nodes also participate in a
# WAN gossip pool with server nodes in other datacenters. Servers act as gateways to
# other datacenters and forward traffic as appropriate.
server = true# Advertise addr - if you want to point clients to a different address than bind or LB.
advertise_addr = "192.168.5.36"# bootstrap_expect
# This flag provides the number of expected servers in the datacenter.
bootstrap_expect=3# encrypt
# Specifies the secret key to use for encryption of Consul network traffic.
encrypt = "t/r8 jTHbMd9u/bD63i70e h4pLUSRprn2mXKTKJXEY="# retry_join
retry_join = ["192.168.5.36", "192.168.5.37", "192.168.5.38"]
When finished, save and exit the file.
Below are some Consul parameters that you may focus on each of your servers:
- server: True means the node will act as a Consul server.
- advertise_addr: Change this with the respective IP address of the Consul server.
- bootstrap_expect: How many servers is your cluster would be?
- encrypt: Every server must have the same key.
- retry_join: Input Consul cluster IP addresses to this parameter.
Now run the command below to verify and validate your Consul configuration. If you have proper Consul syntax, you will get an output such as “Configuration is valid!“.
sudo consul validate /etc/consul.d/
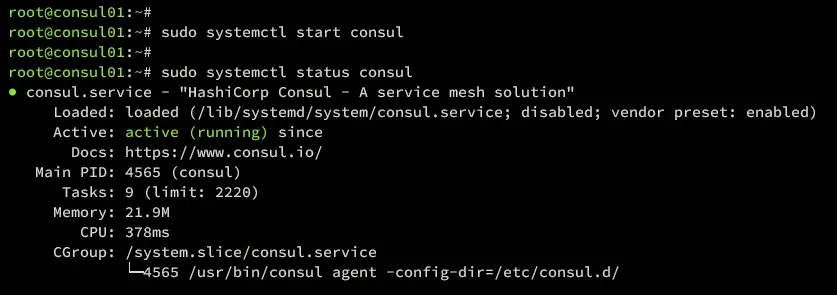
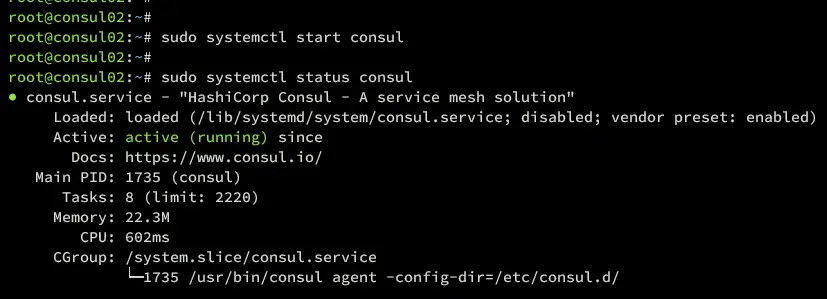
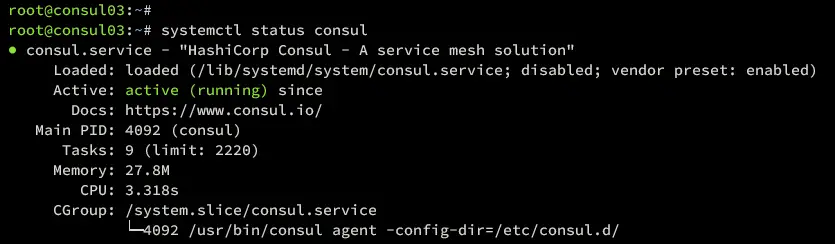
Next, run the command below to start Consul on each of your servers. Starting from consul01, consul02, then consul03.
sudo systemctl start consul
Lastly, you can run the following command to verify the Consul service and ensure the service is running on each of your servers.
sudo systemctl status consul
Below you can see Consul is running on consul01.
Below the Consul service is running on the consul02 server.
And below is the status from the consul03 server.
Interacting with Consul
At this point, you have finished the configuration of the Consul cluster with three Ubuntu servers. In this step, you will verify your Consul cluster by checking the list servers, creating a key-value database in Consul, and then verifying the domain name of the Consul servers.
Check the list of available servers on your Consul cluster using the command below.
consul members
If your Consul installation is successful, you should see three servers within your Consul cluster.
In addition to listing members, you can also run the following command to get the list of peers on the Consul cluster. This will show you the raft ID, state, voter, and protocol version.
consul operator raft list-peers
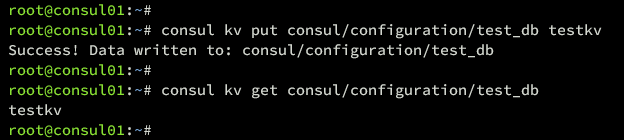
Next, verify your Consul cluster by creating a new key test_db and value testkv using the following command.
consul kv put consul/configuration/test_db testkv
Once the key-value database is created, run the consul command below to retrieve the test_db key. You will see the value testkv.
consul kv get consul/configuration/test_db
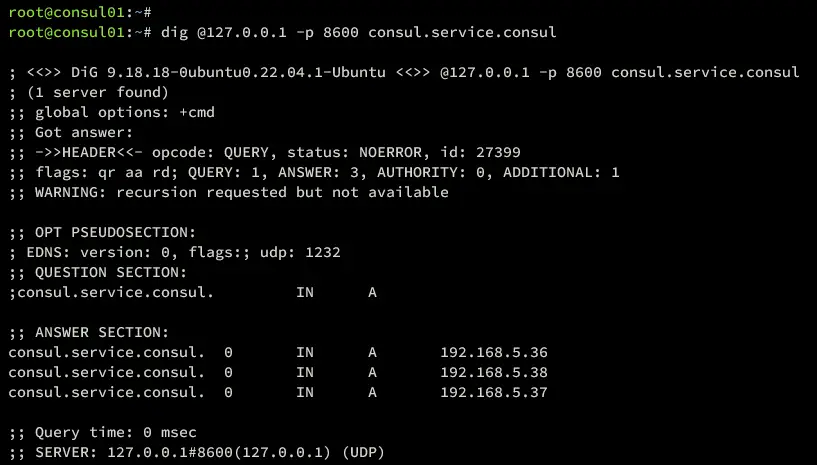
Lastly, check the Consul DNS using the dig command below. This will show you the default domain name for Consul consul.service.consul and point to the IP addresses of Consul clusters.
dig @127.0.0.1 -p 8600 consul.service.consul
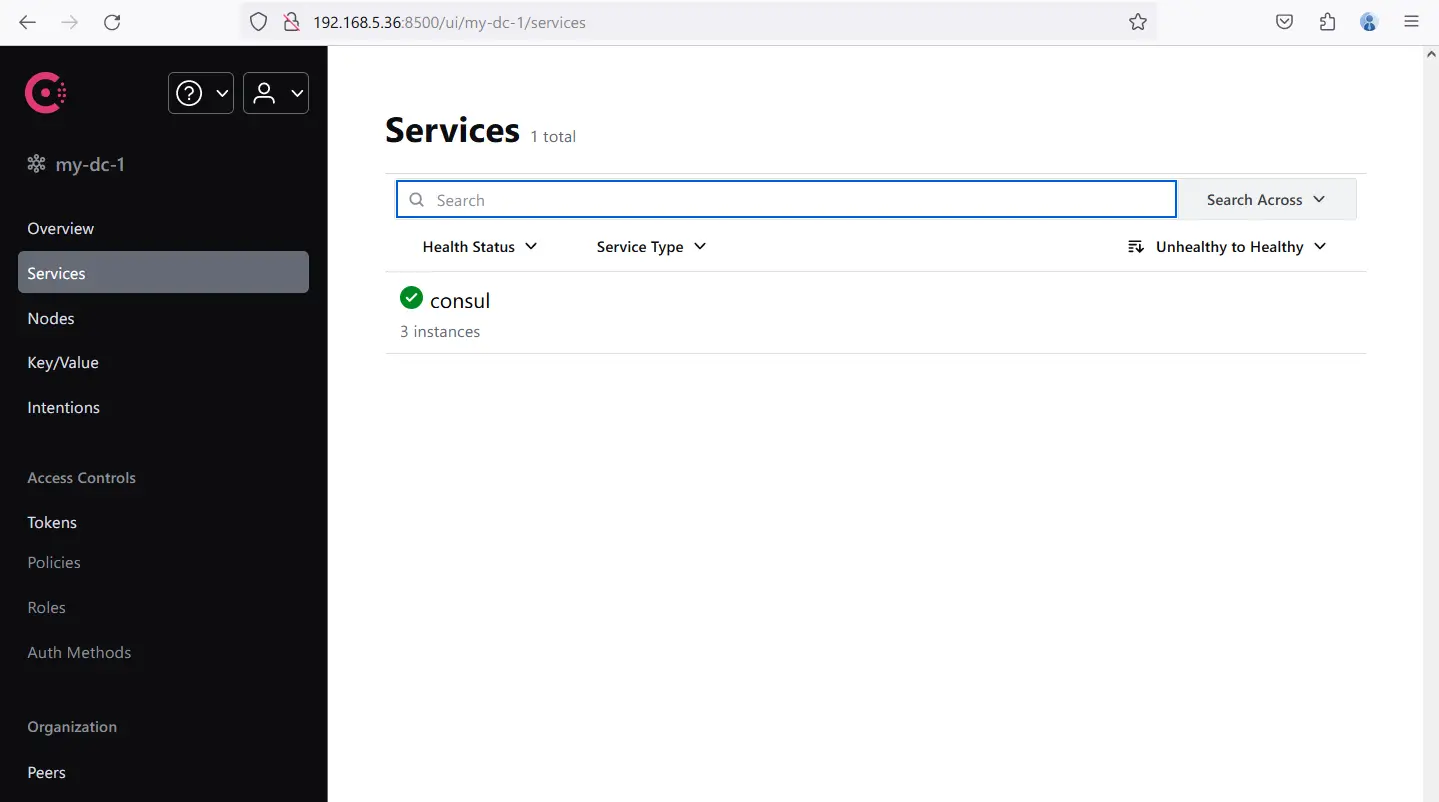
Accessing Consul Web UI
Consul also provides a web administration dashboard on a default installation, and it’s running on port 8500 with path /ui.
Launch your web browser and visit your server IP address like http://192.168.5.36:8500/ui/. Within the Consul dashboard, you can see the information of three Consul instances available.
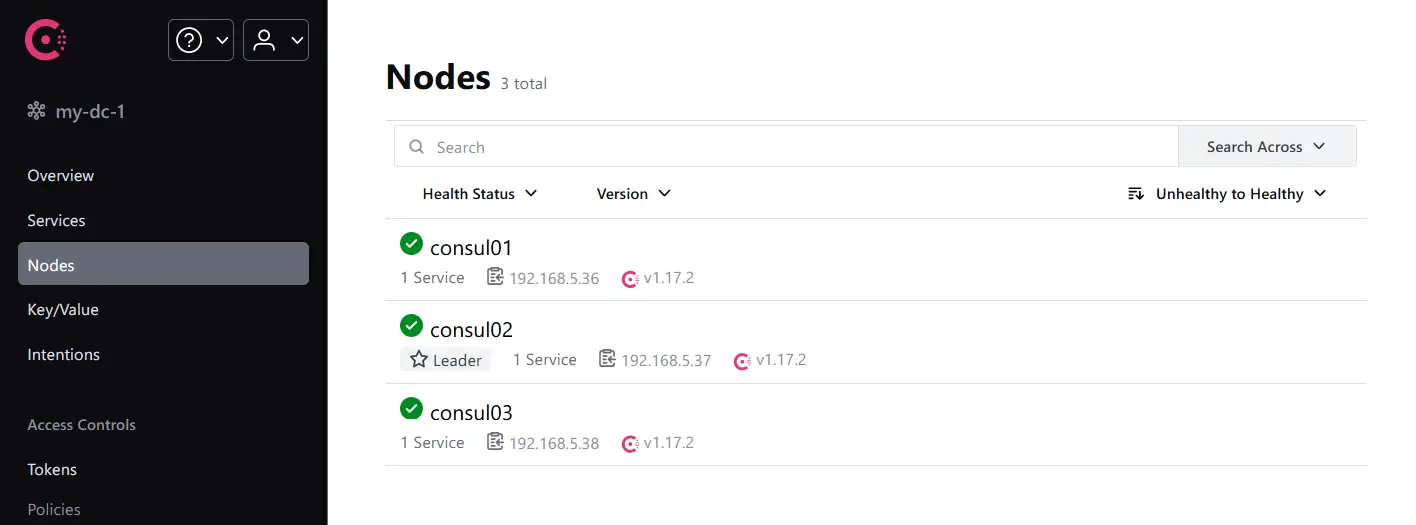
Next, click the Nodes menu which will show you detailed information about each node. Below you can see the Hearly status, server IP address, and Consul version of each server.
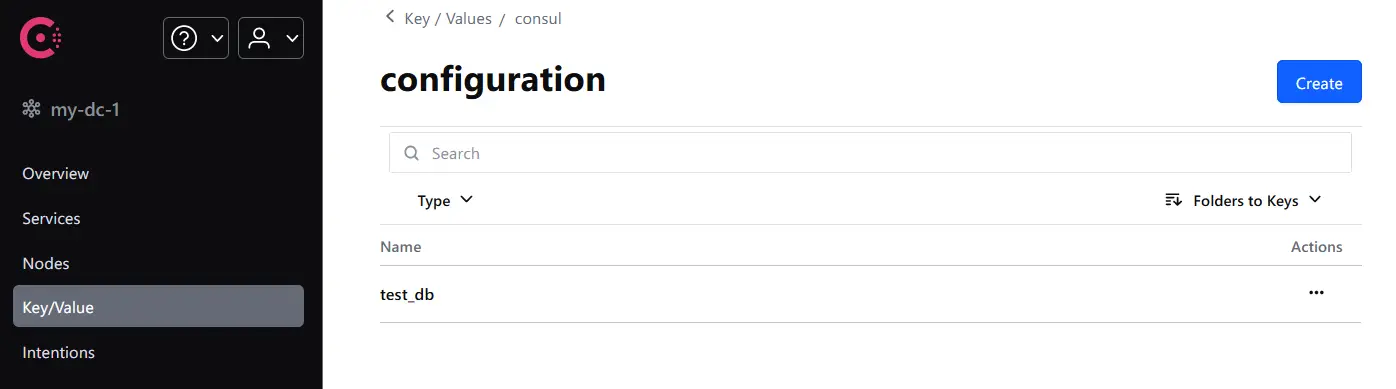
Lastly, click on the Key/Value menu to get the list of available key-value data in your Consul cluster. So below you can see the test_db that you have created before.
Conclusion
Congratulations! You have now successfully installed the Consul cluster using three servers of Ubuntu 22.04 machine. On top of that, you have also learned the basic consul commands for managing the Consul.


