
Docker is a set of open platforms that provides OS-level virtualization for developing, shipping, and running applications. In Docker, applications are delivered as packages standardized units called containers. Each container is isolated from one another, including libraries and configuration files, but each of them can communicate through well-defined network channels.
As for now, Docker has become a standard for software development and DevOps. It’s used by millions of developers to build, share, and run any applications every day at work. It’s used in the lifecycle of application development, from the development itself, testing, and production. With Docker, the application becomes more flexible and portable. Applications can be run anywhere in different operating systems with an easy way, but the application itself, remain the same from libraries to configuration files.
In this tutorial, you will learn how to install Docker on the Debian 11 Bullseye. Also, you will learn the basic usage of Docker for running containers and managing images.
Prerequisites
- A Debian 11 server. Ensure all packages are updated to the latest version.
- A root user or a user with root privileges. This user will be used for installing new packages and editing system configurations.
Install Dependencies
First, you will be installing some basic packages dependencies to your Debian system.
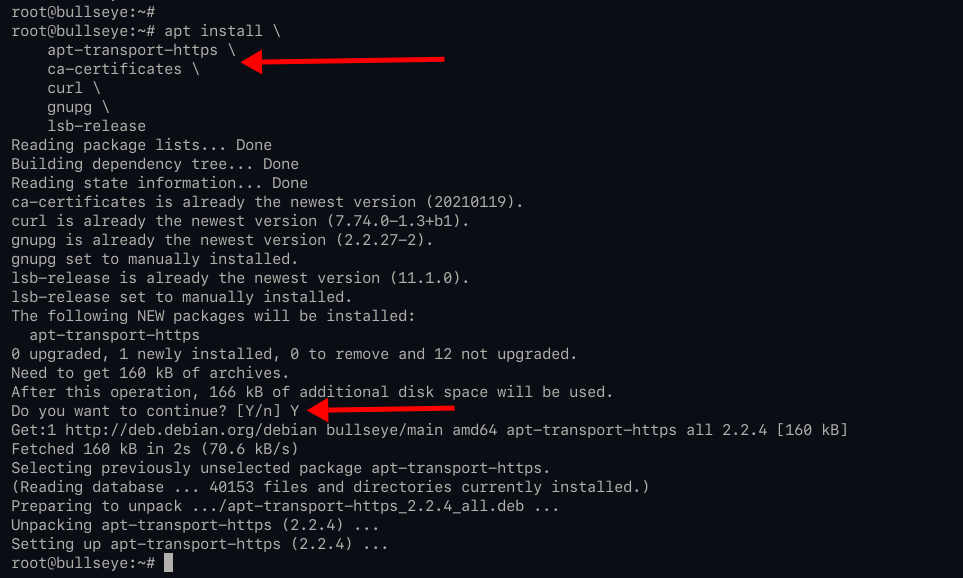
1. Execute the apt command below for installing new packages dependencies.
apt install
    apt-transport-https
    ca-certificates
    curl
    gnupg
    lsb-release
Type ‘y‘ and press ‘Enter‘ to install all of those packages.
Adding Docker Repository
For this guide, you will be installing Docker from the official Docker repository. So you will be adding a new Docker repository to your Debian system.
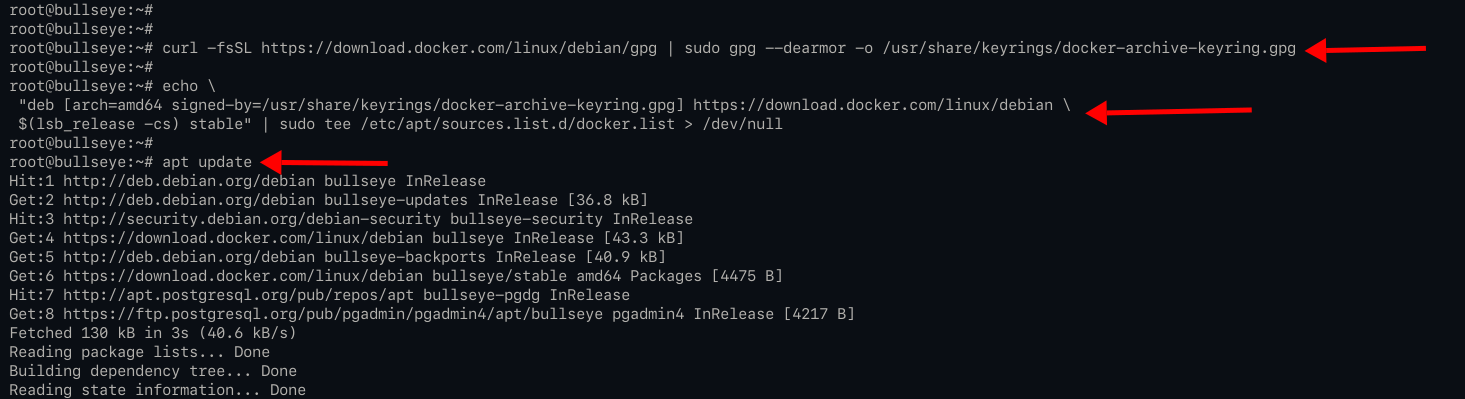
1. Execute the following command to add the GPG key for Docker.
curl -fsSL https://download.docker.com/linux/debian/gpg | sudo gpg --dearmor -o /usr/share/keyrings/docker-archive-keyring.gpg
2. After that, add the Docker repository for Debian 11 system using the command below.
echo
 "deb [arch=amd64 signed-by=/usr/share/keyrings/docker-archive-keyring.gpg] https://download.docker.com/linux/debian
 $(lsb_release -cs) stable" | sudo tee /etc/apt/sources.list.d/docker.list > /dev/null
3. Now run the ‘apt update‘ command to update/refresh all available repositories.
apt update
Now you’re ready to install Docker to Debian 11 Bullseye.
Installing Docker on Debian 11
1. If your system has Docker installed from the Debian repository before, you must remove it using the command below.
sudo apt remove docker docker-engine docker.io containerd runc
2. After that, you can install Docker again using the apt command below.
apt install docker-ce docker-ce-cli containerd.io
Type ‘y‘ and press ‘Enter‘ to confirm the installation.
3. If the installation is complete, execute the following command to verify the installation.
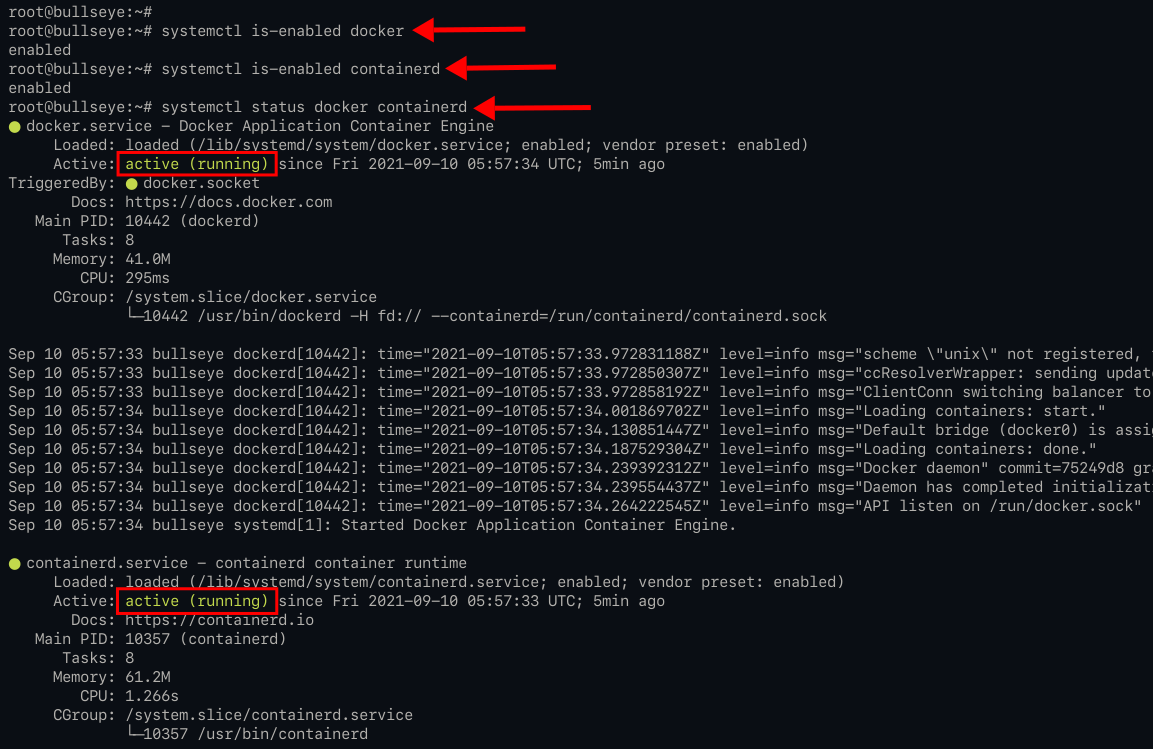
Check whether the service is enabled or not.
systemctl is-enabled docker
systemctl is-enabled containerd
Check Docker and Containerd service status.
systemctl status docker containerd
Below is the similar output you will get.
As seen, the Docker and Containerd services are active (running), and both services are enabled and will run automatically at system startup.
Allow Non-root user to Docker
By default, Docker allows only user ‘root‘ to run containers. And for a non-root user to be able to run containers, you must add your non-root user to the group ‘docker‘, which is automatically created during the Docker installation.
1. For this example, you will be using a user ‘johndoe‘ to run a Docker container.
Create the new user ‘johndoe’ on your Debian system using the following command.
useradd -m -s /bin/bash johndoe
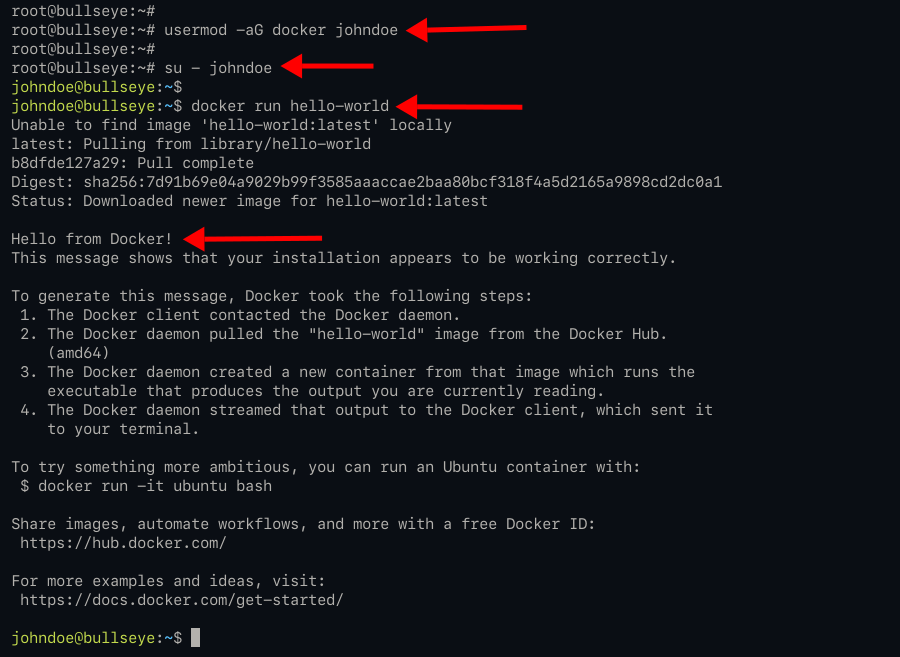
2. After that, execute the following command to add the user ‘johndoe‘ to the group ‘docker‘.
usermod -aG docker johndoe
3. Now log in as user ‘johndoe‘ using the command below and verify the configuration.
su - johndoe
Run the following docker command to verify your installation.
docker run hello-world
And you will see the ‘Hello Docker‘ message below.
Below is a simple explanation of the docker command you run on top.
- The docker will try to find an image name ‘hello-world’. If the image is available locally, the docker will run the container, if the image is not available locally, the Docker will find and download the image ‘hello-world’ on the Docker-hub (default docker image repository).
- If the docker image is downloaded, the docker will run the container. And the container executes commands and shows to you the ‘Hello Docker’ message.
4. Now check the docker container using the docker command below.
Checking container with state ‘running‘.
docker ps
Checking all containers – will display to you all containers, currently running and stopped containers.
docker ps -a
Below is a similar output as below.
As you can see, the new container name ‘bold_bartix‘ is created with the base image ‘hello-world‘, and the current status of the container is ‘Exited‘ or stopped. The container name ‘bold_bartix’ in the screenshot is randomly chosen by Docker, but you can specify the name of your container.
Docker Basic Usage
For this stage, you will learn very basic usage of Docker for managing images and containers.
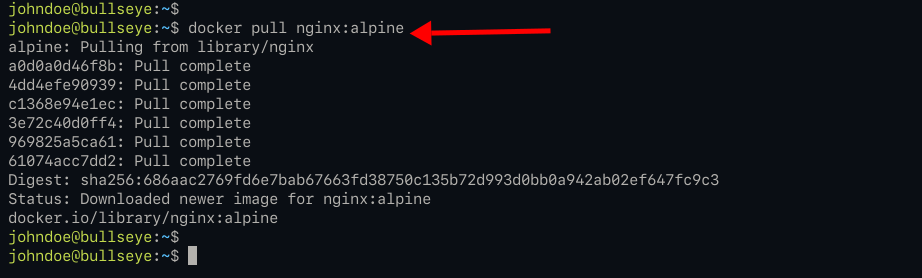
1. First, download the Docker images to your local computer using the following command.
docker pull nginx:alpine
The command will download the Docker image name ‘nginx‘ and tag ‘alpine‘ to your system.
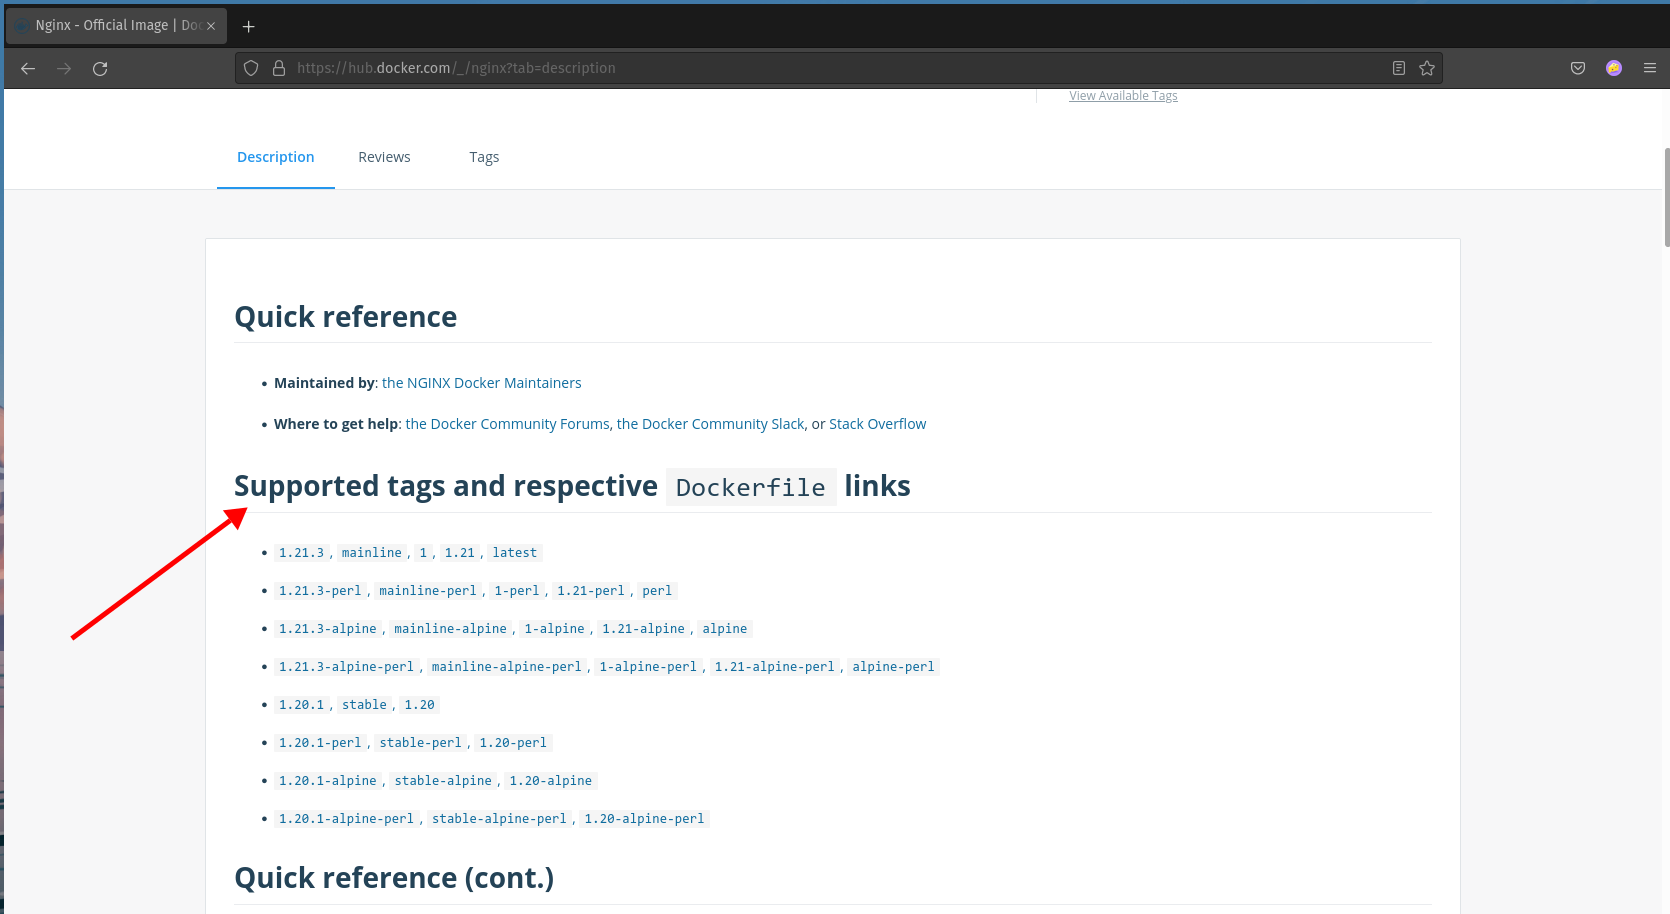
The term ‘tags‘ is like a version of the image itself. The ‘nginx:alpine‘ means the ‘nginx‘ image with tag ‘alpine‘, which means based on the Alpine Linux operating system. Always check all available tags of the Docker images at the official Docker-Hub repository.
Below is an example of all available tags for the Docker image ‘nginx‘.
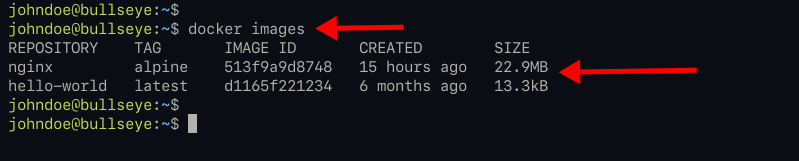
To check all available docker images on your local system, run the following docker command.
docker images
You will see a similar output as below.
As seen, you’ve two Docker images, the nginx:alpine and hello-world.
2. Next, execute the following command to run a container.
docker run -it --rm -d -p 8080:80 --name web nginx:alpine
Now you will get the random string and number of the new container.
Options you must know:
- -i or –interactive – keep the container STDIN open even if unattached.
- -t or –tty – allocates a pseudo-terminal that connects your terminal with the container’s STDIN and STDOUT.
- –rm – automatically remove the container when the container is exited or stopped.
- -d – running the container at the background, deattach the container after it’s running.
- -p 8080:80 – map the port between container and host system. The port ‘80‘ on the container is mapped to the host system port ‘8080‘.
- –name web – specify the new container name as ‘web‘.
- nginx:alpine – the Docker image we use is ‘nginx:alpine‘.
Now check the running container using the command below.
docker ps
You will see a similar result as below.
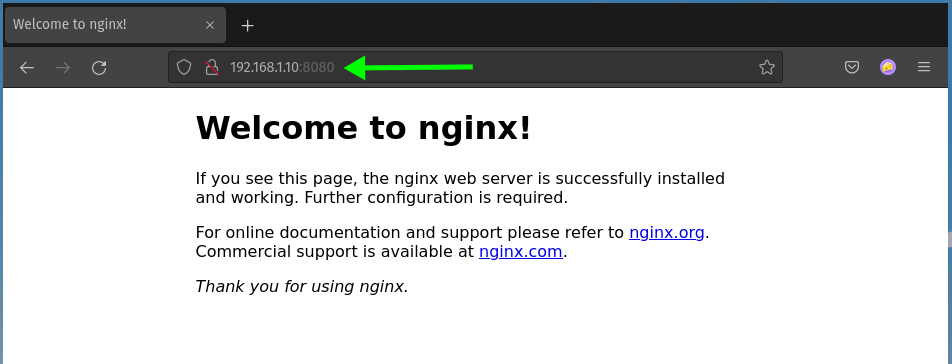
To verify your Nginx container, open your web browser and type your server IP address with port ‘8080‘.
http://192.168.1.10:8080/
And you will see the Nginx index page from the container ‘web ‘ as below.
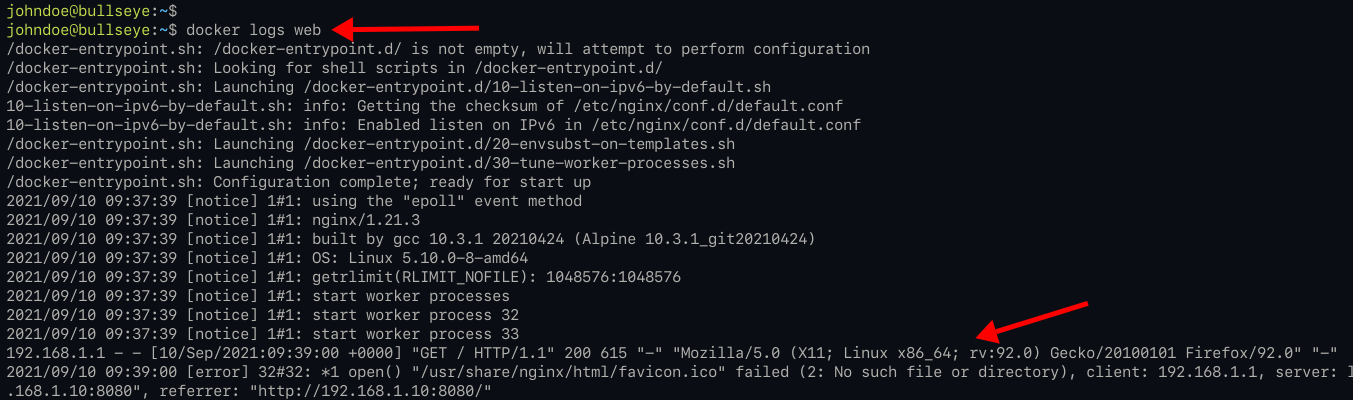
3. Next, you can check the log of the container by executing the following docker command.
docker logs web
And you will see all logs of your container, from start to end.
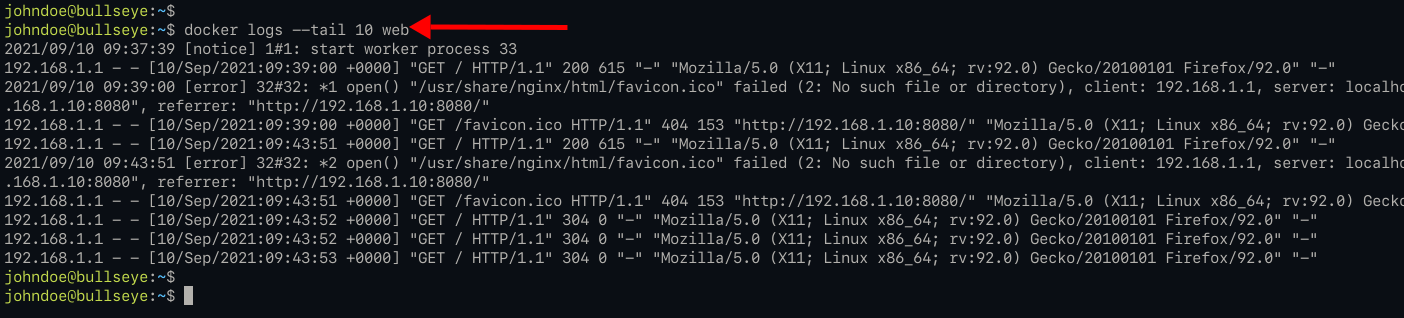
To limit the log output, you can use the ‘–tail n‘ option as below.
docker logs --tail 10 web
And you will see the last 10 lines of the container logs.
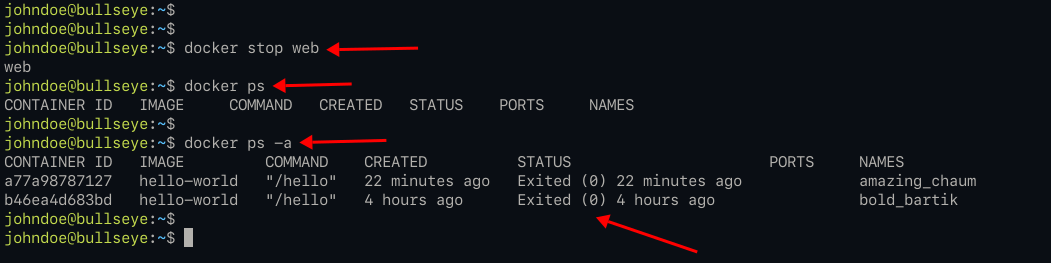
4. Now to stop the Docker container, you can the Docker command below.
docker stop web
After that, verify the running container using the following command.
docker ps
docker ps -a
You will see the following output as below.
The ‘web‘ container is stopped and it’s automatically deleted. It’s because you use the option ‘–rm‘ when running the container.
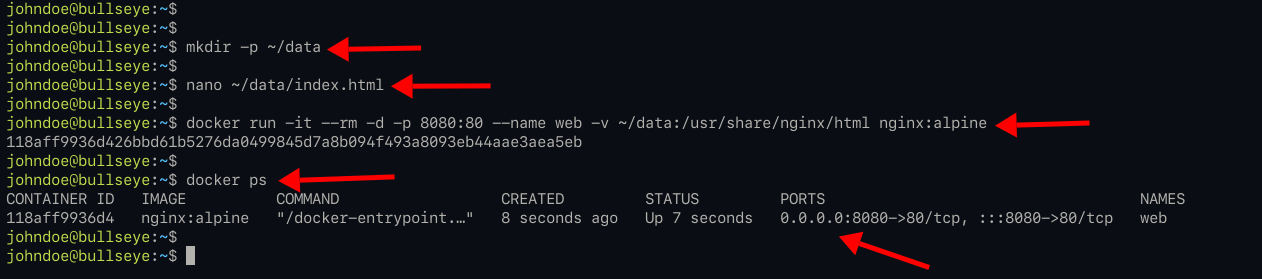
5. Next, you will learn to run the container with the custom volume. The directory on the host machine will be used as a volume for the Docker container.
Create the new ‘data‘ directory and custom ‘index.html‘ file using the following command.
mkdir -p ~/data/
nano ~/data/index.html
Copy and paste the custom ‘index.html‘ script as below.
  Welcome to Docker Nginx


  Hello from Nginx container
Save the configuration by pressing the ‘Ctrl x‘ button, type ‘y‘, then press ‘Enter‘.
Next, create the new container using the docker command below.
docker run -it --rm -d -p 8080:80 --name web -v ~/data:/usr/share/nginx/html nginx:alpine
Now you will get the random number and string of the container.
The option ‘-v ~/data:/usr/share/nginx/html‘ will mount the ‘~/data‘ on the local machine to the container at the ‘/usr/share/nginx/html‘ directory.
Now verify the Docker container using the following command.
docker ps
And you will see a similar output as below.
Next, open your web browser again and type the server IP address following with the port ‘8080‘ as below.
And you will get the custom ‘index.html’ that you just created on top, which means the ‘~/data‘ directory is mounted to the container ‘/usr/share/nginx/html‘ directory.
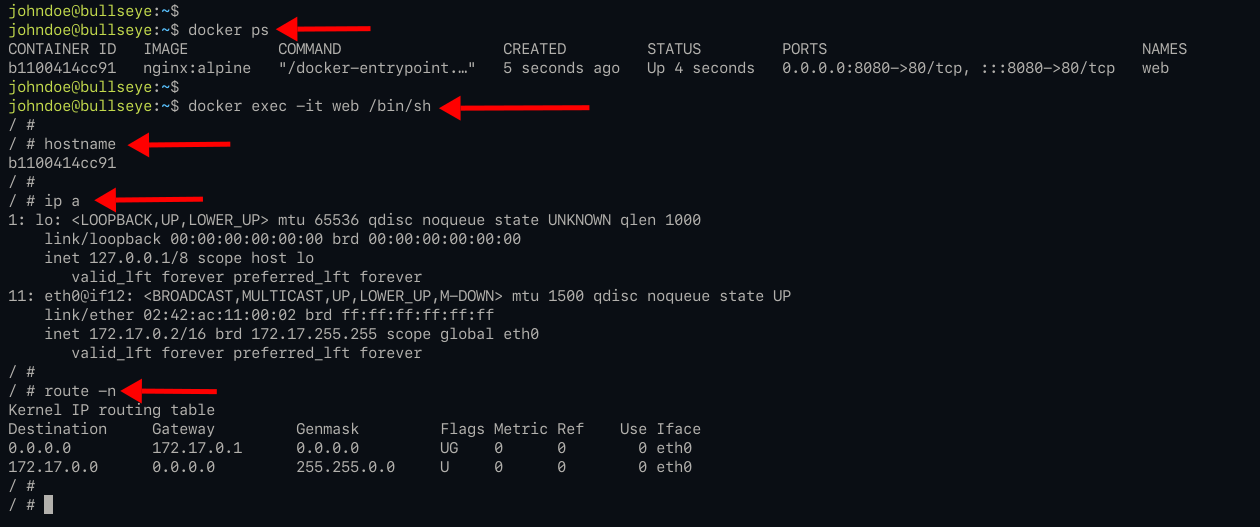
6. Additionally, you can log in to the running current running container ‘web‘ by executing the docker command below.
First, check the container ‘web‘ is running.
docker ps
Now attach to the container ‘web’ using the command below.
docker exec -it web /bin/sh
Inside the container, check the hostname of the container using the following command.
hostname
Check the IP address of the container using the ‘ip‘ command below.
ip a
Check the routing table of the container using the following command.
route -n
Below is the similar output you will get.
To clean up your current environment, stop the ‘web‘ container using the following command.
docker stop web
Also, you can remove all containers with the status ‘exited‘ using the command below.
docker rm $(docker ps --filter "status=exited" -q)
Conclusion
Congratulation! You have successfully installed Docker on Debian 11 Bullseye. Also, you’ve learned the basic usage of Docker for pulling an image from Docker-Hub, run the docker container, checking docker container status, logs, and basic usage of Docker volume. For the next step, you can try to create your custom Docker image for your application push it to the Docker Hub repository.


