
Fail2ban is a system daemon for protecting servers from malicious login and brute-force attacks. Fail2ban is an open-source IPS (Intrusion Prevention Software) framework written in Python and it’s extremely configurable. It works as a daemon service that will monitor SystemD journal and log files and then looking for any failed authentication attempts. When the failed authentication reaches the max X number, the fail2ban will automatically block the IP address using the firewall software.
If you’re a VPS (Virtual Private Server) or dedicated server owner, you should consider installing fail2ban on all of your servers. It will help you to protect some basic services such as SSH and FTP from malicious brute-force attacks. Also, fail2ban is very handy, easy to configure, and flexible.
In this guide, you will learn how to install fail2ban on Rocky Linux, configuring fail2ban with firewalld, and securing the SSH service against brute-force attacks.
Prerequisites
- A user with sudo root privileges.
Setting up Firewalld
Firewalld is the default firewall software on Rocky Linux. It’s automatically installed during your installation of Rocky Linux, but it’s not activated by default.
1. Run the following command to ensure the firewalld package are available on your system.
sudo dnf info firewalld
You will get similar output as below.
As seen on the screenshot, the firewalld package is listed as “Installed Packages“.
2. Next, start the firewalld service using the following command.
sudo systemctl start firewalld
3. Now enable the firewalld service to automatically run at every system boot.
sudo systemctl enable firewalld
And you will the following output.
Created symlink /etc/systemd/system/dbus-org.fedoraproject.FirewallD1.service → /usr/lib/systemd/system/firewalld.service.
Created symlink /etc/systemd/system/multi-user.target.wants/firewalld.service → /usr/lib/systemd/system/firewalld.service.
4. After that, check the firewalld service status using the command below.
sudo systemctl status firewalld
And you will get the following output.
As seen, the firewalld service is active and running.
5. Optionally, you can check the firewalld service status using the firewall-cmd command. The firewall-cmd is the main interface for interacting with firewalld. The firewall-cmd command is a utility for managing firewalld rules, it allows you to add rules, delete rules, checking status, etc.
Execute the firewall-cmd command below to check the firewalld service status.
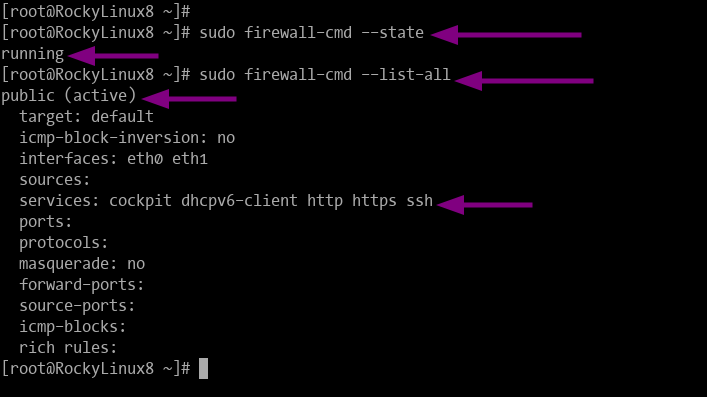
sudo firewall-cmd --state
If your firewalld is active, you will get the output as “running“. Otherwise, you will get the output as “not running“.
Now execute the following firewall-cmd command for checking all firewalld rules curently being applied.
sudo firewall-cmd --list-all
You will get a similar output as below.
Adding EPEL Repository to Rocky Linux
Before installing the fail2ban, you must add the EPEL (Extra Packages for Enterprise Linux) repository to your system.
1. Now execute the following command to install the EPEL repository.
sudo dnf install epel-release
Type “y” to install and continue.
2. When the installation is completed, check all available repositories on your system using the following command.
sudo dnf repolist
Now you will see the output as below.
As seen, the EPEL repository is available and active on the system. Now, let’s continue to the fail2ban installation.
Installing Fail2ban on Rocky Linux
1. To install fail2ban, execute the command below.
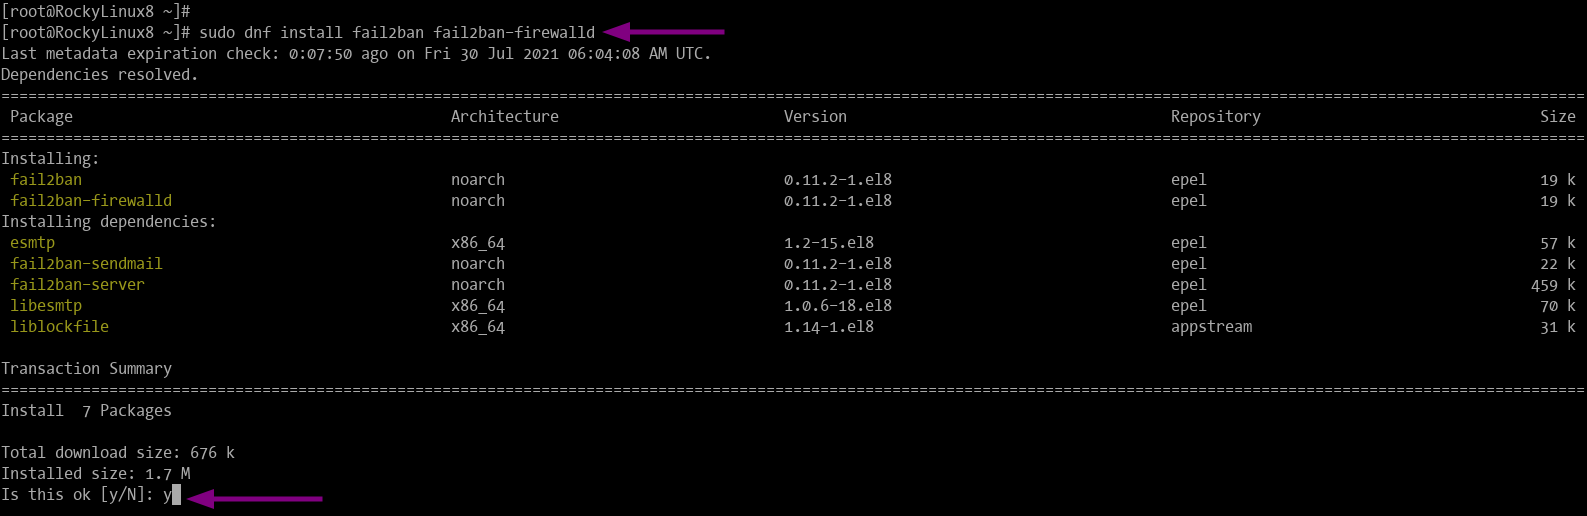
sudo dnf install fail2ban fail2ban-firewalld
Type “y” to confirm the installation and press “Enter” to continue.
As on the command line, you’re also installing the additional package “fail2ban-firewalld”. It will enable fail2ban to manipulate firewalld rules.
2. When the installation is complete, start the fail2ban service using the command below.
sudo systemctl start fail2ban
3. After that, run the following command to enable the fail2ban service to start automatically at every system boot.
sudo systemctl enable fail2ban
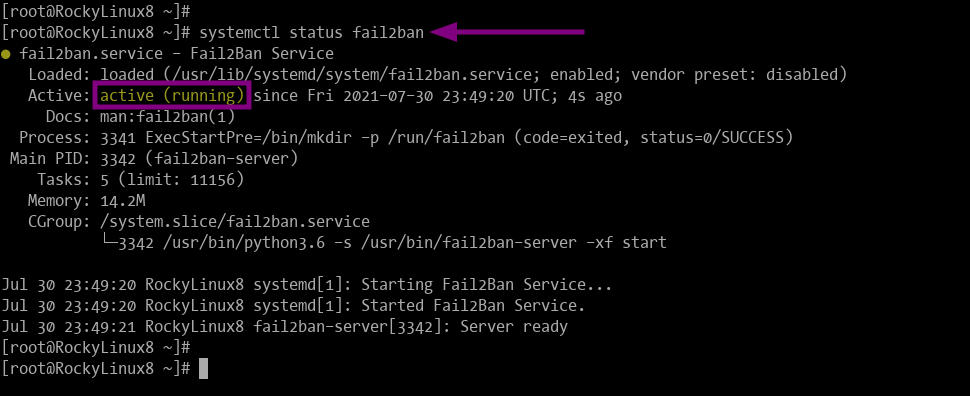
4. Now, check fail2ban status services by running the following command.
sudo systemctl status fail2ban
And you will get the fail2ban service is active and running with the default configuration as below.
Configuring Fail2ban
Now you will be configuring fail2ban and enable fail2ban to work with the firewalld.
1. Copy default fail2ban configuration from “jail.conf” to “jail.local” using the following command.
sudo cp /etc/fail2ban/jail.conf /etc/fail2ban/jail.local
2. Next, edit the fail2ban configuration using the nano editor command below.
sudo nano /etc/fail2ban/jail.local
Under the “[DEFAULT]” section, check configurations below.
[DEFAULT]
....
bantime = 1h
findtime = 1h
maxretry = 5
Options you must know.
- [DEFAULT] = All configurations under this section will apply as a global default configuration.
- bantime = Number of times x IP address will be ban. It supports format as a day, a minute, or hours. For this example, the host or IP address will be ban for “1 hour” after max authentication failed attempts.
- findtime = The IP address will be ban if it has max authentication failed during the last “findtime”.
- maxretry = When the IP address has the X number of maxrtry login failure, then the IP will be ban. For this example, the IP address will be ban after 5 authentications failed attempts.
Adjust the bantime, findtime, and maxrety as your need, then press “Ctrl x” and type “y”, then press “Enter” to save the configuration.
3. The default fail2ban configuration is using the iptables for blocking. To enable fail2ban to use firewalld for blocking, copy the configuration “00-firewalld.conf” to “00-firewalld.local” using the command below.
sudo mv /etc/fail2ban/jail.d/00-firewalld.conf /etc/fail2ban/jail.d/00-firewalld.local
This configuration “00-firewalld.conf” is part of the “fail2ban-firewalld” package.
4. Now restart the fail2ban service to apply new configurations using the command below.
sudo systemctl restart fail2ban
Protecting SSH Service with Fail2ban
By default, the fail2ban is not blocking any IP address, until you enable the jail configuration for every service you want to protect. Also, the jail configuration will override the default configuration on “jail.local”. The jail configuration will be available at the “https://www.howtoforge.com/etc/fail2ban/jail.d” directory.
1. Create a new jail configuration for service SSH using the following command.
sudo nano /etc/fail2ban/jail.d/sshd.local
Now paste the following configuration.
[sshd]
enabled = true# Override the default global configuration
# for specific jail sshd
bantime = 1d
maxretry = 3
As seen, the configuration overrides the “bantime” and “maxretry” options for the jail “sshd“.
Press “Ctrl x” and type “Y” then press “Enter” to save the new jail configuration.
2. To apply the new configuration, restart the fail2ban service using the following command.
sudo systemctl restart fail2ban
3. After that, check the fail2ban status using the command fail2ban-client. The fail2ban-client is a command line for managing the fail2ban control server.
Now execute the fail2ban-client command below to verify the jail configuration.
sudo fail2ban-client status
And you will get a similar output as below.
The fail2ban is running with 1 jail active name “sshd“.
To check the configuration of specific jail, you can use the “get” option following by the jail name, then the options you want to check.
Check the “maxretry” configuration for jail “sshd” using the command below.
sudo fail2ban-client get sshd maxretry
And you will see the output is “3“, match the value on the configuration “sshd.local”.
Next, check the default ban action for jail “sshd” using the command below.
sudo fail2ban-client get sshd actions
And you will see the output is “firewallcmd-rich-rules“, match the fail2ban global configuration at the “00-firewalld.local”.
Verify the Fail2ban and Firewalld Installation
To verify the fail2ban installation, check the full status of the jail (for this guide is sshd jail), and checking the firewalld rules generated by fail2ban.
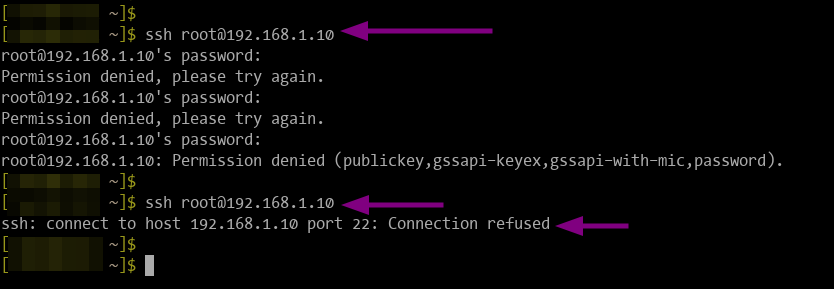
For the testing purpose, below is the screenshot after trying to connect to an SSH server with an incorrect password. After reaching the maxretry “3” times, the connection is dropped by the server.
1. Execute the following command to check the status of specific jail (this example sshd jail).
sudo fail2ban-client status sshd
And you will get similar output like the following.
As seen, the sshd jail has 1 baned IP address. If you’re on a live VPS or dedicated server, you will see much more IP addresses.
2. The fail2ban will generate firewalld rich-rules to block IP addresses. The firewalld rich-rules is an advanced filtering capability on firewalld.
Execute the following command to show the firewalld rich-rules generated by fail2ban.
firewall-cmd --list-rich-rules
And you will get similar output as below.
Uban IP Address on Fail2ban
To unban IP address from fail2ban, you can use the fail2ban-client command.
1. Execute the fail2ban-client command below to unban the IP address “192.168.1.10“.
sudo fail2ban-client unban 192.168.1.10
And the IP address will be removed from the banned list on fail2ban.
Next, run the following command to ensure the IP address is removed from the fail2ban database (for this example the jail sshd).
sudo fail2ban-client status sshd
And you will get the IP address is removed from the “Banned IP List” section.
Conclusion
Congratulation! you’ve successfully installed the fail2ban IPS framework on Rocky Linux 8.4. And for the next step, you can look into another jail configuration to secure other services such as FTP server, phpMyAdmin, WordPress, etc.


