
Jupyter Notebook is a free, open-source, and web-based interactive computing platform that allows users to edit and run documents via a web browser. It is based on Python and allows you to create and share documents that contain live code, equations, and visualizations over the web. Its aim is to develop open-source software, open standards, and services for interactive computing across multiple programming languages.
In this tutorial, I will show you how to install the Jupyter Notebook software on Ubuntu 22.04.
Prerequisites
- A server running Ubuntu 22.04.
- A valid domain name is pointed with your server IP.
- A root password is configured on the server.
Getting Started
First, it is recommended to update and upgrade all your software packages to the latest version. You can update all of them by running the following command:
apt update -y
apt upgrade -y
Once all the packages are updated, you can proceed to the next step:
Install Python
First, you will need to install Python and other dependencies on your server. You can install all of them by running the following command:
apt-get install python3 python3-pip -y
Once all the packages are installed, you can verify the Python version with the following command:
python3 --version
You should see the following output:
Python 3.10.6
Next, update PIP to the latest version with the following command:
pip3 install --upgrade pip
Next, verify the PIP version using the following command:
pip3 --version
You should see the following output:
pip 22.2.2 from /usr/local/lib/python3.10/dist-packages/pip (python 3.10)
Next, install the Python virtual environment package with the following command:
pip3 install virtualenv
Once you are done, you can proceed to the next step.
Install Jupyter Notebook
First, create a directory to store your Notebook with the following command:
mkdir ~/project
Next, navigate to the project directory and create a Python virtual environment with the following command:
cd ~/project
virtualenv notebookenv
Next, activate the virtual environment using the following command:
source notebookenv/bin/activate
Next, install the Jupyter Notebook with the following command:
pip install jupyter
Once the Jupyter Notebook is installed, run the Jupyter Notebook with the following command:
jupyter notebook --allow-root
If everything is fine, you will get the following output:
[I 14:23:26.729 NotebookApp] Serving notebooks from local directory: /root/project
[I 14:23:26.729 NotebookApp] Jupyter Notebook 6.4.12 is running at:
[I 14:23:26.729 NotebookApp] http://localhost:8888/?token=5dbdfdbf2e2dc72ccdaaa7361db8c55877ecfbc45676e625
[I 14:23:26.729 NotebookApp]  or http://127.0.0.1:8888/?token=5dbdfdbf2e2dc72ccdaaa7361db8c55877ecfbc45676e625
[I 14:23:26.730 NotebookApp] Use Control-C to stop this server and shut down all kernels (twice to skip confirmation).
[W 14:23:26.734 NotebookApp] No web browser found: could not locate runnable browser.
[C 14:23:26.734 NotebookApp]

    To access the notebook, open this file in a browser:
        file:///root/.local/share/jupyter/runtime/nbserver-3214-open.html
    Or copy and paste one of these URLs:
        http://localhost:8888/?token=5dbdfdbf2e2dc72ccdaaa7361db8c55877ecfbc45676e625
     or http://127.0.0.1:8888/?token=5dbdfdbf2e2dc72ccdaaa7361db8c55877ecfbc45676e625
Press the CTRL C to stop the Jupyter Notebook.
Once you are done, you can proceed to the next step.
Generate Jupyter Notebook Password
It is recommended to secure the Jupyter Notebook with password. First, generate a Jupyter Notebook configuration file with the following command:
jupyter notebook --generate-config
You should see the following output:
Writing default config to: /root/.jupyter/jupyter_notebook_config.py
Next, set the Jupyter Notebook password with the following command:
jupyter notebook password
Set a password as shown below:
Enter password:
Verify password:
[NotebookPasswordApp] Wrote hashed password to /root/.jupyter/jupyter_notebook_config.json
Next, deactivate from the Python virtual environment with the following command:
deactivate
Once you are done, you can proceed to the next step.
Create a Systemd Service File for Jupyter Notebook
Next, you will need to create a systemd service file to manage the Jupyter Notebook. You can create it with the following command:
nano /etc/systemd/system/jupyter.service
Add the following codes:
[Unit]
Description=Jupyter Notebook

[Service]
Type=simple
PIDFile=/run/jupyter.pid
ExecStart=/root/project/notebookenv/bin/jupyter-notebook --config=/root/.jupyter/jupyter_notebook_config.py --allow-root
User=root
Group=root
WorkingDirectory=/root/project/notebookenv
Restart=always
RestartSec=10

[Install]
WantedBy=multi-user.target
Save and close the file, then reload the systemd daemon with the following command:
systemctl daemon-reload
Next, start the Jupyter Notebook and enable it to start at system reboot with the following command:
systemctl start jupyter
systemctl enable jupyter
To verify the status of the Jupyter Notebook, run the following command:
systemctl status jupyter
You should see the following output:
? jupyter.service - Jupyter Notebook
     Loaded: loaded (/etc/systemd/system/jupyter.service; disabled; vendor preset: enabled)
     Active: active (running) since Tue 2022-10-11 14:27:01 UTC; 4s ago
   Main PID: 3649 (jupyter-noteboo)
      Tasks: 1 (limit: 2242)
     Memory: 53.4M
        CPU: 980ms
     CGroup: /system.slice/jupyter.service
             ??3649 /root/project/notebookenv/bin/python /root/project/notebookenv/bin/jupyter-notebook --config=/root/.jupyter/jupyter_noteb>

Oct 11 14:27:01 ubuntu2204 systemd[1]: Started Jupyter Notebook.
Oct 11 14:27:02 ubuntu2204 jupyter-notebook[3649]: [I 14:27:02.288 NotebookApp] Serving notebooks from local directory: /root/project/noteboo>
Oct 11 14:27:02 ubuntu2204 jupyter-notebook[3649]: [I 14:27:02.289 NotebookApp] Jupyter Notebook 6.4.12 is running at:
Oct 11 14:27:02 ubuntu2204 jupyter-notebook[3649]: [I 14:27:02.289 NotebookApp] http://localhost:8888/
Oct 11 14:27:02 ubuntu2204 jupyter-notebook[3649]: [I 14:27:02.290 NotebookApp] Use Control-C to stop this server and shut down all kernels (>
Oct 11 14:27:02 ubuntu2204 jupyter-notebook[3649]: [W 14:27:02.293 NotebookApp] No web browser found: could not locate runnable browser.
Once you are done, you can proceed to the next step.
Configure Nginx as a Reverse Proxy for Jupyter Notebook
At this point, Jupyter Notebook is started and running on port 8888. Now, you will need to configure the Nginx as a reverse proxy to access the Jupyter Notebook via port 80.
First, install the Nginx web server package with the following command:
apt-get install nginx -y
Once the Nginx is installed, create an Nginx virtual host configuration file with the following command:
nano /etc/nginx/conf.d/jupyter.conf
Add the following configurations:
upstream notebook {
server 127.0.0.1:8888;
}

server {
listen 80;
server_name jupyter.example.com;

access_log /var/log/nginx/example.com.access.log;
error_log /var/log/nginx/example.com.error.log;

location / {
     proxy_pass http://localhost:8888;
     proxy_set_header X-Forwarded-For $proxy_add_x_forwarded_for;
     proxy_set_header X-Real-IP $remote_addr;
     proxy_set_header Host $http_host;
     proxy_http_version 1.1;
     proxy_redirect off;
     proxy_buffering off;
     proxy_set_header Upgrade $http_upgrade;
     proxy_set_header Connection "upgrade";
     proxy_read_timeout 86400;
     }
}
Save and close the file, then verify the Nginx for any syntax error using the following command:
nginx -t
You should see the following output:
nginx: the configuration file /etc/nginx/nginx.conf syntax is ok
nginx: configuration file /etc/nginx/nginx.conf test is successful
Next, restart the Nginx service to apply the changes:
systemctl restart nginx
You can also check the Nginx status with the following command:
systemctl status nginx
You will get the following output:
? nginx.service - A high performance web server and a reverse proxy server
     Loaded: loaded (/lib/systemd/system/nginx.service; enabled; vendor preset: enabled)
     Active: active (running) since Tue 2022-10-11 14:28:53 UTC; 54s ago
       Docs: man:nginx(8)
    Process: 4193 ExecStartPre=/usr/sbin/nginx -t -q -g daemon on; master_process on; (code=exited, status=0/SUCCESS)
    Process: 4194 ExecStart=/usr/sbin/nginx -g daemon on; master_process on; (code=exited, status=0/SUCCESS)
   Main PID: 4195 (nginx)
      Tasks: 2 (limit: 2242)
     Memory: 2.6M
        CPU: 40ms
     CGroup: /system.slice/nginx.service
             ??4195 "nginx: master process /usr/sbin/nginx -g daemon on; master_process on;"
             ??4196 "nginx: worker process" "" "" "" "" "" "" "" "" "" "" "" "" "" "" "" "" "" "" "" "" "" "" "" "" "" "" ""

Oct 11 14:28:53 ubuntu2204 systemd[1]: Starting A high performance web server and a reverse proxy server...
Oct 11 14:28:53 ubuntu2204 systemd[1]: Started A high performance web server and a reverse proxy server.
Next, add the root user to the www-data group using the following command:
usermod -g www-data root
Next, edit the Jupyter Notebook configuration file and enable remote access:
nano /root/.jupyter/jupyter_notebook_config.py
Change the following line:
c.NotebookApp.allow_remote_access = True
Save and close the file, then restart the Jupyter Notebook service to apply the changes:
systemctl restart jupyter
Once you are done, you can proceed to the next step.
Access Jupyter Notebook
Now, open your web browser and access the Jupyter Notebook using the URL http://jupyter.example.com. You will be asked to provide your Jupyter Notebook password on the following screen:
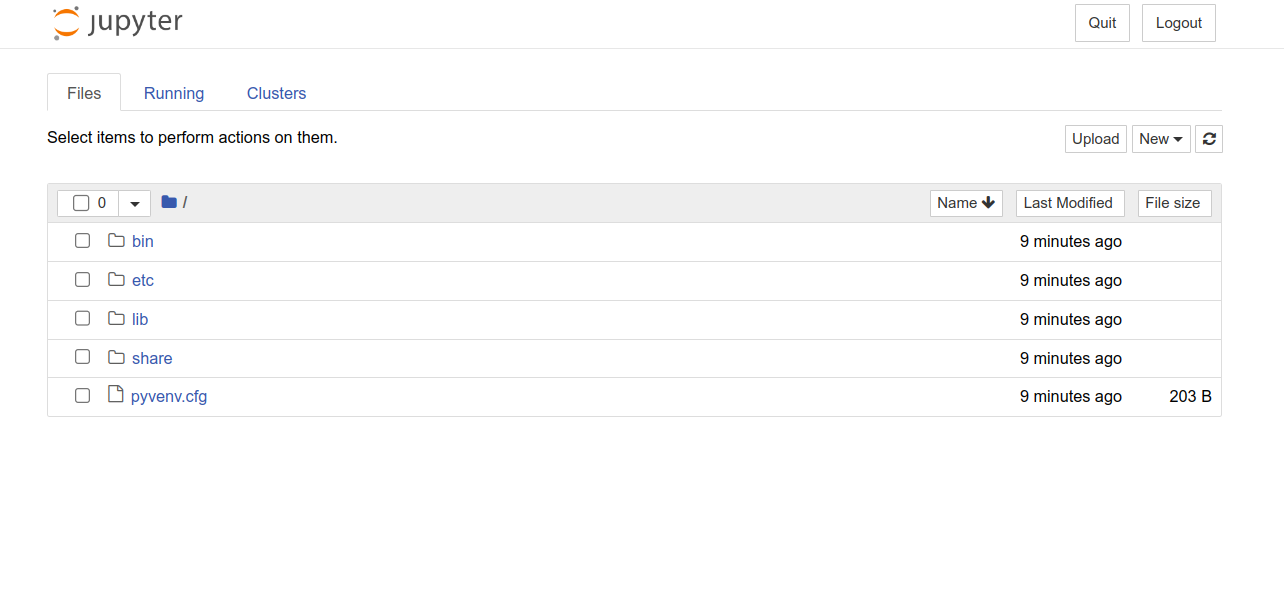
Provide your password and click on the Login button. You should see the Jupyter Notebook dashboard on the following screen:
Conclusion
Congratulations! you have successfully installed Jupyter Notebook with Nginx as a reverse proxy on Ubuntu 22.04. You can now create, share and run your Notebook over the internet. Feel free to ask me if you have any questions.


