
PostgreSQL is a free and open-source database management system focusing on extensibility and SQL compliance. PostgreSQL is an advanced and enterprise-class RDBMS (Relational Database Management System) that supports both SQL (relational) and JSON (non-relational) querying.
It’s a highly stable database management system backed by more than 20 years of development by the open-source community and has a strong reputation among developers and system admins for its reliability, flexibility, feature robustness, and performance.
PostgreSQL is used as a primary database for web applications, mobile applications, and analytic applications. Some notable PostgreSQL users around the globe are Reddit, Skype, Instagram, Disqus, The Guardian, Yandex, Bloomberg, Nokia, BMW, etc.
This tutorial will guide you through installing the latest PostgreSQL 15 on a Rocky Linux 9 server. This also guides you through the basic usage of PostgreSQL for creating users/roles, managing databases, creating tables, insert and retrieving data.
Prerequisites
You will need the following requirements to complete this guide:
- A Rocky Linux 9 server – This example will be using the Rocky Linux with hostname ‘postgresql-rocky‘.
- A non-root user with sudo/root administrator privileges.
- An SELinux running with permissive mode.
Let’s jump to the PostgreSQL 15 installation.
Setting up Repository
At the time of this wiring, the PostgreSQL 15 is not available on the Rocky Linux repository. So, to install PostgreSQL 15, you must use the official PostgreSQL repository.
The first step will be installing and adding PostgreSQL repositories to your Rocky Linux 9 server.
Run the below command to add the official PostgreSQL repository to your system. This repository can be used for multiple RHEL-based distribution versions 9.
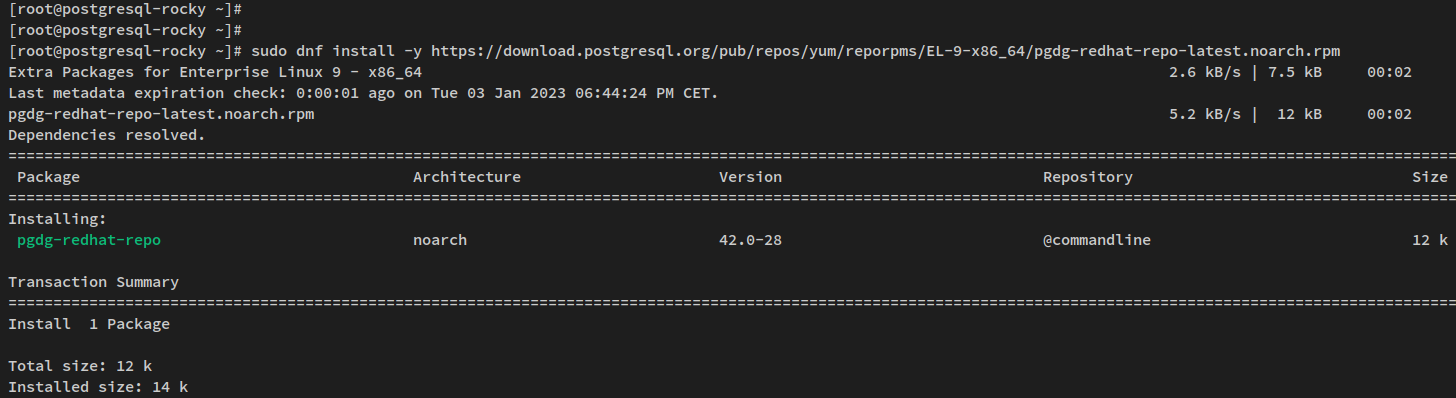
sudo dnf install -y https://download.postgresql.org/pub/repos/yum/reporpms/EL-9-x86_64/pgdg-redhat-repo-latest.noarch.rpm
During the process, you will receive the following output:
Now verify the list of available repositories via the dnf command below.
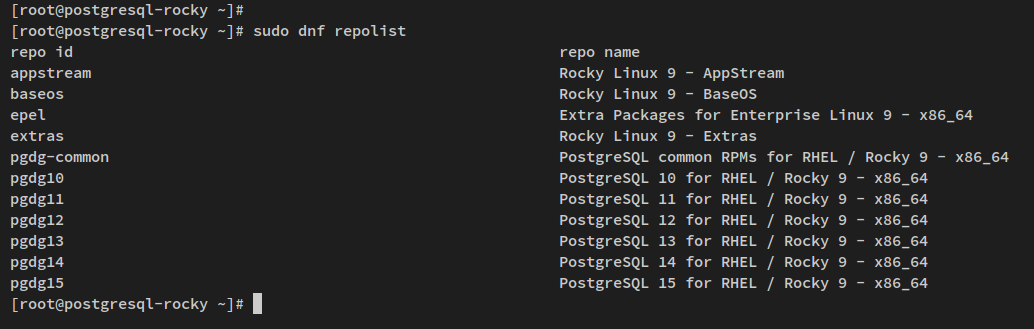
sudo dnf repolist
You’ll receive an output similar to this screenshot – You’ve added multiple versions of PostgreSQL repositories to your Rocky Linux, including the latest version of PostgreSQL 15.
With the PostgreSQL repository added, you’ll go over how to install and configure PostgreSQL 15 in the next step.
Installing PostgreSQL 15
In this step, you’ll install PostgreSQL 15 on Rocky Linux, initialize the PostgreSQL database and configurations, then start and enable the PostgreSQL 15 service.
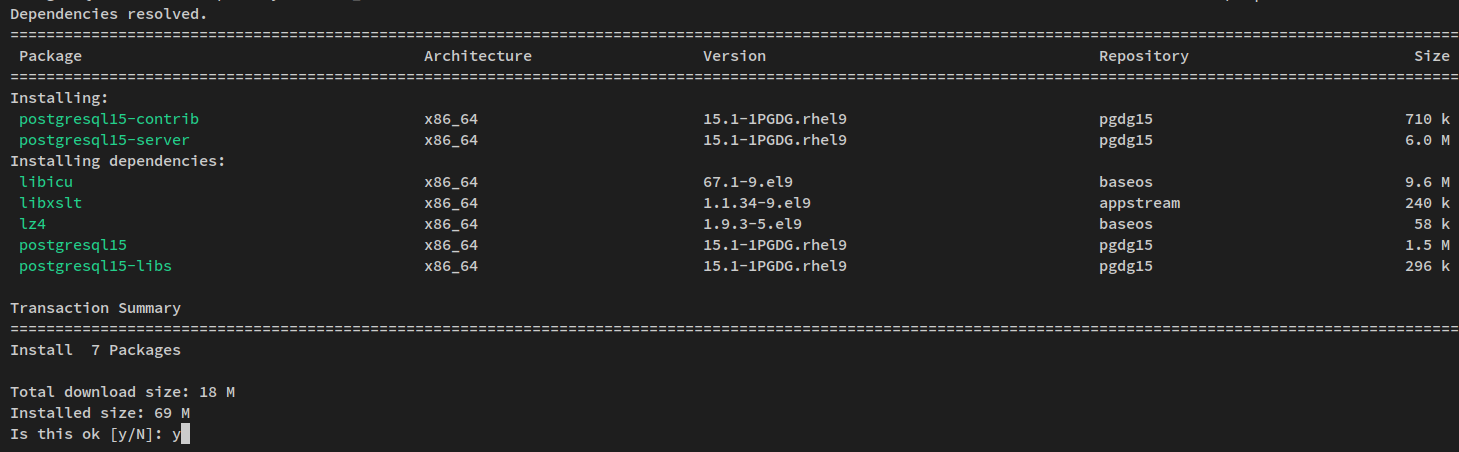
Run the below dnf command to install PostgreSQL 15 server. Input y when prompted for the configuration, then press ENTER to proceed.
sudo dnf install postgresql15-server postgresql15-contrib
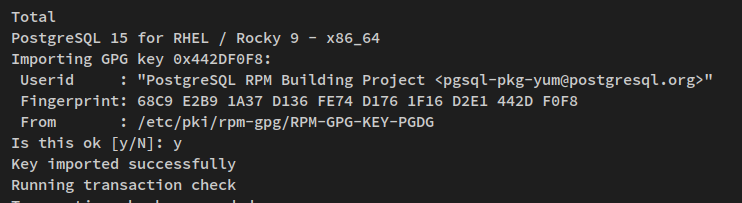
Also, when prompted to accept the GPG keys for the PostgreSQL repository, input y to confirm and press ENTER to proceed.
After PostgreSQL 15 is installed, run the below command to initialize the PostgreSQL database and configuration.
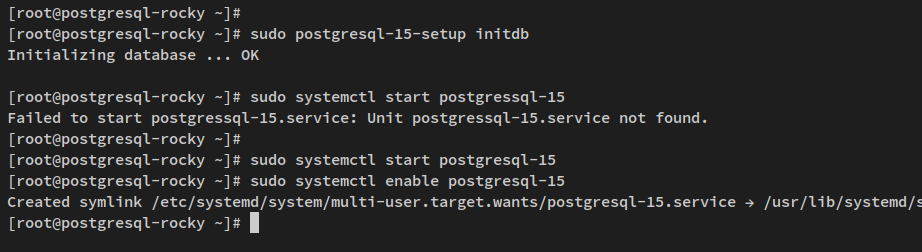
sudo postgresql-15-setup initdb
With this, you’ll receive an output such as ‘Initializing database … OK‘.
Now run the below systemctl command utility to start and enable the PostgreSQL 15 service.
sudo systemctl start postgresql-15
sudo systemctl enable postgresql-15
Lastly, verify the PostgreSQL 15 service via the systemctl below command. This will ensure that your PostgreSQL 15 server is enabled and running.
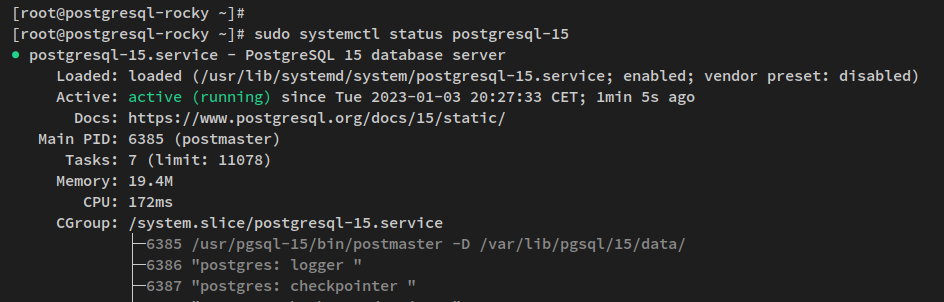
sudo systemctl status postgresql-15
You’ll receive an output like this screenshot – The status of PostgreSQL 15 is running, and it’s enabled, which means the service will start automatically upon bootup.
Now that you’ve installed the PostgreSQL 15 server and it’s enabled and running. In the next step, you will set up the authentication method for PostgreSQL users.
Setting up User Authentication and Password Encryption
With PostgreSQL 15 installed and running, you can now go over the configuration of PostgreSQL authentication. This can be configured via the config file ‘pg_hba.conf’ on the PostgreSQL configuration directory.
Log in to the PostgreSQL shell via the following command.
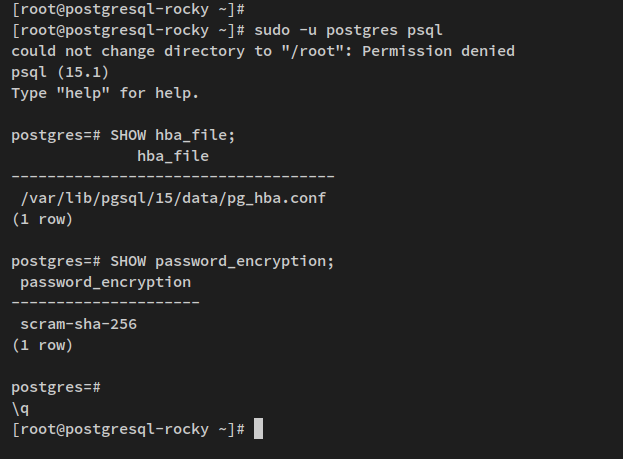
sudo -u postgres psql
After logging in, run the below queries to verify the default PostgreSQL configuration that stored authentication methods and verify the current password encryption that use on your PostgreSQL server.
SHOW hba_file;
SHOW password_encryption;
You’ll receive output similar to this – The default PostgreSQL config file for authentication is ‘/var/lib/pgsql/15/data/pg_hba.conf‘ and the default password authentication enabled is ‘scram-sha-256‘.
Now open the PostgreSQL configuration file ‘/var/lib/pgsql/15/data/pg_hba.conf’ using the below nano editor command.
sudo nano /var/lib/pgsql/15/data/pg_hba.conf
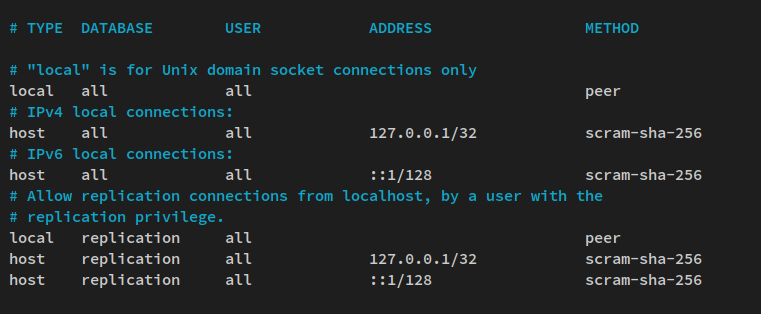
Change the default configuration with the following lines. This will change the password authentication from localhost to the ‘scram-sha-256‘. For the ‘local‘ connection, you can use the default ‘peer‘ or use the ‘scram-sha-256‘ password authentication.
# "local" is for Unix domain socket connections only
local   all             all                                     peer
# IPv4 local connections:
host    all             all             127.0.0.1/32            scram-sha-256
# IPv6 local connections:
host    all             all             ::1/128                 scram-sha-256
Save the file and exit the editor when finished.
Next, run the below systemctl command to restart the PostgreSQL 15 service and apply the changes.
sudo systemctl restart postgresql-15
Lastly, to verify your configuration, log in to the PostgreSQL shell via the below command.
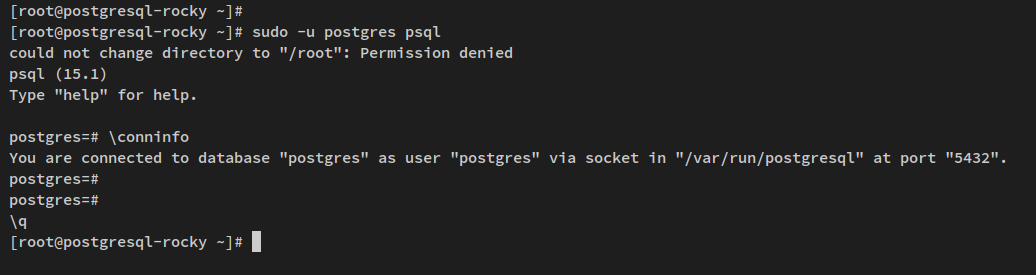
sudo -u postgres psql
Check the connection details using the below query. You should see that you’ve connected to the PostgreSQL via the ‘peer‘ unix_socket local connection.
conninfo
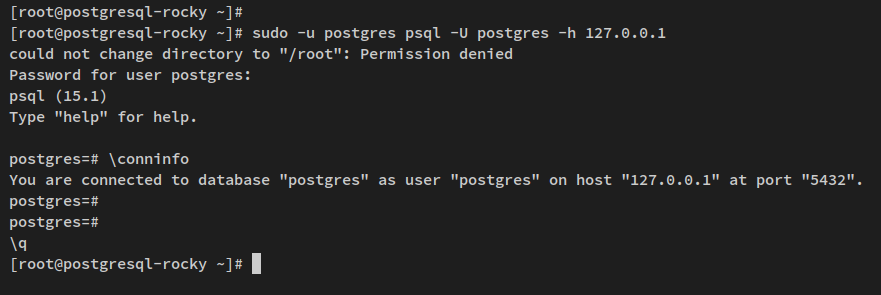
Now if you specify the PostgreSQL host to the localhost of 127.0.0.1, you should see the connection via the password authentication using scram-sha-256.
sudo -u postgres psql -U postgres -h 127.0.0.1
conninfo
Setting up Password for PostgreSQL User
By default, the PostgreSQL created a new system user and the PostgreSQL user with the name ‘postgres‘. And in this step, you’ll set up a new password for both Linux user ‘postgres‘ via command line and the PostgreSQL user ‘postgres‘ via the PostgreSQL shell.
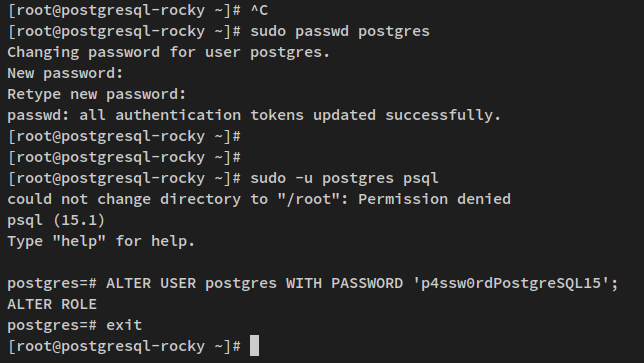
To begin, run the below command to create a new password for the user ‘postgres’. Input the new password and repeat, be sure to use the strong password for your ‘postgres‘ user.
sudo passwd postgres
Next, log in to the PostgreSQL shell via the below command.
sudo -u postgres psql
Run the below query to change the password of the default PostgreSQL user ‘postgres‘. And be sure to use the password in the following query.
ALTER USER postgres WITH PASSWORD 'p4ssw0rdPostgreSQL15';
exit
Type ‘exit‘ to log out from the PostgreSQL shell.
Lastly, log in to the PostgreSQL server again via the below command.
sudo -u postgres psql -U postgres -h 127.0.0.1
When prompted for the password, input the PostgreSQL server password that you’ve created. Then, press ENTER.
If successful, you should see the PostgreSQL shell in the below screenshot. You can also verify the connection status via the following query.
conninfo
In this step, you have changed and configured the password for the default PostgreSQL user ‘postgres‘. You’ve also created a new password for the default UNIX user ‘postgres‘. In the next step, you’ll learn how to create a new PostgreSQL user and create a new database for your application.
Creating New Database and User on PostgreSQL
In this step, you will learn how to create a new PostgreSQL user and database via the PostgreSQL shell. You’ll also learn how to check the list of databases and users available on the PostgreSQL server.
First, ensure that you’ve logged in to the PostgreSQL shell. or you can log in via the below command.
sudo -u postgres psql
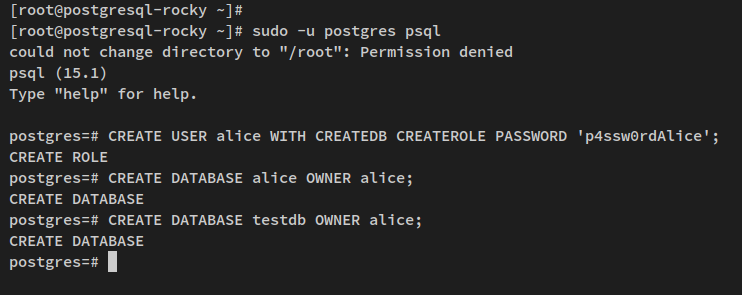
Create a new PostgreSQL user using the below query. This example will create a new user ‘alice‘ with the privileges ‘CREATEDB‘ for creating databases and the ‘CREATEROLE” for creating roles in PostgreSQL.
CREATE USER alice WITH CREATEDB CREATEROLE PASSWORD 'p4ssw0rdAlice';
Next, create a new database using the below PostgreSQL query. For this example, you will create two databases, the ‘alice‘ database, and the ‘testdb‘ database. Both databases will have the same owner, which is the user alice.
CREATE DATABASE alice OWNER alice;
CREATE DATABASE testdb OWNER alice;
Now verify the list of users and the list of databases on your PostgreSQL server.
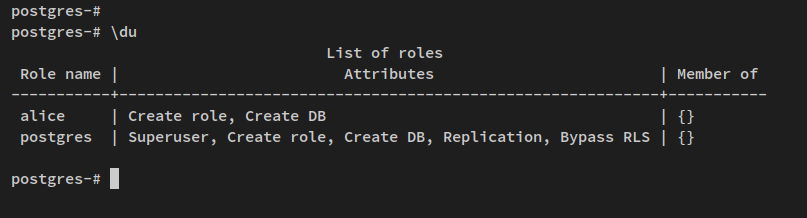
du
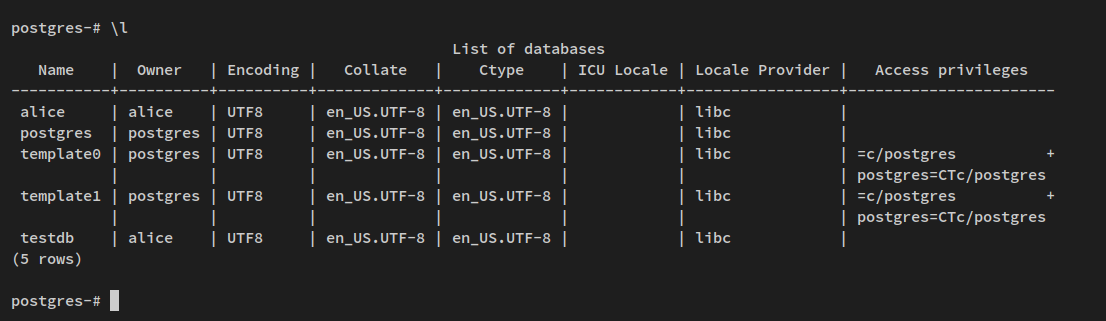
l
The output of the ‘du’ query for displaying list users on the PostgreSQL server. The new user ‘alice‘ is created with the privileges CREATEDB and CREATEROLE.
The output of the ‘l’ query for displaying the list of databases on the PostgreSQL server. You’ll see new databases alice and testdb is created.
Lastly, to verify the new PostgreSQL user, you will log in to the PostgreSQL shell via the new user ‘alice’.
Run the below command to log in to the PostgreSQL shell via the user ‘alice‘. When prompted for the password, input your password and press ENTER to confirm.
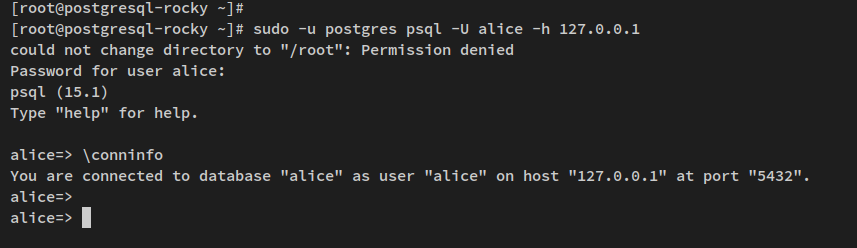
sudo -u postgres psql -U alice -h 127.0.0.1
After logging in to the PostgreSQL shell, run the below query to show current detail connections.
conninfo
You should receive an output similar to this – You’ve connected to the PostgreSQL server via the user ‘alice‘ and connected to the database ‘alice‘.
With this, you’ve now created PostgreSQL users and databases. Also, you’ve logged in to the PostgreSQL shell via the new user. In the next step, you’ll learn how to create a table and insert some data into it.
Create Table and Insert Data
After creating a new PostgreSQL user and database, you’ll now learn how to create a table and insert data in PostgreSQL. You’ll also learn how to switch to a different database on PostgreSQL and how to check the list tables on the PostgreSQL database.
Before you get started, ensure that you’ve logged in to the PostgreSQL shell as the user ‘alice‘.
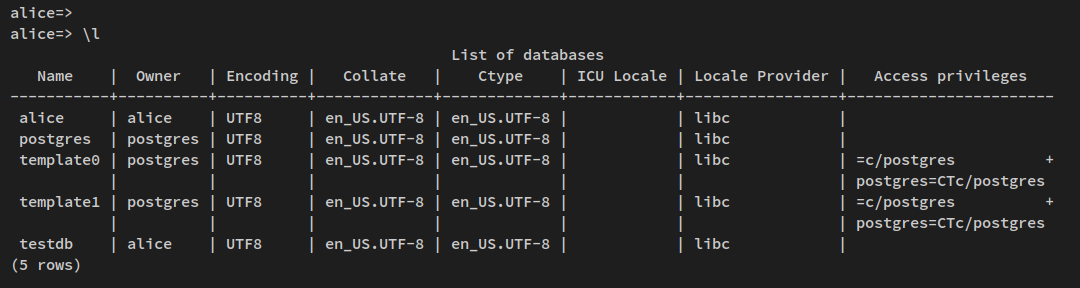
Verify the list of databases to ensure that the database ‘testdb‘ is available.
l
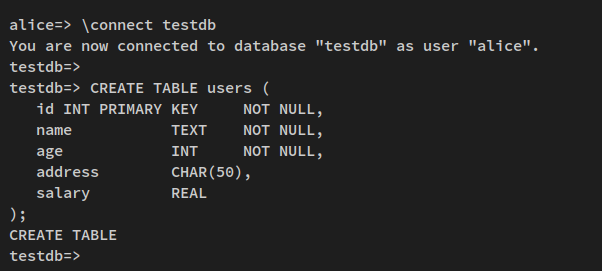
Now switch to the database ‘testdb‘ via the following query. You can use ‘connect‘ or just use ‘c‘.
connect testdb
After switching to the database ‘testdb’, your PostgreSQL shell should become like this ‘testdb=>‘.
Next, run the below query to create a new table ‘users‘ with some columns id, name, age, address, and salary.
CREATE TABLE users (
   id INT PRIMARY KEY     NOT NULL,
   name           TEXT    NOT NULL,
   age            INT     NOT NULL,
   address        CHAR(50),
   salary         REAL
);
The output ‘CREATE TABLE‘ confirms that the new table is created on your database.
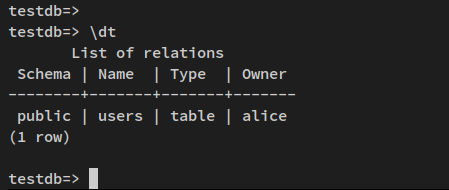
Now verify the list of the table on the current database via the below query. You should see the table ‘users‘ created.
dt
After creating the new table, you’ll insert some data into it via the INSERT query.
Run the below INSERT query to add some data to the table ‘users‘.
INSERT INTO users (id,name,age,address,salary) VALUES (1, 'Paul', 32, 'California', 20000.00);
INSERT INTO users (id,name,age,address,salary) VALUES (2, 'Jesse', 35, 'Mexico', 30000.00);
INSERT INTO users (id,name,age,address,salary) VALUES (3, 'Linda', 27, 'Canada', 40000.00);
The output ‘INSERT 0 1‘ confirms that the new data is added to the table.
With the table created and some data added to PostgreSQL, you’ll learn how to retrieve data from PostgreSQL and update available data in PostgreSQL.
Retrieving Data and Updating Data
After creating a table on PostgreSQL and inserting some data via the INSERT query, you’ll next learn how to retrieve data via the SELECT query and how to update or change data on specific columns via the UPDATE query.
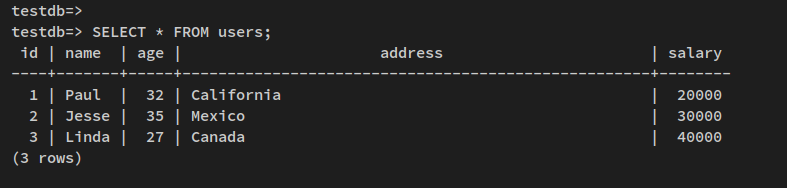
To retrieve data, run the below PostgreSQL query. This will retrieve data from the PostgresSQL table ‘users‘.
SELECT * FROM users;
You will receive an output like this – All data on the table ‘users‘ will be displayed on your PostgreSQL shell.
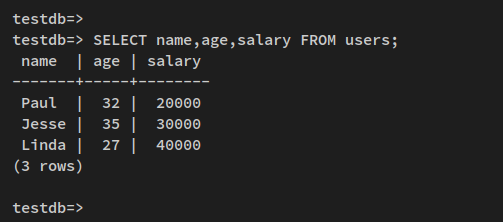
You can also retrieve data from specific columns via the below query. This query will retrieve data from specific columns name, age, and salary.
SELECT name,age,salary FROM users;
Below is the output your will receive on your terminal.
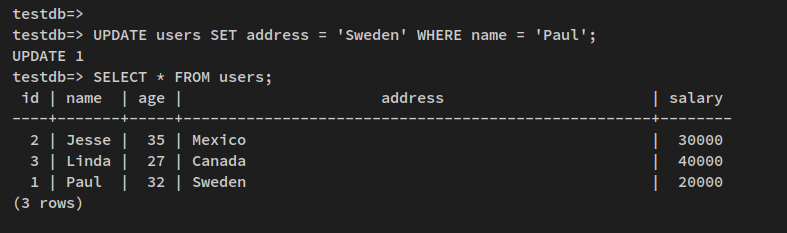
Next, run the below UPDATE query to change the data on the PostgreSQL database. This will update the data on the column ‘address‘ to ‘Sweden‘ for the column ‘name‘ value ‘Paul‘.
UPDATE users SET address = 'Sweden' WHERE name = 'Paul';
The output ‘UPDATE 1‘ confirm that the data is updated and changed.
Run the below query to ensure that the data on the database is changed.
SELECT * FROM users;
You’ll receive an output similar to this – The column ‘address‘ is updated for the ‘name = Paul‘.
At this point, you’ve now learned the basic usage of PostgreSQL query for creating a user, database, table, inserting data, retrieving data, and updating data on the PostgreSQL server.
Clean-up the Environment
In this step, you’ll clean up your PostgreSQL 15 server environment by deleting the database and users that you’ve created. So you’ve cleaned PostgreSQL 15 installation but also learned how to clean up your PostgreSQL server by removing unused users, databases, and tables.
Before you get started, log in to PostgreSQL as the default ‘postgres‘ user.
sudo -u postgres psql
Switch to the database ‘testdb‘ using the ‘connect‘ query.
connect testdb;
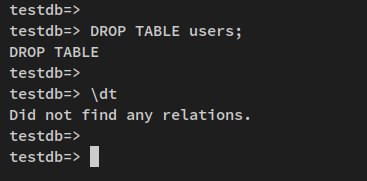
Run the below query to drop the table ‘users‘, then verify the list of tables on the current database.
DROP TABLE users;
dt
The output ‘Did not find any relations.’ confirms that the table ‘users‘ is removed.
Next, switch to the ‘postgres’ database and delete the database ‘alice’ and ‘testdb’.
connect postgres
DROP DATABASE alice;
DROP DATABASE testdb;
Verify the list of databases via the below query. You will see both databases ‘alice‘ and ‘testdb‘ is removed from the PostgreSQL server.
l
Lastly, run the below query to delete the user alice. Then, verify the list of users on the PostgreSQL server.
DROP USER alice;
du
You will receive an output that he user ‘alice‘ is deleted from the PostgreSQL server
With this, you’ve cleaned up your PostgreSQL server and also learned basic queries for deleting users, databases, and tables on the PostgreSQL server.
Conclusion
This guide taught you how to install the latest version of PostgreSQL 15 on a Rocky Linux 9 server. You’ve installed PostgreSQL via the official PostgreSQL repository, and also learned the basic configuration of PostgreSQL authentication.
In addition to that, you’ve learned how to use the PostgreSQL server. From creating a user, changing the user password, creating a database and table, inserting data, querying data, updating data, and cleaning up the PostgreSQL server by removing an unused table, database, and user.
PostgreSQL is an enterprise RDBMS (Relational Database Management System), most used in modern industries on the internet. With that, you may want to check and learn other queries of PostgreSQL next, or you can also learn how to deploy high-availability PostgreSQL with multiple servers.


