In previous articles, we discussed how to set up your own mail server on Ubuntu from scratch. This tutorial is going to show you how to install RainLoop Webmail on Ubuntu 20.04 with Apache or Nginx web server. RainLoop is a simple, modern, fast and open-source Web-based email client written in PHP.
RainLoop webmail Features
- A modern web interface.
- Fast and lightweight
- Supports both SMTP and IMAP.
- Supports multiple accounts, which means you can access all your email addresses from one place.
- Supports two-factor authentication.
- Integration with Facebook, Twitter, Google, and Dropbox.
- Direct access to the mail server, no database needed.
- Easy to install and upgrade (one-click upgrade in the admin panel)
. There are two editions of RainLoop:
- community edition released under the AGPL v3 license
- standard edition released under the RainLoop software license.
We will use the free and open-source community edition in this tutorial.
Step 1: Install Apache, PHP7 or Nginx, PHP7
If you use Apache and PHP7, then install them on Ubuntu 20.04 with:
sudo apt update

sudo apt install apache2 php7.4 libapache2-mod-php7.4
If you use Nginx and PHP7, then install them with:
sudo apt update

sudo apt install nginx php7.4 php7.4-fpm
And install the following PHP extensions which are required by RainLoop.
sudo apt install php7.4-curl php7.4-xml
Step 2: Download and Install RainLoop Webmail on Ubuntu 20.04
First, make a directory for rainloop in the current working directory.
mkdir rainloop
Cd into the directory and download the latest RainLoop community edition with the following commands:
cd rainloop

curl -s http://repository.rainloop.net/installer.php | php
Once that’s done, move this directory to /var/www/.
cd ..

sudo mv rainloop /var/www/
Now set web server user (www-data) as the owner.
sudo chown www-data:www-data /var/www/rainloop/ -R
Step 3: Configure a Virtual Host for RainLoop
We can use either Apache or Nginx web server.
Apache
If you like to use Apache web server, then create the virtual host file with the following command:
sudo nano /etc/apache2/sites-available/rainloop.conf
Put the following text into the file. Replace red text with your actual info.
  ServerName mail.example.com
  DocumentRoot "https://www.linuxbabe.com/var/www/rainloop/"

  ErrorLog "https://www.linuxbabe.com/var/log/apache2/rainloop_error_log"
  TransferLog "https://www.linuxbabe.com/var/log/apache2/rainloop_access_log"


    Options  Indexes  FollowSymLinks  ExecCGI
    AllowOverride All
    Order deny,allow
    Allow from all
    Require all granted
Save and close the file. Then enable this virtual host.
sudo a2ensite rainloop.conf
And reload Apache.
sudo systemctl reload apache2
Nginx
If you like to use Nginx web server, then create the virtual host file with the following command:
sudo nano /etc/nginx/conf.d/rainloop.conf
Put the following text into the file. Replace mail.example.com with your own domain name.
server {
   listen 80;
   server_name mail.example.com;

   root /var/www/rainloop;
   index index.php index.html;

   access_log /var/log/nginx/rainloop_access.log;
   error_log /var/log/nginx/rainloop_error.log;

   location / {
       try_files $uri $uri/ /index.php?$query_string;
   }

   location ~ ^/(. .php)$ {
        try_files $uri =404;
        fastcgi_pass unix:/run/php/php7.4-fpm.sock;
        fastcgi_index index.php;
        fastcgi_param SCRIPT_FILENAME $document_root$fastcgi_script_name;
        include /etc/nginx/fastcgi_params;
   }

   location ^~ /data {
       deny all;
   }
}
Save and close the file. Then test Nginx configurations.
sudo nginx -t
If the test is successful, reload Nginx configurations.
sudo systemctl reload nginx
Step 4: Install TLS/SSL Certificate
If you want to add HTTPS to webmail, then you can obtain a free TLS/SSL certificate from Let’s Encrypt CA. First Let’s install the certbot client. The following command will install the client and apache plugin from the official certbot PPA.
sudo apt install software-properties-common

sudo add-apt-repository ppa:certbot/certbot

sudo apt update

sudo apt install certbot
If you use Apache web server, then you also need to install the Certbot Apache plugin.
sudo apt install python3-certbot-apache
Then issue the following command to obtain a free TLS/SSL certificate. Replace the red-colored text with your actual email address and domain name.
sudo certbot --apache --agree-tos --redirect --hsts --staple-ocsp --email [email protected] -d mail.example.com
If you use Nginx web server, then you need to install the Certbot Nginx plugin.
sudo apt install python3-certbot-nginx
Then use the Nginx plugin to obtain and install the certificate by running the following command. Replace red text with your actual email address and domain name.
sudo certbot --nginx --agree-tos --redirect --staple-ocsp --email [email protected] -d mail.example.com
You will see the following text indicating that you have successfully obtained a TLS certificate. Your certificate and chain have been saved at /etc/letsencrypt/live/mail.example.com/ directory.
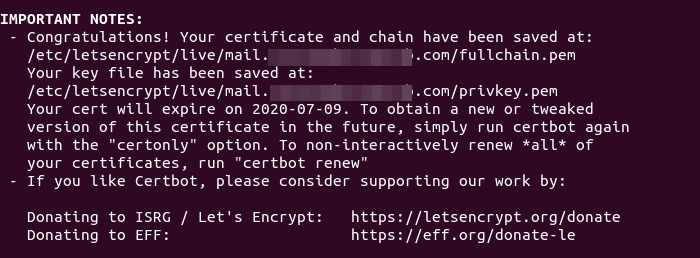
Now if you visit http://mail.example.com, you will be redirected to https://mail.example.com.
Step 5: Configure RainLoop Webmail
Log into RainLoop admin panel via the following URL.
mail.example.com/?admin
Default username is admin and default password is 12345.
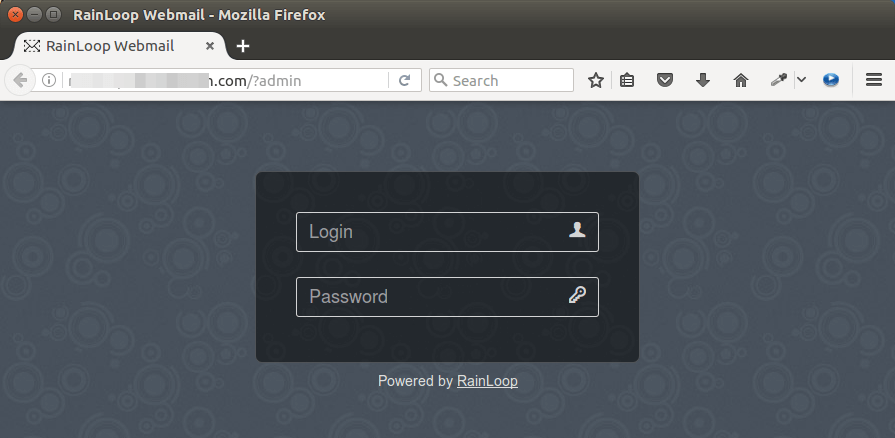
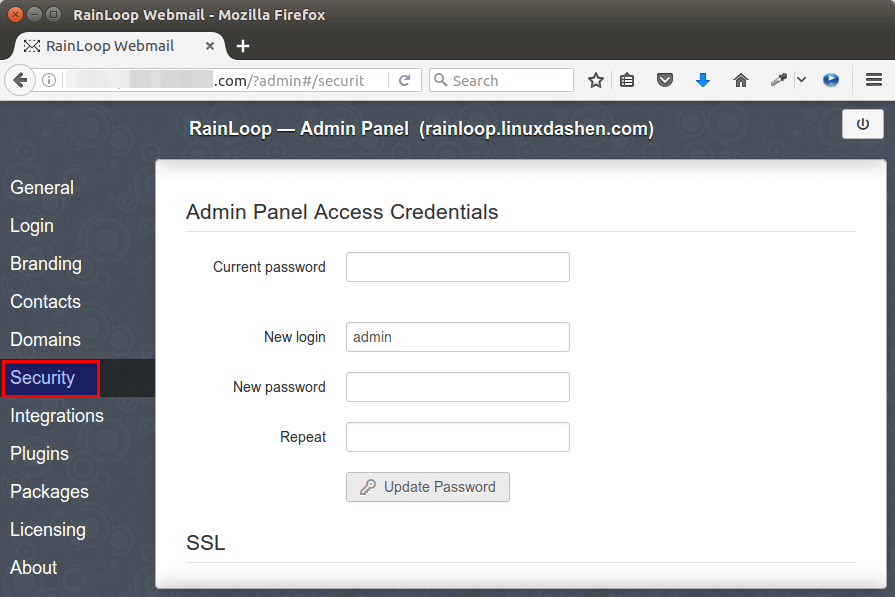
Once you are logged in, it’s recommended to change both your username and password since admin is an easy target. Click the security tab on the left pane. Update your password first, then re-login and update your username.
To access your emails through RainLoop, you need to configure email server settings in the Domains tab. By default, 4 email domains are added: gmail.com, outlook.com, qq.com, yahoo.com.
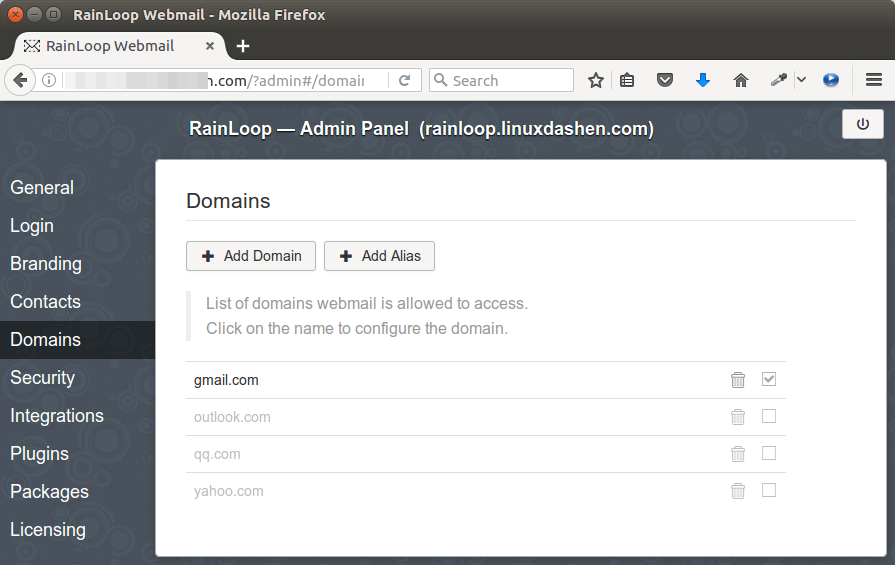
The SMTP server settings and IMAP server settings for these email domains are configured by RainLoop, but only Gmail is enabled by default. To enable the other 3 email domains, simply tick on the checkboxes.
To be able to access your own email server, click the Add Domain button and enter the IMAP and SMTP server settings of your own email server.
If Rainloop and Postfix/Dovecot are running on the same server, then use the following configurations:
- IMAP: server 127.0.0.1, port 143, Secure None.
- SMTP: server 127.0.0.1, port 587, Secure None.
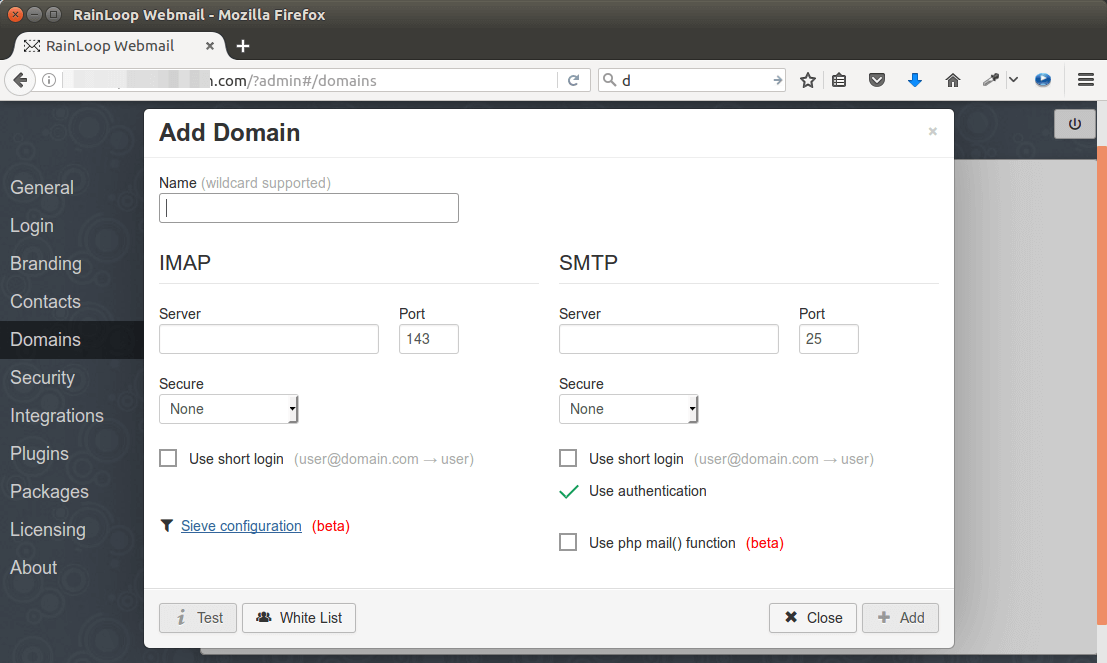
You also need to enable your own email domain by ticking on the checkbox on the right, or the error domain is not allowed will appear when logging into your email address.
After finishing the configuration, enter your RainLoop webmail domain name in the browser address bar without /?admin suffix.
mail.example.com
And log into your email account.
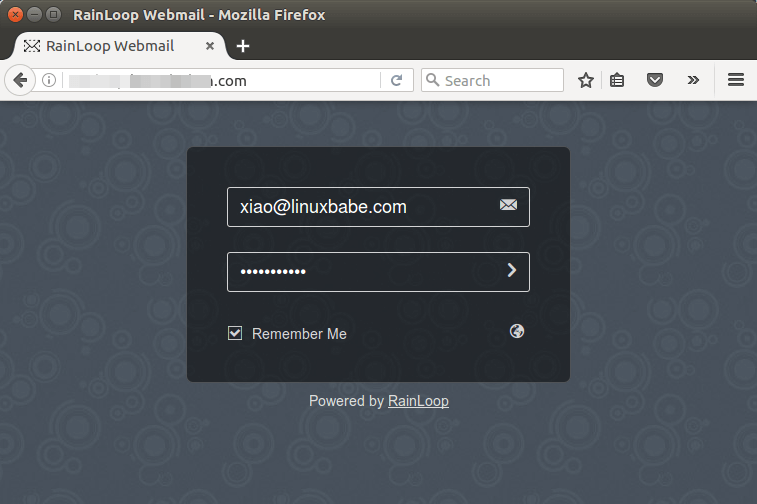
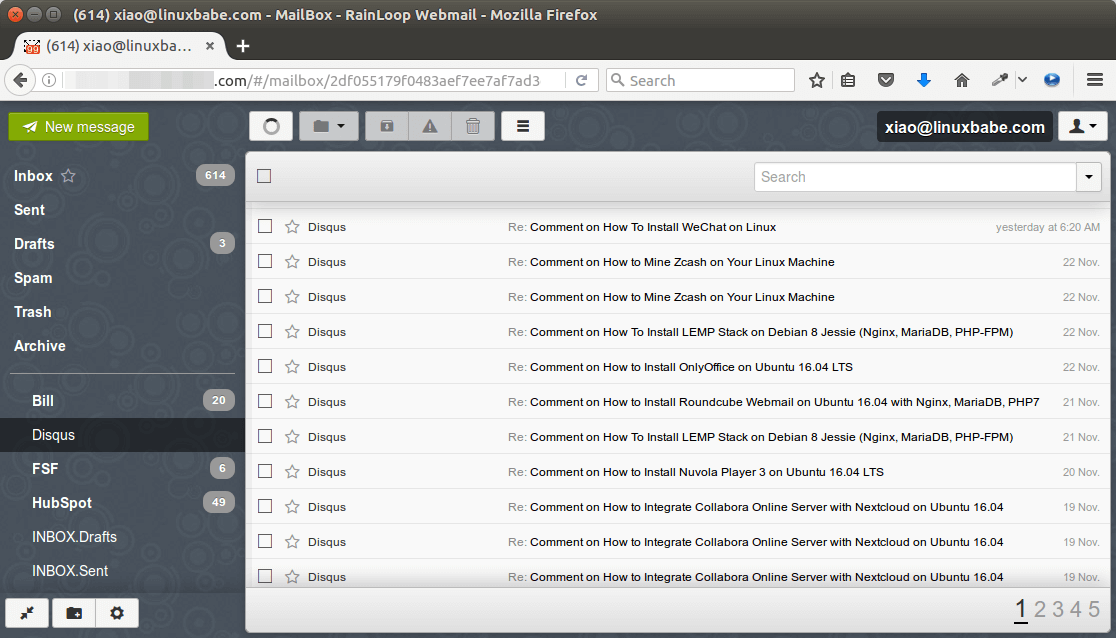
RainLoop webmail
If authentication failed, then you may need to enable short login in the IMAP server settings page.
That’s all you need to do in order to access your emails on Gmail, outlook mail or your own email domain. If you add multiple email accounts, you can easily switch between them from the user drop-down menu. Very cool indeed! You can also configure other settings and customize your webmail interface.
Removing Sensitive Information from Email Headers
By default, Rainloop will add a X-Mailer email header, indicating that you are using Rainloop webmail and the version number. You can tell Postfix to ignore it so recipient can not see it. Run the following command to create a header check file.
sudo nano /etc/postfix/smtp_header_checks
Put the following lines into the file.
/^X-Mailer.*RainLoop/ IGNORE
Save and close the file. Then edit the Postfix main configuration file.
sudo nano /etc/postfix/main.cf
Add the following line at the end of the file.
smtp_header_checks = regexp:/etc/postfix/smtp_header_checks
Save and close the file. Then run the following command to rebuild hash table.
sudo postmap /etc/postfix/smtp_header_checks
Reload Postfix for the change to take effect.
sudo systemctl reload postfix
Now Postfix won’t include X-Mailer: Rainloop in email headers.
Wrapping Up
I hope this tutorial helped you install RainLoop Webmail on Ubuntu 20.04. As always, if you found this post useful, then subscribe to our free newsletter to receive more tips and tricks. Take care 🙂
Rate this tutorial
[Total: 0 Average: 0]

