
Standard Notes is an open-source and completely encrypted notes app. It offers both free and paid plans and offers both, cloud hosting and the option to host it on your server. You can use your server to sync the notes stored between different devices. Standard Notes offers apps for all desktop operating systems and mobile platforms.
This tutorial teaches you how to self-host your standard notes server on a Rocky Linux 9 machine. You will also learn how to activate paid plans on the server for free and how to enable file uploads.
Prerequisites
-
A server running Rocky Linux 9 with at least 2 GB of RAM.
-
A non-root user with sudo privileges.
-
A Fully Qualified domain name pointed to the server. For our tutorial, we will be using the domain
standardnotes.example.com. You will need two more domain names, one for the file server, and the second one for the web app. We will be using the domainsnotes-files.example.comfor the file server andsnotes-web.example.comfor the web app. -
Everything is updated.
$ sudo dnf update
-
Few packages that your system needs.
$ sudo dnf install -y wget nano unzip yum-utils policycoreutils-python-utils
Some of these packages may already be installed on your system.
Step 1 – Configure Firewall
Before installing any packages, the first step is configuring the firewall to open ports for HTTP, and HTTPS. Rocky Linux uses Firewalld Firewall. Check the firewall’s status.
$ sudo firewall-cmd --state
running
The firewall works with different zones, and the public zone is the default one that we will use. List all the services and ports active on the firewall.
$ sudo firewall-cmd --zone=public --list-all
It should show the following output.
public
  target: default
  icmp-block-inversion: no
  interfaces: enp1s0
  sources:
  services: cockpit dhcpv6-client ssh
  ports:
  protocols:
  forward: yes
  masquerade: no
  forward-ports:
  source-ports:
  icmp-blocks:
  rich rules:
Open the HTTP, and HTTPS ports in the firewall.
$ sudo firewall-cmd --zone=public --add-service=http
$ sudo firewall-cmd --zone=public --add-service=https
Recheck the status of the firewall.
$ sudo firewall-cmd --zone=public --list-all
You should see a similar output.
public
  target: default
  icmp-block-inversion: no
  interfaces: enp1s0
  sources:
  services: cockpit dhcpv6-client http https ssh
  ports:
  protocols:
  forward: yes
  masquerade: no
  forward-ports:
  source-ports:
  icmp-blocks:
  rich rules:
Make all the changes permanent and reload the firewall to enable the changes.
$ sudo firewall-cmd --runtime-to-permanent
$ sudo firewall-cmd --reload
Step 2 – Install Docker and Docker Compose
Install the official Docker repository.
$ sudo dnf config-manager
    --add-repo
    https://download.docker.com/linux/centos/docker-ce.repo
Install Docker.
$ sudo dnf install docker-ce docker-ce-cli containerd.io docker-buildx-plugin docker-compose-plugin
Enable and run the Docker daemon.
$ sudo systemctl enable docker --now
Check the status of the Docker service.
$ sudo systemctl status docker
? docker.service - Docker Application Container Engine
     Loaded: loaded (/usr/lib/systemd/system/docker.service; enabled; preset: disabled)
     Active: active (running) since Tue 2024-04-16 23:35:00 UTC; 5s ago
TriggeredBy: ? docker.socket
       Docs: https://docs.docker.com
   Main PID: 23273 (dockerd)
      Tasks: 9
     Memory: 34.0M
        CPU: 176ms
     CGroup: /system.slice/docker.service
             ??23273 /usr/bin/dockerd -H fd:// --containerd=/run/containerd/containerd.sock

Apr 16 23:35:00 standard-notes systemd[1]: Starting Docker Application Container Engine...
Apr 16 23:35:00 standard-notes dockerd[23273]: time="2024-04-16T23:35:00.050964934Z" level=info msg="Starting up"
Apr 16 23:35:00 standard-notes dockerd[23273]: time="2024-04-16T23:35:00.083526973Z" level=info msg="Loading containers: start."
Apr 16 23:35:00 standard-notes dockerd[23273]: time="2024-04-16T23:35:00.654481705Z" level=info msg="Firewalld: interface docker0 already part of docker zone, returning"
Apr 16 23:35:00 standard-notes dockerd[23273]: time="2024-04-16T23:35:00.772647844Z" level=info msg="Loading containers: done."
Apr 16 23:35:00 standard-notes dockerd[23273]: time="2024-04-16T23:35:00.793814339Z" level=info msg="Docker daemon" commit=60b9add containerd-snapshotter=false storage-driver=overlay2 version=26.0.1
Apr 16 23:35:00 standard-notes dockerd[23273]: time="2024-04-16T23:35:00.793962347Z" level=info msg="Daemon has completed initialization"
Apr 16 23:35:00 standard-notes dockerd[23273]: time="2024-04-16T23:35:00.827030005Z" level=info msg="API listen on /run/docker.sock"
Apr 16 23:35:00 standard-notes systemd[1]: Started Docker Application Container Engine.
Add your system user to the Docker group to avoid using sudo to run Docker commands.
$ sudo usermod -aG docker $(whoami)
Login again to your server after logging out to enable the change.
Verify the change.
$ groups
navjot wheel docker
Step 3 – Install Nginx
Rocky Linux 9 ships with an older version of Nginx. You need to use the official Nginx repository to install the latest version.
Create and open the file /etc/yum.repos.d/nginx.repo for editing.
$ sudo nano /etc/yum.repos.d/nginx.repo
Paste the following code in it.
[nginx-stable]
name=nginx stable repo
baseurl=http://nginx.org/packages/centos/$releasever/$basearch/
gpgcheck=1
enabled=0
gpgkey=https://nginx.org/keys/nginx_signing.key
module_hotfixes=true

[nginx-mainline]
name=nginx mainline repo
baseurl=http://nginx.org/packages/mainline/centos/$releasever/$basearch/
gpgcheck=1
enabled=1
gpgkey=https://nginx.org/keys/nginx_signing.key
module_hotfixes=true
Once you are finished, save the file by pressing Ctrl X and entering Y when prompted. We will use the mainline version of Nginx and therefore have enabled the mainline repo in the above file by using enabled=1 under the mainline section instead of the stable one. You can choose either one.
Install Nginx.
$ sudo dnf install nginx -y
Verify the installation.
$ nginx -v
nginx version: nginx/1.25.5
Enable and start the Nginx server service.
$ sudo systemctl enable nginx --now
Check the status of the service.
$ sudo systemctl status nginx
? nginx.service - nginx - high performance web server
     Loaded: loaded (/usr/lib/systemd/system/nginx.service; enabled; preset: disabled)
     Active: active (running) since Tue 2024-04-16 23:41:23 UTC; 6s ago
       Docs: http://nginx.org/en/docs/
    Process: 4886 ExecStart=/usr/sbin/nginx -c /etc/nginx/nginx.conf (code=exited, status=0/SUCCESS)
   Main PID: 4887 (nginx)
      Tasks: 3 (limit: 10819)
     Memory: 3.1M
        CPU: 11ms
     CGroup: /system.slice/nginx.service
             ??4887 "nginx: master process /usr/sbin/nginx -c /etc/nginx/nginx.conf"
             ??4888 "nginx: worker process"
             ??4889 "nginx: worker process"

Apr 16 23:41:23 standard-notes systemd[1]: Starting nginx - high performance web server...
Apr 16 23:41:23 standard-notes systemd[1]: Started nginx - high performance web server.
Step 4 – Install SSL
We need to install Certbot to generate the SSL certificate. We will use the Snapd package installer for that. Since Rocky Linux doesn’t ship with it, install the Snapd installer. It requires the EPEL (Extra Packages for Enterprise Linux) repository to work.
Install EPEL repository.
$ sudo dnf install epel-release -y
Install Snapd package.
$ sudo dnf install snapd -y
Enable and Start the Snap service.
$ sudo systemctl enable snapd --now
Install the Snap core package, and ensure that your version of Snapd is up to date.
$ sudo snap install core && sudo snap refresh core
Create necessary links for Snapd to work.
$ sudo ln -s /var/lib/snapd/snap /snap
$ echo 'export PATH=$PATH:/var/lib/snapd/snap/bin' | sudo tee -a /etc/profile.d/snapd.sh
Install Certbot.
$ sudo snap install --classic certbot
Use the following command to ensure that the Certbot command can be run by creating a symbolic link to the /usr/bin directory.
$ sudo ln -s /snap/bin/certbot /usr/bin/certbot
Check the Certbot version.
$ certbot --version
certbot 2.10.0
Run the following command to generate an SSL Certificate.
$ sudo certbot certonly --nginx --agree-tos --no-eff-email --staple-ocsp --preferred-challenges http -m [email protected] -d standardnotes.example.com
The above command will download a certificate to the /etc/letsencrypt/live/standardnotes.example.com directory on your server.
We need to do the same for the Files subdomain.
$ sudo certbot certonly --nginx --agree-tos --no-eff-email --staple-ocsp --preferred-challenges http -m [email protected] -d snotes-files.example.com
And last, again for the web app.
$ sudo certbot certonly --nginx --agree-tos --no-eff-email --staple-ocsp --preferred-challenges http -m [email protected] -d snotes-web.example.com
Generate a Diffie-Hellman group certificate.
$ sudo openssl dhparam -dsaparam -out /etc/ssl/certs/dhparam.pem 4096
Check the Certbot renewal scheduler service.
$ systemctl list-timers
You will find snap.certbot.renew.service as one of the services scheduled to run.
NEXT                        LEFT          LAST                        PASSED      UNIT                        ACTIVATES                   ----------------------------------------------------------------------------------------------------------------------------------
Wed 2024-04-17 00:00:00 UTC 5min left   Tue 2024-04-16 23:29:44 UTC 24min ago    logrotate.timer              logrotate.service
Wed 2024-04-17 00:31:26 UTC 36min left  -                           -            dnf-makecache.timer          dnf-makecache.service
Wed 2024-04-17 11:00:00 UTC 11h left    -                           -            snap.certbot.renew.timer     snap.certbot.renew.service
Do a dry run of the process to check whether the SSL renewal is working fine.
$ sudo certbot renew --dry-run
If you see no errors, you are all set. Your certificate will renew automatically.
Step 5 – Download and Configure Standard Notes
Make sure you are in your system’s home directory.
$ cd ~
Create a working directory for Standard Notes Server and switch to it.
$ mkdir standardnotes
$ cd ~/standardnotes
Download the environment example file from the Standard Notes GitHub repository.
$ wget https://raw.githubusercontent.com/standardnotes/server/main/.env.sample
Create the working environment file from the downloaded example file.
$ cp .env.sample .env
You will need three authentication and encryption keys for configuring the .env file. Run the following command to generate three separate keys and copy their output.
$ openssl rand -hex 32
You will also need a strong database password. You can run the following command to generate a secure database password.
$ openssl rand -hex 12
Open the environment file for editing.
$ nano .env
Choose a strong database password and add it to the DB_PASSWORD variable.
######
# DB #
######

DB_HOST=db
DB_PORT=3306
DB_USERNAME=std_notes_user
DB_PASSWORD=changeme
DB_DATABASE=standard_notes_db
DB_TYPE=mysql

#########
# CACHE #
#########

REDIS_PORT=6379
REDIS_HOST=cache
CACHE_TYPE=redis

########
# KEYS #
########

AUTH_JWT_SECRET=
AUTH_SERVER_ENCRYPTION_SERVER_KEY=
VALET_TOKEN_SECRET=
Add the keys generated before and put them against the three variables in the KEYS section.
By default, User Registration is enabled. If you want to disable public user registration on your Standard Notes server, add the following variable in the environment file. However, do this only after you have created your first account on it. If you use the setting at the very beginning, you won’t be able to use the app yourself.
AUTH_SERVER_DISABLE_USER_REGISTRATION=true
Add the following variable to define your Standard Notes Files URL.
PUBLIC_FILES_SERVER_URL=https://snotes-files.example.com
The complete .env file should look like the following.
######
# DB #
######

DB_HOST=db
DB_PORT=3306
DB_USERNAME=std_notes_user
DB_PASSWORD=
DB_DATABASE=standard_notes_db
DB_TYPE=mysql

#########
# CACHE #
#########

REDIS_PORT=6379
REDIS_HOST=cache
CACHE_TYPE=redis

########
# KEYS #
########

AUTH_JWT_SECRET=52b354ad5d8f11c995b4eed33870a1a7afbbc84b8da61e0b583660b075d0390c
AUTH_SERVER_ENCRYPTION_SERVER_KEY=fce4fe78972c3407be47127aee57d67e86b84afb628020b7ab6999edb3c905f1
VALET_TOKEN_SECRET=50aad911a283f252713139667b6475ac105280a220e009e05f733cf785630ce5

AUTH_SERVER_DISABLE_USER_REGISTRATION=true
PUBLIC_FILES_SERVER_URL=https://snotes-files.example.com
Save the file by pressing Ctrl X and entering Y when prompted once finished.
Download the Localstack bootstrap script from the GitHub repository.
$ wget https://raw.githubusercontent.com/standardnotes/server/main/docker/localstack_bootstrap.sh
Give the script executable permissions.
$ chmod x localstack_bootstrap.sh
Download the Docker Compose File for the Standard Notes server from the GitHub repository.
$ wget https://raw.githubusercontent.com/standardnotes/server/main/docker-compose.example.yml
Create a working Docker compose file from the downloaded example compose file.
$ cp docker-compose.example.yml docker-compose.yml
Open it for editing.
$ nano docker-compose.yml
Change the value for the MYSQL_ROOT_PASSWORD and the MYSQL_PASSWORD to the database password you selected in the .env file earlier. Your Docker Compose File should look like the following.
services:
  server:
    image: standardnotes/server
    env_file: .env
    container_name: server_self_hosted
    restart: unless-stopped
    ports:
      - 3000:3000
      - 3125:3104
    volumes:
      - ./logs:/var/lib/server/logs
      - ./uploads:/opt/server/packages/files/dist/uploads
    networks:
      - standardnotes_self_hosted

  localstack:
    image: localstack/localstack:3.0
    container_name: localstack_self_hosted
    expose:
      - 4566
    restart: unless-stopped
    environment:
      - SERVICES=sns,sqs
      - HOSTNAME_EXTERNAL=localstack
      - LS_LOG=warn
    volumes:
      - ./localstack_bootstrap.sh:/etc/localstack/init/ready.d/localstack_bootstrap.sh
    networks:
      - standardnotes_self_hosted

  db:
    image: mysql:8
    container_name: db_self_hosted
    environment:
      - MYSQL_DATABASE=standard_notes_db
      - MYSQL_USER=std_notes_user
      - MYSQL_ROOT_PASSWORD=
      - MYSQL_PASSWORD=
    expose:
      - 3306
    restart: unless-stopped
    command: --default-authentication-plugin=mysql_native_password --character-set-server=utf8mb4 --collation-server=utf8mb4_general_ci
    volumes:
      - ./data/mysql:/var/lib/mysql
      - ./data/import:/docker-entrypoint-initdb.d
    networks:
      - standardnotes_self_hosted

  cache:
    image: redis:6.0-alpine
    container_name: cache_self_hosted
    volumes:
      - ./data/redis/:/data
    expose:
      - 6379
    restart: unless-stopped
    networks:
      - standardnotes_self_hosted

networks:
  standardnotes_self_hosted:
    name: standardnotes_self_hosted
Save the file by pressing Ctrl X and entering Y when prompted once finished. This concludes the download and configuration of the Standard Notes server setup.
Step 6 – Start Standard Notes Server
Run the following command to start the server.
$ docker compose up -d
This command will take a few minutes to complete. During this time, the process will pull all the relevant Docker images and create containers for all the services. It will also populate the database and perform appropriate migrations. The CPU usage might shoot up for a couple of minutes, but it should come down soon.
You can find logs for the Standard Notes server in the logs directory. You can check the process logs using the following command.
$ tail -f logs/*.log
Press Ctrl C to exit the logs. You can check the status of the running containers using either of the following commands.
$ docker compose ps
OR
$ docker ps
You will receive a similar output.
NAME                     IMAGE                       COMMAND                  SERVICE      CREATED          STATUS                   PORTS
cache_self_hosted        redis:6.0-alpine            "docker-entrypoint.s…"   cache        16 minutes ago   Up 5 minutes             6379/tcp
db_self_hosted           mysql:8                     "docker-entrypoint.s…"   db           16 minutes ago   Up 5 minutes             3306/tcp, 33060/tcp
localstack_self_hosted   localstack/localstack:3.0   "docker-entrypoint.sh"   localstack   16 minutes ago   Up 5 minutes (healthy)   4510-4559/tcp, 4566/tcp, 5678/tcp
server_self_hosted       standardnotes/server        "docker-entrypoint.sh"   server       16 minutes ago   Up 5 minutes             0.0.0.0:3000->3000/tcp, :::3000->3000/tcp, 0.0.0.0:3125->3104/tcp, :::3125->3104/tcp
You can check the health of the server using the following command.
$ curl http://localhost:3000/healthcheck
OK
Standard Notes uses port 3000 by default. If you configured a different port in the .env file, you should update that in the command above.
Step 7 – Install Standard Notes Web App
You can either use the existing Standard Notes web app or host yours. For our tutorial, we will self-host the Standard Notes web app.
Install Git
Before we move ahead, we need to install need few things, one of which is Git. Install Git.
$ sudo dnf install git -y
Install NodeJS
The next step is to install NodeJS. We will install Node 18.x LTS version for this. Issue the following commands to install NodeJS.
$ curl -fsSL https://rpm.nodesource.com/setup_18.x | sudo bash -
$ sudo dnf install -y nodejs
Confirm the installation.
$ node --version
v18.20.2
Install Yarn
We also need the Yarn package manager. Install it using Node.
$ sudo npm install --global yarn
Install PM2 package manager.
We need PM2 to help run the Standard Notes web app as a background service.
$ sudo npm install --global pm2
Install the web app
Create a directory for the web app and switch to it.
$ cd ~
$ mkdir snotes-app
$ cd ~/snotes-app
Download the Standard Notes App from GitHub.
$ git clone https://github.com/standardnotes/app.git .
Use Yarn to install the dependencies. Ignore any warnings.
$ yarn install
Build the packages for the web app.
$ yarn build:web
Switch to the web directory.
$ cd packages/web
Start the web app using PM2.
$ pm2 start "yarn start" --name api
You can check the status of the service using the following command.
$ pm2 status
[PM2] Starting /usr/bin/bash in fork_mode (1 instance)
[PM2] Done.
????????????????????????????????????????????????????????????????????????????????????????????????????????????????????????????????????
? id ? name   ? namespace   ? version ? mode    ? pid      ? uptime ? ?    ? status    ? cpu      ? mem      ? user     ? watching ?
????????????????????????????????????????????????????????????????????????????????????????????????????????????????????????????????????
? 0  ? api    ? default     ? N/A     ? fork    ? 15090    ? 0s     ? 0    ? online    ? 0%       ? 26.2mb   ? navjot   ? disabled ?
????????????????????????????????????????????????????????????????????????????????????????????????????????????????????????????????????
The app will be started and is accessible via port 3001. We will use this information to create a Nginx configuration for the web app.
PM2 doesn’t restart the application upon reboot. To do so, we need to generate a startup script.
$ pm2 startup
You should get a similar output.
[PM2] Init System found: systemd
[PM2] To setup the Startup Script, copy/paste the following command:
sudo env PATH=$PATH:/usr/bin /usr/lib/node_modules/pm2/bin/pm2 startup systemd -u navjot --hp /home/navjot
Run the command provided in the output.
$ sudo env PATH=$PATH:/usr/bin /usr/lib/node_modules/pm2/bin/pm2 startup systemd -u navjot --hp /home/navjot
This will generate and enable a systemd service file.
Save the process to be started automatically on reboot.
$ pm2 save
Step 8 – Configure Nginx
Open the file /etc/nginx/nginx.conf for editing.
$ sudo nano /etc/nginx/nginx.conf
Add the following line before the line include /etc/nginx/conf.d/*.conf;.
server_names_hash_bucket_size 64;
Save the file by pressing Ctrl X and entering Y when prompted.
Create and open the file /etc/nginx/conf.d/standardnotes.conf for editing.
$ sudo nano /etc/nginx/conf.d/standardnotes.conf
Paste the following code in it. Replace standardnotes.example.com with your domain name. We have set the value of the client_max_body_size to 50MB. You can change it as per your requirements.
server {
  listen 443 ssl;
  listen [::]:443 ssl;
  http2 on;
  http3 on;
  quic_retry on;

  server_name standardnotes.example.com;

  client_max_body_size 50M;

  access_log  /var/log/nginx/standardnotes.access.log;
  error_log   /var/log/nginx/standardnotes.error.log;

  ssl_certificate      /etc/letsencrypt/live/standardnotes.example.com/fullchain.pem;
  ssl_certificate_key  /etc/letsencrypt/live/standardnotes.example.com/privkey.pem;
  ssl_trusted_certificate /etc/letsencrypt/live/standardnotes.example.com/chain.pem;

  ssl_session_timeout  5m;
  ssl_session_cache shared:MozSSL:10m;
  ssl_session_tickets off;

  ssl_protocols TLSv1.2 TLSv1.3;
  ssl_prefer_server_ciphers off;
  ssl_ciphers ECDHE-ECDSA-AES128-GCM-SHA256:ECDHE-RSA-AES128-GCM-SHA256:ECDHE-ECDSA-AES256-GCM-SHA384:ECDHE-RSA-AES256-GCM-SHA384:ECDHE-ECDSA-CHACHA20-POLY1305:ECDHE-RSA-CHACHA20-POLY1305:DHE-RSA-AES128-GCM-SHA256:DHE-RSA-AES256-GCM-SHA384;
  ssl_ecdh_curve X25519:prime256v1:secp384r1:secp521r1;
  resolver 8.8.8.8;
  ssl_stapling on;
  ssl_stapling_verify on;
  ssl_dhparam /etc/ssl/certs/dhparam.pem;

  location / {
    proxy_pass http://127.0.0.1:3000;
    proxy_cache off;
  }
}
# enforce HTTPS
server {
    listen 80;
    listen [::]:80;
    server_name  standardnotes.example.com;
    return 301   https://$host$request_uri;
}
Save the file by pressing Ctrl X and entering Y when prompted.
The above file is for the main Standard Notes application. Next, we need to configure another file for the Files subdomain.
$ sudo nano /etc/nginx/conf.d/files-standardnotes.conf
Paste the following code in it. Replace snotes-files.example.com with your domain name. We have set the value of the client_max_body_size variable to 50MB. You can change it as per your requirements.
server {
  listen 443 ssl;
  listen [::]:443 ssl;
  http2 on;
  http3 on;
  quic_retry on;

  server_name snotes-files.example.com;

  client_max_body_size 50M;

  access_log  /var/log/nginx/files-standardnotes.access.log;
  error_log   /var/log/nginx/files-standardnotes.error.log;

  ssl_certificate      /etc/letsencrypt/live/snotes-files.example.com/fullchain.pem;
  ssl_certificate_key  /etc/letsencrypt/live/snotes-files.example.com/privkey.pem;
  ssl_trusted_certificate /etc/letsencrypt/live/snotes-files.example.com/chain.pem;

  ssl_session_timeout  5m;
  ssl_session_cache shared:MozSSL:10m;
  ssl_session_tickets off;

  ssl_protocols TLSv1.2 TLSv1.3;
  ssl_prefer_server_ciphers off;
  ssl_ciphers ECDHE-ECDSA-AES128-GCM-SHA256:ECDHE-RSA-AES128-GCM-SHA256:ECDHE-ECDSA-AES256-GCM-SHA384:ECDHE-RSA-AES256-GCM-SHA384:ECDHE-ECDSA-CHACHA20-POLY1305:ECDHE-RSA-CHACHA20-POLY1305:DHE-RSA-AES128-GCM-SHA256:DHE-RSA-AES256-GCM-SHA384;
  ssl_ecdh_curve X25519:prime256v1:secp384r1:secp521r1;
  resolver 8.8.8.8;
  ssl_stapling on;
  ssl_stapling_verify on;
  ssl_dhparam /etc/ssl/certs/dhparam.pem;

  location / {
    proxy_pass http://127.0.0.1:3125;
    proxy_cache off;
  }
}
# enforce HTTPS
server {
    listen 80;
    listen [::]:80;
    server_name  snotes-files.example.com;
    return 301   https://$host$request_uri;
}
And finally, we need to create a config file for the web app.
$ sudo nano /etc/nginx/conf.d/web-standardnotes.conf
Paste the following code in it.
server {
  listen 443 ssl;
  listen [::]:443 ssl;
  http2 on;
  http3 on;
  quic_retry on;

  server_name snotes-web.example.com;

  client_max_body_size 50M;

  access_log  /var/log/nginx/standardnotes-web.access.log;
  error_log   /var/log/nginx/standardnotes-web.error.log;

  ssl_certificate      /etc/letsencrypt/live/snotes-web.example.com/fullchain.pem;
  ssl_certificate_key  /etc/letsencrypt/live/snotes-web.example.com/privkey.pem;
  ssl_trusted_certificate /etc/letsencrypt/live/snotes-web.example.com/chain.pem;

  ssl_session_timeout  5m;
  ssl_session_cache shared:MozSSL:10m;
  ssl_session_tickets off;

  ssl_protocols TLSv1.2 TLSv1.3;
  ssl_prefer_server_ciphers off;
  ssl_ciphers ECDHE-ECDSA-AES128-GCM-SHA256:ECDHE-RSA-AES128-GCM-SHA256:ECDHE-ECDSA-AES256-GCM-SHA384:ECDHE-RSA-AES256-GCM-SHA384:ECDHE-ECDSA-CHACHA20-POLY1305:ECDHE-RSA-CHACHA20-POLY1305:DHE-RSA-AES128-GCM-SHA256:DHE-RSA-AES256-GCM-SHA384;
  ssl_ecdh_curve X25519:prime256v1:secp384r1:secp521r1;
  resolver 8.8.8.8;
  ssl_stapling on;
  ssl_stapling_verify on;
  ssl_dhparam /etc/ssl/certs/dhparam.pem;

  location / {
    proxy_pass http://127.0.0.1:3125;
    proxy_cache off;
  }
}
# enforce HTTPS
server {
    listen 80;
    listen [::]:80;
    server_name  snotes-web.example.com;
    return 301   https://$host$request_uri;
}
Verify your Nginx configuration.
$ sudo nginx -t
Restart the Nginx server to enable the configuration files.
$ sudo systemctl restart nginx
Step 9 – Configure SELinux
Apply the policy to allow connections to be made to outside hosts.
$ sudo setsebool -P httpd_can_network_connect 1
Apply the policy to allow Nginx to give access to PostgreSQL.
$ sudo setsebool -P httpd_can_network_connect_db 1
Step 10 – Use Standard Notes
If you open the URL https://standardnotes.example.com in your browser, you should see the following output.

This means your server is up and running. To use Standard Notes, you will need to use the official apps. For our tutorial, we will use their web app but the method will stay the same for the desktop and mobile apps.
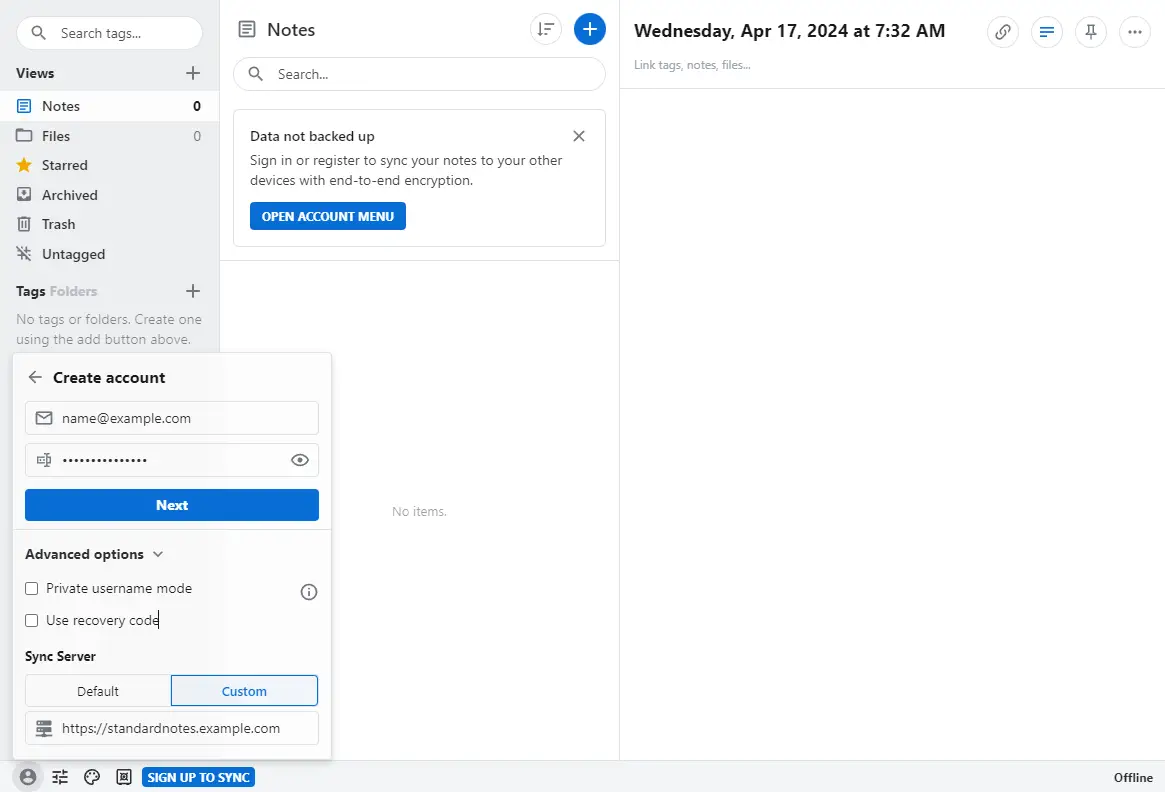
Open the URL https://snotes-web.example.com to access the web app. Click the Create Free Account link at the bottom left of the page and fill in your email address and password. Click on the Advanced features button, uncheck the Custom sync server option, and fill in the URL https://standardnotes.example.com in the box.
Click the Next button to proceed. You will be asked for your password again.
Once signed in, you can start creating notes and using the application.
Step 11 – Enable Paid features
So far, we have enabled basic functionality for the Standard Notes application. However, you can activate some paid server-side features, and Standard Notes allows you to do them for free. This won’t activate the client-side premium features like Super Notes and Nested tags. You can purchase a heavily discounted subscription via the Standard Notes Offline plan to activate them.
You need to run the following command from the Standard Notes directory to enable the server-side premium features in the self-hosted application.
$ cd ~/standardnotes

$ docker compose exec db sh -c "MYSQL_PWD=$MYSQL_ROOT_PASSWORD mysql $MYSQL_DATABASE -e
      'INSERT INTO user_roles (role_uuid , user_uuid) VALUES ((SELECT uuid FROM roles WHERE name="PRO_USER" ORDER BY version DESC limit 1) ,(SELECT uuid FROM users WHERE email="EMAIL@ADDR")) ON DUPLICATE KEY UPDATE role_uuid = VALUES(role_uuid);'
    "

$ docker compose exec db sh -c "MYSQL_PWD=$MYSQL_ROOT_PASSWORD mysql $MYSQL_DATABASE -e
      'INSERT INTO user_subscriptions SET uuid=UUID(), plan_name="PRO_PLAN", ends_at=8640000000000000, created_at=0, updated_at=0, user_uuid=(SELECT uuid FROM users WHERE email="EMAIL@ADDR"), subscription_id=1, subscription_type="regular";'
    "
Reload the web application, and the paid features should be activated for your account. To activate the client-side features, open your app preferences, choose the General >> Offline activation menu, and enter the activation code you got by purchasing the offline plan.
Step 12 – Configure the Server for Files upload
File upload is a paid feature of Standard Notes and won’t work without purchasing the offline plan. We have enabled the custom API URL for the file uploads. But they will still not work. To make them work, we need to give proper permissions to the uploads directory. The uploads are stored in the ~/standardnotes/uploads directory. Run the following commands to change permissions.
$ sudo chmod -R 775 data
$ sudo chmod -R 755 uploads
$ sudo chown -R 1001.1001 uploads
Now, Standard Notes sets zero as an upload limit for every user. It means no user can upload files unless given a quota manually. Therefore the final step in making file uploads work is to enable the file quota for the paid user account. We can do that by performing an SQL query inside the database container.
Log in to the MySQL shell inside the Database container.
$ docker exec -it db-standalone mysql -u std_notes_user -p
Enter password:
Once inside the MySQL shell, let us check the list of databases.
mysql > show databases;
 --------------------
| Database           |
 --------------------
| information_schema |
| performance_schema |
| standard_notes_db  |
 --------------------
3 rows in set (0.01 sec)
Switch to the Standard Notes database.
mysql > use standard_notes_db;
Run the following SQL command to add a 10GB file quota to the paid user activated above.
mysql> INSERT INTO subscription_settings(uuid, name, value, created_at, updated_at, user_subscription_uuid) VALUES (UUID(), "FILE_UPLOAD_BYTES_LIMIT", 10737418240, FLOOR(UNIX_TIMESTAMP(NOW(6))*1000000), FLOOR(UNIX_TIMESTAMP(NOW(6))*1000000), (SELECT us.uuid FROM user_subscriptions us INNER JOIN users u ON us.user_uuid=u.uuid WHERE u.email="[email protected]"));
Here 10737418240 refers to total bytes which translates to 10GB. You can modify this number to anything you need.
Exit the MySQL shell and the database container.
mysql > exit
Step 13 – Upgrade Standard Notes Server and the web app
The first step in upgrading the Standard Notes Server is to stop and remove the existing containers.
$ cd ~/standardnotes
$ docker compose stop
$ docker compose remove --orphans
Grab the latest .env, localstack_bootstrap.sh and the Docker compose files from the GitHub repository. Make the required changes and replace your existing files with the updated ones.
Start the Server containers again.
$ docker compose up -d
Your updated sync server is running now.
Switch to the web app directory.
$ cd ~/snotes-app
Switch to the web app root directory.
$ cd packages/web
Stop the existing process.
$ pm2 stop api
Switch back to the main app directory.
$ cd ~/snotes-app
Pull the latest changes from the GitHub repository.
$ git pull
Go back inside the web directory.
$ cd packages/web
Start the process.
$ pm2 start api
Your web app should be updated.
Conclusion
This concludes our tutorial on installing and configuring the Standard Notes server on a Rocky Linux 9 machine. If you have any questions, post them in the comments below.
")

")