Umami is a free and open-source web analytics written in Nodejs. It is easy to use and install and offers a user-friendly interface. It is based on privacy and is an alternative to services like Google Analytics. With umami, you can install your web analytics on your server with a database of your choice, such as PostgreSQL or MySQL.
With umami, you can collect essential metrics from your websites, such as page views, devices used, and where visitors come from. All these metrics are displayed on a single dashboard and are easy to read and monitor. Umami is a privacy-oriented web analytics program that stores all data on your server and does not collect any personal information. Moreover, all information collected by umami is anonymized.
Below, you will find some notable features of Umami web analytics:
- Open-source and self-hosted
- Lightweight
- Simple and easy to use
- Unlimited websites
- Privacy oriented
- Multiple account support
- All data with you
Requirements
In this tutorial you will learn how to install and configure Umami Web Analytics on Debian 11 Bullseye. You will install Umami with PostgreSQL database and Apache2 web server on Debian 11 Bullseye.
Below you can see the current environment for this example:
- Operating system: Debian 11 Bullseye
- Root privileges
- Domain name: umami.example.io
Goals you will learn:
- Installing Node.js
- Install PostgreSQL database
- Install Umami Web Analytics
- Set up Apache2 as a reverse proxy
Before you start, update your Debian repositories and bring all packages to the latest version.
sudo apt update && sudo apt upgrade -y
Install Node.js
The umami web analytics requires Nodejs version 12 or newer. For this first step, install Nodejs 12 and npm from the official Debian 11 repository.
Run the following apt command to install the nodejs, npm and git packages.
sudo apt install nodejs npm git
Type“y” to confirm the installation and press“Enter” to continue.
When the installation of nodejs and npm is complete, check it with the following command.
nodejs --version
npm --version
Below you can see the output you will get.
# nodejs version
v12.22.5
# npm version
7.5.2
Now go to the next step to install and configure the PostgreSQL database.
Installing PostgreSQL
The Debian 11 repository provides the PostgreSQL packages by default and is ready for installation.
Run the following apt command to install PostgreSQL on your Debian system.
sudo apt install postgresql postgresql-common postgresql-client
Type“y” to confirm and press“Enter” to continue. 2.
Start and activate the PostgreSQL service with the following command.
sudo systemctl enable --now postgresql
Now check the current status of the PostgreSQL service with the following command.
sudo systemctl status postgresql
You will see similar output messages as below.

The PostgreSQL service is in the“active (exited)” state, which means that it is running, but systemd cannot find a daemon to monitor it.
3. you can also check the list of open ports on your system with the ss command.
ss -plnt
You will see that PostgreSQL port‘5432‘ is in‘LISTEN‘ state.

Create new database and user for umami
After installing the PostgreSQL server you need to create a new database and user for the umami installation.
1. log in to the PostgreSQL shell with the following command.
sudo -u postgres psql
2. create a new database and a new user for the umami installation with the PostgreSQL query below. Make sure you change the password of the user with your secure password.
CREATE ROLE umami LOGIN ENCRYPTED PASSWORD 'StrongPasswordUmami';
CREATE DATABASE umamidb OWNER=umami;
Now type“q” and press“Enter” to exit PostgreSQL.

Details about the PostgreSQL database and user for your deployment:
- Database: umamidb
- Database user: umami
- Password: StrongPasswordUmami (for this example)
Go to the next step to install Umami Web Analytics.
Download and configure Umami Web Analytics
In this step you will install umami web analytics with all Nodejs dependencies. Then you will set up the database for your installation.
It is recommended to run the application with a non-root user, so you will also create a new system user.
Run the following command to create a new system user named“umami“.
sudo adduser --system --group --no-create-home --shell /sbin/nologin umami
Below you can see the output you will get. 2.
Adding system user `umami' (UID 108) ...
Adding new group `umami' (GID 115) ...
Adding new user `umami' (UID 108) with group `umami' ...
Not creating home directory `/home/umami'.
2. then create a new directory “/var/www” and change to your current working directory.
mkdir -p /var/www/; cd /var/www
Download the source code of umami using the git command (see below).
git clone https://github.com/mikecao/umami.git
Go to the directory “umami” and install all nodejs dependencies.
cd umami/
npm install
Wait until all dependencies are installed and make sure you don’t get any errors.
When the installation of all dependencies is finished, import the umami database schema into the“umamidb” database using the following command.
psql -h localhost -U umami -d umamidb -f sql/schema.postgresql.sql
Enter the database password for the“umami” user and press“Enter” to start importing the database schema.
Next, create a new ‘.env’ file to set up the PostgreSQL database.
nano .env
Copy and paste the following configuration. Make sure you change the database name, user, password and hash salt with your information.
DATABASE_URL=postgresql://umami:StrongPasswordUmami@localhost:5432/umamidb
HASH_SALT=change_this_hash_salt
Save the configuration and exit the program.
5. to verify the installation of umami web analytic, run the following npm command.
npm run build
npm start
The umami web analytic will run on the default port“3000“.
Open your web browser and enter the IP address of the server with port 3000 to see the umami login page.
Go back to your terminal shell and press“Ctrl c” to end the process. 6.
Now change the ownership of the umami installation directory“/var/www/umami” to the system user“umami“.
sudo chown -R umami:umami /var/www/umami
The basic installation of umami web analytics is complete. Go to the next step to set up umami as a systemd service and set up the apache/httpd web server.
Set up umami as systemd service
There are several ways to run the Node.js application in the background. One of them is to create a systemd service configuration for your applications.
For this step you create a new service file“umami.service“. 1.
1. create a new service file “/etc/system/system/umami.service” with the editor nano.
nano /etc/systemd/system/umami.service
Copy and paste the following configuration.
[Unit]
Description=Umami Website Analytics
After=network.target postgresql.service
[Service]
Type=simple
ExecStart=/usr/bin/npm start
Restart=always
# Consider creating a dedicated user for umami here:
User=umami
Group=umami
#Environment=NODE_ENV=production
WorkingDirectory=/var/www/umami [Install]
WantedBy=multi-user.target
Save the configuration and exit.
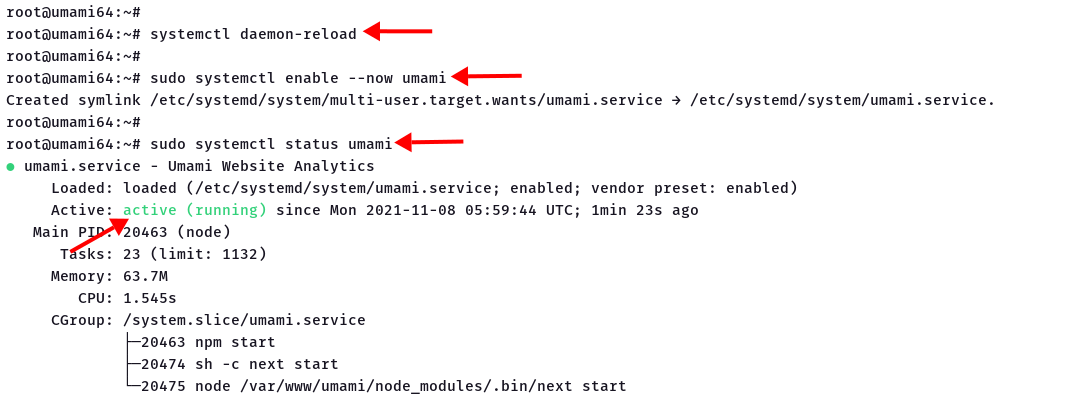
2. next you reload the systemd manager with the command below.
sudo systemctl daemon-reload
Now you can start the umami.service.
Execute the following systemctl command to start and activate the umami service.
sudo systemctl enable --now umami
Then check the status of the umami service with the following command.
sudo systemctl status umami
You will see that the umami service is active and running as shown below.
4. also check the umami service by checking the list of open ports on your system with the ss command.
ss -plnt
Below you can see a similar output.

The umami service is running on the default port“3000” as a nodejs application.
Set up Apache2 as reverse proxy
In this step you will install and configure the Apache web server as a reverse proxy for Umami web analytics. 1.
1. first install the Apache2 packages with the apt command below.
sudo apt install apache2
Type“y” and press“Enter” to continue the installation.
2. after that activate some Apache2 modules that are needed for the reverse proxy.
a2enmod proxy
a2enmod proxy_http
a2enmod ssl
3. next create a new configuration for the virtual host"https://vitux.com/etc/apache2/sites-available/umami.conf" with the nano editor.
nano /etc/apache2/sites-available/umami.conf
Copy the following configuration and paste it there. Make sure that you replace the domain name with your domain.
  ServerName umami.example.io
  ServerAlias www.umami.example.io
Options -Indexes

ProxyRequests on

ProxyPass / http://localhost:3000/
ProxyPassReverse / http://localhost:3000/
Save the configuration and exit.
For SSL/HTTPS use the following configuration. Make sure you change the domain name and the path of the SSL certificates.
ServerName umami.example.io
Redirect permanent / https://umami.example.io/


ServerName umami.example.io
ServerAlias www.umami.example.io

Protocols h2 http/1.1
Options -Indexes

SSLEngine On
SSLCertificateFile /etc/letsencrypt/live/umami.example.io/fullchain.pem
SSLCertificateKeyFile /etc/letsencrypt/live/umami.example.io/privkey.pem

ProxyRequests on

ProxyPass / http://localhost:3000/
ProxyPassReverse / http://localhost:3000/
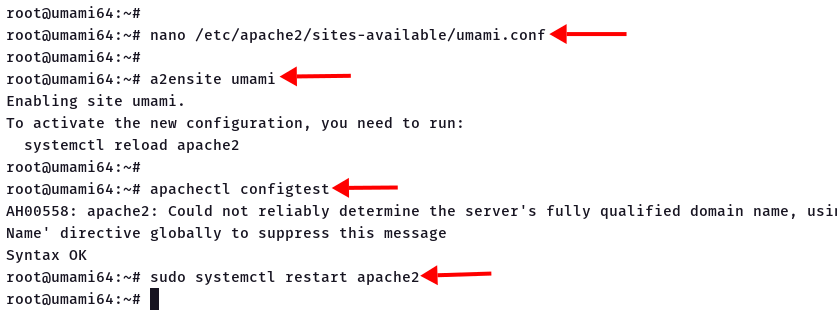
Now activate the virtual host configuration“umami.conf” with the command below. 4.
a2ensite umami
Check the Apache2 configuration and make sure there are no errors.
apachectl configtest
Now restart the Apache2 service to apply the new configuration.
sudo systemctl restart apache2
The configuration of Apache2 as a reverse proxy for Umami Web Analytic is complete.
Enable the UFW Firewall
It is always recommended to use the firewall on your system, especially in production environment.
1. install the UFW firewall on your Debian server using the apt command below.
sudo apt install ufw -y
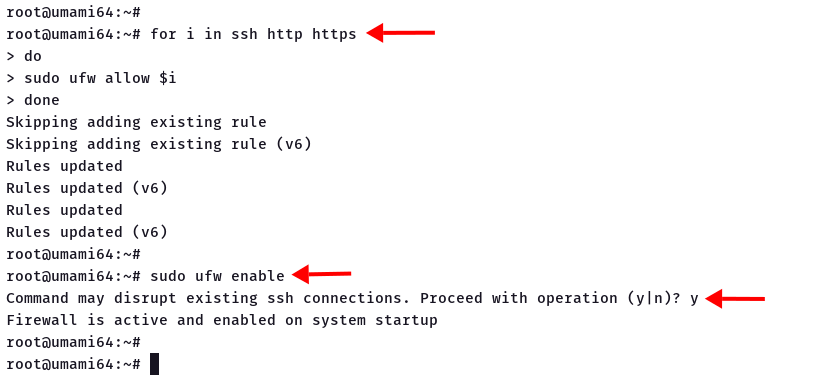
When the installation is complete, add the SSH, HTTP and HTTPS services to the UFW firewall rule. 3.
for i in ssh http https
do
sudo ufw allow $i
done
Start and enable the UFW firewall with the command below.
sudo ufw enable
Type“y” and press“Enter” to start and enable the UFW firewall.
Check the installation of Umami Web Analytic
Open your web browser and type your Umami domain installation in the address bar.
https://umami.example.io/
1. you will be redirected to the Umami login page.
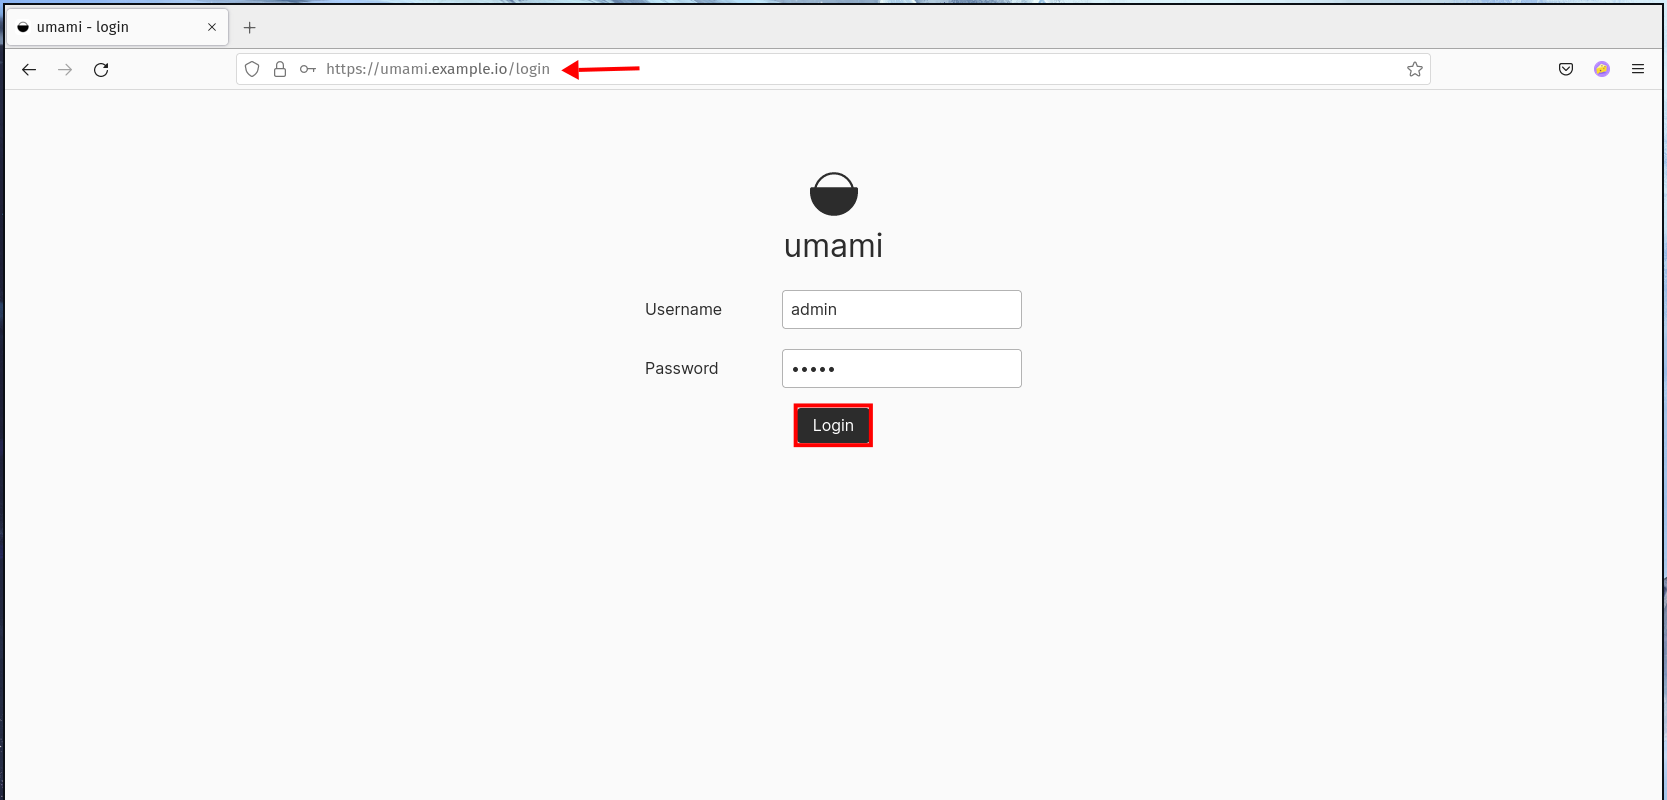
Enter the default user“admin” and password“umami” and then click the“Login” button.
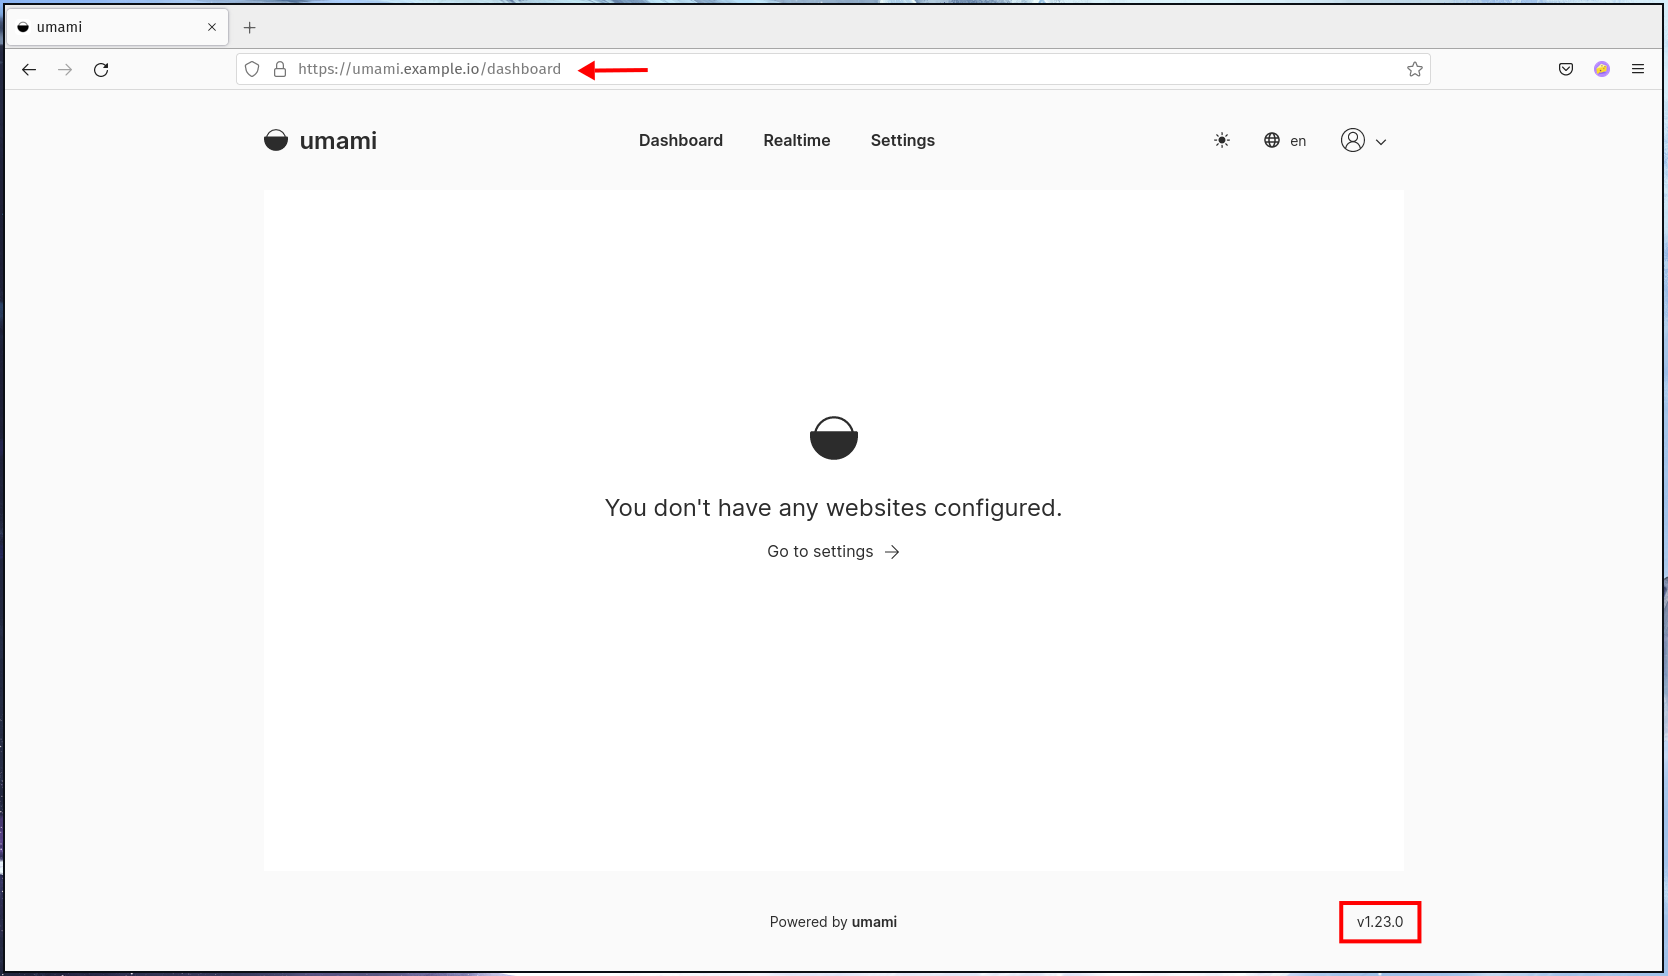
2. now you will see the default Umami dashboard (see below).
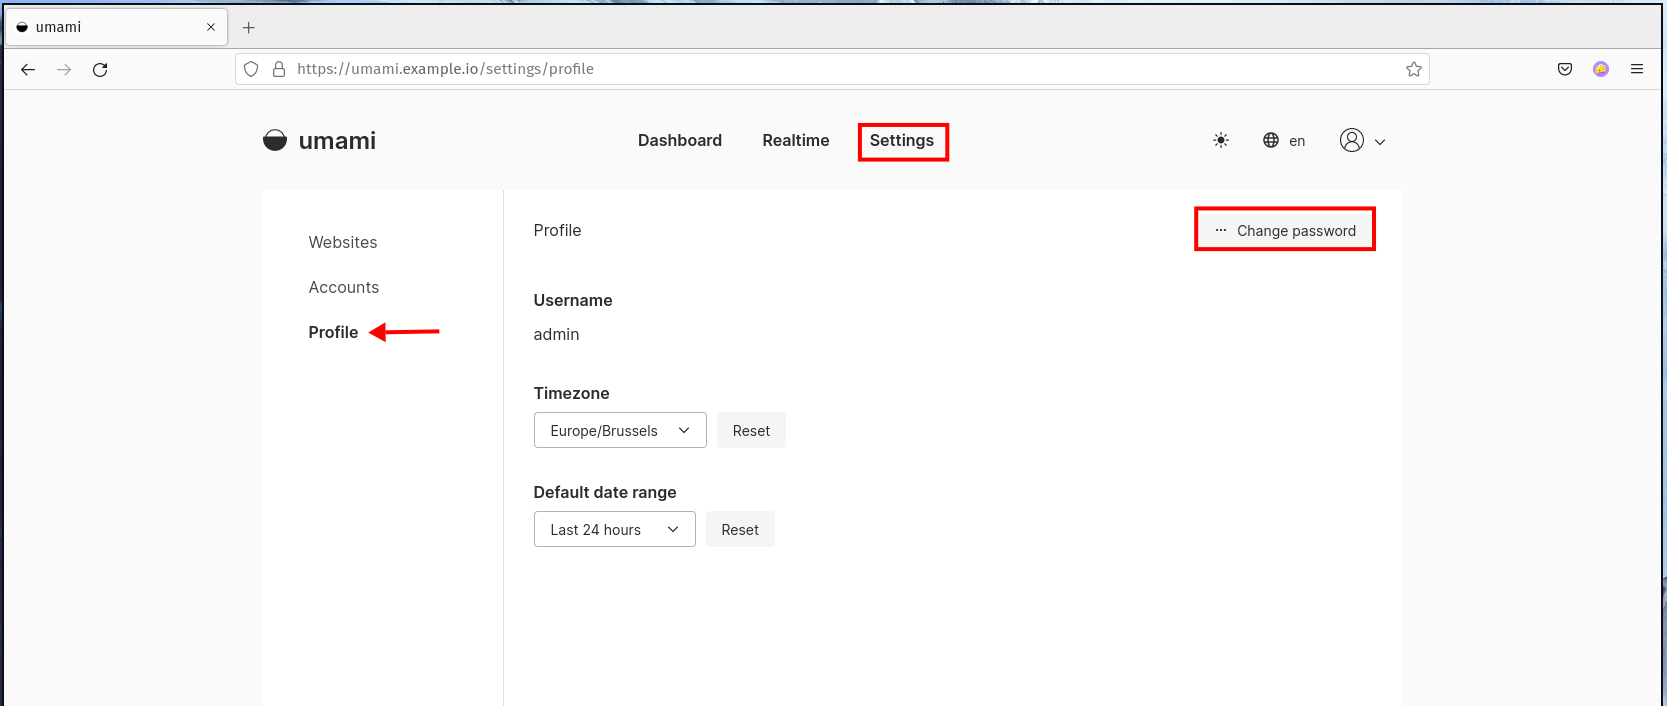
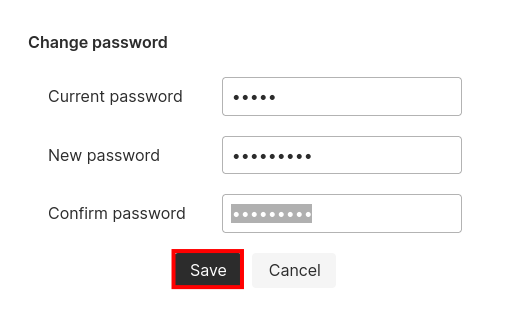
Next, click on the menu “Settings” > “Profile” > “Change Password” to set up a new password for the default user “admin”. 4.
4. enter the old password“umami” and your new secure password, then click“Save“.
5. now switch to the‘Realtime‘ menu to display realtime metrics on umami.
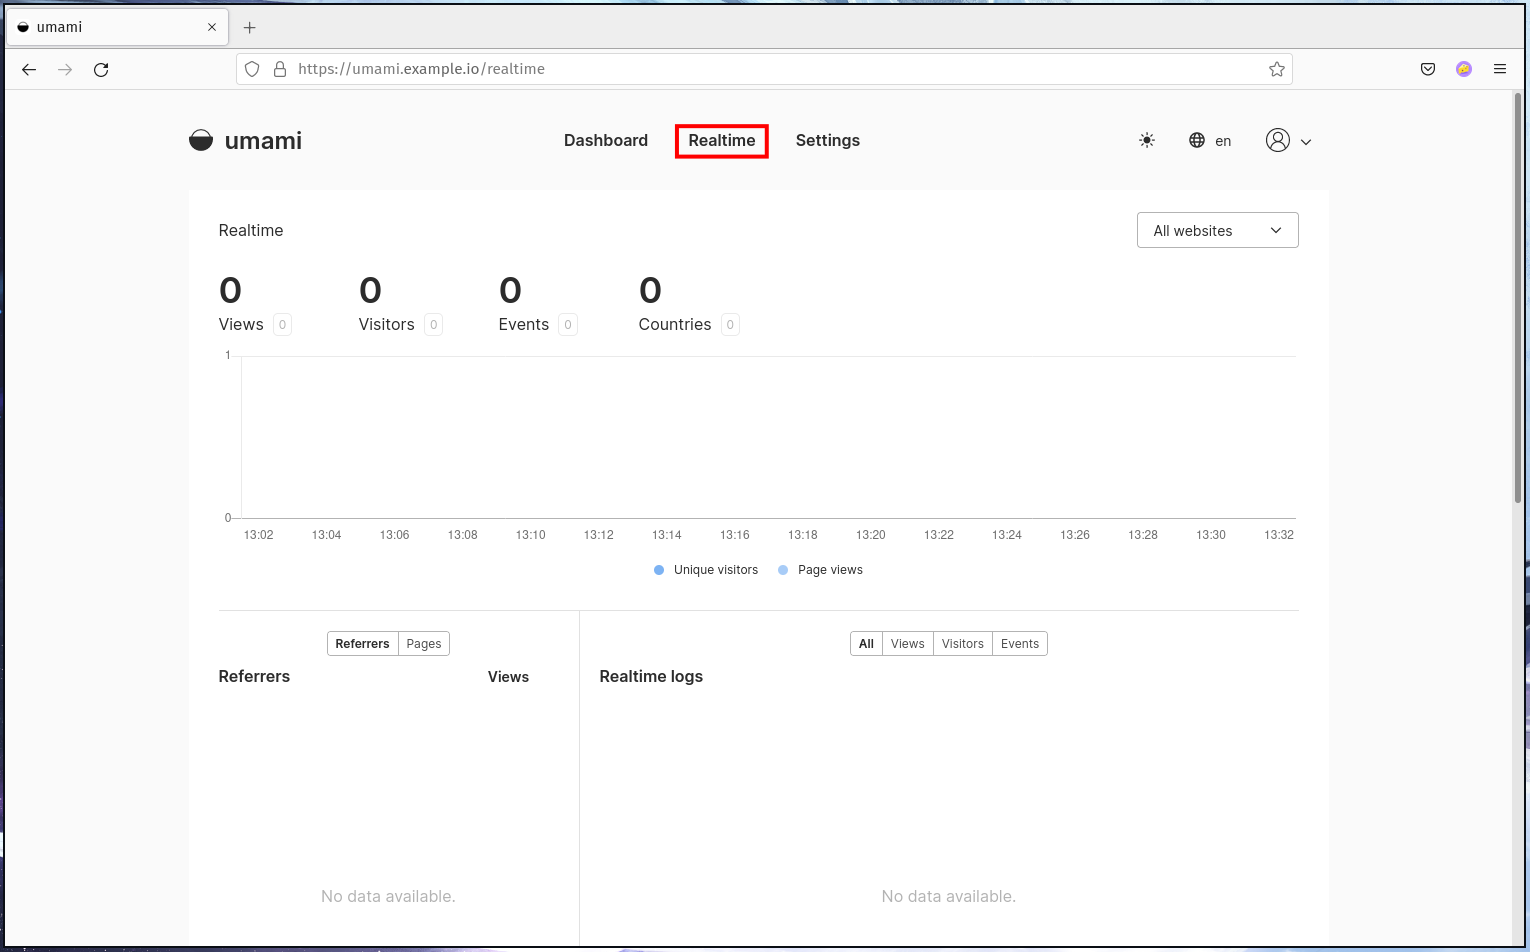
With this you have finished the installation of umami on the Debian server.
Conclusion
Congratulations! You have successfully installed the open-source web analytics system umami on the Debian 11 Bullseye with PostgreSQL database and Apache2 web server.
In the next step, you can add your website, generate the tracking code, and embed it on your website. Then, you can see all metrics on the real-time dashboard of umami.

