Now more than ever, page loading speed is crucial to any website owner. A few seconds of lag in loading your website will quickly send internet users to the next site leading to high bounce rates and reduced revenue. In fact, page loading speed is a crucial ranking aspect that Google uses to rank websites. The slower your website, the lower the rank it gets.
Varnish cache, also known as a caching reverse HTTP proxy, is a high-performance and blazing fast web application that speeds up your website by forwarding incoming HTTP requests to your webserver. It sits in front of a webserver and caches all the web traffic that is frequently accessed by users and stores it in memory. By so doing, it speeds up the retrieval time of the web pages. The cache also serves thousands of concurrent HTTP requests without crashing or overloading the webserver. It can boost your website speed by up to 300 – 100 times.
Let now install the Varnish cache on Ubuntu 20.04
Step 1: Update Ubuntu package index and packages
We will get started by updating the package lists and upgrading the packages to their latest versions.
$ sudo apt update && sudo apt upgrade

Our system is now fully updated and packages are up to their latest versions.
Step 2: Install Apache webserver
With the package lists and updated and current packages upgraded to their latest versions, we are going to install the Apache webserver.
$ sudo apt install apache2
This installs Apache and all the dependencies that Apache depends on to function as expected.

When the installation is complete, confirm Apache’s running status.
$ sudo systemctl status apache2

Being a webserver, Apache listens on port 80 by default. Use the netstat command as shown to verify this.
$ sudo netstat -pnltu
 Advertisement
Step 3: Install Varnish cache
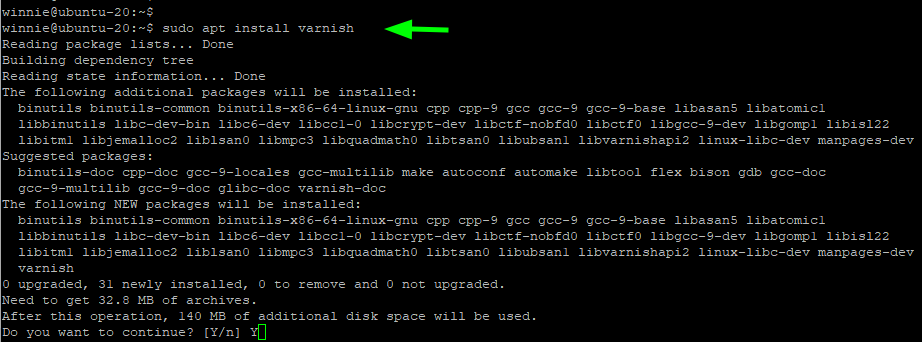
Moving on, we are going to install the Varnish cache which will forward requests to Apache. To do so, we will run the command:
$ sudo apt install varnish
This installs additional packages such as make and gcc, dependencies, and python libraries.

Just like Apache, Varnish starts automatically and you can confirm this as shown.
$ sudo systemctl status varnish

Step 4: Configure Varnish cache and Apache
So far, we have Apache and Varnish cache installed. As we know, Apache listens on port 80 by default as any webserver would. Since Varnish cache is the intermediary that will be forwarding HTTP requests to Apache, a few changes are required in both Apache & Varnish configuration.
First, we will configure Apache to listen to requests from Varnish on port 8080. Then we need to configure the Varnish accelerator to listen on port 80 so as to act as an intermediary between the users sending HTTP requests and the Apache webserver.
We will start by configuring Apache by editing the ports.conf file.
$ sudo vim /etc/apache2/ports.conf
Locate the Listen directive and edit it to port 8080. Sav the changes and exit.

Next, modify the default Apache virtual host file to listen to HTTP requests forwarded to it by Varnish cache on port 8080 as shown.
$ sudo vim /etc/apache2/sites-enabled/000-default.conf

Save the changes and exit. For the changes to reflect, restart Apache.
$ sudo systemctl restart apache2

Verify that Apache is listening on port 8080 using the netstat command.
$ sudo netstat -pnltu

Now, if you try to Access the Apache welcome page on the browser. You will get an error. This is because we have set it to listen on port 8080, and so you will have to specify the port number on the URL.
http://server-ip:8080

Moving on. We will configure varnish to listen to incoming HTTP requests = on port 80. So, edit the following file.
$ sudo vim /etc/default/varnish
Locate the DAEMON_OPTS directive and change it to port 80.

Once again, save the changes and exit. When you peek at the varnish.vcl file this is what you get.
$ sudo vim /etc/default/varnish.vcl

Moving on, edit the Varnish systemd file;
$ sudo vim /lib/systemd/system/varnish.service
Locate the ExecStart directive and change the port from port 6081 to 80.

Save the changes and restart both Apache and Varnish accelerator.
$ sudo systemctl restart apache2
$ sudo systemctl daemon-reload
$ sudo systemctl restart varnish

Step 5: Test the configuration
To confirm that everything went according to plan, use the curl command to send a GET request to view the HTTP headers. Be keen enough to observe the following line.
Via: 1.1 varnish (varnish/6.2)
This confirms that the Varnish accelerator is doing its job of forwarding requests to Apache. Great!

You can now browse your web server without specifying any port since Varnish is now listening on port 80.

Conclusion
Your web server should now enjoy enhanced performance thanks to the blazing fast Varnish cache.


