
In this tutorial, we will show you step-by-step how to install and configure an open-source monitoring system Zabbix 4.0 LTS on the CentOS 8 system. This guide will cover some topics, including installation and configuration of the LAMP Stack for our Zabbix installation, and how to change the default password for Zabbix admin web UI.
Prerequisites
- CentOS 8 Server
- Root privileges
- Basic knowledge about Linux CentOS commands
What we will do:
- Install Apache Httpd
- Install and Configure PHP
- Install and Configure MariaDB
- Install and Configure Zabbix 4.0 LTS
- Configure Firewalld
- Configure SELinux
- Zabbix Post-Installation
- Change Default Admin of Zabbix
Step 1 – Install Apache Httpd
For this guide, we’re going to use the Apache/httpd for our web server. The Zabbix server will run under the Apache webserver.
You can install the Apache/httpd package using the dnf command below.
dnf install httpdOnce the installation is complete, add the httpd service to the system boot and start the service using the following commands.
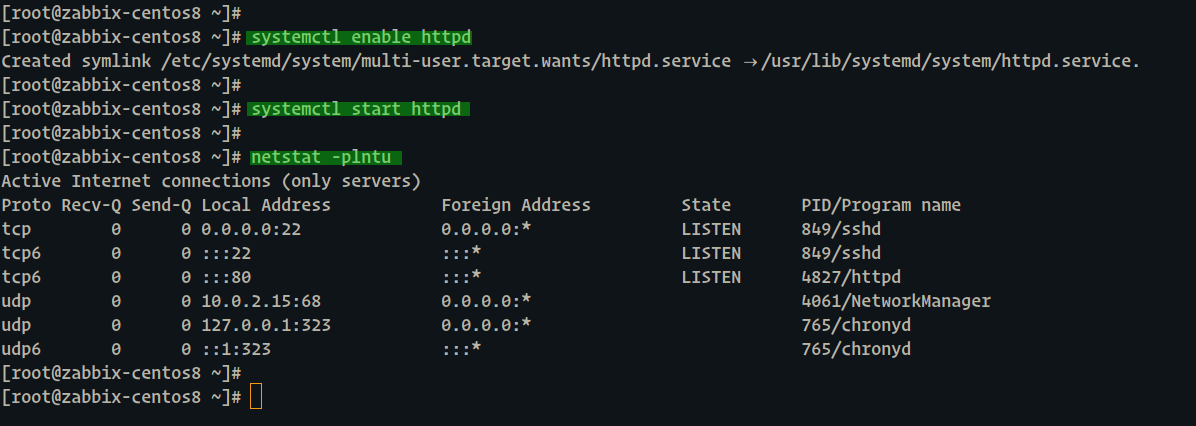
systemctl enable httpd

systemctl start httpd
Now check the httpd service using the netstat command below and make sure the HTTP port ’80’ is on the ‘LISTEN’ state.
netstat -plntuBelow is the result.
As a result, the httpd service is up and running on default HTTP port ’80’ on the CentOS 8 server.
Step 2 – Install PHP
After installing the Apache/httpd web server, we’re going to install PHP packages and its extensions needed for the Zabbix installation. We’re going to install and configure PHP as Zabbix installation requirements.
Install PHP packages using the dnf command below.
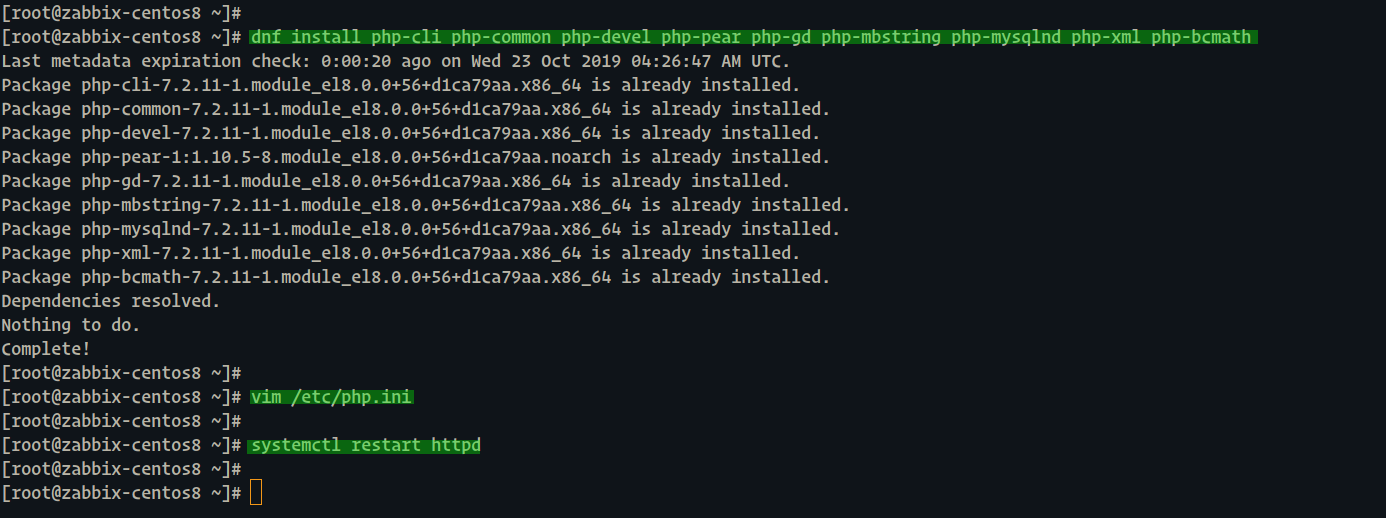
dnf install php-cli php-common php-devel php-pear php-gd php-mbstring php-mysqlnd php-xml php-bcmathOnce the installation is complete, configure the PHP configuration ‘/etc/php.ini’ using the vim editor.
vim /etc/php.iniChange the values of the configuration as shown below.
date.timezone = Asia/Jakarta

max_execution_time = 600

max_input_time = 600

memory_limit = 256M

post_max_size = 32M

upload_max_filesize = 16M
Save and close.
Now restart the Apache/httpd service.
systemctl restart httpdAnd the PHP installation and configuration on CentOS 8 server has been completed.
Step 3 – Install and Configure MariaDB
By default, Zabbix offers support for many databases for the installation, including MySQL, PostgreSQL, SQLite, and Oracle database. For this guide, we will be using MariaDB as the database for our Zabbix installation.
Install mariadb-server using the dnf command below.
dnf install mariadb-serverOnce the installation is complete, add the MariaDB service to the system boot and start the service using the following command.
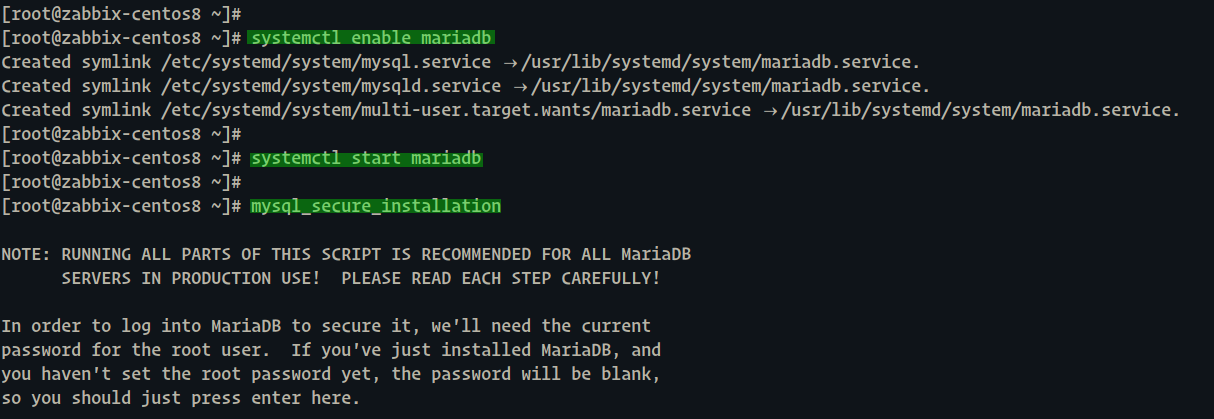
systemctl enable mariadb

systemctl start mariadb
The MariaDB server is up and running.
Next, we’re going to configure the MariaDB root password. Run the ‘mysql_secure_installation’ command below for configuring the root password.
mysql_secure_installationType your root password and press Enter.
Set a root password? [Y/n] Y

Disallow root login remotely? [Y/n] Y

Remove test database and access to it? [Y/n] Y

Reload privilege tables now? [Y/n] Y
And the MariaDB root password has been configured.
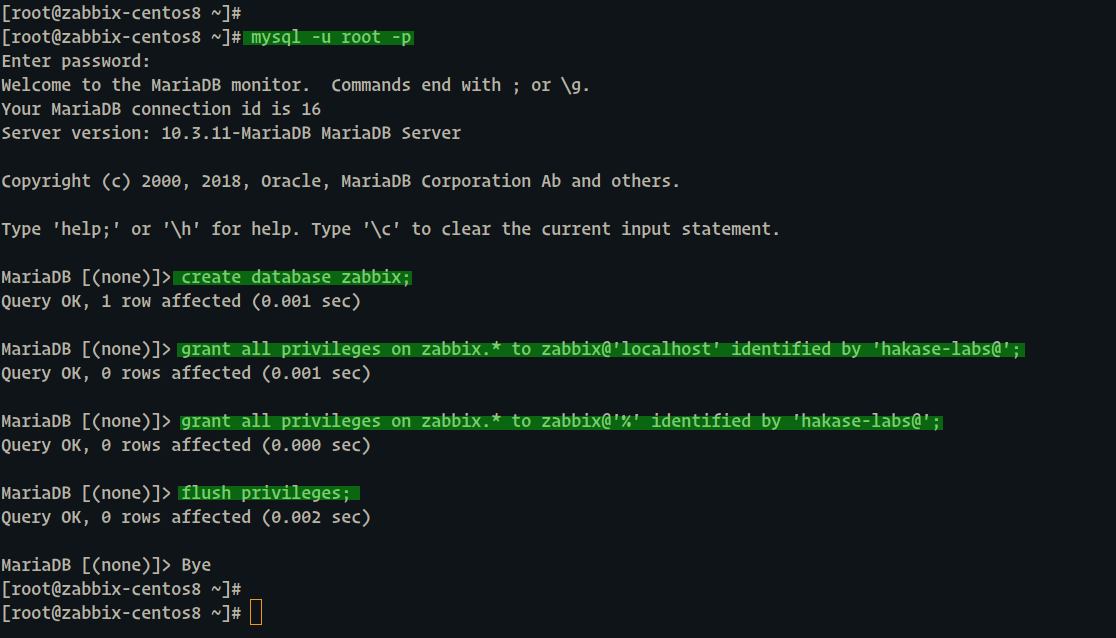
Next, we’re going to create a new database and user for the Zabbix installation. We will create a new database and user called ‘zabbix’ with the password ‘[email protected]‘.
Log in to the MariaDB/mysql shell using the mysql command below.
mysql -u root -p

TYPE YOUR ROOT PASSWORD:
And run the following MariaDB queries below on the shell.
create database zabbix;

grant all privileges on zabbix.* to [email protected]'localhost' identified by '[email protected]';

grant all privileges on zabbix.* to [email protected]'%' identified by '[email protected]';

flush privileges;
And as a result, the new database and user for Zabbix installation has been created.
Step 4 – Install and Configure Zabbix 4.0 LTS
In this step, we’re going to install the Zabbix 4.0 LTS. We will install the Zabbix LTS version from the official Zabbix repository.
– Add Repository and Install Packages
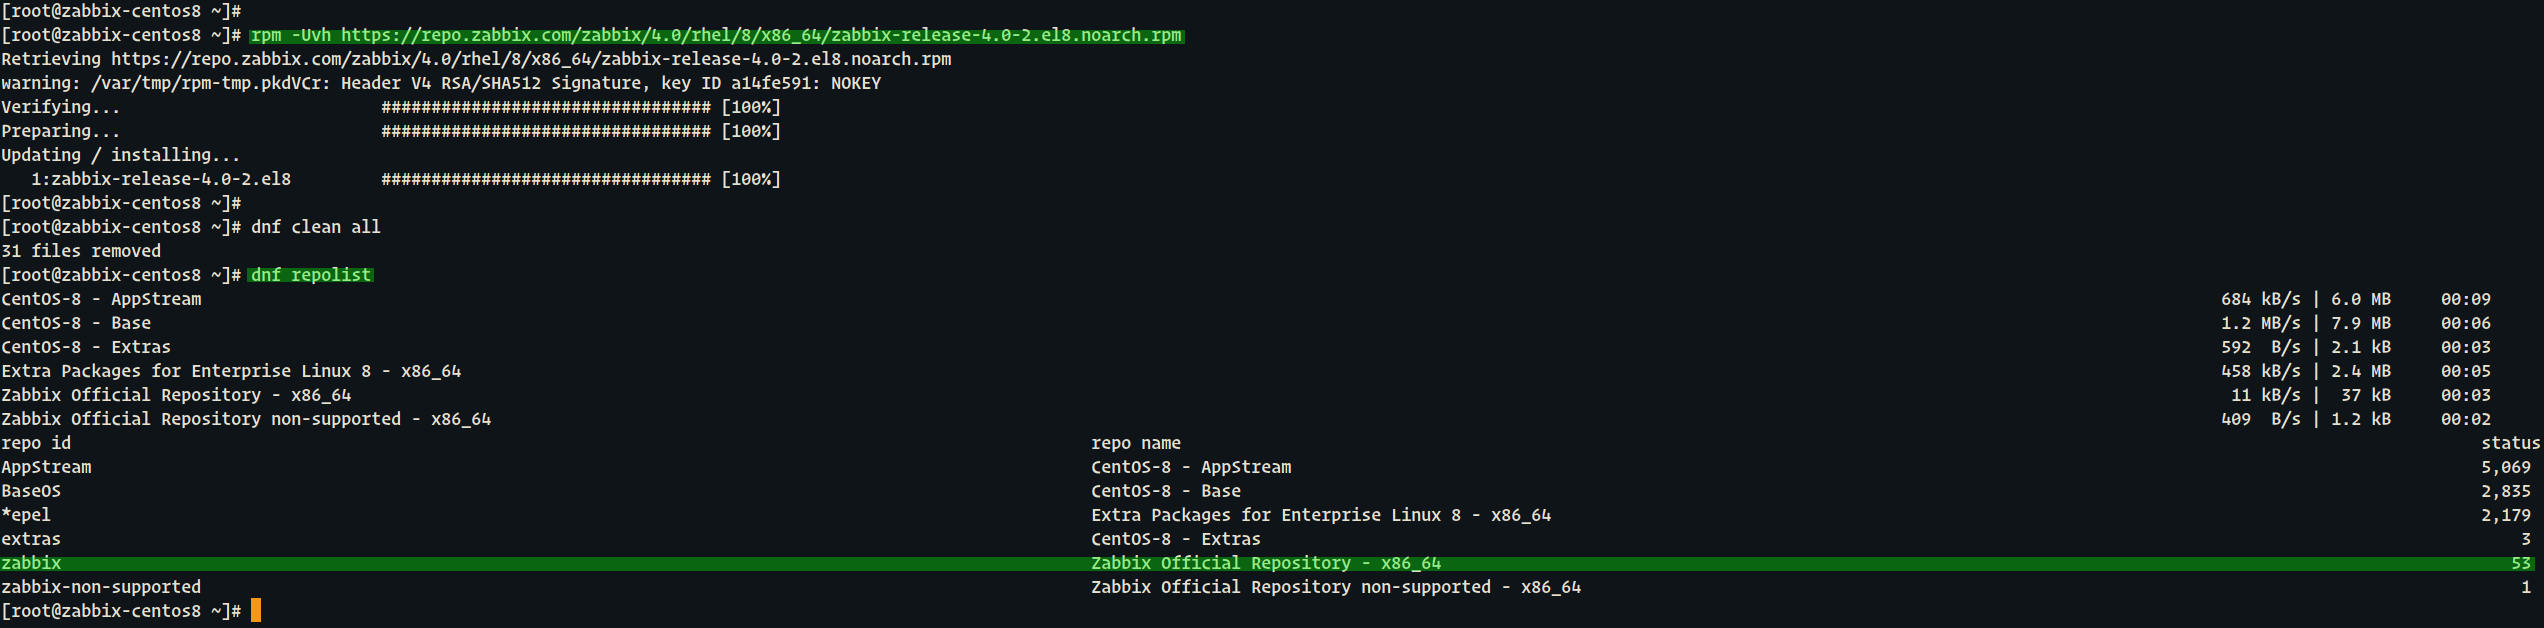
Firstly, we need to add the Zabbix 4.0 LTS repository to the system using the rpm command below.
rpm -Uvh https://repo.zabbix.com/zabbix/4.0/rhel/8/x86_64/zabbix-release-4.0-2.el8.noarch.rpmAfter that, remove system packages cache and check all available repository on the system.
dnf clean all

dnf repolist
Now you will get the result as below.
As a result, the Zabbix repository has been added to the CentOS 8 system.
Now run the dnf command below to install Zabbix Server and Agent.
dnf -y install zabbix-server-mysql zabbix-web-mysql zabbix-agentWait for the Zabbix installation finished.
Gambar
– Import MySQL Database Scheme
Once the Zabbix installation is complete, we will import the MariaDB database scheme for Zabbix.
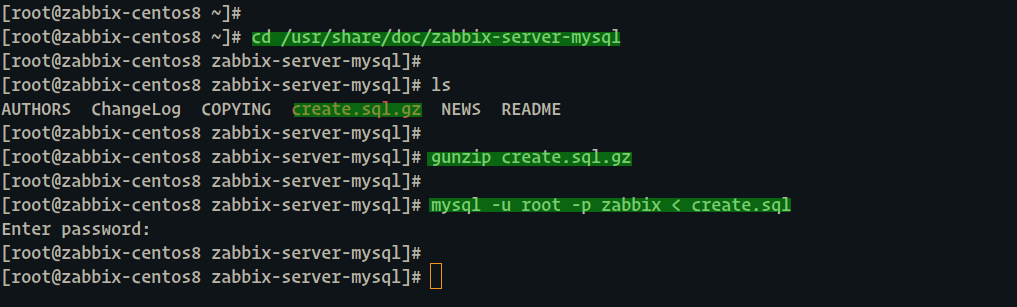
Go to the ‘/usr/share/doc/zabbix-server-mysql’ directory and extract the database scheme.
cd /usr/share/doc/zabbix-server-mysql

gunzip create.sql.gz
Now import the database scheme to our ‘zabbix’ database using the MySQL command below.
mysql -u root -p zabbix < create.sqlType your MariaDB root password and the database schema has been imported.
– Configure Zabbix Server and Zabbix Agent
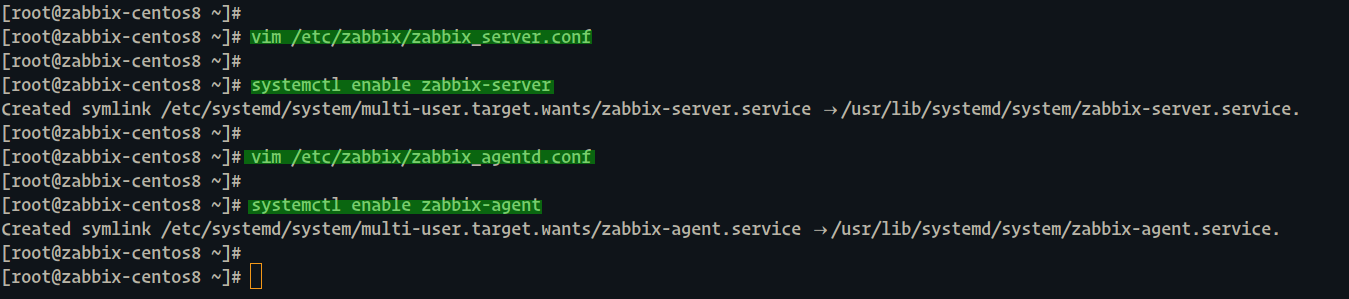
Zabbix-server is the central process of the Zabbix software system. We will configure the Zabbix-server by editing the configuration ‘/etc/zabbix/zabbix_server.conf’.
Edit the ‘/etc/zabbix/zabbix_server.conf’ configuration file using vim editor.
vim /etc/zabbix/zabbix_server.confOn the database line configuration, type the configuration as below and change the ‘DBPassword’ value with your own database password.
DBHost=localhost

[email protected]
Save and close.
After that, add the zabbix-server to the system boot.
systemctl enable zabbix-serverAnd the zabbix-server configuration has been completed.
Next, we will show you the zabbix-agent configuration. The zabbix-agent must be installed on all machines that will be monitored.
Edit the zabbix-agent configuration ‘/etc/zabbix/zabbix_agentd.conf’ using vim editor.
vim /etc/zabbix/zabbix_agentd.confNow change the ‘Server’ and ‘ServerActive’ value with the zabbix-server IP address as below.
Server=10.5.5.50

ServerActive=10.5.5.50
Save and close.
Now add the zabbix-agent service to the system boot.
systemctl enable zabbix-agentAnd the zabbix-agent configuration has been completed.
Step 5 – Configure Firewalld
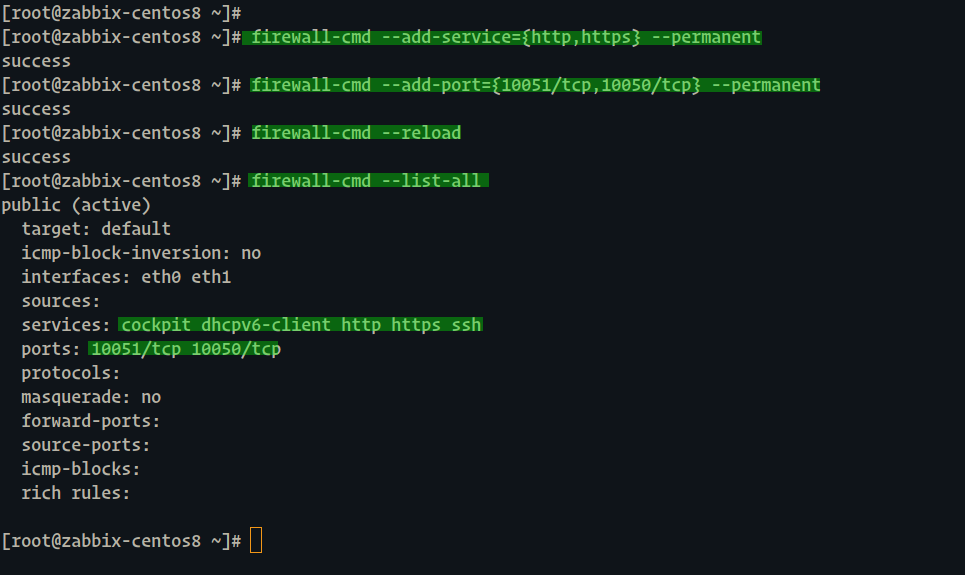
For the firewalld configuration, we’re going to add new services including HTTP, HTTPS, and the port that used by the Zabbix server and agent.
Add HTTP, HTTP, and Zabbix ports ‘10050-10051’ to the firewalld using the following commands.
firewall-cmd --add-service={http,https} --permanent

firewall-cmd --add-port={10051/tcp,10050/tcp} --permanent
After that, reload the firewalld and check all available services and ports on it.
firewall-cmd --reload

firewall-cmd --list-all
And you will be shown the result as below.
As a result, the HTTP, HTTPS, and Zabbix Ports ‘10050-10051’ has been added to the firewalld.
Step 6 – Configure SELinux
If you’re running the Zabbix on CentOS 8 with SELinux enabled on it, then you must do all command on this section.
Install SELinux utilities using the dnf command below.
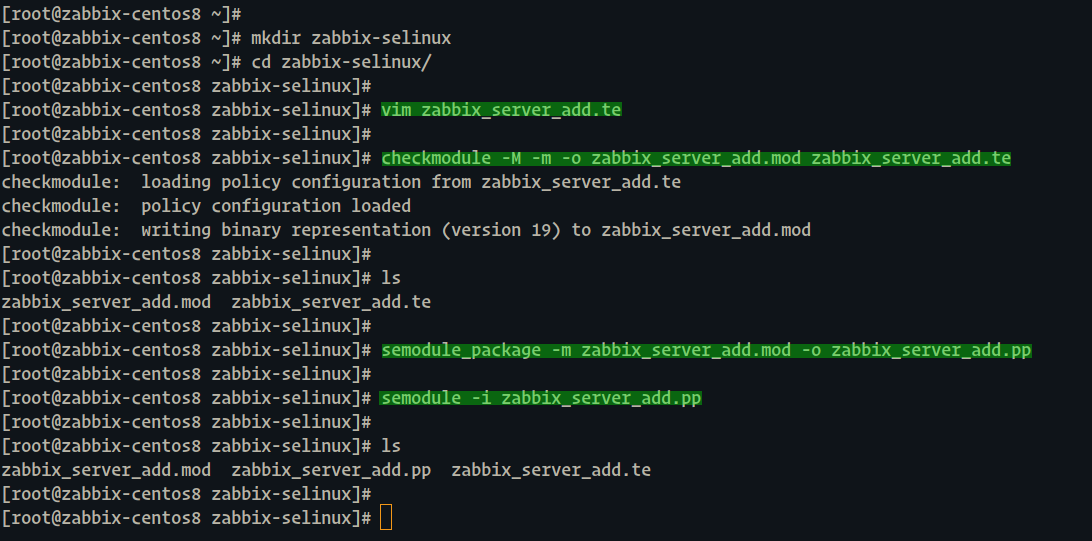
dnf install policycoreutils checkpolicy setroubleshoot-serverOnce the installation is complete, create a new directory ‘~/zabbix-linux’ and go into it.
mkdir -p ~/zabbix-selinux

cd ~/zabbix-selinux/
Now create a new SELinux policy module file ‘zabbix_server_add.te’ using vim editor.
vim zabbix_server_add.tePaste the following configuration.
module zabbix_server_add 1.1;
require {

        type zabbix_var_run_t;

        type tmp_t;

        type zabbix_t;

        class sock_file { create unlink write };

        class unix_stream_socket connectto;

        class process setrlimit;

        class capability dac_override;

}

#============= zabbix_t ==============

#!!!! This avc is allowed in the current policy

allow zabbix_t self:process setrlimit;

#!!!! This avc is allowed in the current policy

allow zabbix_t self:unix_stream_socket connectto;

#!!!! This avc is allowed in the current policy

allow zabbix_t tmp_t:sock_file { create unlink write };

#!!!! This avc is allowed in the current policy

allow zabbix_t zabbix_var_run_t:sock_file { create unlink write };

#!!!! This avc is allowed in the current policy

allow zabbix_t self:capability dac_override;
Save and close.
Now convert the ‘zabbix_server_add.te’ into the policy module using the checkmodule command below.
checkmodule -M -m -o zabbix_server_add.mod zabbix_server_add.teNow compile the policy module ‘zabbix_server_add.mod’ using the semodule_package command.
semodule_package -m zabbix_server_add.mod -o zabbix_server_add.ppAfter that, load the compiled policy module ‘zabbix_server_add.pp’ to the system.
semodule -i zabbix_server_add.ppThe local custom policy module for Zabbix has been loaded.
Next, for additional SELinux configuration. Run the setsbool command below.
setsebool -P httpd_can_network_connect 1

setsebool -P httpd_can_connect_zabbix 1

setsebool zabbix_can_network on
And the SELinux configuration for Zabbix has been completed.
Step 7 – Zabbix Initial Setup
Firstly, start the zabbix-server using the following commands.
systemctl start zabbix-server

systemctl status zabbix-server
Now start the zabbix-agent service.
systemctl start zabbix-agent

systemctl status zabbix-agent
And then restart the httpd service.
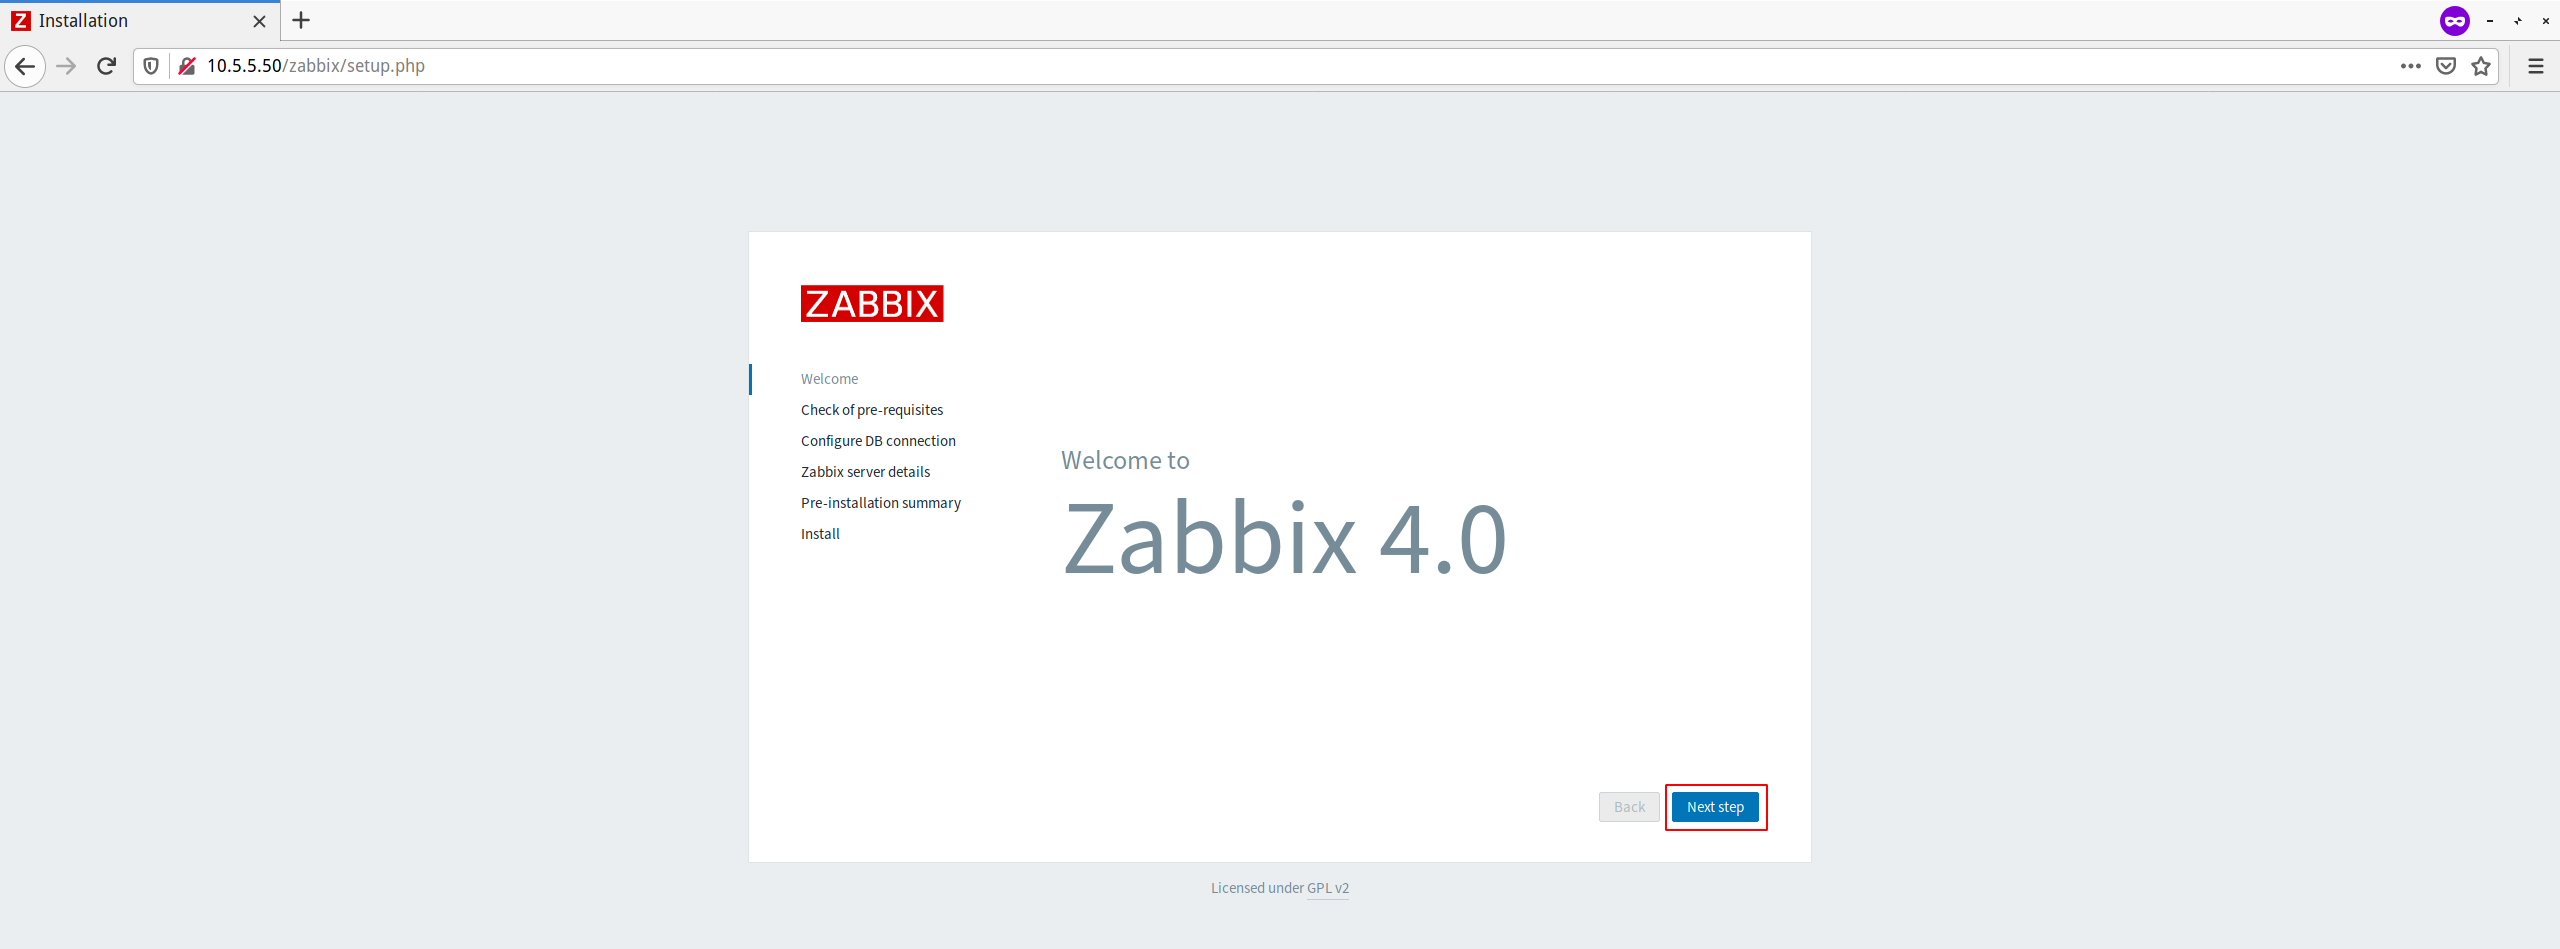
systemctl restart httpdNext, open your web browser and type the server IP address as follows.
http://10.5.5.50/zabbix/
And you will get the welcome message from Zabbix.
Click the ‘Next Step’ button.
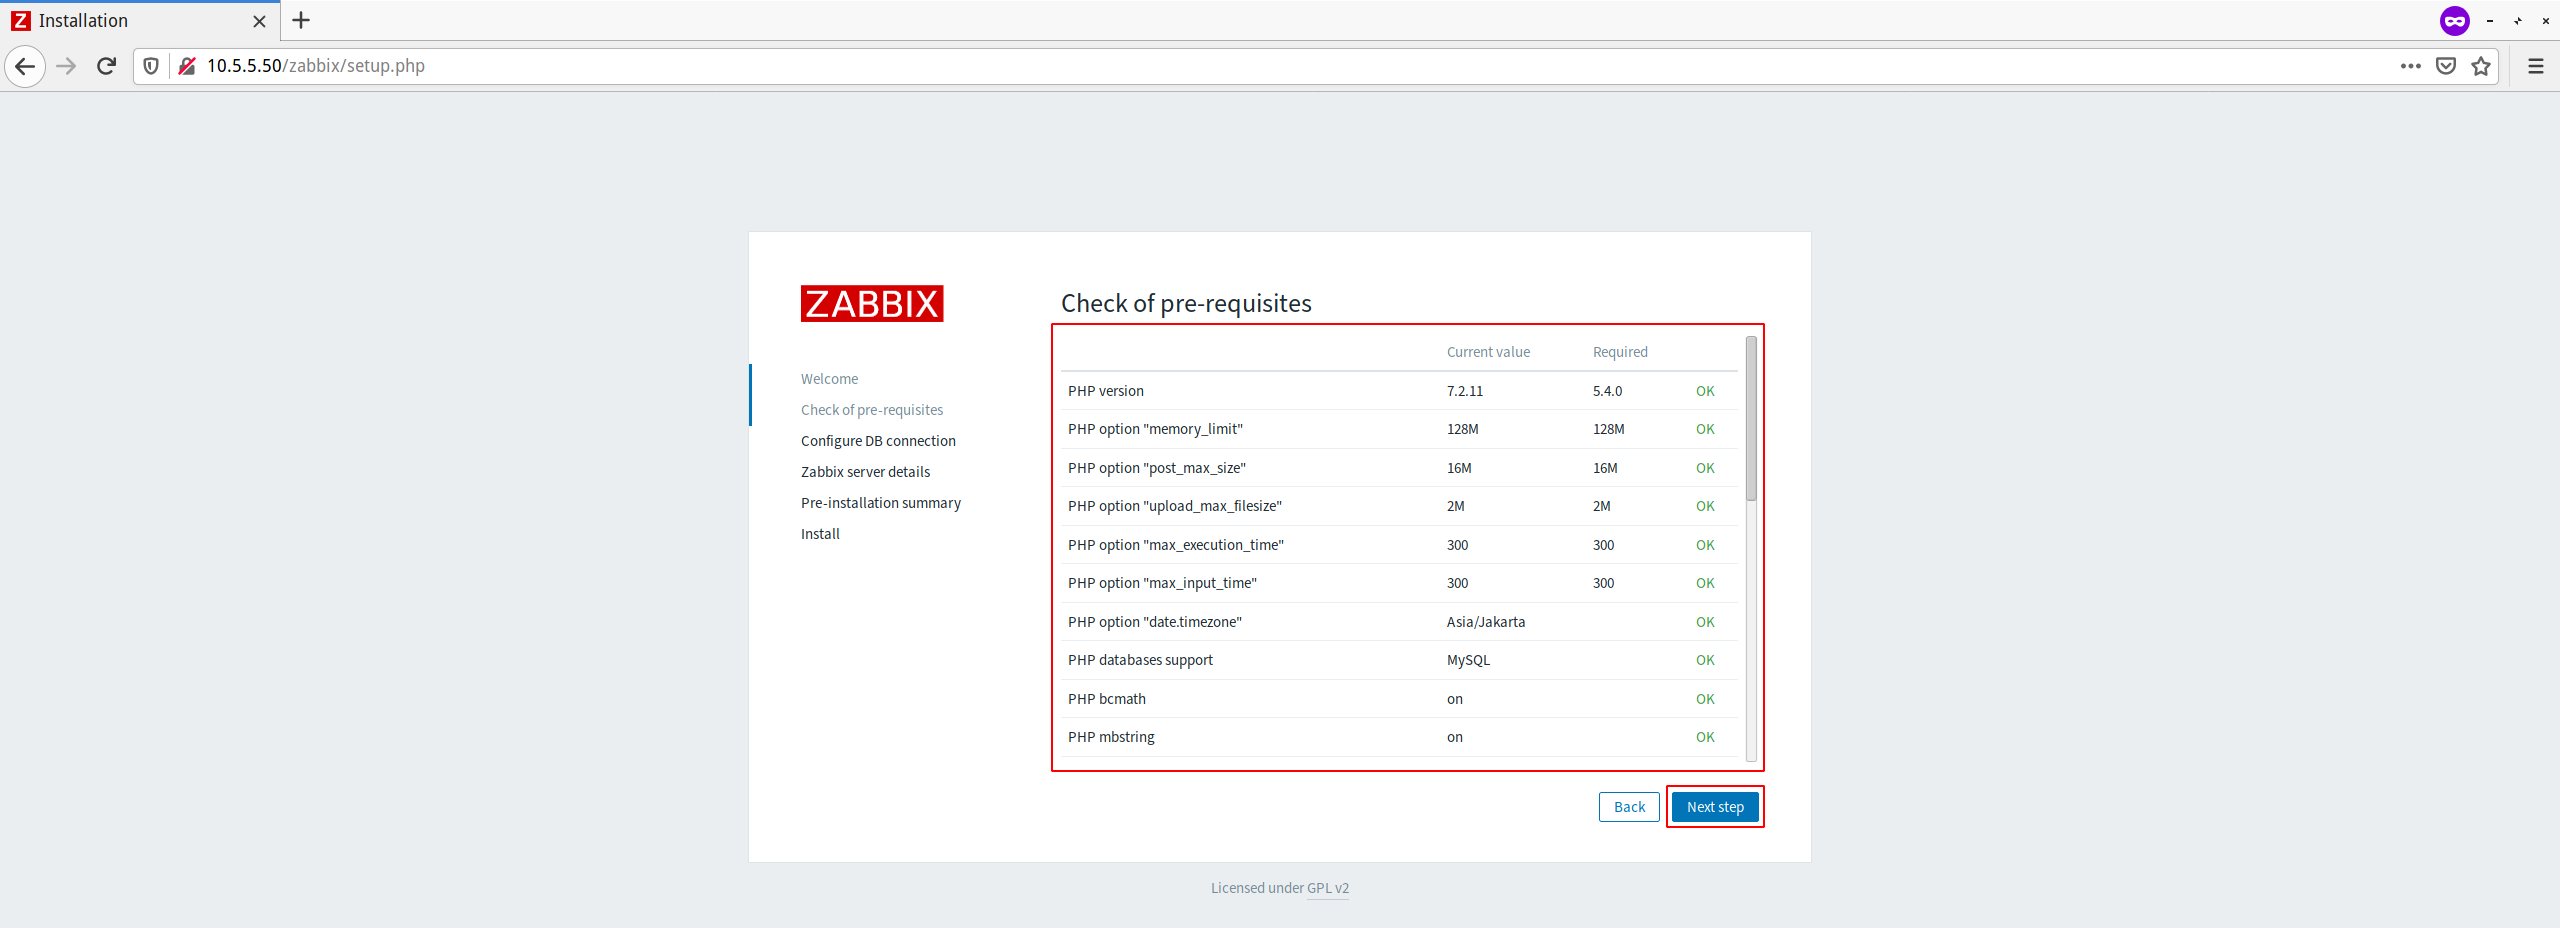
Now, Zabbix will check all system requirements for its installation. Make sure there is no error.
Click the ‘Next Step’ button.
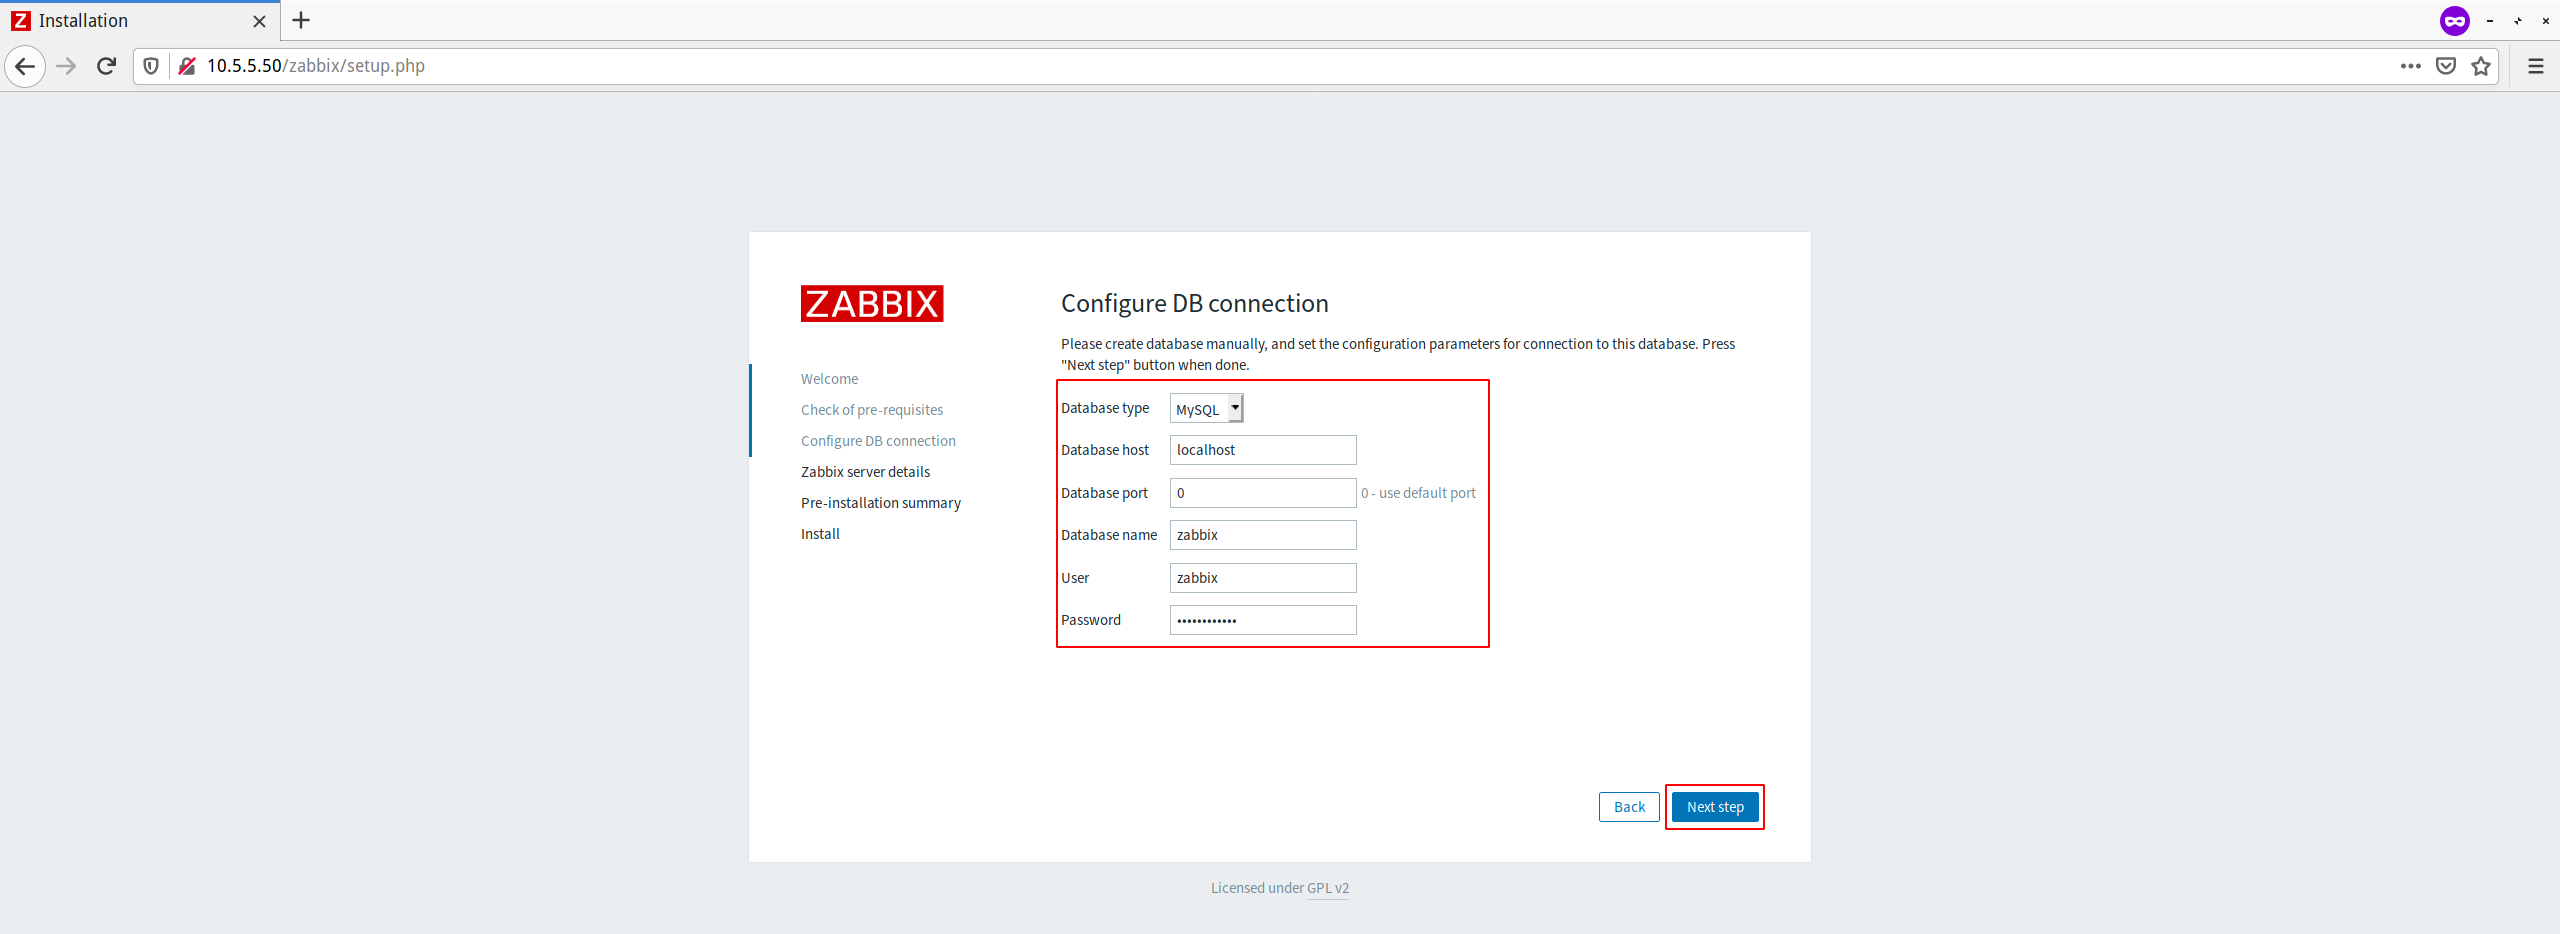
For the database info, type all your database setup.
And click the ‘Next step’ button.
Now comes the Zabbix server details configuration. On the ‘Host’ field, type your own server IP address, and change the name with your own domain name or hostname.
Click the ‘Next step’ button again.
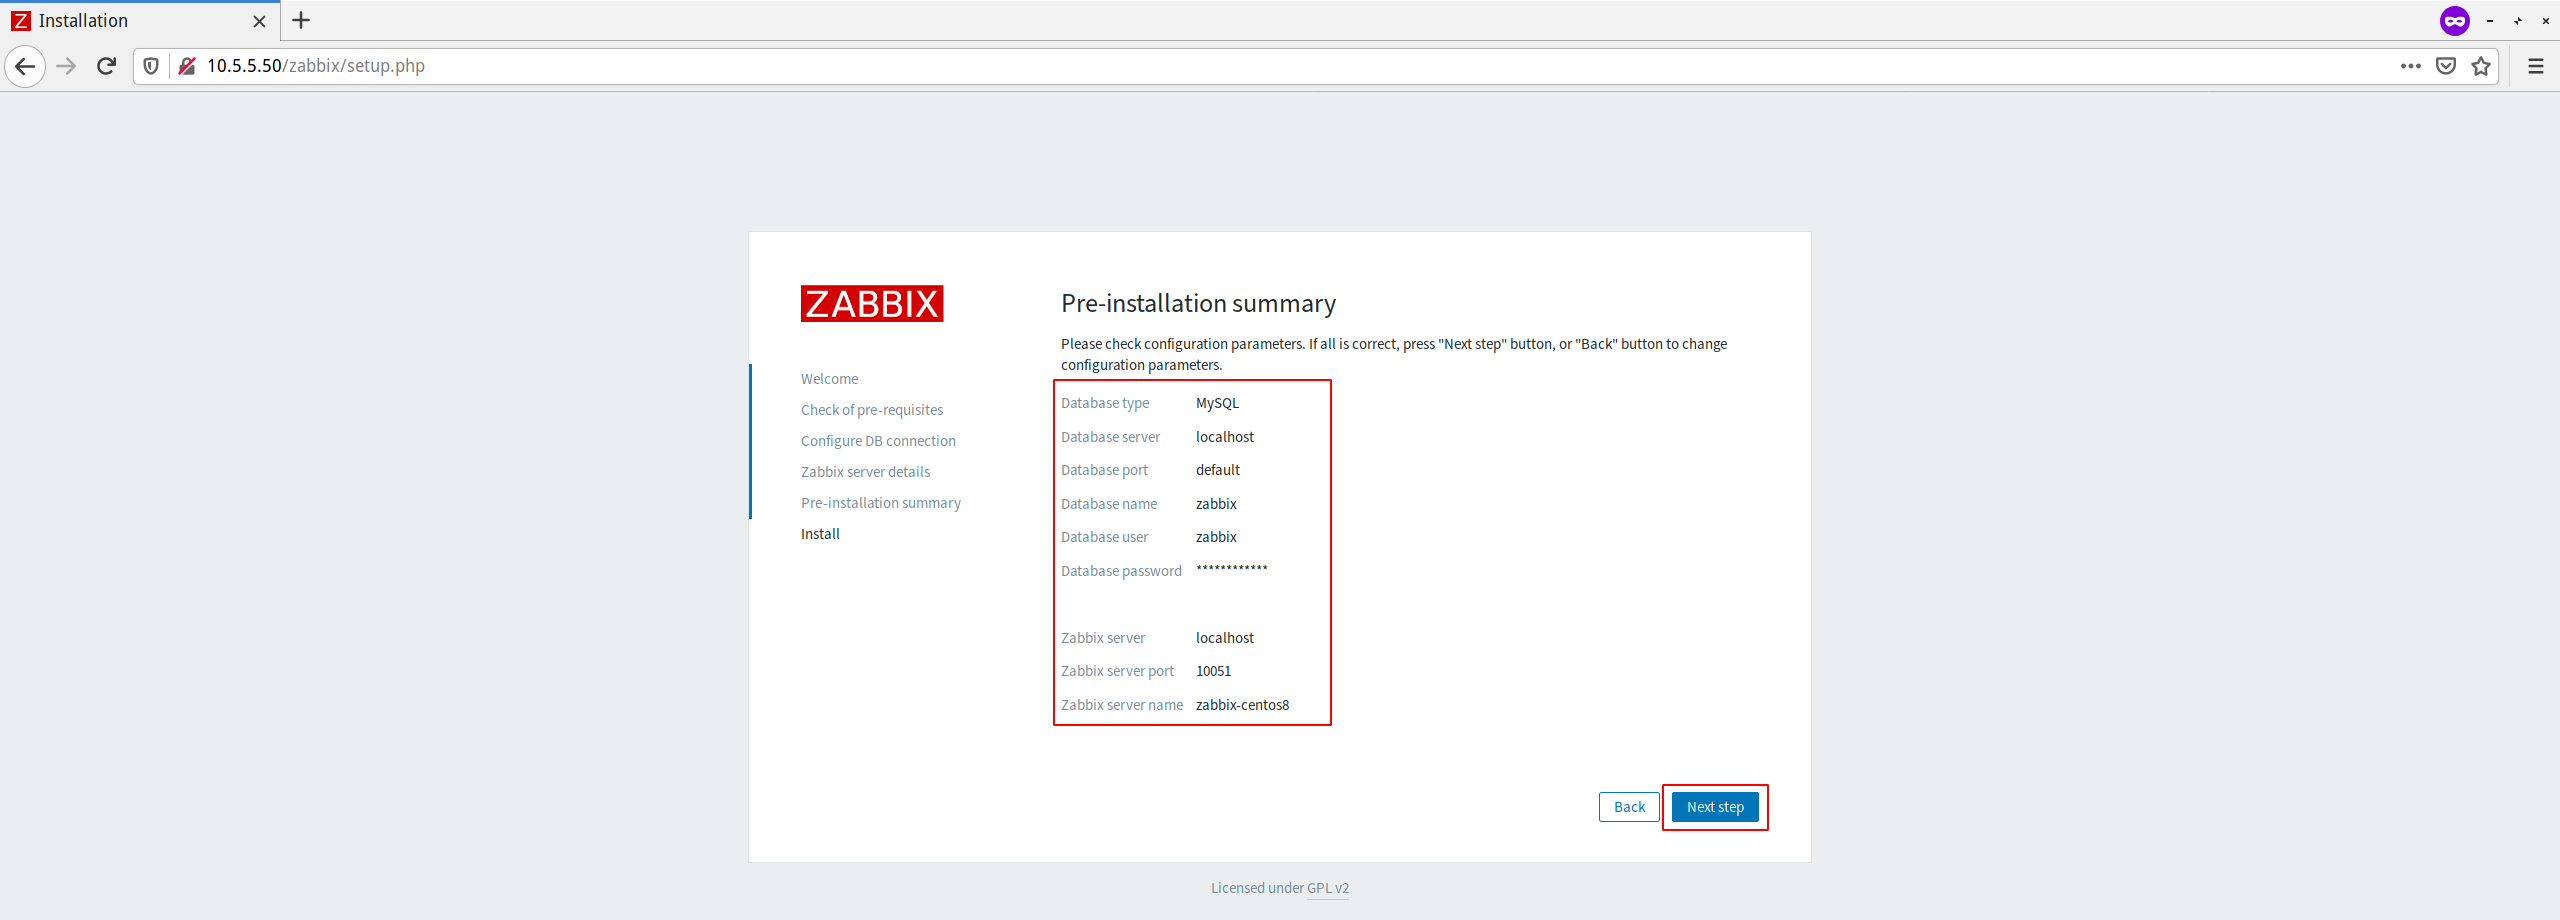
Make sure all of those configurations are correct, then click the “Next Button” to install Zabbix.
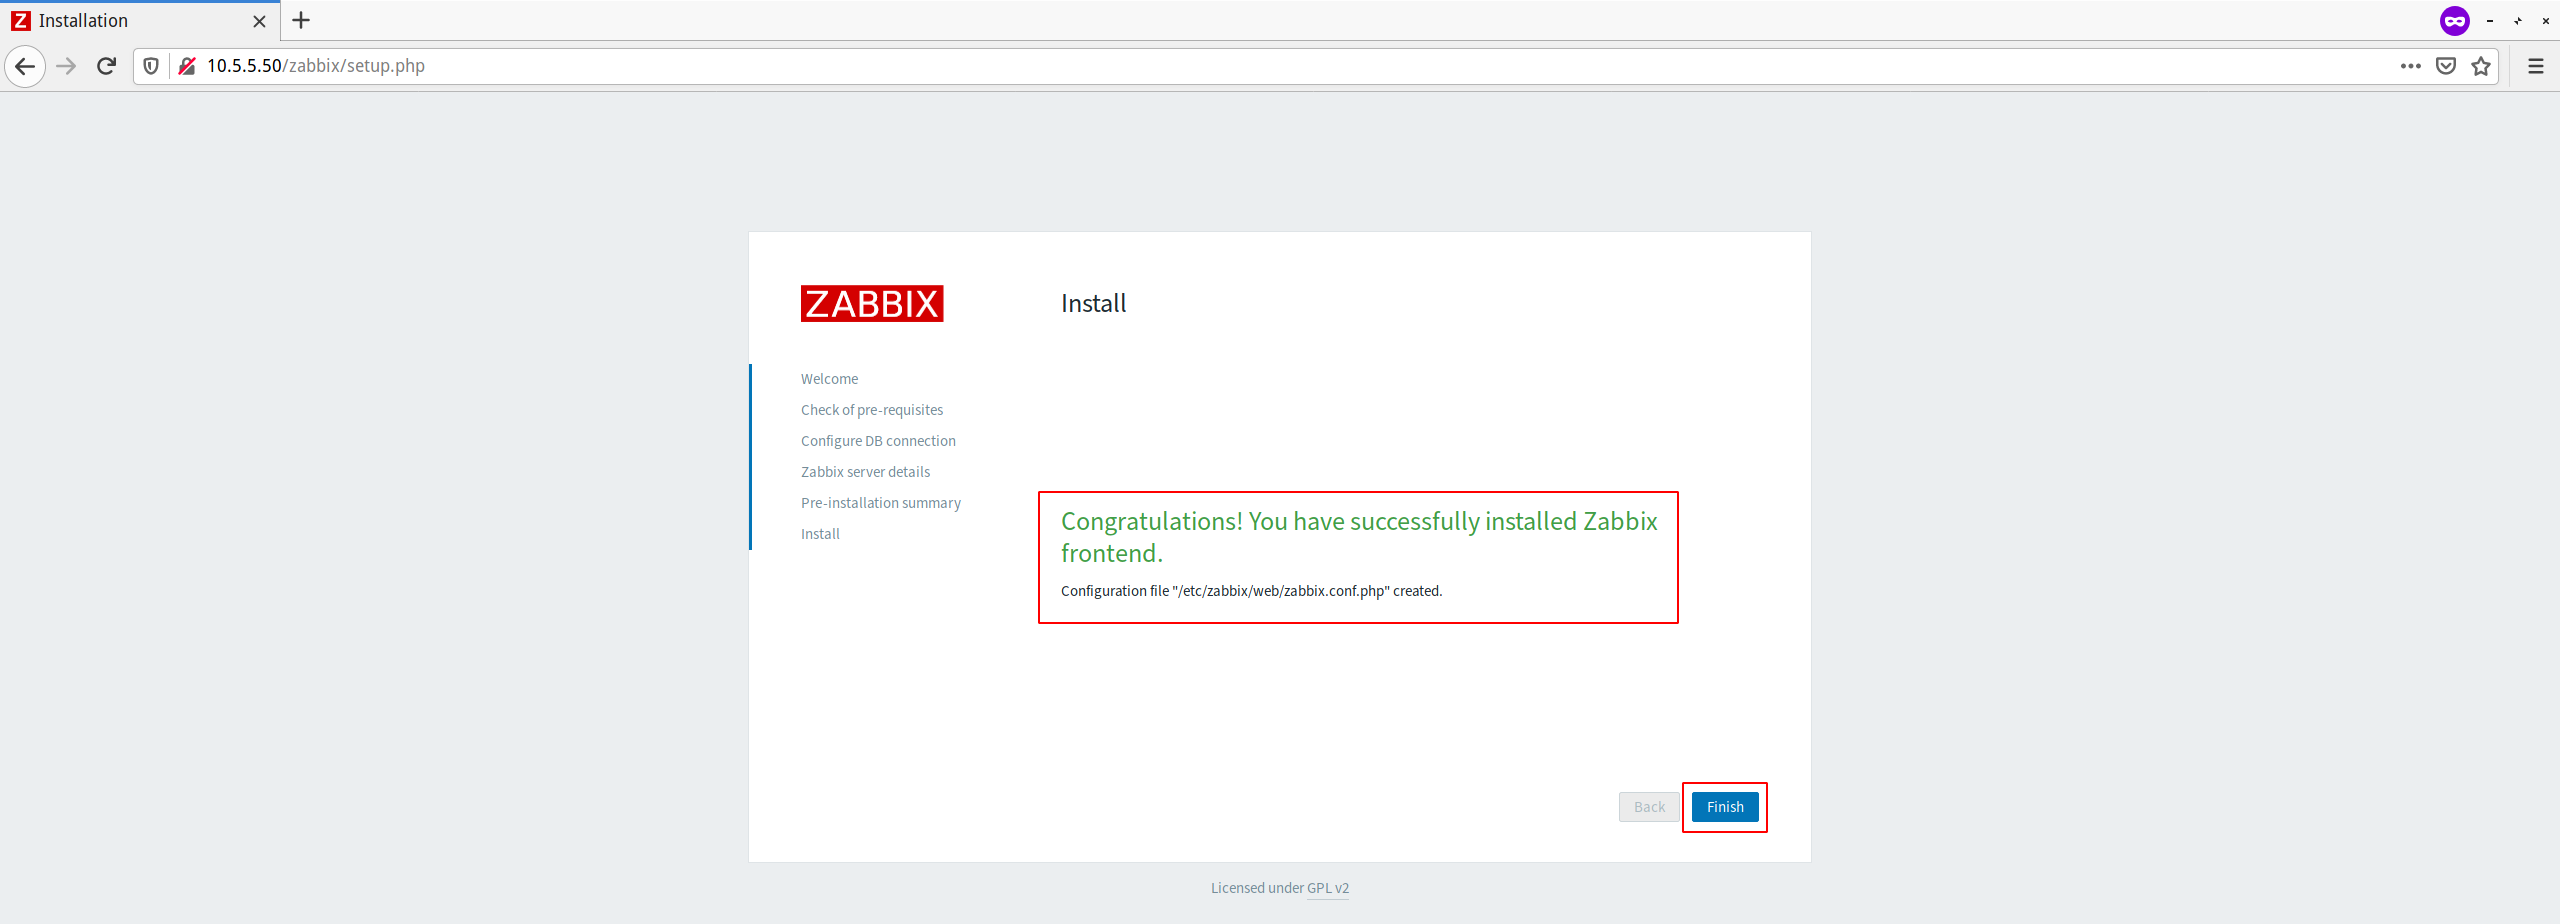
And when the installation is complete, you will get the page as shown below.
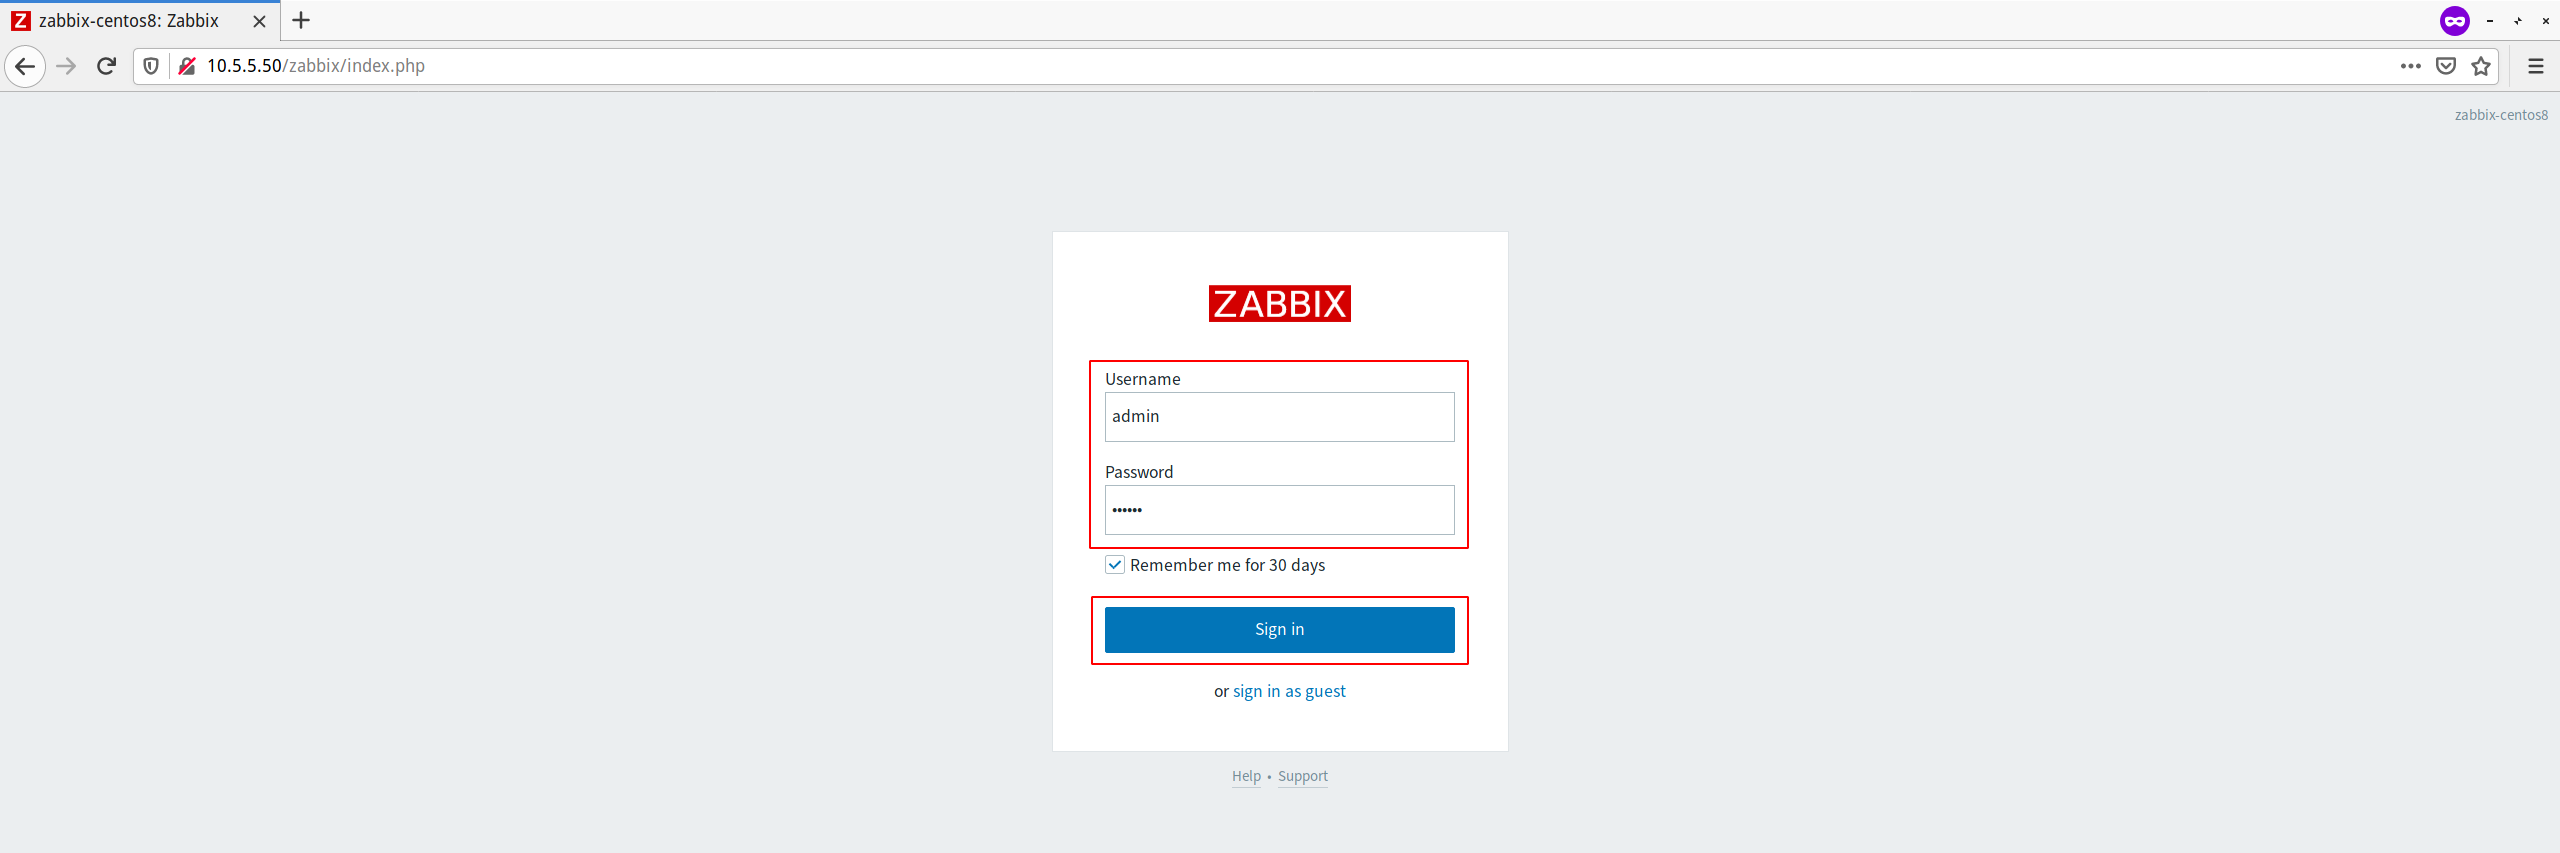
Click the ‘Finish’ button and you will be redirected to the Zabbix login page.
Login with default user ‘admin’ and password ‘zabbix’.
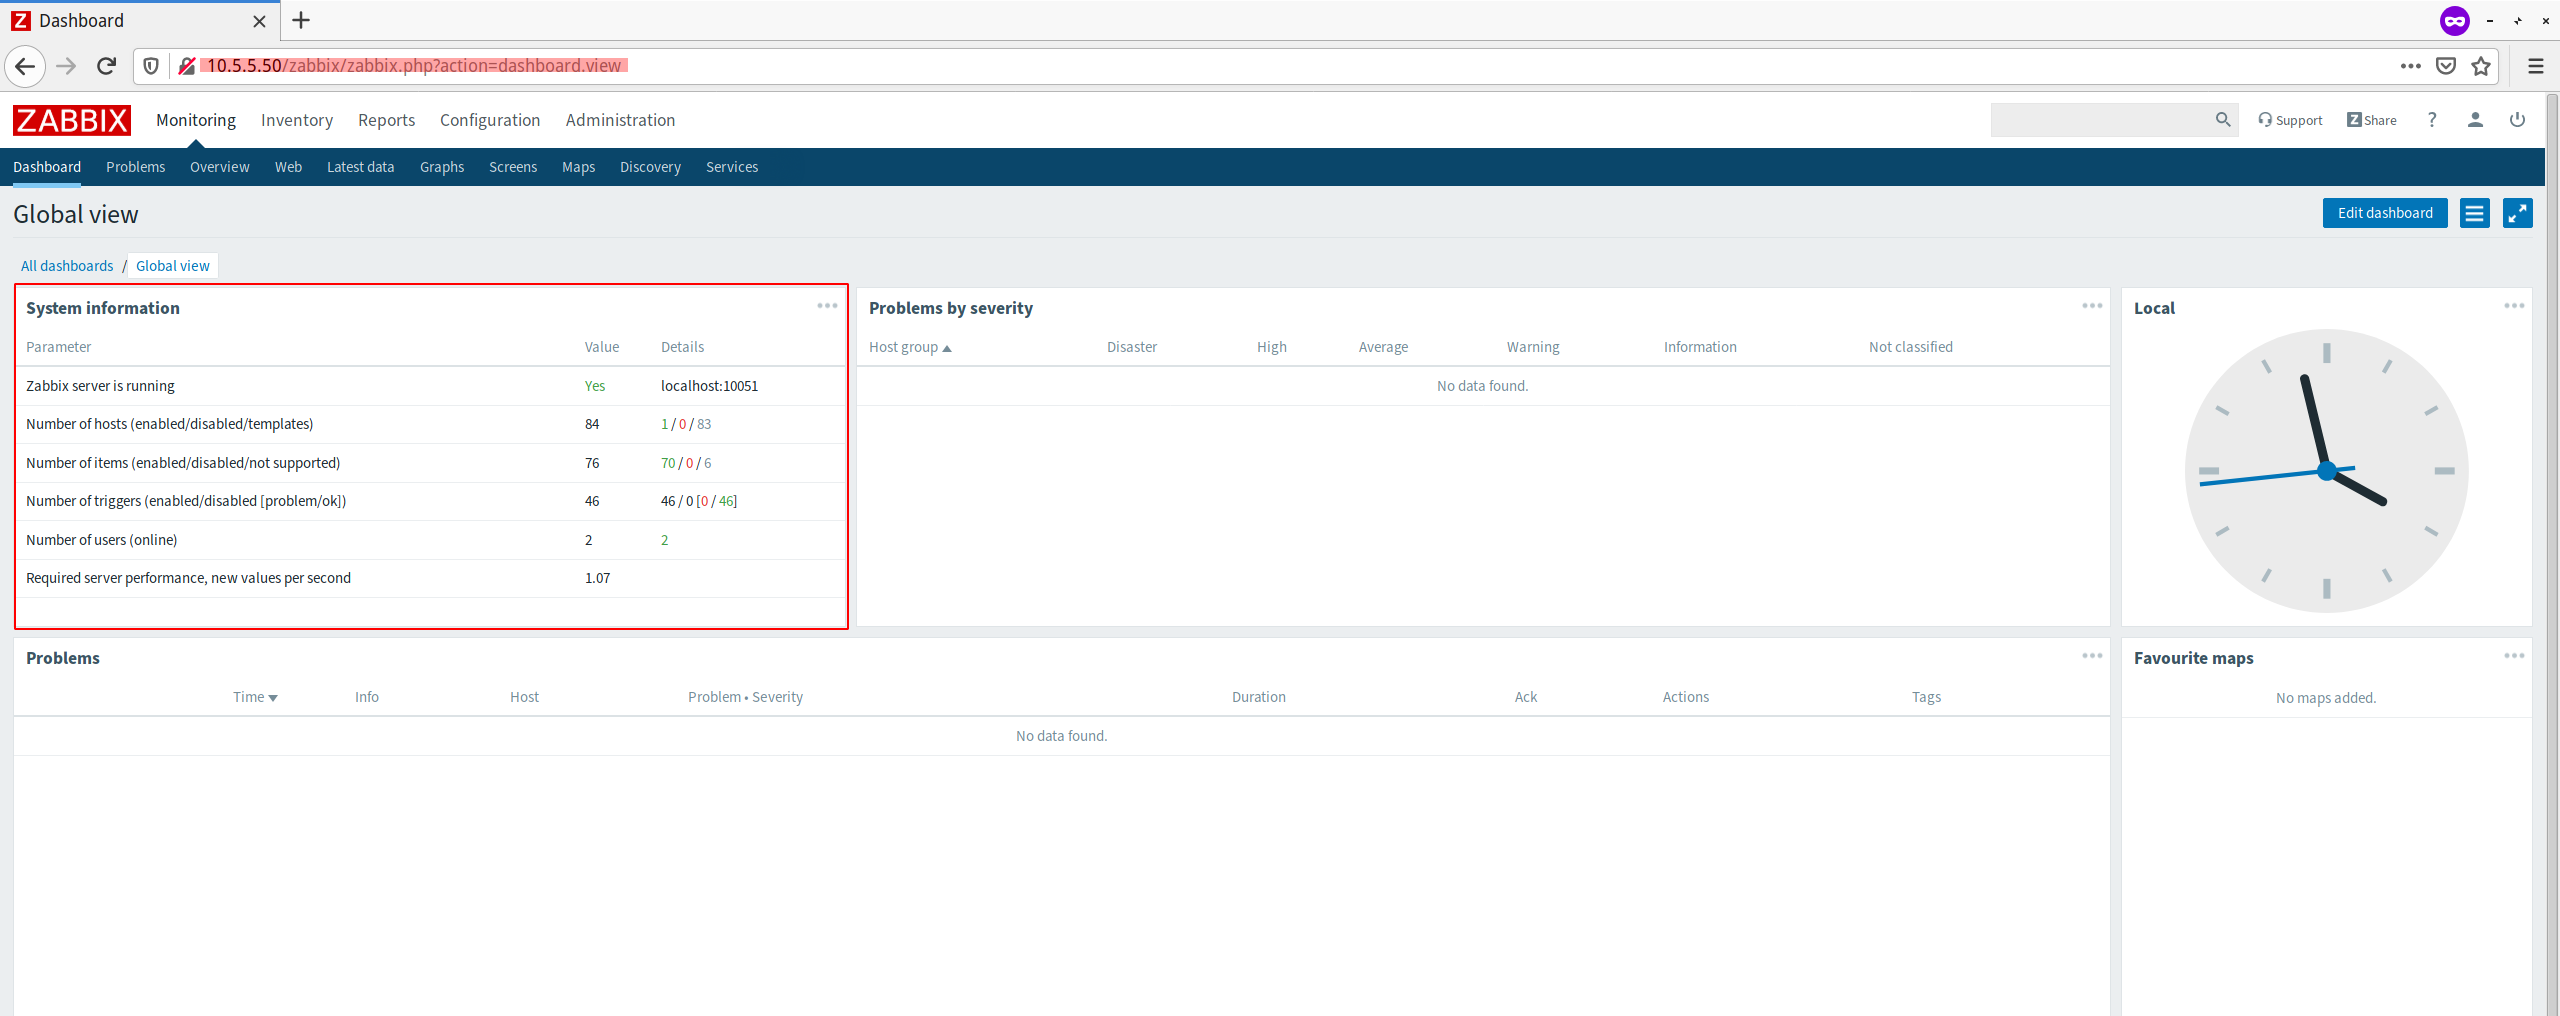
And you will get the default Zabbix dashboard.
And the Zabbix installation has been completed.
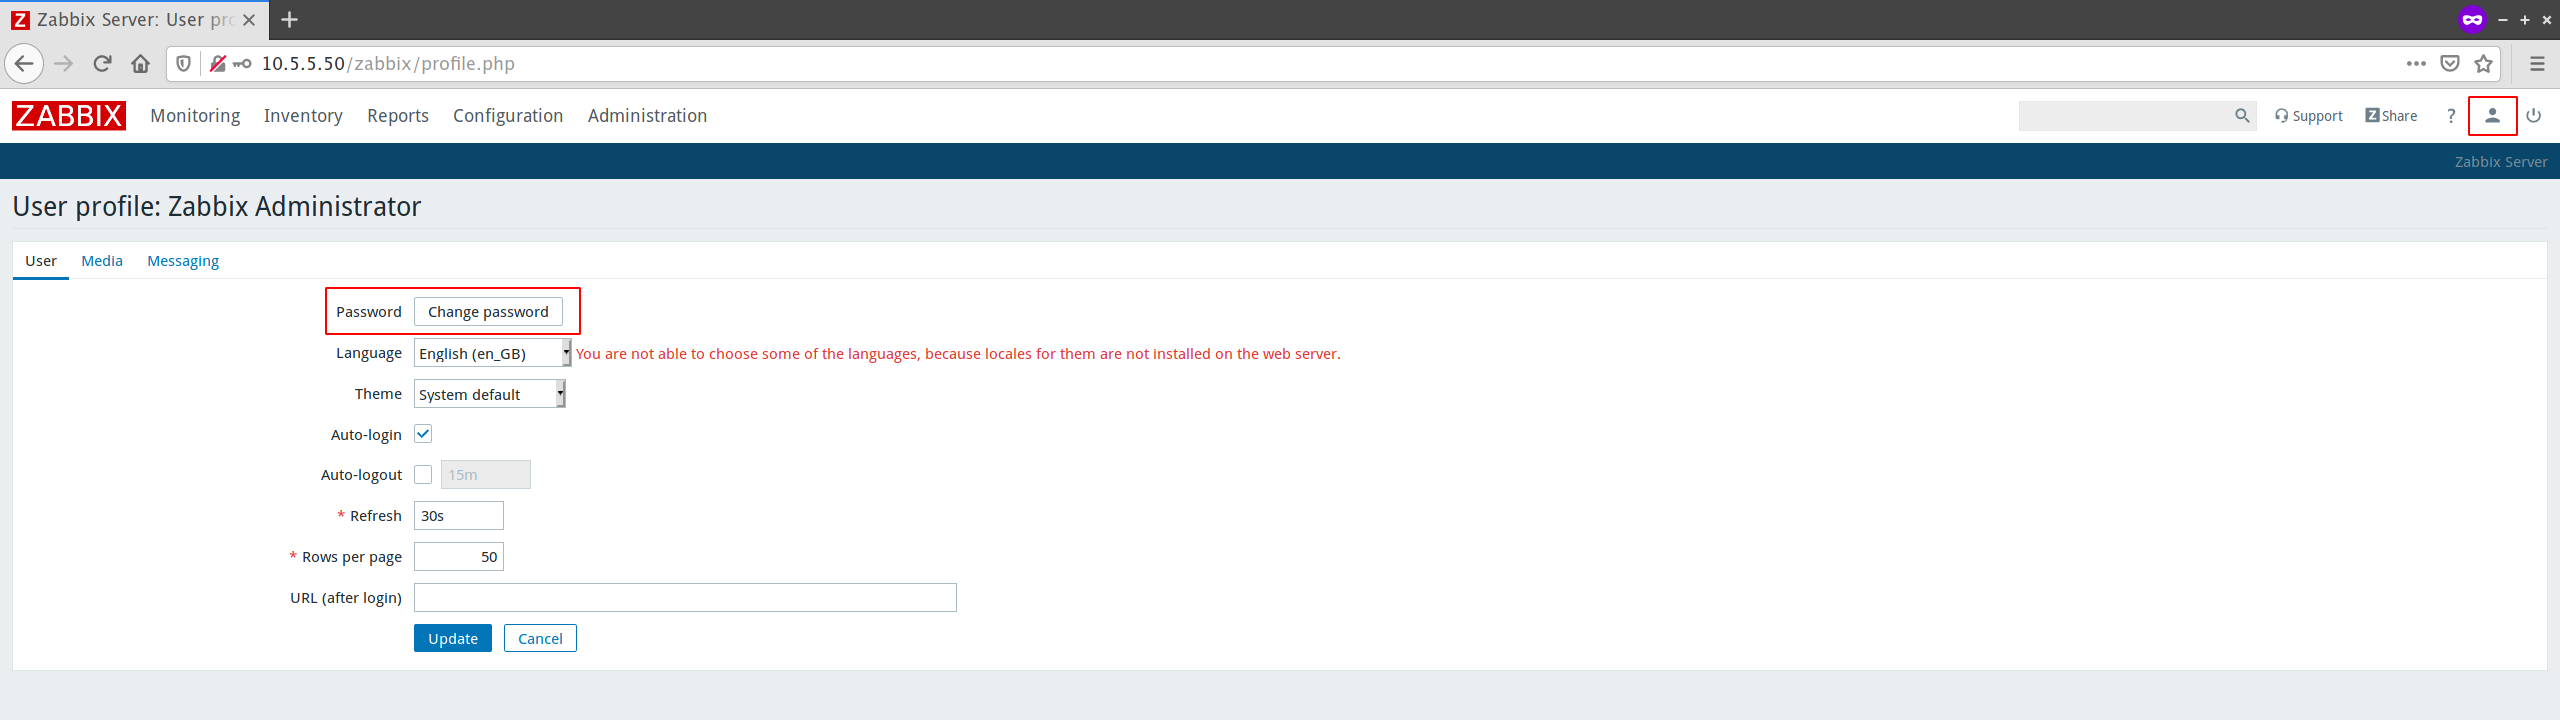
Step 8 – Change Default Admin Password
For this last step, we’re going to change the default admin password for zabbix.
On the Zabbix admin dashboard, click the user icon on the top right.
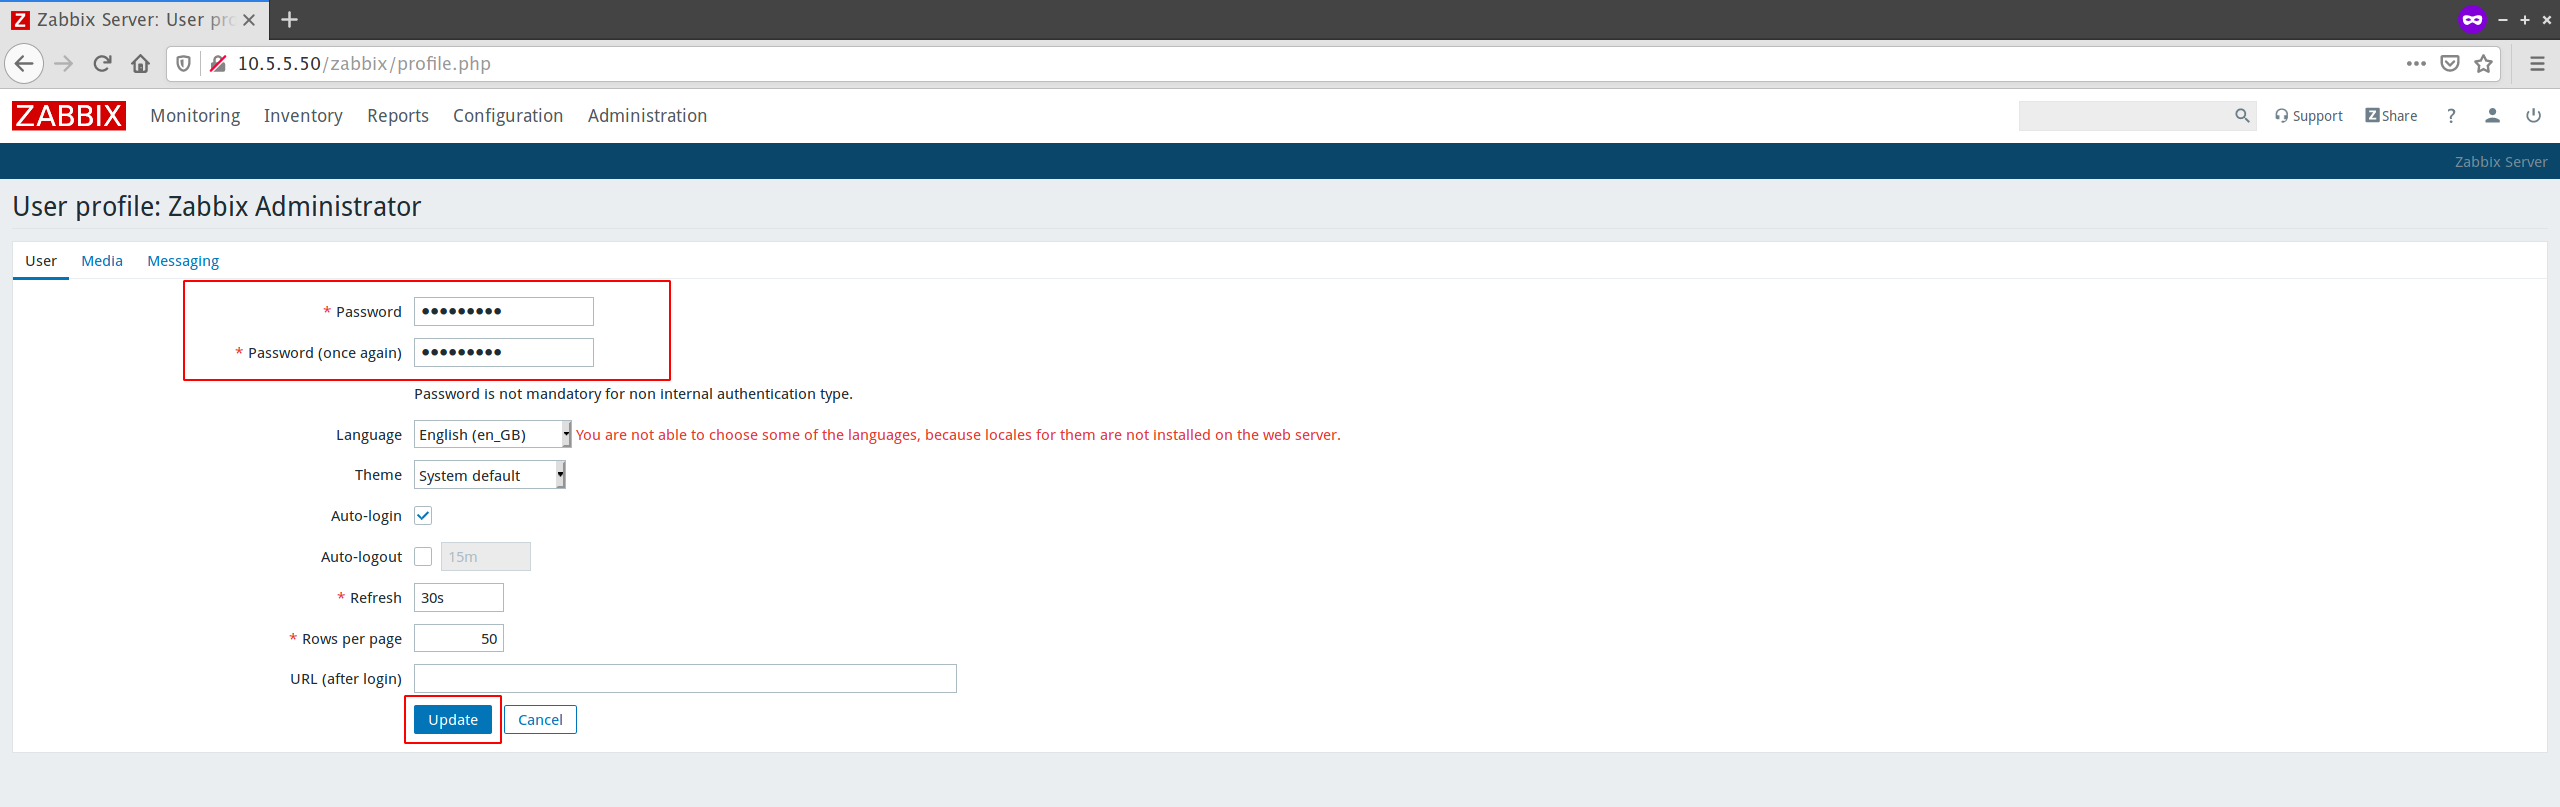
Click the ‘Change Password’ button and type your new password.
Now click the ‘update’ button, and the default admin password has been changed.
And the Zabbix Installation and Configuration on the CentOS 8 system has been completed successfully.


