
Zulip is an open-source chat server similar to Microsoft Teams, Rocket Chat, or Slack. It is written in Python and uses Django, PostgreSQL, and JavaScript. It integrates with over 90 third-party plugins, including Github, Jira, Stripe, Zendesk, Sentry, etc. You can expand the integrations by connecting them with Zapier and IFTTT. It comes with features like private messaging, group chats, threaded conversations, custom channels, video calls, drag-and-drop file uploads, custom emojis, Giphy integration, Image and tweet previews, and many more. Zulip comes with desktop and mobile apps for every platform, making it platform-agnostic.
This tutorial teaches you how to install and configure Zulip Chat on a Rocky Linux 9 server.
Prerequisites
-
A server running Rocky Linux 9.
-
At least 2GB RAM if you expect less than 100 users. For 100 users, get a 4GB RAM and 2 CPU server.
-
A non-root user with sudo privileges.
-
A domain name configured to point to the server,
zulip.example.com. -
Everything is updated.
$ sudo dnf update
-
Few packages that your system needs.
$ sudo dnf install wget curl nano unzip yum-utils policycoreutils-python-utils -y
Some of these packages may already be installed on your system.
Step 1 – Configure Firewall
Before installing any packages, the first step is configuring the firewall to open ports for HTTP, and HTTPS. Rocky Linux uses Firewalld Firewall. Check the firewall’s status.
$ sudo firewall-cmd --state
running
The firewall works with different zones, and the public zone is the default one that we will use. List all the services and ports active on the firewall.
$ sudo firewall-cmd --zone=public --list-all
It should show the following output.
public
  target: default
  icmp-block-inversion: no
  interfaces: enp1s0
  sources:
  services: cockpit dhcpv6-client ssh
  ports:
  protocols:
  forward: yes
  masquerade: no
  forward-ports:
  source-ports:
  icmp-blocks:
  rich rules:
Open the HTTP, and HTTPS ports in the firewall.
$ sudo firewall-cmd --zone=public --add-service=http
$ sudo firewall-cmd --zone=public --add-service=https
Recheck the status of the firewall.
$ sudo firewall-cmd --zone=public --list-all
You should see a similar output.
public
  target: default
  icmp-block-inversion: no
  interfaces: enp1s0
  sources:
  services: cockpit dhcpv6-client http https ssh
  ports:
  protocols:
  forward: yes
  masquerade: no
  forward-ports:
  source-ports:
  icmp-blocks:
  rich rules:
Make all the changes permanent and reload the firewall to enable the changes.
$ sudo firewall-cmd --runtime-to-permanent
$ sudo firewall-cmd --reload
Step 2 – Install Docker and Docker Compose
Install the official Docker repository.
$ sudo dnf install yum-utils
$ sudo dnf config-manager
    --add-repo
    https://download.docker.com/linux/centos/docker-ce.repo
Install Docker.
$ sudo dnf install docker-ce docker-ce-cli containerd.io docker-buildx-plugin docker-compose-plugin
Enable and run the Docker daemon.
$ sudo systemctl enable docker --now
Check the status of the Docker service.
$ sudo systemctl status docker
? docker.service - Docker Application Container Engine
     Loaded: loaded (/usr/lib/systemd/system/docker.service; enabled; preset: disabled)
     Active: active (running) since Tue 2024-02-06 07:17:33 UTC; 5s ago
TriggeredBy: ? docker.socket
       Docs: https://docs.docker.com
   Main PID: 22302 (dockerd)
      Tasks: 10
     Memory: 31.3M
        CPU: 198ms
     CGroup: /system.slice/docker.service
             ??22302 /usr/bin/dockerd -H fd:// --containerd=/run/containerd/containerd.sock
Add your system user to the Docker group to avoid using sudo to run Docker commands.
$ sudo usermod -aG docker $(whoami)
Login again to your server after logging out to enable the change.
Step 3 – Install Nginx
For the production environment, it is recommended to run the Synapse server using an Nginx proxy.
Rocky Linux 9 ships with an older version of Nginx. You need to use the official Nginx repository to install the latest version.
Create and open the file /etc/yum.repos.d/nginx.repo for editing.
$ sudo nano /etc/yum.repos.d/nginx.repo
Paste the following code in it.
[nginx-stable]
name=nginx stable repo
baseurl=http://nginx.org/packages/centos/$releasever/$basearch/
gpgcheck=1
enabled=1
gpgkey=https://nginx.org/keys/nginx_signing.key
module_hotfixes=true

[nginx-mainline]
name=nginx mainline repo
baseurl=http://nginx.org/packages/mainline/centos/$releasever/$basearch/
gpgcheck=1
enabled=0
gpgkey=https://nginx.org/keys/nginx_signing.key
module_hotfixes=true
Once you are finished, save the file by pressing Ctrl X and entering Y when prompted.
We will be installing the Nginx mainline so enable the package for it.
$ sudo dnf config-manager --enable nginx-mainline
Install Nginx.
$ sudo dnf install nginx -y
Verify the installation.
$ nginx -v
nginx version: nginx/1.25.3
Enable and start the Nginx server service.
$ sudo systemctl enable nginx --now
Check the status of the service.
$ sudo systemctl status nginx
? nginx.service - nginx - high performance web server
     Loaded: loaded (/usr/lib/systemd/system/nginx.service; enabled; preset: disabled)
     Active: active (running) since Tue 2024-02-06 07:18:56 UTC; 5s ago
       Docs: http://nginx.org/en/docs/
    Process: 22762 ExecStart=/usr/sbin/nginx -c /etc/nginx/nginx.conf (code=exited, status=0/SUCCESS)
   Main PID: 22763 (nginx)
      Tasks: 5 (limit: 50339)
     Memory: 4.9M
        CPU: 16ms
     CGroup: /system.slice/nginx.service
             ??22763 "nginx: master process /usr/sbin/nginx -c /etc/nginx/nginx.conf"
             ??22764 "nginx: worker process"
             ??22765 "nginx: worker process"
             ??22766 "nginx: worker process"
             ??22767 "nginx: worker process"
Step 4 – Install SSL
We need to install Certbot to generate the SSL certificate. We will use the Snapd package installer for that. Since Rocky Linux doesn’t ship with it, install the Snapd installer. It requires the EPEL (Extra Packages for Enterprise Linux) repository to work.
Install EPEL repository.
$ sudo dnf install epel-release -y
Install Snapd package.
$ sudo dnf install snapd -y
Enable and Start the Snap service.
$ sudo systemctl enable snapd --now
Install the Snap core package, and ensure that your version of Snapd is up to date.
$ sudo snap install core && sudo snap refresh core
Create necessary links for Snapd to work.
$ sudo ln -s /var/lib/snapd/snap /snap
$ echo 'export PATH=$PATH:/var/lib/snapd/snap/bin' | sudo tee -a /etc/profile.d/snapd.sh
Install Certbot.
$ sudo snap install --classic certbot
Use the following command to ensure that the Certbot command can be run by creating a symbolic link to the /usr/bin directory.
$ sudo ln -s /snap/bin/certbot /usr/bin/certbot
Check the Certbot version.
$ certbot --version
certbot 2.8.0
Run the following command to generate an SSL Certificate.
$ sudo certbot certonly --nginx --agree-tos --no-eff-email --staple-ocsp --preferred-challenges http -m [email protected] -d zulip.example.com
The above command will download a certificate to the /etc/letsencrypt/live/zulip.example.com directory on your server.
Generate a Diffie-Hellman group certificate.
$ sudo openssl dhparam -dsaparam -out /etc/ssl/certs/dhparam.pem 4096
Check the Certbot renewal scheduler service.
$ systemctl list-timers
You will find snap.certbot.renew.service as one of the services scheduled to run.
NEXT                        LEFT          LAST                        PASSED      UNIT                        ACTIVATES                   ----------------------------------------------------------------------------------------------------------------------------------
Tue 2024-02-06 07:30:00 UTC 6min left     Tue 2024-02-06 07:20:11 UTC 3min 41s ago sysstat-collect.timer      sysstat-collect.service
Tue 2024-02-06 08:22:43 UTC 58min left    Tue 2024-02-06 07:22:39 UTC 1min 13s ago dnf-makecache.timer        dnf-makecache.service
Tue 2024-02-06 09:36:00 UTC 2h 12min left -                           -            snap.certbot.renew.timer   snap.certbot.renew.service
Do a dry run of the process to check whether the SSL renewal is working fine.
$ sudo certbot renew --dry-run
If you see no errors, you are all set. Your certificate will renew automatically.
Step 5 – Configure SELinux
Apply the policy to allow connections to be made to outside hosts.
$ sudo setsebool -P httpd_can_network_connect 1
Apply the policy to allow Nginx to give access to PostgreSQL.
$ sudo setsebool -P httpd_can_network_connect_db 1
Step 6 – Prepare and Configure Zulip for Installation
First, create a secret key for Zulip. Save the generated key because we will need it later.
$ openssl rand -base64 32
sLIeucGPMCNbR0LwcRhyXafXmputmtse6 EYU04 9JY=
Create a directory for the Zulip Docker Compose file and switch to it.
$ mkdir ~/docker-zulip
$ cd ~/docker-zulip
Create and open the environment file for editing.
$ nano .env
Paste the following code in it.
[email protected]
EXTERNAL_HOST=zulip.example.com
ZULIP_AUTH_BACKENDS=EmailAuthBackend
ZULIP_PUSH_NOTIFICATION_BOUNCER_URL=https://push.zulipchat.com
DISABLE_HTTPS=true
SSL_CERTIFICATE_GENERATION=self-signed

EMAIL_HOST=email-smtp.us-west-2.amazonaws.com
EMAIL_HOST_USER=AMAZONSESUSERNAME
EMAIL_PASSWORD=AMAZONSESPASSWORD
EMAIL_PORT=465
EMAIL_USE_SSL=True
EMAIL_USE_TLS=False
[email protected]

ZULIP_GIT_URL=https://github.com/zulip/zulip.git
ZULIP_GIT_REF=8.2

SECRET_KEY=sLIeucGPMCNbR0LwcRhyXafXmputmtse6 EYU04 9JY=
POSTGRES_USER=zulip
POSTGRES_DB=zulip
POSTGRES_PASSWORD=REPLACE_WITH_SECURE_POSTGRES_PASSWORD
REDIS_PASSWORD=REPLACE_WITH_SECURE_REDIS_PASSWORD
MEMCACHED_PASSWORD=REPLACE_WITH_SECURE_MEMCACHED_PASSWORD
RABBITMQ_DEFAULT_USER=zulip
RABBITMQ_DEFAULT_PASS=REPLACE_WITH_SECURE_RABBITMQ_PASSWORD
Save the file by pressing Ctrl X and entering Y when prompted once finished.
Let us go through all the variables we defined.
- ZULIP_ADMINISTRATOR – is the primary email address of the administrator account created during installation.
- EXTERNAL_HOST – is the domain name we will use for our Zulip install.
- ZULIP_AUTH_BACKENDS – defines the method for logging in. We are using
EmailAuthBackendwhich means Zulip will ask for an email address and password. There are other authentication methods that use Google, GitHub, and Apple credentials for logging in. You can find more information in the Zulip documentation and the defaultsettings.pyfile. - ZULIP_PUSH_NOTIFICATION_BOUNCER_URL – is the URL Zulip will use for sending mobile push notifications. For the community version of Zulip for an organization with 10 or fewer users, push notifications are free. Your organization may still qualify for unlimited push notifications for free depending on requirements. Check Zulip billing documentation for details.
- DISABLE_HTTPS – We have set this to true to disable SSL for Zulip because we will handle it outside the container.
- SSL_CERTIFICATE_GENERATION – Since we have disabled SSL for Zulip, we need to set it to generate self-signed certificates.
- EMAIL_HOST – The SMTP email host we need for enabling Email notifications. Here we are using the Amazon SES Email service for our tutorial.
- EMAIL_HOST_USER – The SMTP email username.
- EMAIL_PASSWORD – The SMTP email password.
- EMAIL_PORT – The SMTP email port.
- EMAIL_USE_SSL – Whether the SMTP host supports SSL authentication.
- EMAIL_USE_TLS – Whether the SMTP host supports TLS authentication.
- EMAIL_NOREPLY_ADD – The no-reply email address used for sending notification emails.
- ZULIP_GIT_URL – We are using the Zulip docker image but if you want to build a custom image, you need to input the URL of the Zulip Git repository.
- ZULIP_GIT_REF – The version of Zulip to use from the Git repository for building the docker image.
- SECRET_KEY – A strong secret key Zulip needs for authentication. Enter the key we created earlier.
- POSTGRES_USER – Choose a username for your PostgreSQL user.
- POSTGRES_DB – Choose the database name for your PostgreSQL database.
- POSTGRES_PASSWORD – Choose a strong password for the PostgreSQL database.
- REDIS_PASSWORD – Choose a strong password for the Redis database.
- MEMCACHED_PASSWORD – Choose a strong password for the Memcached service.
- RABBITMQ_DEFAULT_USER – Choose a username for the RabbitMQ service.
- RABBITMQ_DEFAULT_PASS – Choose a strong password for the RabbitMQ service.
Create and open the Docker compose file for editing.
$ nano docker-compose.yml
Add the following code to define the database service.
services:
  database:
    image: "zulip/zulip-postgresql:14"
    container_name: zulip-db
    restart: unless-stopped
    environment:
      POSTGRES_DB: ${POSTGRES_DB}
      POSTGRES_USER: ${POSTGRES_USER}
      POSTGRES_PASSWORD: ${POSTGRES_PASSWORD}
    volumes:
      - "postgresql-14:/var/lib/postgresql/data:rw"
    networks:
      network:
        ipv4_address: 10.5.0.2
The database service contains the following options:
- image – This tells Docker to pull the
zulip-postgresql:14image. Even though the latest version of Zulip supports PostgreSQL 16, the corresponding docker image supports only PostgreSQL 14. - container_name – specifies a name for the container.
- restart – this defines the container restart policy. We have set the container to restart automatically unless it is stopped manually.
- environment – You need to set environment variables for the container. We have set three variables defining the PostgreSQL database, username, and password.
- volumes – Here we create a named volume called
postgresql-14which points to the PostgreSQL data directory in the container. - networks – we use this to give the container a static IP address which can be used to access it from other containers.
Next, below the database service section, add the definition for the memcached service.
  memcached:
    image: "memcached:alpine"
    restart: unless-stopped
    container_name: zulip-memcached
    command:
      - "sh"
      - "-euc"
      - |
        echo 'mech_list: plain' > "$$SASL_CONF_PATH"
        echo "zulip@$$HOSTNAME:$$MEMCACHED_PASSWORD" > "$$MEMCACHED_SASL_PWDB"
        echo "zulip@localhost:$$MEMCACHED_PASSWORD" >> "$$MEMCACHED_SASL_PWDB"
        exec memcached -S
    environment:
      SASL_CONF_PATH: "https://www.howtoforge.com/home/memcache/memcached.conf"
      MEMCACHED_SASL_PWDB: "https://www.howtoforge.com/home/memcache/memcached-sasl-db"
      MEMCACHED_PASSWORD: ${MEMCACHED_PASSWORD}
    networks:
      network:
        ipv4_address: 10.5.0.3
The memcached service contains the following definitions specific to it:
- image – Here we will use the
memcached:alpineimage for the container. An alpine image keeps the image size down since it only ships with the bare essentials. - command – Here we will run some commands which are run post container creation to configure Memcached and set Zulip credentials. These commands also override the default commands declared by the image.
- environment – Here we set the location of the Memcached configuration file, the password database file, and the password.
- network – Here we set a unique private IP address for the docker container.
Next, add the definition for the rabbitmq service below the memcached section.
  rabbitmq:
    image: "rabbitmq:alpine"
    restart: unless-stopped
    container_name: zulip-rabbitmq
    environment:
      RABBITMQ_DEFAULT_USER: ${RABBITMQ_DEFAULT_USER}
      RABBITMQ_DEFAULT_PASS: ${RABBITMQ_DEFAULT_PASS}
    volumes:
      - "rabbitmq:/var/lib/rabbitmq:rw"
    networks:
      network:
        ipv4_address: 10.5.0.4
The rabbitmq service contains the following definitions specific to it:
- image – Similarly as before, we will use the alpine image for the RabbitMQ container.
- environment – We use the environment section to set RabbitMQ’s default username and password.
- volumes – Here we create a named volume called
rabbitmqwhich points to the RabbitMQ directory in the container. - network – Same as before, we set a unique IP address for the container.
Next, add the definition for the redis service below the rabbitmq section.
  redis:
    image: "redis:alpine"
    restart: unless-stopped
    container_name: zulip-redis
    command:
      - "sh"
      - "-euc"
      - |
        echo "requirepass '$$REDIS_PASSWORD'" > /etc/redis.conf
        exec redis-server /etc/redis.conf
    environment:
      REDIS_PASSWORD: ${REDIS_PASSWORD}
    volumes:
      - "redis:/data:rw"
    networks:
      network:
        ipv4_address: 10.5.0.5
The redis service contains the following definitions specific to it:
- image – Here we will use the alpine image for the Redis container.
- command – We will use the commands to configure the Redis password and start the server with it.
- volumes – Here we create a named volume called
rediswhich points to the data directory in the container. - network – Same as before, we set a unique IP address for the Redis container.
Finally, add the definition for the zulip service below the redis section.
  zulip:
    image: "zulip/docker-zulip:8.2-0"
    restart: unless-stopped
    container_name: zulip
    ports:
      - "8080:80"
    environment:
      DB_HOST: "database"
      DB_HOST_PORT: "5432"
      DB_USER: ${POSTGRES_USER}
      DISABLE_HTTPS: ${DISABLE_HTTPS}
      SSL_CERTIFICATE_GENERATION: ${SSL_CERTIFICATE_GENERATION}
      LOADBALANCER_IPS: 10.5.0.0/16
      SETTING_MEMCACHED_LOCATION: "memcached:11211"
      SETTING_RABBITMQ_HOST: "rabbitmq"
      SETTING_REDIS_HOST: "redis"
      SECRETS_email_password: ${EMAIL_PASSWORD}
      SECRETS_rabbitmq_password: ${RABBITMQ_DEFAULT_PASS}
      SECRETS_postgres_password: ${POSTGRES_PASSWORD}
      SECRETS_memcached_password: ${MEMCACHED_PASSWORD}
      SECRETS_redis_password: ${REDIS_PASSWORD}
      SECRETS_secret_key: ${SECRET_KEY}
      SETTING_EXTERNAL_HOST: ${EXTERNAL_HOST}
      SETTING_ZULIP_ADMINISTRATOR: ${ZULIP_ADMINISTRATOR}
      SETTING_EMAIL_HOST: ${EMAIL_HOST}
      SETTING_EMAIL_HOST_USER: ${EMAIL_HOST_USER}
      SETTING_EMAIL_PORT: ${EMAIL_PORT}
      SETTING_EMAIL_USE_SSL: ${EMAIL_USE_SSL}
      SETTING_EMAIL_USE_TLS: ${EMAIL_USE_TLS}
      ZULIP_AUTH_BACKENDS: ${ZULIP_AUTH_BACKENDS}
      SETTING_NOREPLY_EMAIL_ADDRESS: ${EMAIL_NOREPLY_ADD}
      # Uncomment this when configuring the mobile push notifications service
      # SETTING_PUSH_NOTIFICATION_BOUNCER_URL: ${ZULIP_PUSH_NOTIFICATION_BOUNCER_URL}
    volumes:
      - "zulip:/data:rw"
    ulimits:
      nofile:
        soft: 1000000
        hard: 1048576
    networks:
      network:
        ipv4_address: 10.5.0.6
The zulip service contains the following definitions specific to it:
- ports – Zulip container runs nginx as a part of the process. Here we have mapped port 80 of the container to port 8080 on the host server. We will use it later to configure Nginx as a proxy manager outside the container.
- environment – Here we configure environment variables to configure Zulip. Most of the environment variables are picked from the
.envfile which we explained earlier. The database host is set to thedatabasecontainer service and the port to default PostgreSQL port 5432. TheLOADBALANCER_IPSvariable is set to the docker network subnet. This is required to make Zulip work from behind a reverse proxy server. TheMEMCACHED_LOCATIONis set to thememcachedservice with its default port 11211. Similarly, we have set the RabbitMQ and Redis hosts to point to their respective container services. - volumes – Here we set a named volume and set it to the
/datadirectory in read-write mode. - ulimits – Here we set the soft and hard limits for the resource usage of the user for the container.
- networks – Same as before, we set a unique IP address for the Zulip container.
And at last, paste the following code.
volumes:
  zulip:
  postgresql-14:
  rabbitmq:
  redis:
networks:
  network:
    driver: bridge
    ipam:
      config:
        - subnet: 10.5.0.0/16
          gateway: 10.5.0.1
Here we define the named volumes we created earlier for our containers. Next, we define the bridge network to connect all the containers and provide subnet and gateway IP addresses.
Once finished, save the file by pressing Ctrl X and entering Y when prompted once finished.
The finished Docker compose file will look like the following.
services:
  database:
    image: "zulip/zulip-postgresql:14"
    restart: unless-stopped
    environment:
      POSTGRES_DB: ${POSTGRES_DB}
      POSTGRES_USER: ${POSTGRES_USER}
      POSTGRES_PASSWORD: ${POSTGRES_PASSWORD}
    volumes:
      - "postgresql-14:/var/lib/postgresql/data:rw"
    networks:
      network:
        ipv4_address: 10.5.0.2
  memcached:
    image: "memcached:alpine"
    restart: unless-stopped
    command:
      - "sh"
      - "-euc"
      - |
        echo 'mech_list: plain' > "$$SASL_CONF_PATH"
        echo "zulip@$$HOSTNAME:$$MEMCACHED_PASSWORD" > "$$MEMCACHED_SASL_PWDB"
        echo "zulip@localhost:$$MEMCACHED_PASSWORD" >> "$$MEMCACHED_SASL_PWDB"
        exec memcached -S
    environment:
      SASL_CONF_PATH: "https://www.howtoforge.com/home/memcache/memcached.conf"
      MEMCACHED_SASL_PWDB: "https://www.howtoforge.com/home/memcache/memcached-sasl-db"
      MEMCACHED_PASSWORD: ${MEMCACHED_PASSWORD}
    networks:
      network:
        ipv4_address: 10.5.0.3
  rabbitmq:
    image: "rabbitmq:alpine"
    restart: unless-stopped
    environment:
      RABBITMQ_DEFAULT_USER: ${RABBITMQ_DEFAULT_USER}
      RABBITMQ_DEFAULT_PASS: ${RABBITMQ_DEFAULT_PASS}
    volumes:
      - "rabbitmq:/var/lib/rabbitmq:rw"
    networks:
      network:
        ipv4_address: 10.5.0.4
  redis:
    image: "redis:alpine"
    restart: unless-stopped
    command:
      - "sh"
      - "-euc"
      - |
        echo "requirepass '$$REDIS_PASSWORD'" > /etc/redis.conf
        exec redis-server /etc/redis.conf
    environment:
      REDIS_PASSWORD: ${REDIS_PASSWORD}
    volumes:
      - "redis:/data:rw"
    networks:
      network:
        ipv4_address: 10.5.0.5
  zulip:
    image: "zulip/docker-zulip:8.1-0"
    restart: unless-stopped
    #build:
    #  context: .
    #  args:

    #    ZULIP_GIT_URL: ${ZULIP_GIT_URL}
    #    ZULIP_GIT_REF: ${ZULIP_GIT_REF}
        # Set this up if you plan to use your own CA certificate bundle for building
        # CUSTOM_CA_CERTIFICATES: ${ZULIP_CUSTOM_CA_CERTIFICATES}
    ports:
      - "8080:80"
    environment:
      DB_HOST: 10.5.0.2
      DB_HOST_PORT: "5432"
      DB_USER: ${POSTGRES_USER}
      DISABLE_HTTPS: ${DISABLE_HTTPS}
      LOADBALANCER_IPS: 10.5.0.6
      SSL_CERTIFICATE_GENERATION: ${SSL_CERTIFICATE_GENERATION}
      SETTING_MEMCACHED_LOCATION: "memcached:11211"
      SETTING_RABBITMQ_HOST: "rabbitmq"
      SETTING_REDIS_HOST: "redis"
      SECRETS_email_password: ${EMAIL_PASSWORD}
      SECRETS_rabbitmq_password: ${RABBITMQ_DEFAULT_PASS}
      SECRETS_postgres_password: ${POSTGRES_PASSWORD}
      SECRETS_memcached_password: ${MEMCACHED_PASSWORD}
      SECRETS_redis_password: ${REDIS_PASSWORD}
      SECRETS_secret_key: ${SECRET_KEY}
      SETTING_EXTERNAL_HOST: ${EXTERNAL_HOST}
      SETTING_ZULIP_ADMINISTRATOR: ${ZULIP_ADMINISTRATOR}
      SETTING_EMAIL_HOST: ${EMAIL_HOST}
      SETTING_EMAIL_HOST_USER: ${EMAIL_HOST_USER}
      SETTING_EMAIL_PORT: ${EMAIL_PORT}
      SETTING_EMAIL_USE_SSL: ${EMAIL_USE_SSL}
      SETTING_EMAIL_USE_TLS: ${EMAIL_USE_TLS}
      ZULIP_AUTH_BACKENDS: ${ZULIP_AUTH_BACKENDS}
      SETTING_NOREPLY_EMAIL_ADDRESS: ${EMAIL_NOREPLY_ADD}
      # Uncomment this when configuring the mobile push notifications service
      # SETTING_PUSH_NOTIFICATION_BOUNCER_URL: ${ZULIP_PUSH_NOTIFICATION_BOUNCER_URL}
    volumes:
      - "zulip:/data:rw"
    ulimits:
      nofile:
        soft: 1000000
        hard: 1048576
    networks:
      network:
        ipv4_address: 10.5.0.6
volumes:
  zulip:
  postgresql-14:
  rabbitmq:
  redis:
networks:
  network:
    driver: bridge
    ipam:
      config:
        - subnet: 10.5.0.0/16
          gateway: 10.5.0.1
Step 7 – Install Zulip
Start the Zulip container using the following command.
$ docker compose up -d
Check the status of the containers using the following commands.
$ docker ps
You should see a similar output.
CONTAINER ID   IMAGE                       COMMAND                  CREATED         STATUS         PORTS                                                 NAMES
fea5d02f53d7   rabbitmq:alpine             "docker-entrypoint.s…"   2 minutes ago   Up 2 minutes   4369/tcp, 5671-5672/tcp, 15691-15692/tcp, 25672/tcp   zulip-rabbitmq
01cb77f16c1a   zulip/zulip-postgresql:14   "docker-entrypoint.s…"   2 minutes ago   Up 2 minutes   5432/tcp                                              zulip-db
f5b6523a3a8c   zulip/docker-zulip:8.2-0    "https://www.howtoforge.com/sbin/entrypoint.sh…"   2 minutes ago   Up 2 minutes   443/tcp, 0.0.0.0:8080->80/tcp, :::8080->80/tcp        zulip
c0a358209b09   redis:alpine                "docker-entrypoint.s…"   2 minutes ago   Up 2 minutes   6379/tcp                                              zulip-redis
27be352a0a35   memcached:alpine            "docker-entrypoint.s…"   2 minutes ago   Up 2 minutes   11211/tcp                                             zulip-memcached
You can also use the following command for the same.
$ docker compose ps
In this case, your output would look like the following.
NAME              IMAGE                       COMMAND                  SERVICE     CREATED              STATUS              PORTS
zulip             zulip/docker-zulip:8.2-0    "https://www.howtoforge.com/sbin/entrypoint.sh…"   zulip       About a minute ago   Up About a minute   443/tcp, 0.0.0.0:8080->80/tcp, :::8080->80/tcp
zulip-db          zulip/zulip-postgresql:14   "docker-entrypoint.s…"   database    About a minute ago   Up About a minute   5432/tcp
zulip-memcached   memcached:alpine            "docker-entrypoint.s…"   memcached   About a minute ago   Up About a minute   11211/tcp
zulip-rabbitmq    rabbitmq:alpine             "docker-entrypoint.s…"   rabbitmq    About a minute ago   Up About a minute   4369/tcp, 5671-5672/tcp, 15691-15692/tcp, 25672/tcp
zulip-redis       redis:alpine                "docker-entrypoint.s…"   redis       About a minute ago   Up About a minute   6379/tcp
The Zulip container will take some time to start working. You can follow the progress using the following command.
$ docker logs zulip --follow
You will see a long list of commands that are run to set up the container. Once you see the following output, it means Zulip is installed.
2024-02-21 09:02:55,310 INFO success: go-camo entered RUNNING state, process has stayed up for > than 1 seconds (startsecs)
2024-02-21 09:02:55,311 INFO success: smokescreen entered RUNNING state, process has stayed up for > than 1 seconds (startsecs)
2024-02-21 09:02:55,311 INFO success: zulip-django entered RUNNING state, process has stayed up for > than 1 seconds (startsecs)
2024-02-21 09:02:55,311 INFO success: zulip-tornado entered RUNNING state, process has stayed up for > than 1 seconds (startsecs)
2024-02-21 09:02:55,311 INFO success: zulip_deliver_scheduled_emails entered RUNNING state, process has stayed up for > than 1 seconds (startsecs)
2024-02-21 09:02:55,311 INFO success: zulip_deliver_scheduled_messages entered RUNNING state, process has stayed up for > than 1 seconds (startsecs)
2024-02-21 09:02:55,311 INFO success: process-fts-updates entered RUNNING state, process has stayed up for > than 1 seconds (startsecs)
2024-02-21 09:02:55,311 INFO success: cron entered RUNNING state, process has stayed up for > than 1 seconds (startsecs)
2024-02-21 09:02:55,311 INFO success: nginx entered RUNNING state, process has stayed up for > than 1 seconds (startsecs)
2024-02-21 09:02:55,311 INFO success: zulip_events_deferred_work entered RUNNING state, process has stayed up for > than 1 seconds (startsecs)
2024-02-21 09:02:55,311 INFO success: zulip_events_digest_emails entered RUNNING state, process has stayed up for > than 1 seconds (startsecs)
2024-02-21 09:02:55,311 INFO success: zulip_events_email_mirror entered RUNNING state, process has stayed up for > than 1 seconds (startsecs)
2024-02-21 09:02:55,312 INFO success: zulip_events_embed_links entered RUNNING state, process has stayed up for > than 1 seconds (startsecs)
2024-02-21 09:02:55,312 INFO success: zulip_events_embedded_bots entered RUNNING state, process has stayed up for > than 1 seconds (startsecs)
2024-02-21 09:02:55,312 INFO success: zulip_events_invites entered RUNNING state, process has stayed up for > than 1 seconds (startsecs)
2024-02-21 09:02:55,312 INFO success: zulip_events_email_senders entered RUNNING state, process has stayed up for > than 1 seconds (startsecs)
2024-02-21 09:02:55,312 INFO success: zulip_events_missedmessage_emails entered RUNNING state, process has stayed up for > than 1 seconds (startsecs)
2024-02-21 09:02:55,312 INFO success: zulip_events_missedmessage_mobile_notifications entered RUNNING state, process has stayed up for > than 1 seconds (startsecs)
2024-02-21 09:02:55,312 INFO success: zulip_events_outgoing_webhooks entered RUNNING state, process has stayed up for > than 1 seconds (startsecs)
2024-02-21 09:02:55,312 INFO success: zulip_events_user_activity entered RUNNING state, process has stayed up for > than 1 seconds (startsecs)
2024-02-21 09:02:55,312 INFO success: zulip_events_user_activity_interval entered RUNNING state, process has stayed up for > than 1 seconds (startsecs)
2024-02-21 09:02:55,312 INFO success: zulip_events_user_presence entered RUNNING state, process has stayed up for > than 1 seconds (startsecs)
Press Ctrl C to exit the screen. Zulip is installed. However, we still need to configure Nginx to serve Zulip.
Step 8 – Configure Nginx
Open the file /etc/nginx/nginx.conf for editing.
$ sudo nano /etc/nginx/nginx.conf
Add the following line before the line include /etc/nginx/conf.d/*.conf;.
server_names_hash_bucket_size 64;
Save the file by pressing Ctrl X and entering Y when prompted.
Create and open the file /etc/nginx/conf.d/zulip.conf for editing.
$ sudo nano /etc/nginx/conf.d/zulip.conf
Paste the following code in it.
server {
    listen 80;
    listen [::]:80;
    location / {
        return 301 https://$host$request_uri;
    }
}

server {
    listen 443 ssl;
    listen [::]:443 ssl;
    http2 on;
    server_name zulip.example.com;

    ssl_certificate /etc/letsencrypt/live/zulip.example.com/fullchain.pem;
    ssl_certificate_key /etc/letsencrypt/live/zulip.example.com/privkey.pem;
    ssl_trusted_certificate /etc/letsencrypt/live/zulip.example.com/chain.pem;

    ssl_session_timeout 1d;
    ssl_session_cache shared:MozSSL:10m;
    ssl_session_tickets off;
    ssl_prefer_server_ciphers on;
    ssl_stapling on;
    ssl_stapling_verify on;
    ssl_dhparam /etc/ssl/certs/dhparam.pem;
    resolver 1.1.1.1 1.0.0.1 [2606:4700:4700::1111] [2606:4700:4700::1001] 8.8.8.8 8.8.4.4 [2001:4860:4860::8888] [2001:4860:4860::8844] valid=60s;
    resolver_timeout 2s;

    ssl_protocols TLSv1.2 TLSv1.3;
    ssl_ciphers ECDHE-ECDSA-AES128-GCM-SHA256:ECDHE-RSA-AES128-GCM-SHA256:ECDHE-ECDSA-AES256-GCM-SHA384:ECDHE-RSA-AES256-GCM-SHA384:ECDHE-ECDSA-CHACHA20-POLY1305:ECDHE-RSA-CHACHA20-POLY1305:DHE-RSA-AES128-GCM-SHA256:DHE-RSA-AES256-GCM-SHA384;

    tcp_nopush on;
    gzip on;

    location / {
        proxy_set_header X-Forwarded-For $proxy_add_x_forwarded_for;
        proxy_set_header X-Forwarded-Proto $scheme;
        proxy_set_header Host $host;
        proxy_http_version 1.1;
        proxy_buffering off;
        proxy_read_timeout 20m;
        proxy_pass http://127.0.0.1:8080;
    }
}
Save the file by pressing Ctrl X and entering Y when prompted once finished.
Verify the Nginx configuration file syntax.
$ sudo nginx -t
nginx: the configuration file /etc/nginx/nginx.conf syntax is ok
nginx: configuration file /etc/nginx/nginx.conf test is successful
Restart the Nginx service.
$ sudo systemctl restart nginx
Step 9 – Accessing Zulip Interface
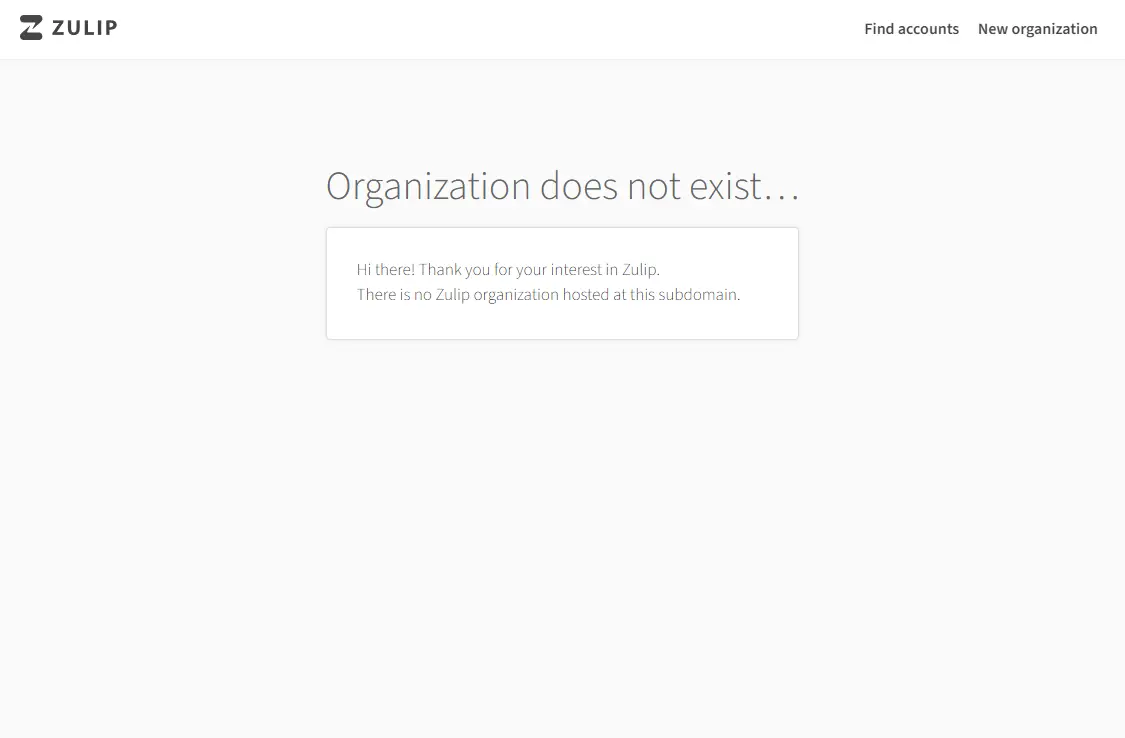
Visit https://zulip.example.com/ in your browser, and the following screen will appear.
Using the link New Organization on the top will take you to the following page.
As you can see, Zulip doesn’t let you create an organization from the front end. Go back to the terminal and run the following command to create the new organization page URL. We will talk more about how to use Zulip commands in the next section.
$ docker compose exec -u zulip zulip /home/zulip/deployments/current/manage.py generate_realm_creation_link
Please visit the following secure single-use link to register your
new Zulip organization:

    https://zulip.example.com/new/svvss33z4qmwewmanbbcalen
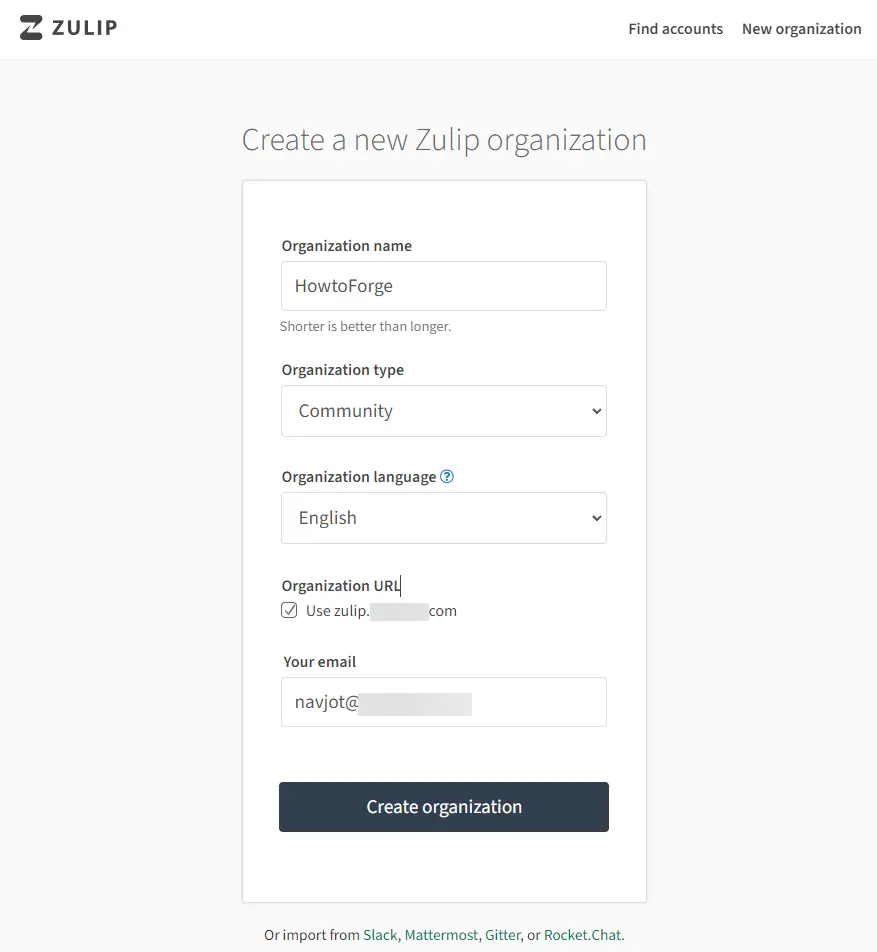
Open the URL https://zulip.example.com/new/cjjivovgcillw44z7gsnobkv in your browser and you will be taken to the following page.
Enter your organization’s name, organization type, language, and email ID to start creating your organization. Click the Create organization button to proceed.
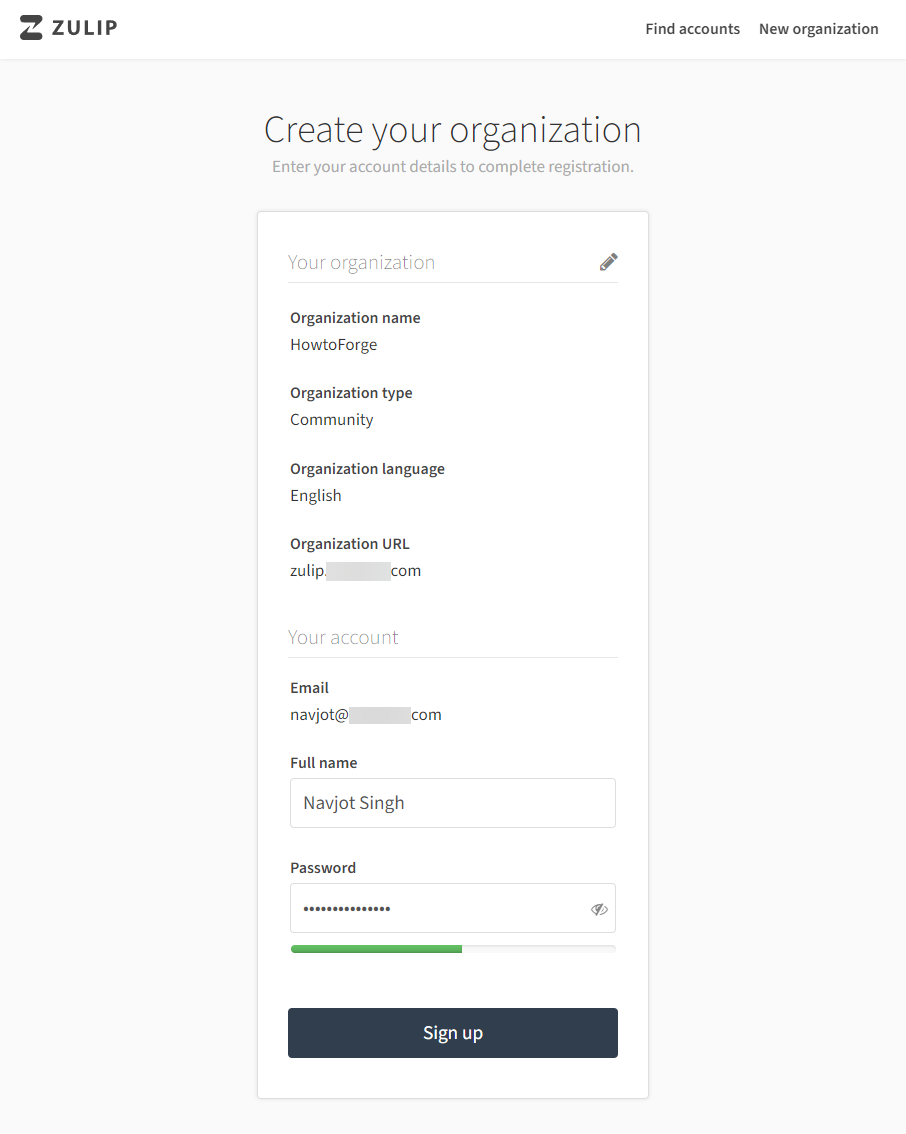
You will be asked to set up an account on the next screen.
Enter your name, choose a password for logging in, and click the Sign up button to proceed.
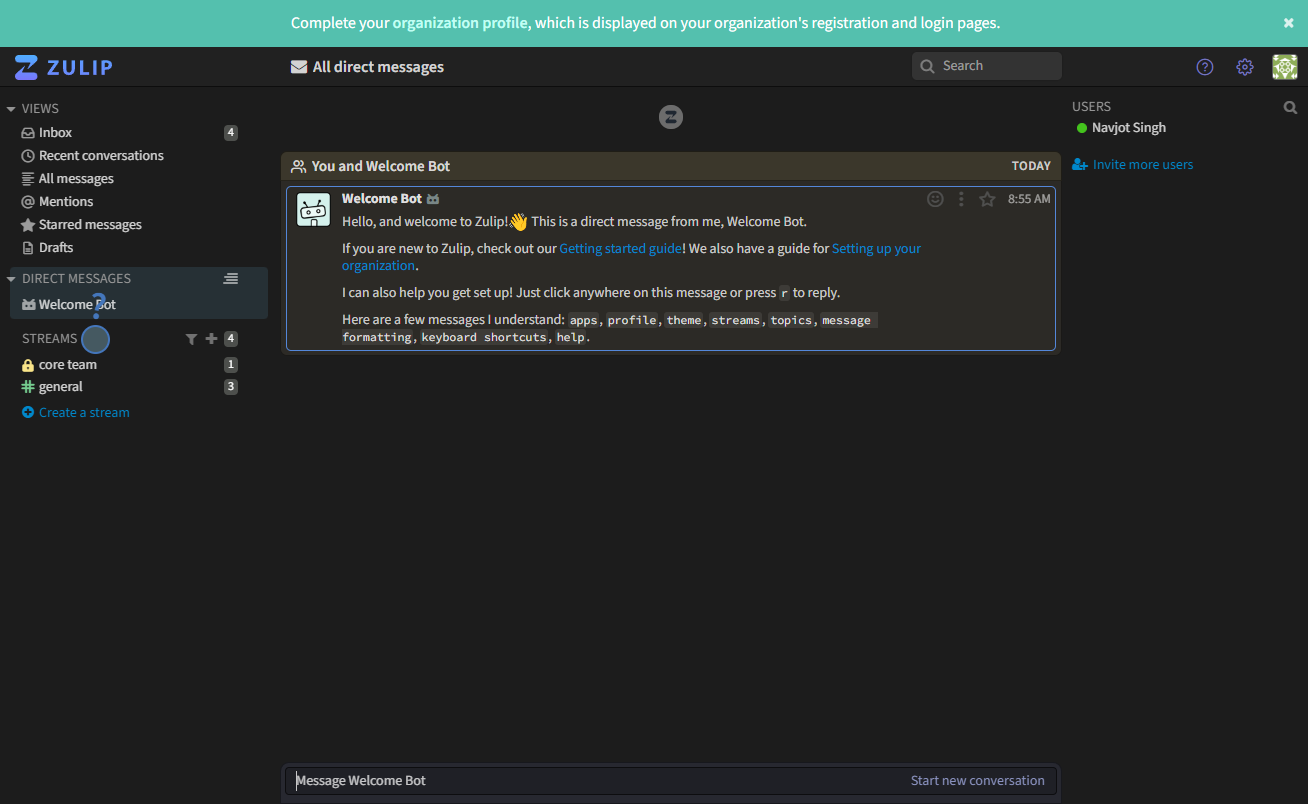
Once finished, the Zulip dashboard will open, and you can start using it.
Step 10 – Zulip Server Commands
From time to time, to run Zulip Server commands, you will need access to the container shell. To access the shell as zulip user, use the following command.
$ docker compose exec -u zulip zulip bash
Or you can use the following command.
$ docker exec -itu zulip zulip bash
To run a command inside a container, you can run it using a single command as follows.
$ docker compose exec -u zulip zulip
    /home/zulip/deployments/current/manage.py help
However, there is a simpler method of doing it. We can create a shell script for running commands. Create and open zulip_manage.sh for editing.
$ nano zulip_manage.sh
Paste the following code in it.
#!/bin/sh

docker compose exec -u zulip zulip /home/zulip/deployments/current/manage.py "$@"
Save the file by pressing Ctrl X and entering Y when prompted.
Make the script executable.
$ chmod x zulip_manage.sh
To stop the Zulip server, use the following command.
$ docker exec -u zulip zulip /home/zulip/deployments/current/scripts/stop-server
process-fts-updates: stopped
zulip-django: stopped
zulip-tornado: stopped
zulip-workers:zulip_events_deferred_work: stopped
zulip-workers:zulip_events_digest_emails: stopped
zulip-workers:zulip_events_email_mirror: stopped
zulip-workers:zulip_events_email_senders: stopped
zulip-workers:zulip_events_embed_links: stopped
zulip-workers:zulip_events_embedded_bots: stopped
zulip-workers:zulip_events_invites: stopped
zulip-workers:zulip_events_missedmessage_emails: stopped
zulip-workers:zulip_events_missedmessage_mobile_notifications: stopped
zulip-workers:zulip_events_outgoing_webhooks: stopped
zulip-workers:zulip_events_user_activity: stopped
zulip-workers:zulip_events_user_activity_interval: stopped
zulip-workers:zulip_events_user_presence: stopped
zulip_deliver_scheduled_emails: stopped
zulip_deliver_scheduled_messages: stopped

Zulip stopped successfully!
To start the server again, use the following command.
$ docker exec -u zulip zulip /home/zulip/deployments/current/scripts/start-server
2024-02-21 09:18:52,932 start-server: Running syntax and database checks
System check identified no issues (28 silenced).
2024-02-21 09:18:54,944 start-server: Starting Tornado process
zulip-tornado: started
2024-02-21 09:18:56,089 start-server: Starting django server
zulip-django: started
2024-02-21 09:18:58,133 start-server: Starting workers
process-fts-updates: started
zulip-workers:zulip_events_deferred_work: started
zulip-workers:zulip_events_digest_emails: started
zulip-workers:zulip_events_email_mirror: started
zulip-workers:zulip_events_email_senders: started
zulip-workers:zulip_events_embed_links: started
zulip-workers:zulip_events_embedded_bots: started
zulip-workers:zulip_events_invites: started
zulip-workers:zulip_events_missedmessage_emails: started
zulip-workers:zulip_events_missedmessage_mobile_notifications: started
zulip-workers:zulip_events_outgoing_webhooks: started
zulip-workers:zulip_events_user_activity: started
zulip-workers:zulip_events_user_activity_interval: started
zulip-workers:zulip_events_user_presence: started
zulip_deliver_scheduled_emails: started
zulip_deliver_scheduled_messages: started
2024-02-21 09:19:19,571 start-server: Done!
Zulip started successfully!
Restart the server in a similar manner.
$ docker exec -u zulip zulip /home/zulip/deployments/current/scripts/restart-server
There are a lot of management tasks you can achieve using the manage.py script shipped with Zulip.
You can run the script using the following command. We will use the help sub-command to list all the possible operations one can perform.
$ ./zulip_manage.sh help
Type 'manage.py help ' for help on a specific subcommand.

Available subcommands:

[analytics]
    check_analytics_state
    clear_analytics_tables
    clear_single_stat
    populate_analytics_db
    update_analytics_counts

[django]
    dbshell
    makemigrations
    migrate
    shell
    showmigrations

[zerver]
    add_users_to_streams
    archive_messages
    audit_fts_indexes
    backup
    bulk_change_user_name
    change_password
    change_realm_subdomain
    change_user_email
    change_user_role
    check_redis
    checkconfig
    compilemessages
    convert_gitter_data
    convert_mattermost_data
    convert_rocketchat_data
    convert_slack_data
    create_default_stream_groups
    create_realm
    create_realm_internal_bots
    create_stream
    create_user
    deactivate_realm
    deactivate_user
    delete_old_unclaimed_attachments
    delete_realm
    delete_user
    deliver_scheduled_emails
    deliver_scheduled_messages
    edit_linkifiers
    email_mirror
    enqueue_digest_emails
    enqueue_file
    export
    export_search
    export_single_user
    export_usermessage_batch
    fetch_tor_exit_nodes
    fill_memcached_caches
    generate_realm_creation_link
    get_migration_status
    import
    list_realms
    logout_all_users
    makemessages
    merge_streams
    process_queue
    promote_new_full_members
    purge_queue
    query_ldap
    rate_limit
    reactivate_realm
    realm_domain
    register_server
    remove_users_from_stream
    reset_authentication_attempt_count
    restore_messages
    runtornado
    scrub_realm
    send_custom_email
    send_password_reset_email
    send_realm_reactivation_email
    send_test_email
    send_to_email_mirror
    send_webhook_fixture_message
    send_welcome_bot_message
    show_admins
    soft_deactivate_users
    sync_ldap_user_data
    transfer_uploads_to_s3
    unarchive_stream
Docker’s entrypoint.sh file also provides with few other options. Run the following command to see them.
$ docker exec -it zulip bash /sbin/entrypoint.sh app:help
You should see the following output.
Available commands:
> app:help     - Show this help menu and exit
> app:version  - Container Zulip server version
> app:managepy - Run Zulip's manage.py script (defaults to "shell")
> app:backup   - Create backups of Zulip instances
> app:restore  - Restore backups of Zulip instances
> app:certs    - Create self-signed certificates
> app:run      - Run the Zulip server
> [COMMAND]    - Run given command with arguments in shell
Step 11 – Test Outgoing Email
To test your outgoing email configuration, you can send a test mail using the following command.
$ ~/docker-zulip/zulip_manage.sh send_test_email [email protected]
If you run into any trouble, read:

  https://zulip.readthedocs.io/en/latest/production/email.html#troubleshooting

The most common error is not setting `ADD_TOKENS_TO_NOREPLY_ADDRESS=False` when
using an email provider that doesn't support that feature.

Sending 2 test emails from:
  * [email protected]
  * [email protected]

Successfully sent 2 emails to [email protected]
Step 12 – Upgrading Zulip
The first step in upgrading Zulip is to stop the existing containers.
$ cd ~/docker-zulip
$ docker compose stop
Open the docker-compose.yml file for editing.
$ nano docker-compose.yml
Check the latest available version from Zulip’s DockerHub Tags page. Modify the version in the following section.
.....
zulip:
    image: "zulip/docker-zulip:8.2-0"
    restart: unless-stopped
    container_name: zulip
....
Make any other changes you need. You will need to refer to Zulip’s changelog and Zulip’s Docker GitHub repository for it.
Once finished, save the file by pressing Ctrl X and entering Y when prompted.
Start the containers again. The Zulip container will be recreated with the changes.
$ docker compose up -d
Remove any old containers.
$ docker compose rm
Conclusion
This concludes our tutorial on installing and configuring the Zulip Chat server on a Rocky Linux 9 server. You can follow Zulip’s official documentation to explore in detail. If you have any questions, post them in the comments below.


