
Dnsmasq is a small and lightweight network service for your local environment (LAN). It provides network services such as DNS, DHCP, and TFTP. Dnsmasq can be used as a DNS forwarder, recursive DNS Server, and DNS caching system. It also loads DNS contents from the /etc/hosts file, which allows you to set up domain names for local hostnames.
Dnsmasq is designed to be lightweight with a small memory footprint, suitable for low-resource devices such as Routers and Firewalls. Dnsmasq can be run on Linux, BSDs, Android, and macOS.
This tutorial will install and configure a local DNS Server with Dnsmasq on a Debian 12 server. We will set up a local DNS Server that can be used for your local network, adding local domain names, enabling DNS cache, and enabling DHCP Server via Dnsmasq. You’ll also learn how to set up and add a client machine to use the local DNS Server. Once you’ve completed this tutorial, you’ll be able to access all of your applications via the local domain name, and your DNS requests will be faster because you’ve enabled cache DNS.
Prerequistes
Before you begin, you must have the following requirements to complete this tutorial:
- A Debian 12 server – This example uses a Debian server with the hostname ‘dnsmasq-server‘ and the IP address 192.168.5.20.
- A non-root user with sudo/root administrator privileges.
For the client machine, you can use any Linux distribution because the DNS configuration is similar for every distribution.
Preparing the System
In this step, you’ll prepare your Debian server that will be used as the local DNS Server. You’ll update the package index, stop and disable the ‘systemd-resolved‘ service, then you’ll create a define the static DNS resolver configuration via the ‘/etc/resolv.conf‘ file.
On the Debian system, the DNS resolver is managed by the ‘systemd-resolved’ service, which provides network name resolution via the D-BUS interface. To set up the DNS Server software such as Dnsmasq, you must disable the ‘systemd-resolved‘ service.
Before you get started, run the below apt command to update and refresh your Debian package index.
sudo apt update
Next, run the below command to stop and disable the ‘systemd-resolved‘ service. On the Debian system, the DNS configuration is managed by the NetworkManager and systemd-resolved service.
sudo systemctl disable --now systemd-resolved
sudo systemctl stop systemd-resolved
Remove the link file of DNS resolver configuration ‘/etc/resolv.conf’ via the following command.
sudo unlink /etc/resolv.conf
After that, create a new DNS resolver config file ‘/etc/resolv.conf‘ using the below nano editor command.
sudo nano /etc/resolv.conf
Add the following lines to the file. This will add the Cloudflare and Google public DNS as the resolver for your Debian server.
nameserver 1.1.1.1
nameserver 8.8.8.8
Save the file and exit the editor when you’re finished. Now move to the next steps for the Dnsmasq installation and configuration.
Installing and Configuring Dnsmasq
In this step, you’ll install and set up the local DNS Server using the Dnsmasq. You’ll set up the Dnsmasq to run on the default DNS port 53 and the internal IP address ‘192.168.5.20‘. You’ll also define the domain name for the Dnsmasq service, enable the DNS cache, and lastly enable the DHCP server via the Dnsmasq.
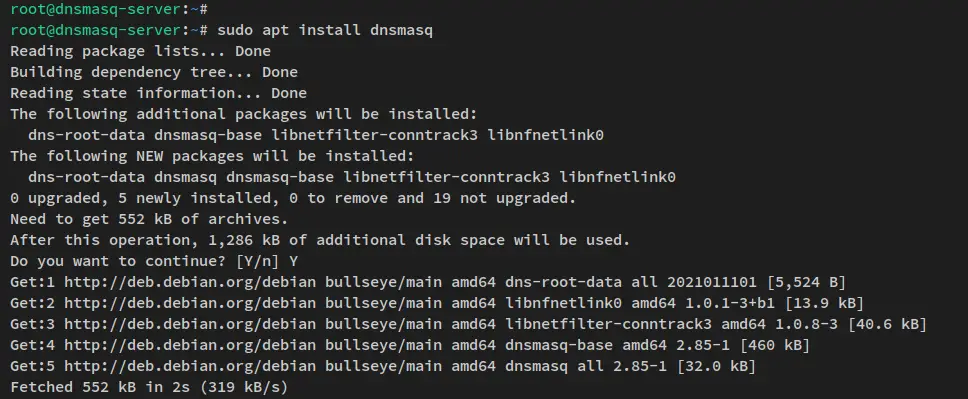
The default ‘dnsmasq‘ package is available on the Debian repository. Run the below apt command to install the Dnsmasq package.
sudo apt install dnsmasq
When prompted, input y to confirm and press ENTER to proceed.
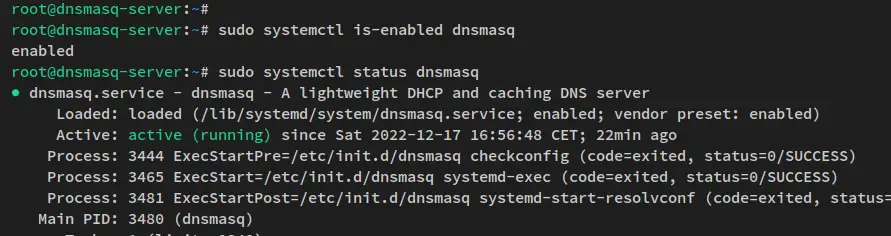
After the Dnsmasq is installed, run the below systemctl command utility to verify the ‘dnsmasq’ service and ensure that the service is enabled and running.
sudo systemctl is-enabled dnsmasq
sudo systemctl status dnsmasq
You’ll receive the output similar to this – The dnsmasq service is enabled and will be run automatically upon the bootup. And the current status of the dnsmasq service is running.
With the Dnsmasq is running on your Debian system, you’ll next start the Dnsmasq configuration via the file ‘/etc/dnsmasq.conf‘.
To start, run the below command to back up the default Dnsmasq config file.
sudo cp /etc/dnsmasq.conf{,.orig}
Now open the Dnsmasq configuration file ‘/etc/dnsmasq.conf‘ using the below nano editor command.
sudo nano /etc/dnsmasq.conf
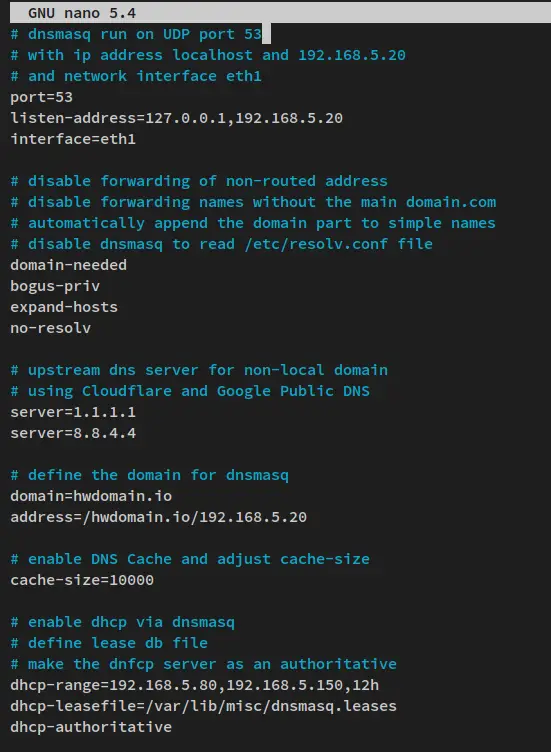
Add the following lines to the file.
# dnsmasq run on UDP port 53
# with IP address localhost and 192.168.5.20
# and network interface eth1
port=53
listen-address=127.0.0.1,192.168.5.20
interface=eth1# disable forwarding of non-routed address
# disable forwarding names without the main domain.com
# automatically append the domain part to simple names
# disable dnsmasq to read /etc/resolv.conf file
domain-needed
bogus-priv
expand-hosts
no-resolv# upstream DNS server for non-local domain names
# using Cloudflare and google public DNS
server=1.1.1.1
server=8.8.8.8# define the domain for dnsmasq
domain=hwdomain.io
address=/hwdomain.io/192.168.5.20# enable DNS Cache and adjust cache-size
cache-size=1000# enable DHCP via dnsmasq
# define lease db file
# make the dhcp server as an authoritative
dhcp-range=192.168.5.80,192.168.5.150,12h
dhcp-leasefile=/var/lib/misc/dnsmasq.leases
dhcp-authoritative
Save the file and close the editor when you’re finished.
Detail options that you’ll be using for Dnsmasq:
- port: which port you will be using to run the Dnsmasq.
- listen-address: which IP address you’ll be using to run the Dnsmasq. You can use multiple IP addresses.
- interface: which interface the Dnsmasq will be bind and running.
- domain-needed: disable forwarding names without the main domain address. You can access like ‘mysql1‘ host unless you give the full with local domain such as ‘mysql1.hwdomain.io‘.
- bogus-priv: disable forwarding for non-routed addresses.
- expand-hosts: automatically append the local domain part to simple names.
- no-resolv: ignore the ‘/etc/resolv.conf’ file on the server.
- server: define the upstream DNS Server that you’ll be using for non-local addresses or domains. This example uses the Public DNS Server by Cloudflare and Google.
- domain: define the domain name for the Dnsmasq server. In this example, the Dnsmasq server will get the local domain hwdomain.io.
- address: define which IP address for the domain name on Dnsmasq. In this example, the domain hwdomain.io will be resolved to the IP address 192.168.5.20.
- cache-size: enabled DNS cache on Dnsmasq. Be sure to adjust the size, which increases the performance and speed.
- dhcp-range: enable the DHCP server via the Dnsmasq. Adjust the IP address pool for your network and lease time.
- dhcp-leasefile: define the file that will be sued to store the DHCP lease.
- dhcp-authoritative: make the DHCP server as authoritative.
Next, open the config file ‘/etc/hosts’ using the below nano editor command. You can define the subdomain for your internal applications and will automatically be configured with the Dnsmasq domain name ‘hwdomain.io‘.
sudo nano /etc/hosts
Add the following lines to the file. In this example, you’ll define the sub-domain app1, db1, and files. The root domain for these sub-domains is the Dnsmasq server itself ‘hwdomain.io‘.
With the following lines, the ‘app1.hwdomain.io‘ will be resolved to the IP address ‘192.168.5.10‘, the sub-domain ‘db1.hwdomain.io‘ will be pointed to the server IP address ‘192.168.5.25‘, and the sub-domain ‘files.hwdomain.io‘ will be pointed to the IP address ‘192.168.5.50‘.
192.168.5.10 app1
192.168.5.25 db1
192.168.5.50 files
Save the file and exit the editor when you’re finished.
Next, open the ‘/etc/resolv.conf‘ file with the following nano editor command and add the Dnsmasq server IP address as the ‘nameserver‘.
sudo nano /etc/resolv.conf
Add the following lines to the top of the file. Be sure to change the IP address with the Dnsmasq server IP address.
nameserver 127.0.0.1
nameserver 192.168.5.20
Save the file and exit the editor when you’re done.
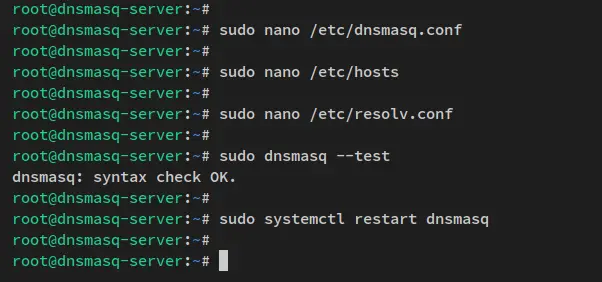
Now run the ‘dnsmasq’ command below to verify the Dnsmasq configuration and ensure that you’ve got the proper format configuration. You should receive the output such as ‘dnsmasq – syntax check OK‘.
sudo dnsmasq --test
Lastly, run the below systemctl command utility to restart the ‘dnsmasq’ service and apply the changes.
sudo systemctl restart dnsmasq
At this point, you’ve now finished the configuration of the local DNS Server via Dnsmasq on the Debian system. You’ve also configured the local domain name and subdomains, enabled the DNS cache, and enabled the DHCP server via Dnsmasq.
In the next steps, you’ll verify your Dnsmasq server installation and configuration.
Verifying Dnsmasq Installation
In this step, you’ll verify the Dnsmasq installation by checking the Dnsmasq service and LISTEN port on your system. Then, you’ll verify the local domain name and sub-domains that you’ve configured via the ‘/etc/hosts’ file.
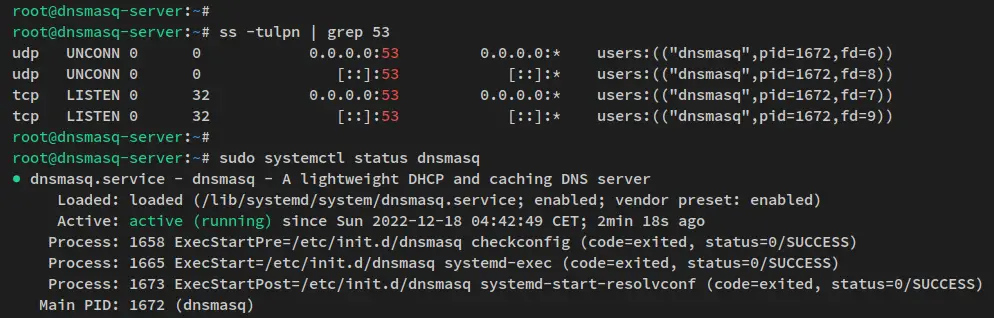
Run the below command to ensure that the Dnsmasq service is running on port 53. Then, verify the status of the Dnsmasq service via the systemctl command utility.
ss -tulpn | grep 53
sudo systemctl status dnsmasq
You’ll receive the output similar to this – The Dnsmasq service is running on the default port 53 and it’s enabled and will be run automatically upon the bootup.
Next, you’ll verify the domain name and sub-domains that you’ve configured on the Dnsmasq via the ‘/etc/hosts‘ file. But before that, run the below apt command to install the ‘dnsutils‘ package to your system. The ‘dnsutils’ package provides command line tools for testing DNS Server configuration.
sudo apt install dnsutils
Input y when prompted and press ENTER to proceed to the installation.
After the ‘dnsutils‘ is installed, run the following dig command to verify the domain name and sub-domains that you’ve configured.
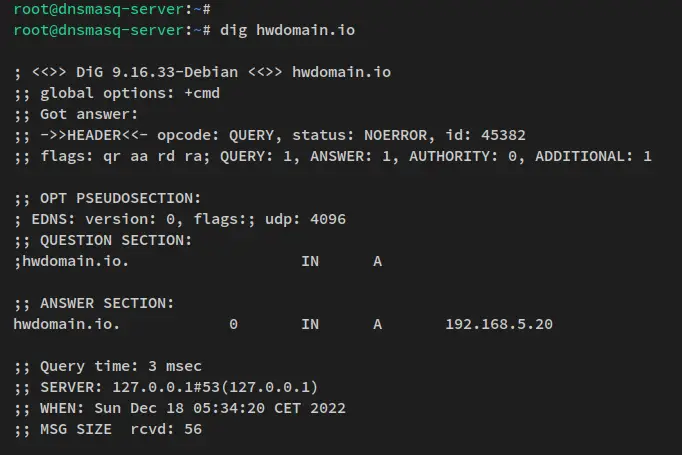
Verify the Dnsmasq main domain ‘hwdomain.io‘, which is pointed to the Dnsmasq server IP address ‘192.168.5.20’.
dig hwdomain.io
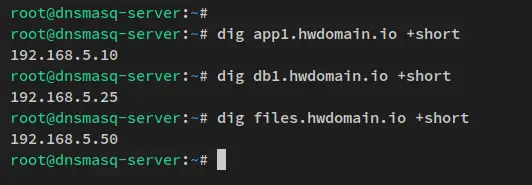
Verify sub-domains that you’ve defined via the ‘/etc/hosts’ file via the dig command below.
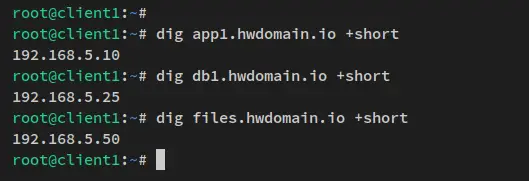
dig app1.hwdomain.io  short
dig db1.hwdomain.io  short
dig files.hwdomain.io  short
The sub-domain ‘app1.hwdomain.io is pointed to the IP address ‘192.168.5.10‘, the sub-domain ‘db1.hwdomain.io‘ is pointed to the IP address ‘192.168.5.25‘, and lastly ‘files.hwdomain.io‘ is pointed to the IP address ‘192.168.5.50‘.
Below is the similar output you’ll receive.
Now, you’ve configured and tested the Dnsmasq installation as the local DNS Server on a Debian server. In the next steps, you’ll set up and secure the Dnsmasq using the UFW firewall.
Setting up UFW Firewall
Now you’ll set up the firewall on your local DNS Server. You’ll secure the Dnsmasq installation by limiting access to the DNS Server via the UFW firewall.
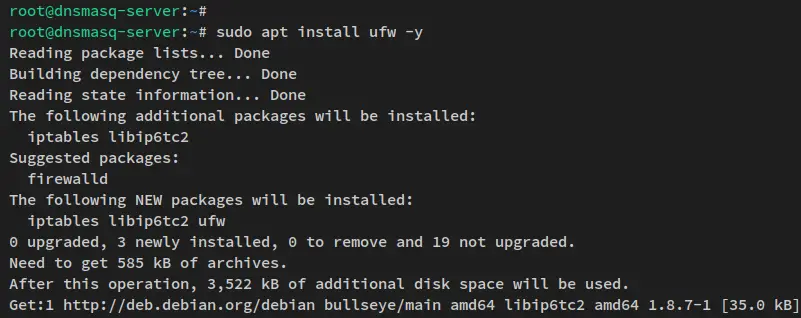
Run the below apt command to install the UFW firewall on your Debian system.
sudo apt install ufw -y
After installing UFW, run the below command to add the OpenSSH service and the DNS port 53 to the UFW firewall. In this example, you’ll specify the source of the network that is allowed to access the Dnsmasq server, which is the local network with IP addresses 192.168.5.0/24‘.
Be sure to change the local network IP addresses with your internal network subnet.
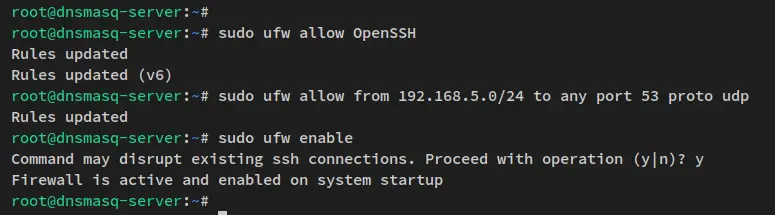
sudo ufw allow OpenSSH
sudo ufw allow from 192.168.5.0/24 to any port 53 proto udp
Next, run the below command to start and enable the UFW firewall.
sudo ufw enable
When asked for the configuration, input y to confirm and press ENTER to proceed. And the UFW firewall should now be running and enabled and will start automatically upon the bootup.
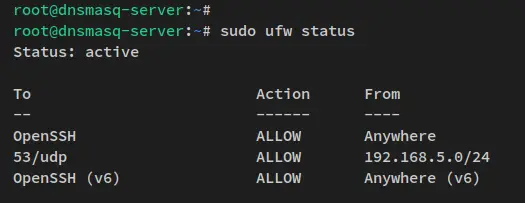
Lastly, run the below command to verify the status of the UFW firewall. You should see the UFW firewall is ‘active’ and the OpenSSH service and the DNS port 53 added to the firewall.
sudo ufw status
With the UFW firewall configured, you can now add clients to connect to your local DNS Server.
Setting up Client
In this step, you’ll set up the client machine with Debian-based distribution and the hostname ‘client‘. You’ll add the local DNS Server Dnsmasq to the client machine.
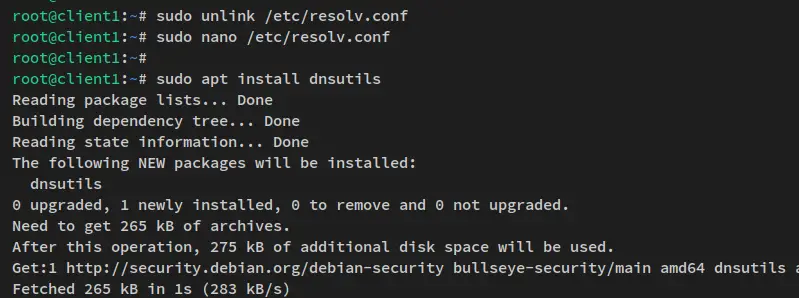
Run the below command to remove the link of the DNS resolver configuration file ‘/etc/resolv.conf’. Then, create a new resolver configuration ‘/etc/resolv.conf‘ using the nano editor command below.
sudo unlink /etc/resolv.conf
sudo nano /etc/resolv.conf
Input the following line to the file. Be sure to change the IP address with your Dnsmasq server IP address.
nameserver 192.168.5.20
Save the file and exit the editor when you’re finished.
Next, run the below command to install the ‘dnsutils’ package to the client machine.
sudo apt install dnsutils
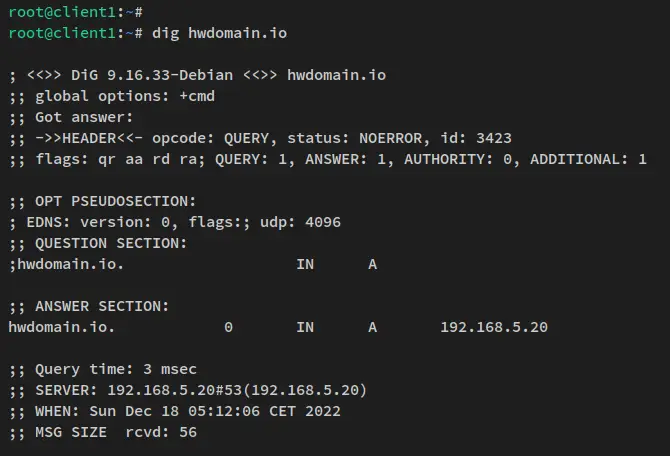
Now run the dig command below to verify the domain name ‘hwdomain.io‘, which will be pointed to the Dnsmasq server IP address.
dig hwdomain.io
Below is the output you will receive.
For sub-domains, run the dig command below. Each sub-domain will be pointed to the IP address defined in the ‘/etc/hosts‘ file on the Dnsmasq server.
dig app1.hwdomain.io  short
dig db1.hwdomain.io  short
dig files.hwdomain.io  short
Below is the similar output you’ll receive on the client machine.
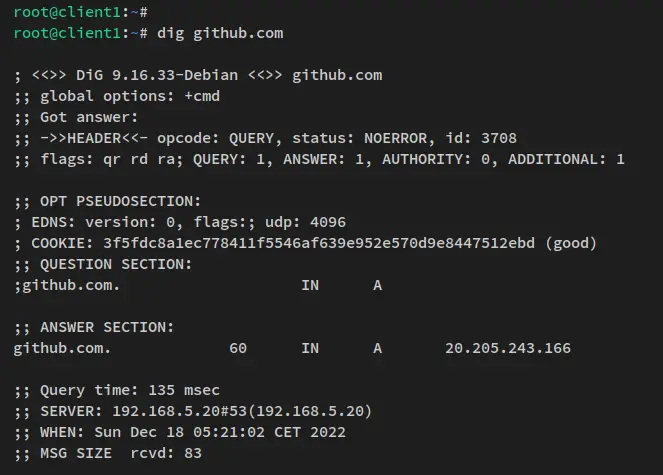
Next, you’ll also need to ensure that you can access the public domain name via the Dnsmasq local DNS Server. You can verify this by checking the public domain name such as ‘github.com‘.
dig github.com
You’ll receive the output similar to this screenshot – At the bottom of the output, you should see that your request is answered by the Dnsmasq local DNS Server that runs on ‘192.168.5.20′ with the default port ‘53‘. With this in mind, you’ve successfully connected to the public domain name via the Dnsmasq local DNS Server.
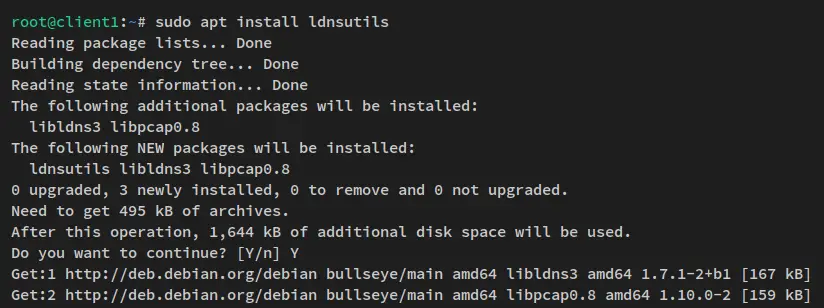
Lastly, you will verify the DNS cache via the ‘drill’ and ‘dig’ commands. The ‘drill‘ command is part of the ‘ldnsutils‘ package, so run the below apt command to install it.
sudo apt install ldnsutils
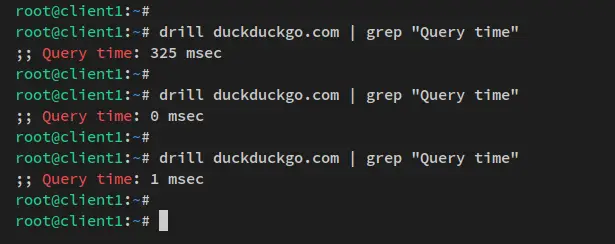
After installing the ldnsutils, run the below drill command to verify the DNS cache that you’ve configured on the Dnsmasq server.
drill duckduckgo.com | grep "Query time"
drill duckduckgo.com | grep "Query time"
You’ll receive the output like the following screenshot – at the first time you make the request, the ‘Query time‘ is 60ms. But the second time you request the same domain, the query time is reduced to 1 ms, which is the DNS request is cached on the local DNS Server Dnsmasq.
You can also verify the DNS cache via the dig command with the option ‘ stats‘.
dig  noall  stats duckduckgo.com
dig  noall  stats duckduckgo.com
You’ve now finished the client machine configuration and verified that the Dnsmas local DNS Server is fully working, from the local domain name and sub-domains that you’ve defined via the ‘/etc/hosts’ file, to the DNS cache that you’ve enabled on Dnsmasq.
Conclusion
In this tutorial, you have created your own local DNS Server with Dnsmasq. You’ve set up your own local DNS Server for your local environment with the Dnmasq on a Debian 12 server. Also, this included the configuration of Dnsmasq with local domain names and sub-domains, enabled the DNS cache to get faster recurring DNS responses, and enabled the DHCP Server via the Dnsmasq.
Lastly, you’ve also added and configured the client machine to use the local DNS Server that you’ve created. Within this, you’ve also learned how to troubleshoot DNS Server with the dig command and how to set up a DNS resolver on a Linux system.


